
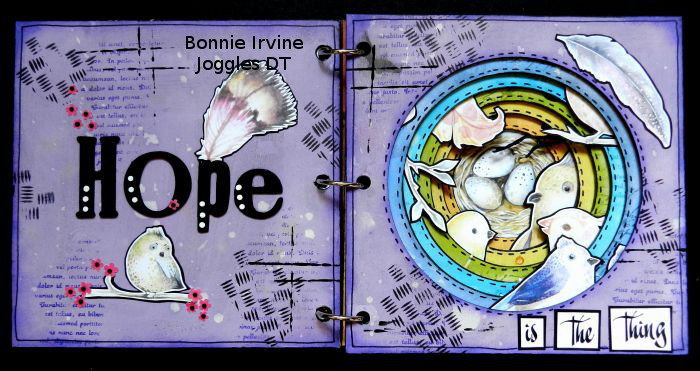
Hi everyone. It’s Bonnie here today with a project using one of the new Joggles Tunnel Books. Let me just say…I am smitten! I am a huge fan of altering books and of tunnel books in particular. These are such heavy chipboard that they make the book and all of the media I piled on very sturdy and the rings are small enough that the book is not floppy but large enough that I can add layers and not have it splay out. I based my book on an Emily Dickinson quote which I have loved from the first moment I read it. The theme is Hope.
Before I show you my process, I just wanted to say a word or two about my lengthy supply list. I use a lot of supplies because I have a lot of supplies…been doing this for years. I like to make use of what I have and I also like to show you ways to use many different supplies in case you already have them but they sit unused or you have been sitting on the fence about adding something to your stash. What I don’t want is for you to think that you need a ton of supplies to alter one of these tunnel books because you can keep them simple and still have a wonderful end product.
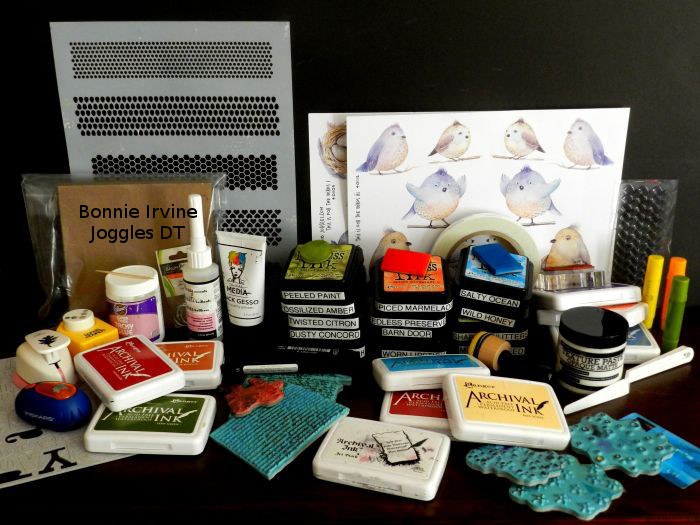
Supplies:
Joggles 6 x 6 inch Tunnel Book with Circular Tunnel
Tim Holtz Distress Ink Pads: Spiced Marmalade; Salty Ocean; Wild Honey; Shabby Shutters; Peeled Paint; Dusty Concord; Seedless Preserves; Barn Door; Worn Lipstick; Mustard Seed; Fossilized Amber; Twisted Citron; Blueprint Sketch
Archival Ink Pads: Jet Black; Vermillion; Red Geranium; Forget-Me-Not; Orange Blossom; Pale Ochre; Fern Green; Deep Purple; Hydrangea; Tiger Lily;
Ranger Inkssentials Mini Ink Blending Tool
Faber Castell Gelatos: Lemon; Pistachio; Cotton Candy; Cherry; Mango;
Joggles Cling Mounted Rubber Stamps – Background Noise – Spark
Joggles Cling Mounted Rubber Stamps – Background Noise – Circles
Joggles Cling Mounted Rubber Stamps – Background Noise – Dots
KaiserCraft Texture Stamp – Checker Plate
Joggles/ Margaret Applin Designs Cling Mounted Rubber Stamp – Vintage Correspondence
Joggles Cling Mounted Rubber Stamp – Nonsense Latin Text
Stampotique Originals – Dotted Squares
Darkroom Door Cling Stamp Sheet – Paint Splats
Dina Wakley Media – Black Gesso; Dina Wakley Media – White Gesso; Dina Wakley Media – Palette Knife
Adhesives: Aleene’s Super Thick Tacky Glue -4 ounce jar; Inkssentials Glossy Accents – 2 fl ounces; Scor Tape – o.5 inches
Joggles Collage Sheets: This is for the Birds I; This is for the Birds II; This is for the Birds III; Bird Feathers Fluff II
Joggles Stencil – Punchinella Quintet – Minis
Joggles Stencil – Punchinella Trio I
Faber Castell Pitt Artist pens: Big Brush – Black; Medium Tip – Black
Other: metal wing & brad; branches die; leafy branch die; bottle lids; old gift card; baby wipes; Tim Holtz splatter stamp; toothpick; punches (leaves, flowers), rhinestones; letter stickers; black card stock; white card stock; vintage music paper; washi tape; designer paper for covers; scissors; pencil
Better get a snack and a cuppa…this could take a while…LOL. There are close ups of each page at the end of the post if you prefer to cut to the chase!
My Process:
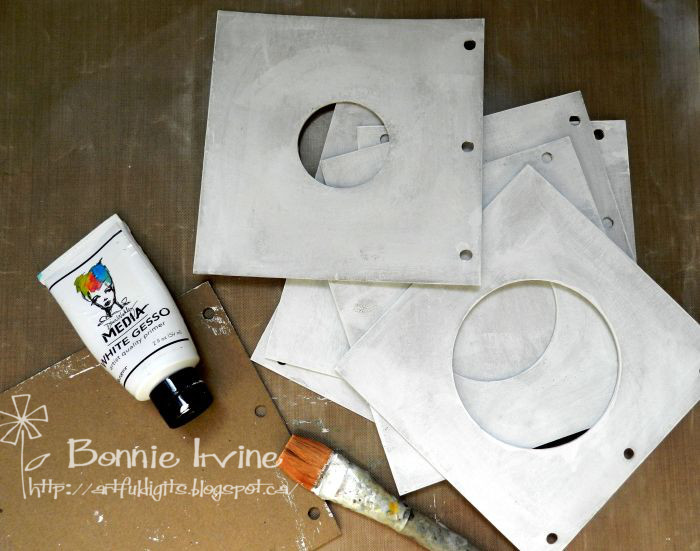
Because the quote I intended to use was about Hope, I decided to feature the colours of the rainbow starting with violet and ending with red. I also knew that I wanted to use Tim Holtz Distress Inks to colour the pages so I covered each of them with white gesso both for the tooth and to neutralize the chipboard colour.
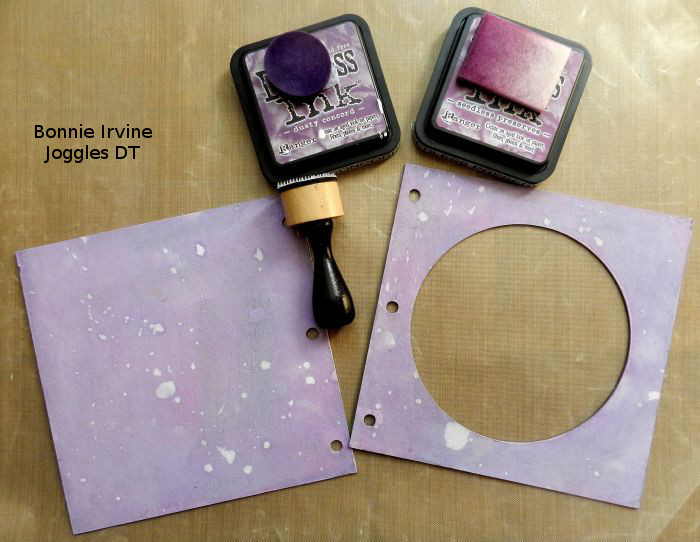
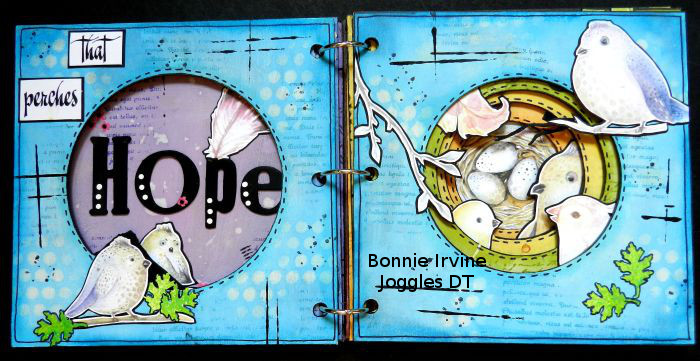
Once that was dry, I applied Distress Inks to each pair of pages using an Inkssentials Mini Ink Blending Tool following the colours of a rainbow (ROY G BIV) in reverse order. I left the covers until the end. On the first spread (Violet), I used Dusty Concord and Seedless Preserves and then flicked the pages with water to create texture.
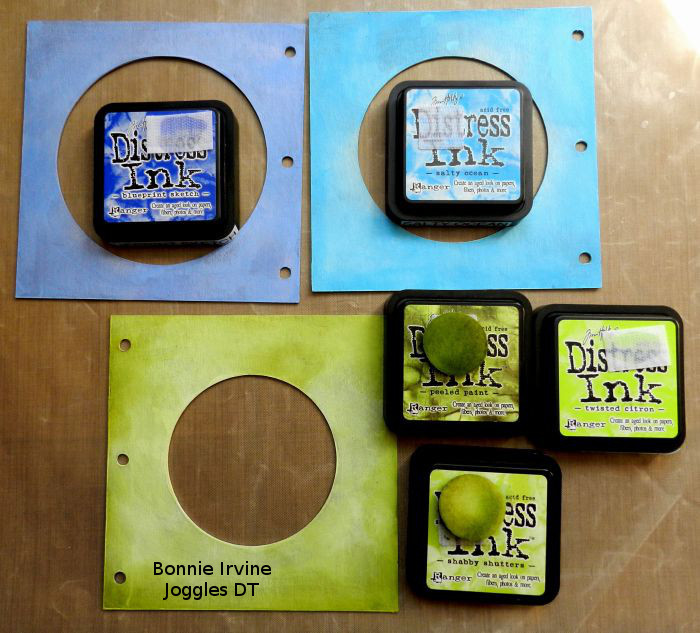
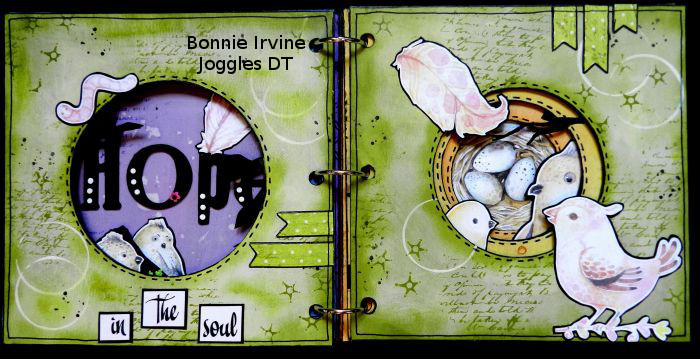
For the second (Indigo) pages, I used Blueprint Sketch Distress ink. For the third (Blue) spread, I used Salty Ocean. The fourth (green) pages were inked with Twisted Citron, Shabby Shutters, and Peeled Paint Distress Inks.
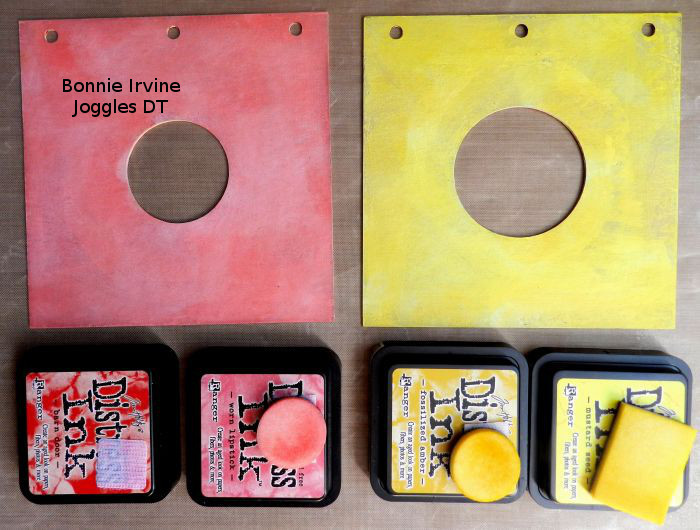
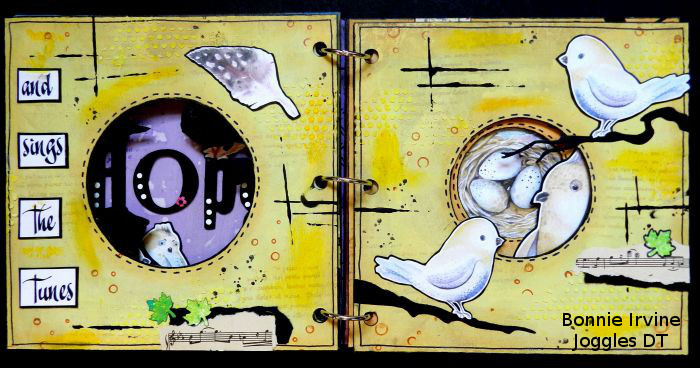
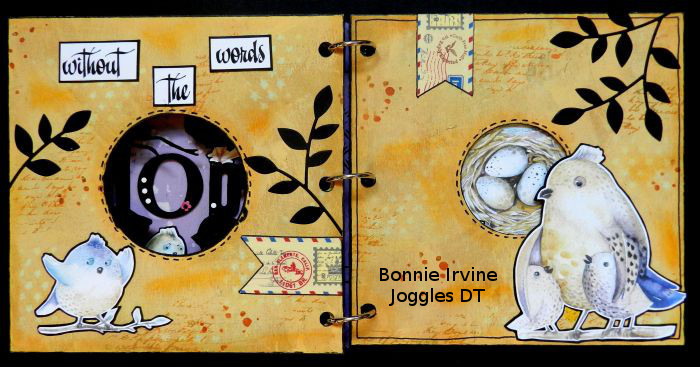
The fifth (yellow) pages were inked with Mustard Seed and Fossilized Amber Distress Inks and the sixth (orange) set with Spiced Marmalade and Wild Honey which I unfortunately left out of this photo. The final two (red) pages were colourized with Worn Lipstick and Barn Door.
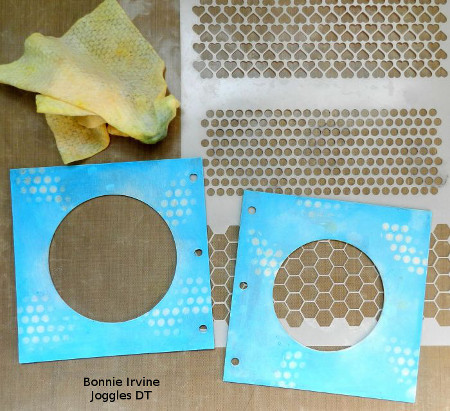
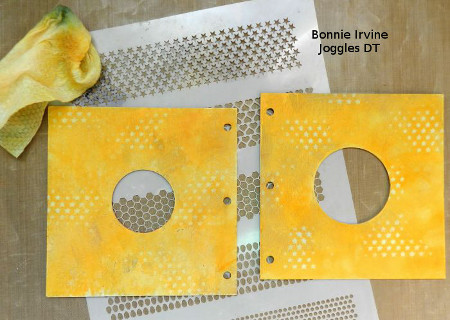
Because Distress Inks are re-active with water, I used a baby wipe to remove some of the ink on the blue pages through the Punchinella Trio I stencil. I did the same thing on the orange pages using the Punchinella Quintet- Minis stencil.
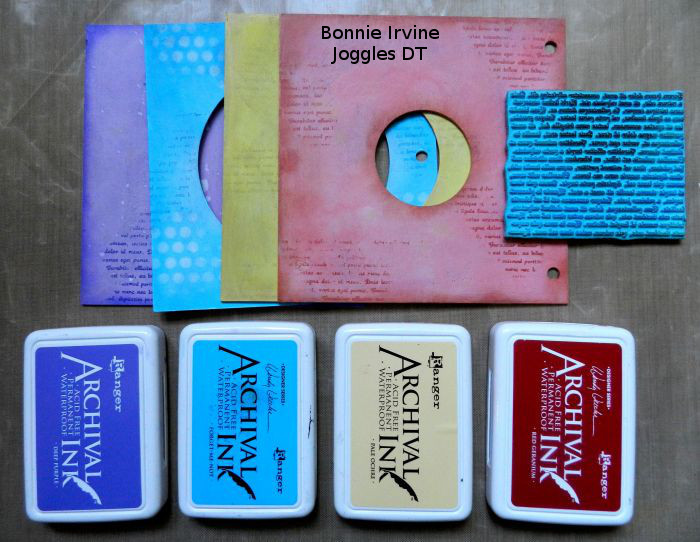
To add texture and script to the backgrounds, I used Archival Inks and Joggles Cling Mounted Rubber Stamp – Nonsense Text. Deep Purple for the Violet pages, Forget-Me-Not for the Blue pages, Pale Ochre for the Yellow pages, and Red Geranium for the Red Pages.
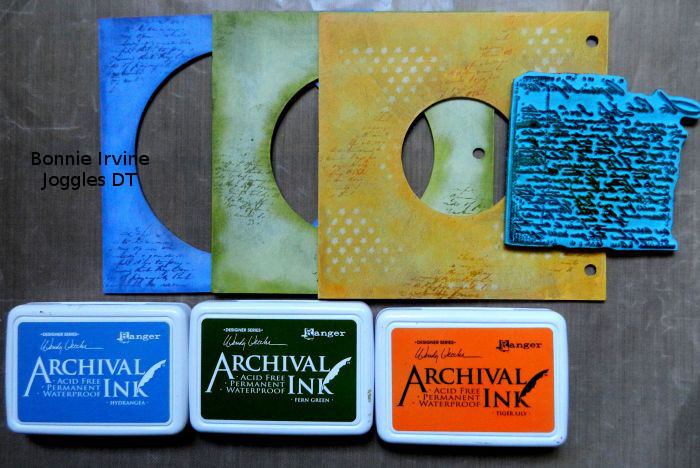
I repeated the process switching to Joggles/Margaret Applin Designs Vintage Correspondence Cling Mounted Rubber Stamp for the remaining three spreads. Hydrangea Archival Ink was used on the Indigo pages, Fern Green Archival on the Green pages, and Tiger Lily on the Orange pages.
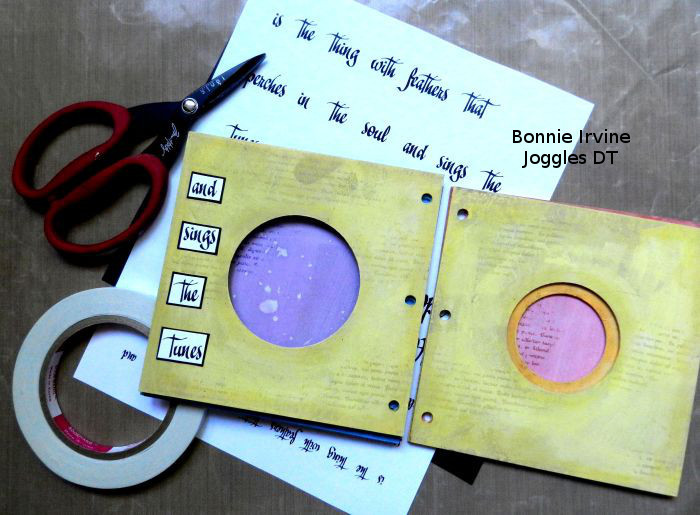
The wording for the quote was printed onto white card stock. Each word was cut apart, matted with black card stock, and adhered with Scor Tape. The words were placed mainly on the left hand pages with two exceptions at the beginning and end of the book.
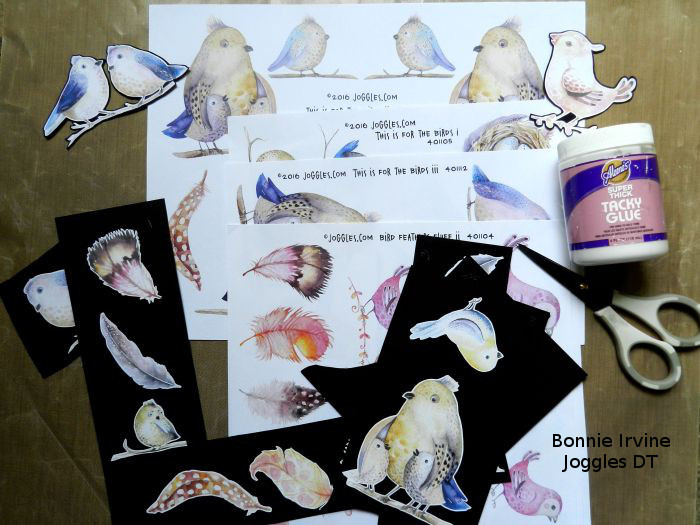
The images from the four collage sheets listed above were roughly cut out and auditioned to see where they might fit. They were then fussy cut, matted with black card stock, and trimmed out again.
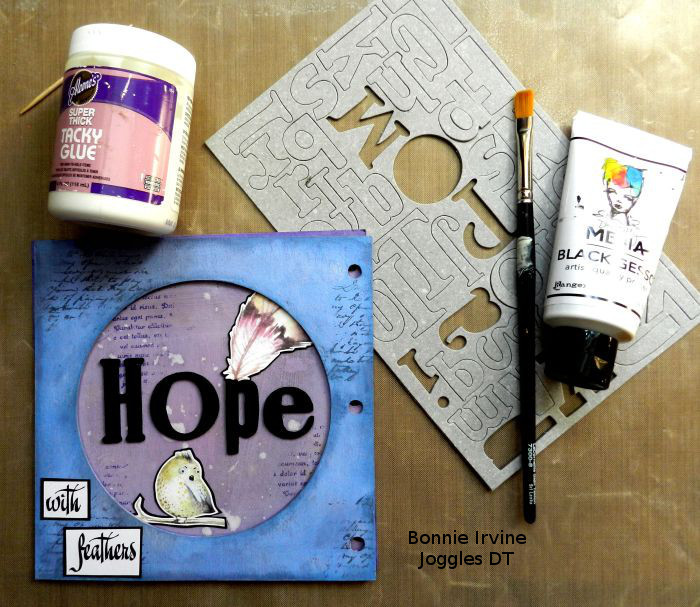
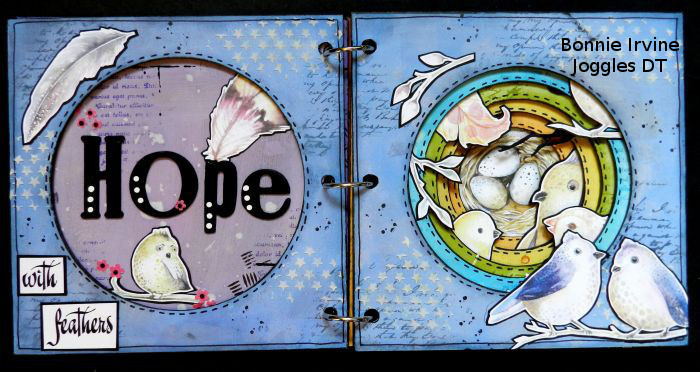
In terms of placement, the very first and very last pages took priority. I wanted the word Hope and parts of the images to show through the big opening in the Indigo spread so the letters were centered in that space and the images tucked under and around them. The letters are Idea-ology Grunge Board letters painted with black gesso.
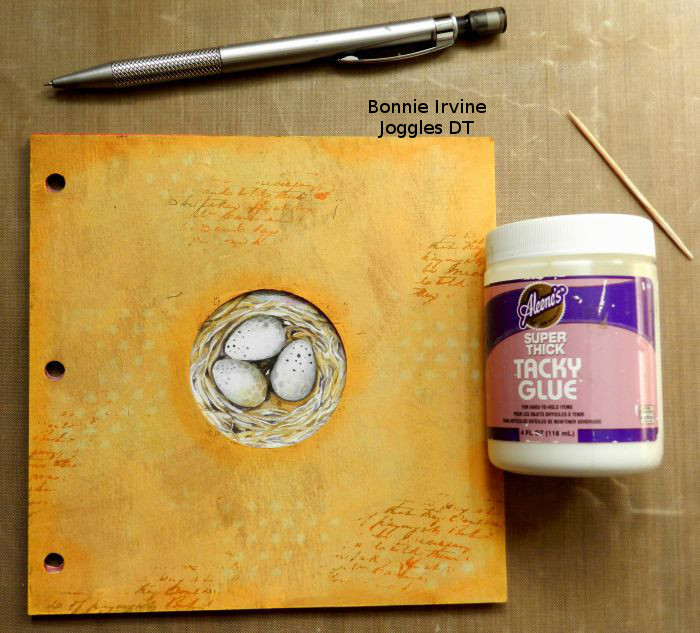
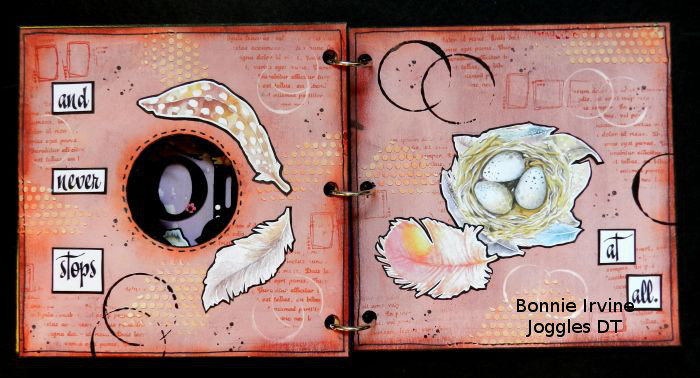
The image which goes on the last page and shows through all of the openings is the most important because it becomes the focal image for the book. I chose the nest and adhered it in the right space by using the orange page’s hole as my guide. A pencil was used to mark the background where each image would go and also to number all of the images on the back according to their page. I had the images peeking through the openings enough to add interest but not enough to block the view of the nest.
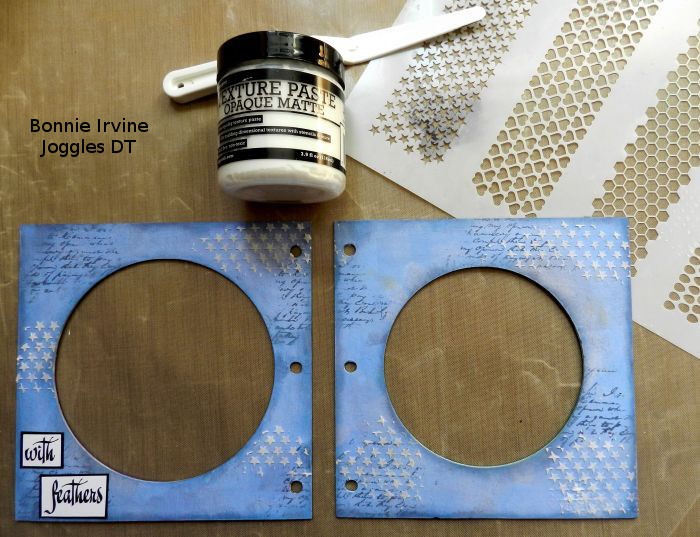
Before the images were adhered, Ranger Texture Paste was scraped through some of the Punchinella Quintet stencil. The stars were added to the Indigo pages, the circles to the Yellow spread and the Red spread. I didn’t want every page to be the same although that is also an effective and much simpler approach.
At this point, I edged each of the pages and the inside edges of the circles with Black Faber Castell Big Brush Pen allowing it to slightly overlap the coloured pages to create a frame. I doodled a simple border on the edges of each page and faux stitched around the circular openings with a Medium black Pitt Artist pen, as well.
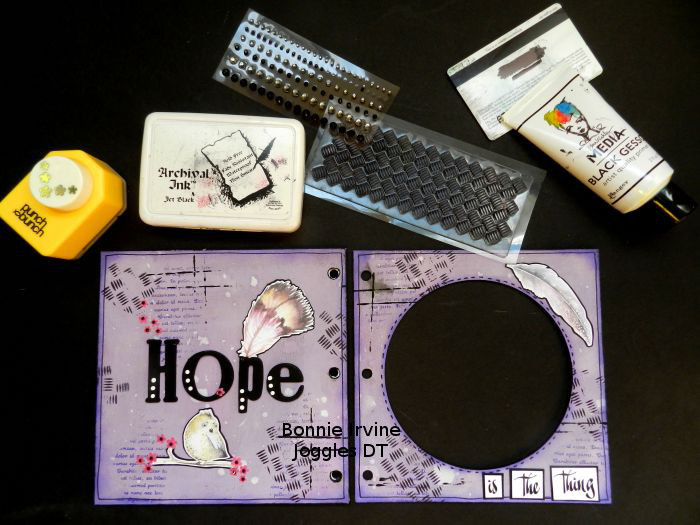
All of the images were adhered to the pages and then details which are my favourite part were added to them. For the Violet pages, KaiserCraft Checker Plate Stamp was applied with Jet Black Archival Ink. Black gesso lines were added with the edge of an old gift card. Tiny flowers were punched from scrap papers and rhinestones were adhered to their centers.
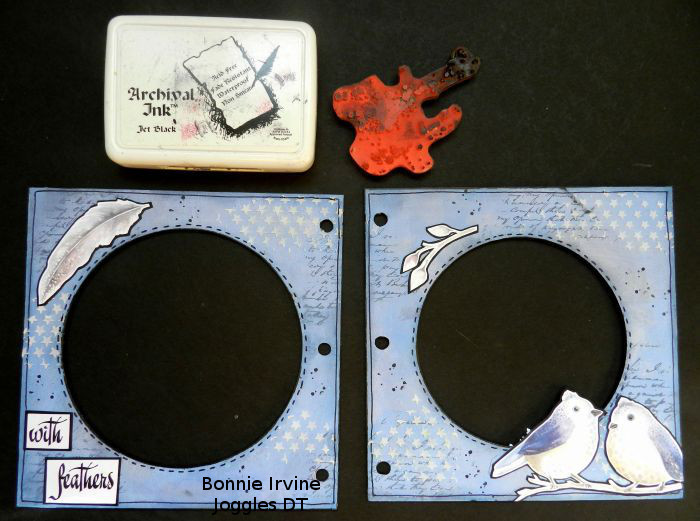
Because of the Texture Paste stars, the Indigo pages needed very little after the images were adhered. Black splatter dots were added with a Tim Holtz stamp and Jet Black Archival Ink.
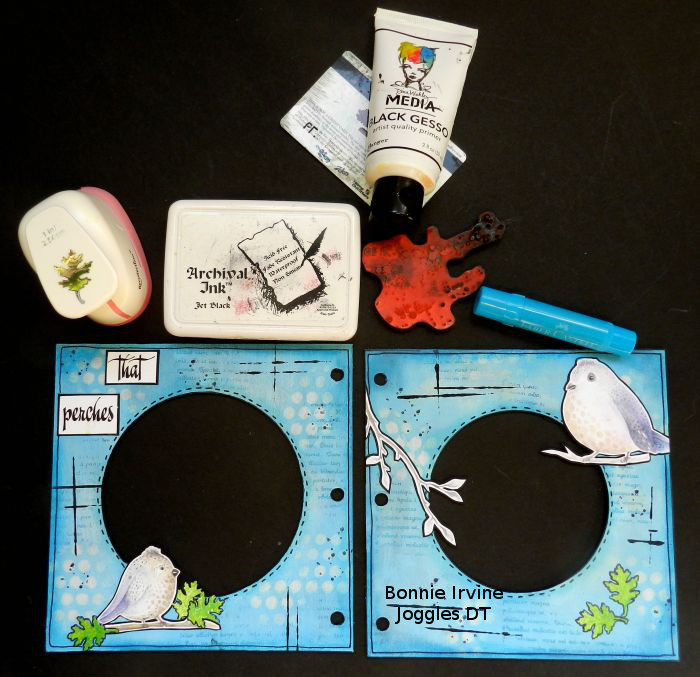
Cotton Candy Gelato was used to intensify the colour on the outside of the Blue pages and around the circles. Tiny punched leaves outlined with Black Pitt pen were added on both pages, black gesso card lines were scattered around the pages, and the splatter dots added with Jet Black Archival Ink.
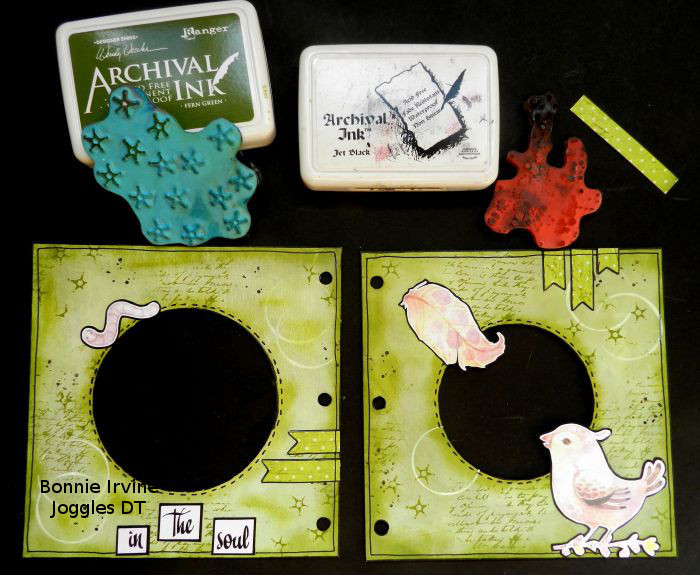
Fern Green Archival Ink was used to add the Joggles Background Noise – Spark stamp around the Green pages. Tiny strips of the paper used for the cover were cut into flags and added to both pages to break them up. White gesso rings were applied with a bottle lid to add a little more pattern. Pisatchio Gelato deepened the page edges and the circles.
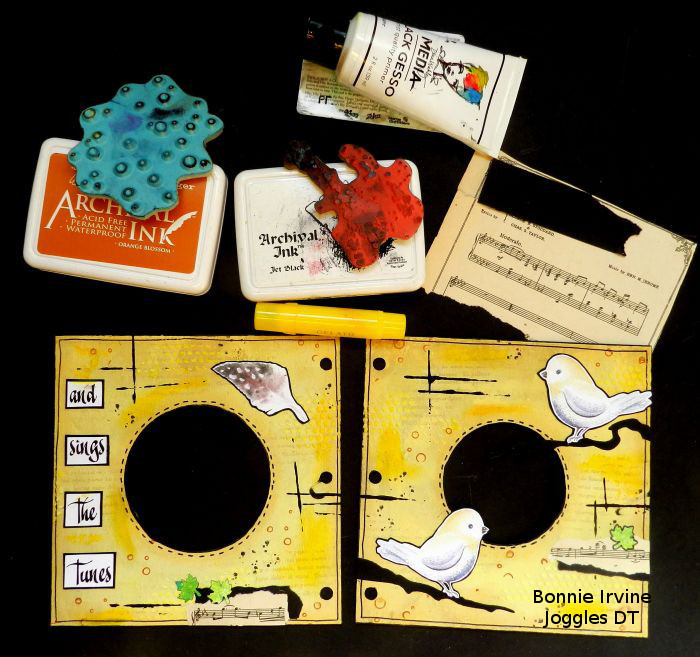
Lemon Gelato was used to deepen the edges and the circles and add interest to the background of the Yellow pages. Orange Blossom Archival was used to apply the Joggles Background Noise – Circles stamp and black gesso card lines were tapped on. The birds were given die cut branches for their perches. To emphasize the idea of them singing the tunes, vintage music paper was torn and adhered to each page along with punched leaves from mop up papers and a bit of black cardstock. The splatter dots again made their appearance.
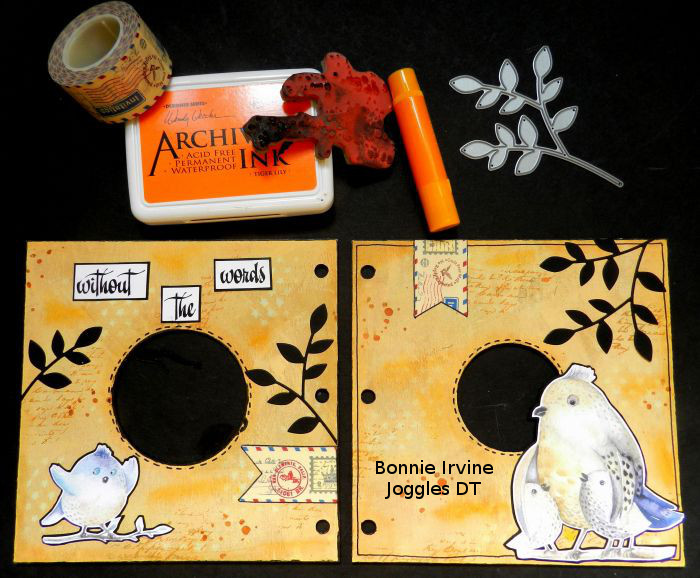
Mango Gelato was used to deepen the edges and the circles plus a few areas of the Orange pages. Die cut leafy branches were adhered with Aleene’s Super Thick Tacky Glue, like all of the images, and this time the splatter dots came from Joggles Background Noise – Dots rubber stamp and Tiger Lily Archival Ink. Wide washi tape adhered to white card stock so it was no longer transparent was cut into flags and added to each page.
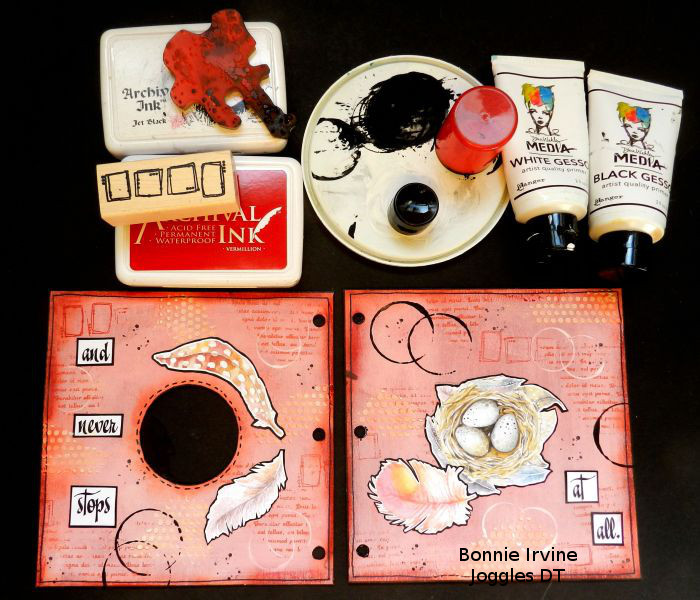
The edges of the Red pages and the circle were deepened with Cherry Gelato. Vermillion Archival Ink was applied to Stampotique Originals Dotted Squares stamp, stamped off onto scratch paper, and then applied to the background so the pattern was lighter and more faded. Both white gesso and black gesso rings were applied with bottle tops and the black splatter dots returned.
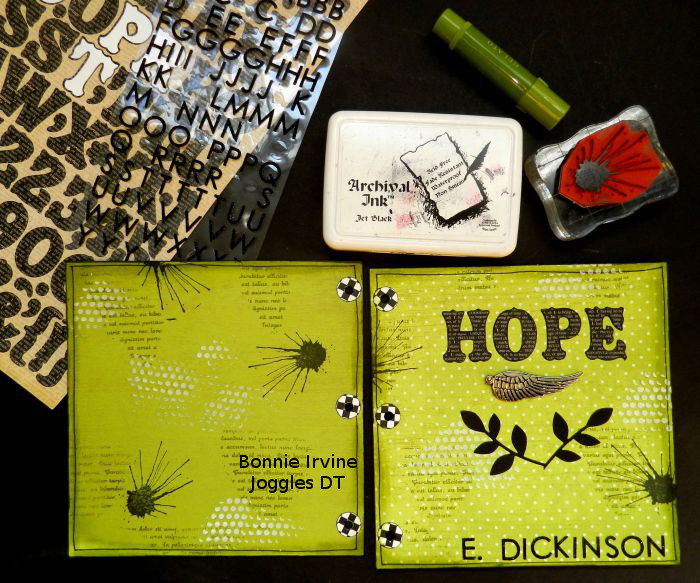
The front and back pages of the tunnel book were covered with green card stock, dotty for the front and plain for the back. This was adhered with Scor Tape and Pistachio Gelato was used to deepen the edges. Script was applied with Fern Green Archival Ink and the Nonsense Latin Text stamp. One of the Darkroom Door Paint Splats stamps was added to each with Jet Black Archival and Ranger Texture Paste was scraped through the circles on the Joggles Punchinella Quintet stencil. Letter stickers spelled out the title and the author of the quote. Decorative reinforcement circles were punched from black and white washi tape and added around the binder ring holes. A metal wing and sprigs from a die cut leafy branch finished the covers.
Wowsers! That’s a lot of steps. If you are a cut to the chase kind of person, here are close-ups of the pages without all that explanation:
Thanks so much for joining me today on the Joggles blog. I cannot wait to see what others do with these fabulous tunnel books and hope that I have given you a few ideas. Barb shared an awesome video about her process and about the gorgeous tunnel books that she kitted up to go along with it. You can check it out here. Yum!








15 Comments
What a fantastic tutorial, Bonnie. The end result is soooo cool. The best thing about it is the possibilities! I just love it!
Thanks, Cathy! I am so excited by the possibilities as well. I can’t wait to see what others do. The hardest part was narrowing all my ideas down to one 🙂
This book is spectacular!!
Thanks so much, Gracie. It was a lot of fun to create.
Well, all I can say is OMG! What a labor of love! It is truly magnificent.
Thanks, Connie. It did take a while but it was such an enjoyable process that I didn’t mind one minute of it. I have so many more ideas for these tunnel books 🙂
Just incredible! Thank you for such a detailed tutorial. You made it seem doable. When I first saw the finished book, I thought no way can I do that. After going through all of the steps, I can’t wait to get started! Thank you, thank you, You are one talented lady!
Blown away,
Debbie
Aw,Debbie, thanks so much for your comment! You have given me a smile. It was my goal to de-mystify the process and make it doable. It’s just one small step at a time…nothing tricky or hard. I can’t wait to see what you create!
Bonnie, this is just spectacular! I, too, love this quote and have used it on journal pages. I have ordered a book and can’t wait to do a Halloween Alice in Wonderland theme. (Maybe). Thinking of the falling down a deep hole part. Ah, another project! Thanks for all the great ideas!
Thanks so much, Faye. An Alice in Wonderland Halloween themed book would be amazing! I love that idea and am excited to see what you do! The night before Christmas and the Wizard of Oz would also be fun…so many ideas!
Love this, thanks for sharing such a great tutorial!!
Amazing book Bonnie
Absolutely fabulous book. I love the way you’ve used the rainbow colours. Brilliant step-by-step photos too. Love it! xx
Lovely inspiration!
Another amazing tunnel book. They look like a lot of fun to do. Thanks for sharing all your steps.