
Virginia has created a Halloween themed Tunnel Book using the 6″ x 6″ version with the circular tunnel. She’s outdone herself again and I hope you enjoy her tutorial!
Potions Tunnel Book
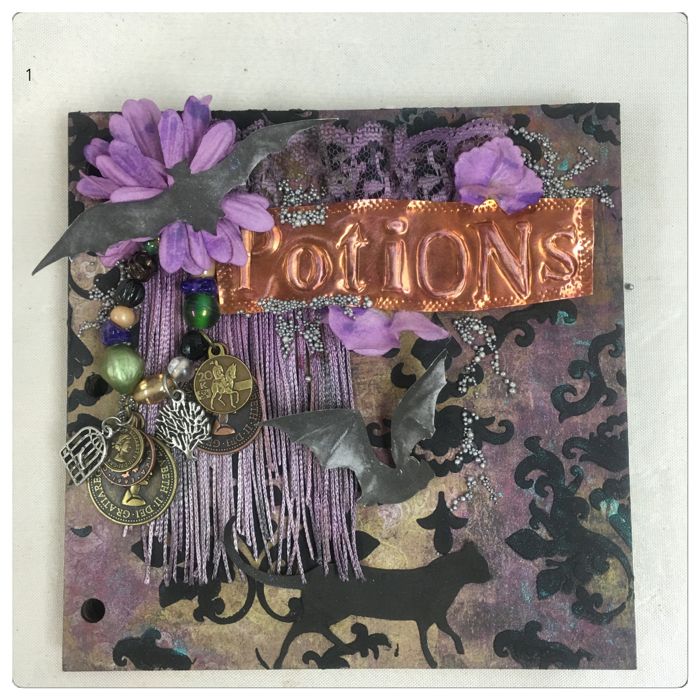
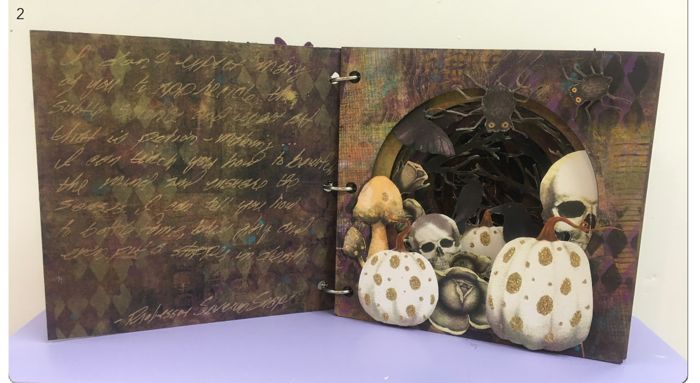
Supplies:
Joggles 6″ x 6″ Circular Tunnel Book
Assorted Stencils
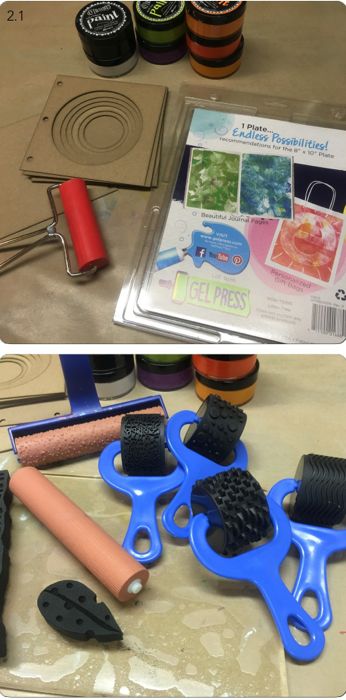
Dylusions Paints – Squeezed Orange, Pure Sunshine, Tangerine Dream, Crushed Grape, Fresh Lime, Melted Chocolate, Black Marble, White Linen
Gel Press Plate
Assorted Texture Tools
Brayer
Lace
Fringe
Dylusions Ink Sprays – Squeezed Orange, Crushed Grape, Slate Gray
Tim Holtz Distress Paint – Frayed Burlap, Black Soot
Spray Bottle of Water
Rubber Gloves
Joggles Collage Sheets – Halloween IV Minis (401132), Cats and Bats and Trees Oh My (401066), Halloween Shades of Grey I (401125), Halloween Shades of Grey II (401129)
Markers – Pale Orange, Pale Green, Pale Gray, Pale Purple
Gold Glitter
Scrap Piece of Copper
Alphabet Stencils
Stylus
ScorTape
Black Foam Tape
Clear Glue
White Glue
Hot Glue Gun
Faux Flowers
Prills – Silver
Assorted Beads & Charms
Black Artist Paste
Tim Holtz Distress Ink Pad – Antique Linen
Lindy’s Stamp Gang Starburst – Teapot Purple, Sweet Violet Purple Teal
Assorted small text Rubber Stamps
Gold Gel Pen
Tim Holtz – idea-ology – Small Talk
Small scrap piece of Black Card Stock
Scrap piece of Leather or Faux Leather for Tiny Book Cover – 1.5” x 2.5”
Scrap piece of Copy Paper for Tiny Book Pages – I cut 4 pieces at 1 3/8” x 2 3/8” and 2 pieces at 1 3/8” x 1 1/8” to cover the Magnets on the inside of the Tiny Book Cover
Piece of Twine or Embroidery Floss to Bind the Tiny Book
Large Tapestry Needle
2 small Flat Magnets to hold the Tiny Book closed
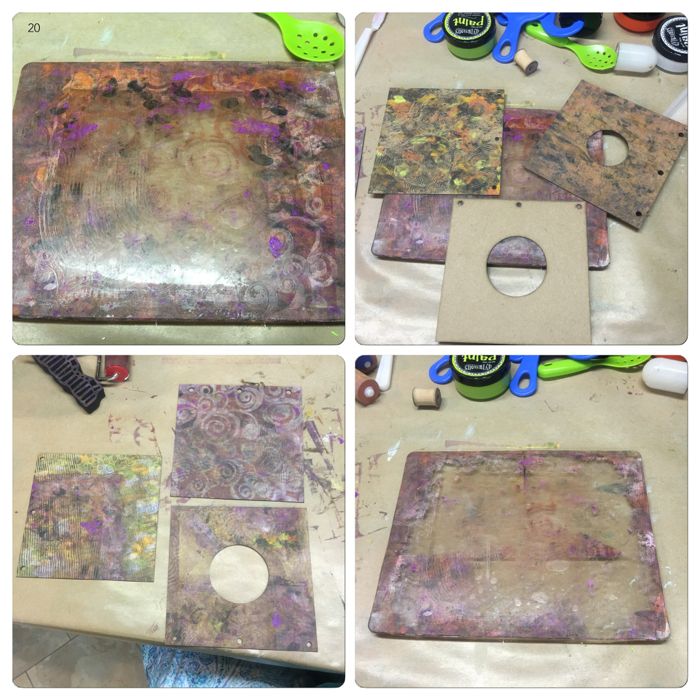
I began by coating all of the Book Pages using the Gel Press Plate with Dylusions Paints.
I’m not going to go into the entire process here. If you need further guidance than what I provide here, Barb has a video that gives you the basics or you can always find videos on YouTube.
NOTE: I do NOT clean the Gel Press after each print. Just keep adding more paint. You’ll pick up some of the old paint on some of your prints, but that’s ok, even desirable!!!
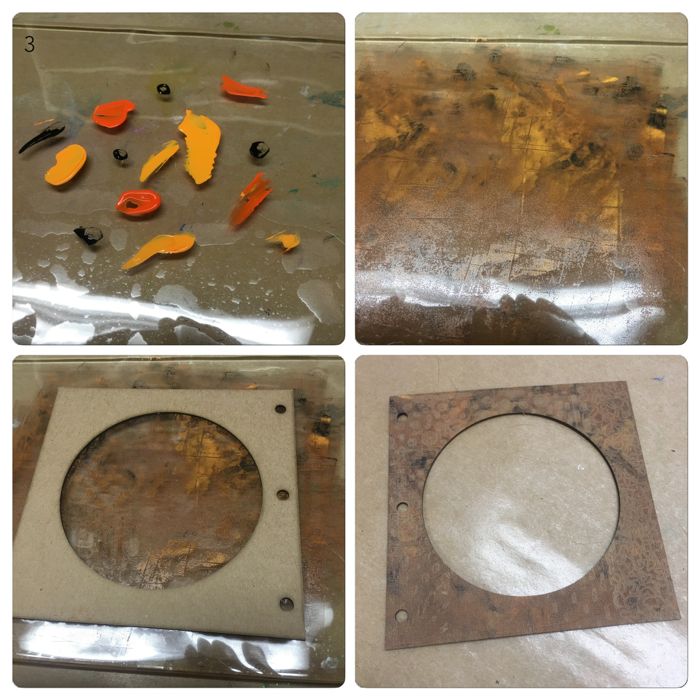
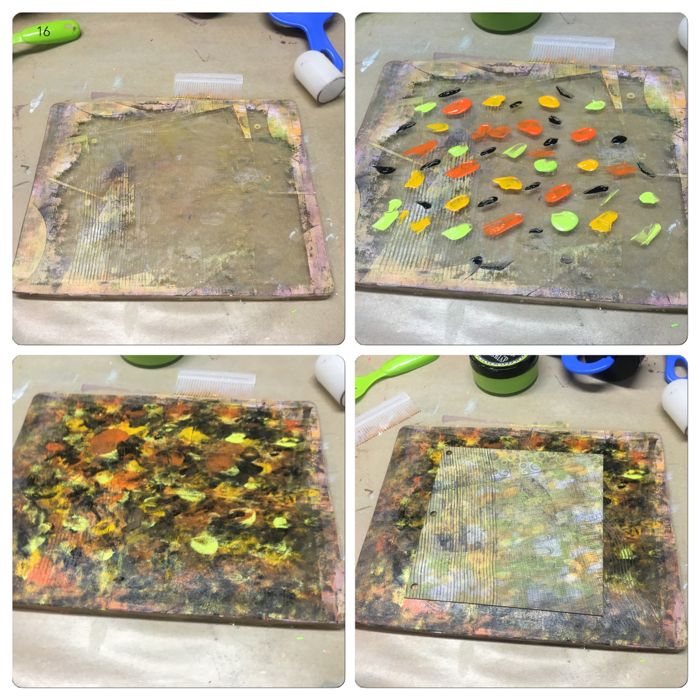
Dylusions – Pure Sunshine, Tangerine Dream & Black Marble. Notice they get a little muddy, which was good for the look I was trying to achieve. Although I love the bright colors of the Dylusions paints I really wanted something that would give a creepy haunted forest look. Also I did not precoat the chipboard with anything. I wanted the color of the chipboard to help mute the colors.
I did run a few texture tools through this before I printed it, but it’s difficult t see in the photo. The printed piece shows a bit of the texture.
Before adding more paint to the Gel Press surface I used the brayer to re-distribute the paint.
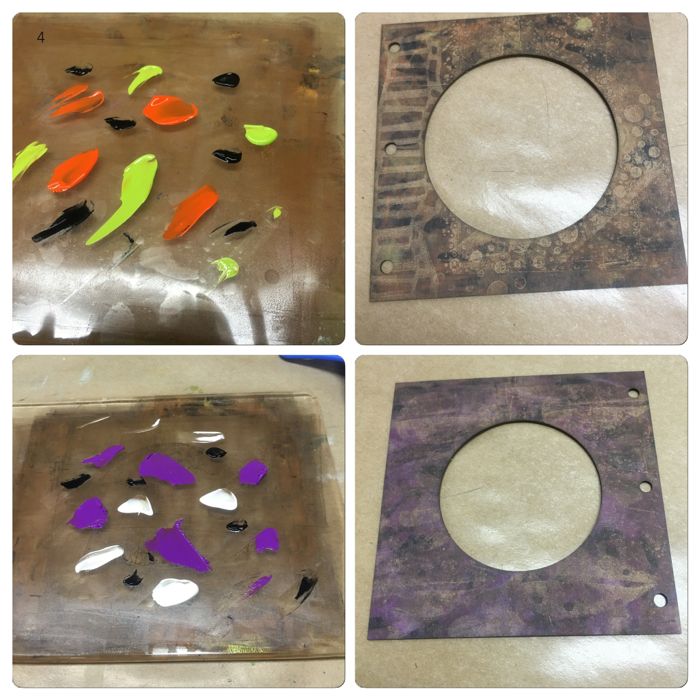
Upper Pics: Using Dylusions – Tangerine Dream, Fresh Lime and Black Marble.
Lower Pics: Using Dylusions – Crushed Grape, Black Marble and White Linen.
Again I re-distributed the paint on the Gel Press using a brayer
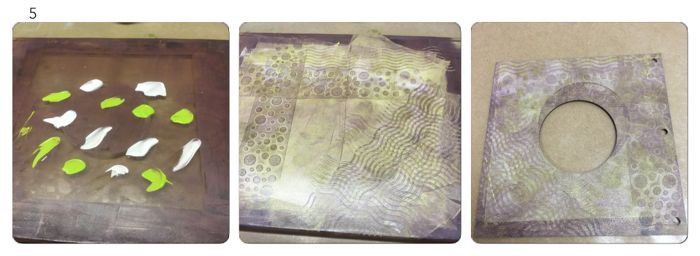
Dylusions – Fresh Lime & White Linen. Texture tool marks are more visible using the lighter colors.
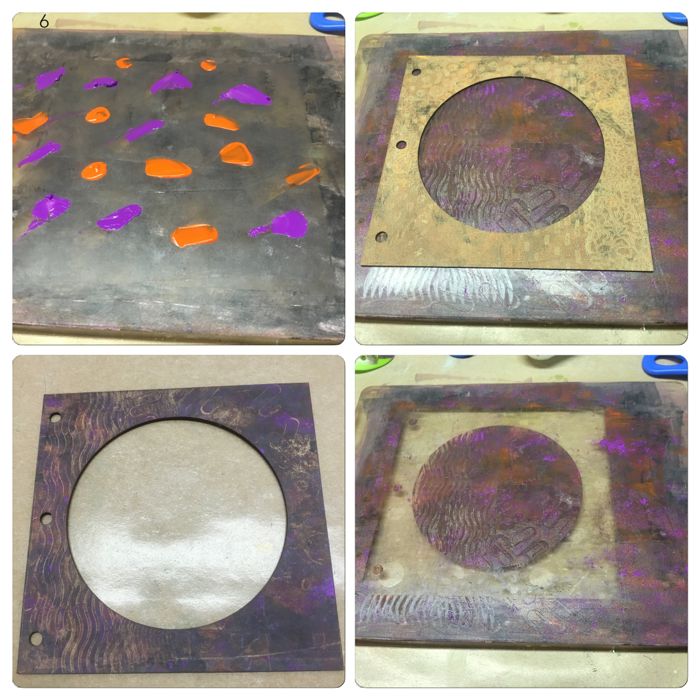
Dylusions – Crushed Grape & Squeezed Orange. After printing this one, instead of rolling the brayer over the entire surface before applying more paint I left it as is.
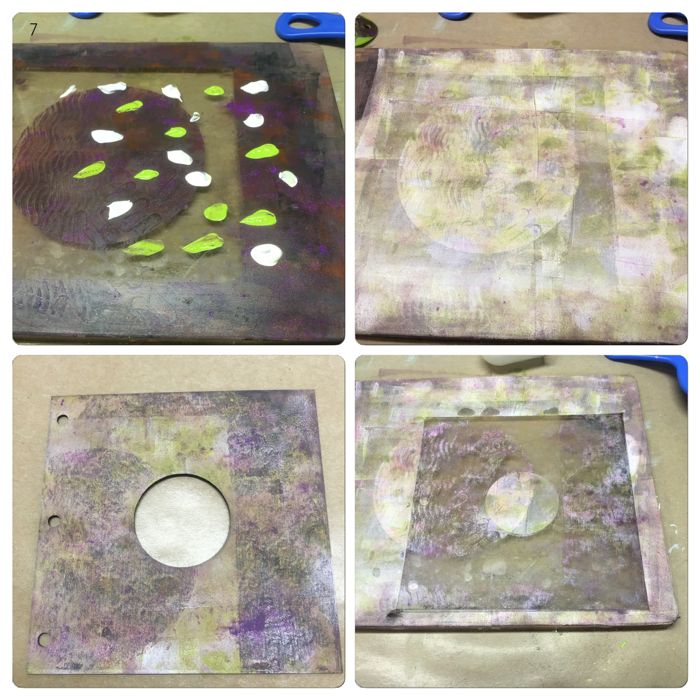
Dylusions – Fresh Lime and White Linen. Notice after spreading the paint you can see the image from the last print? This makes for great texture. Again leave the paint as is after taking your print.
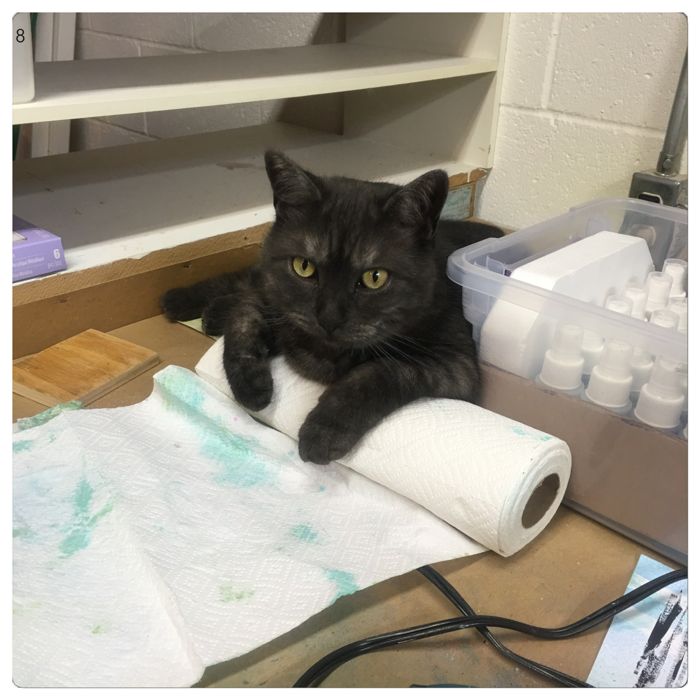
My HELPER….[rolls eyes]
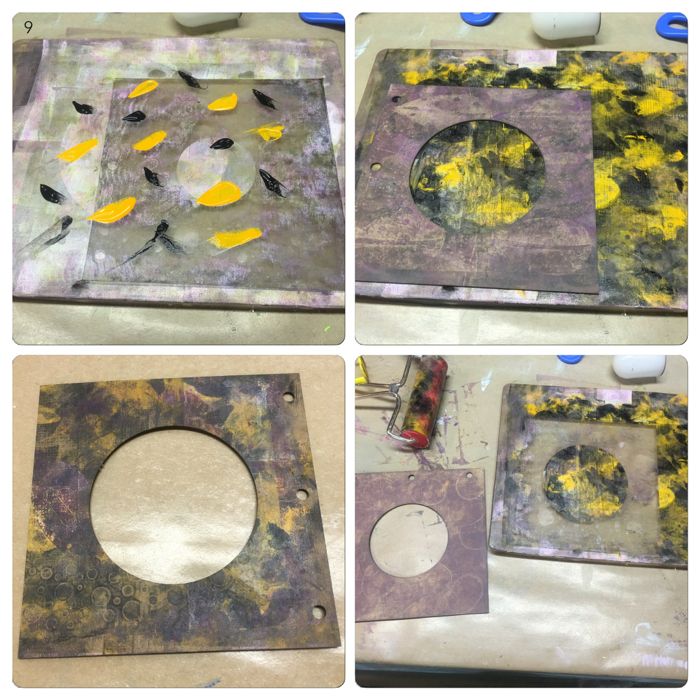
Dylusions – Pure Sunshine & Black Marble. Notice I didn’t over brayer this one. I left the colors a little bold knowing I would be picking up the color from the last print as well.
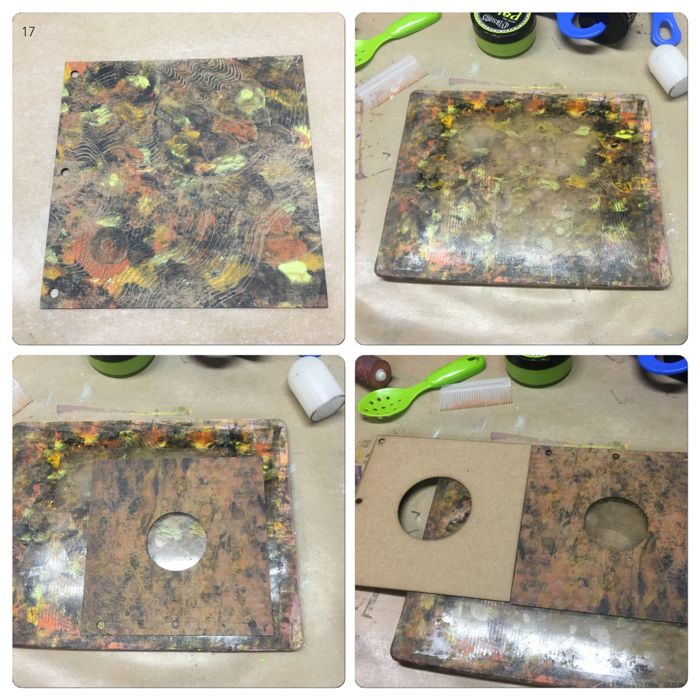
Note when you are trying to pick up color from the last print you may have to leave the chipboard on the Gel Press for a little bit…half of a minute maybe. This will allow the paint to grab the chipboard for better transfer. Again leave the paint on the Gel Press as is.
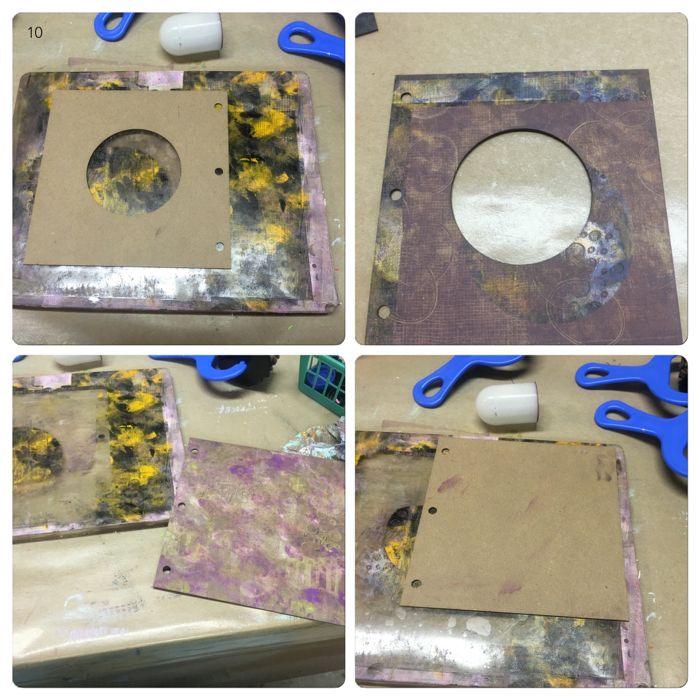
This time I did not add any additional paint. I wanted to pick up more of the paint still on the Gel Press. See how I placed the chipboard and printed only on the top and along one edge with part of the circle printed?
There is still more yumminess on the Gel Press so I printed from it again.
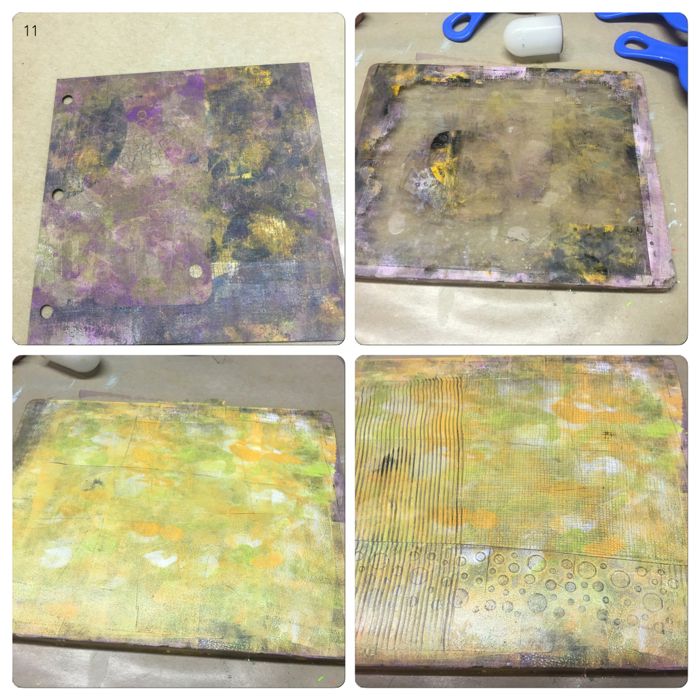
Ok that’s enough from that one. Added more paint. Dylusions Fresh Lime, Pure Sunshine and White Linen. Swiped some texture tools through it.
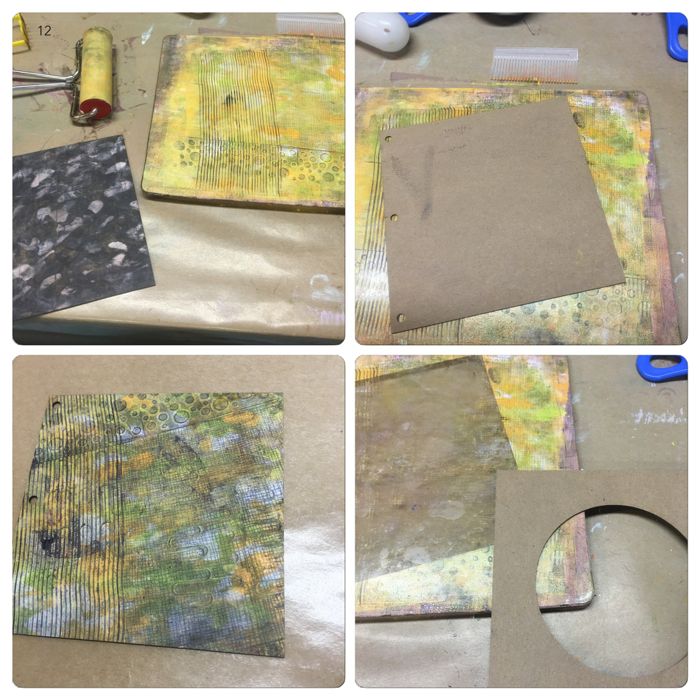
I took a piece I had already printed using Black and White and printed it again. Interesting…but not sure I like it. Time to pick up more of that left over paint along the edges.
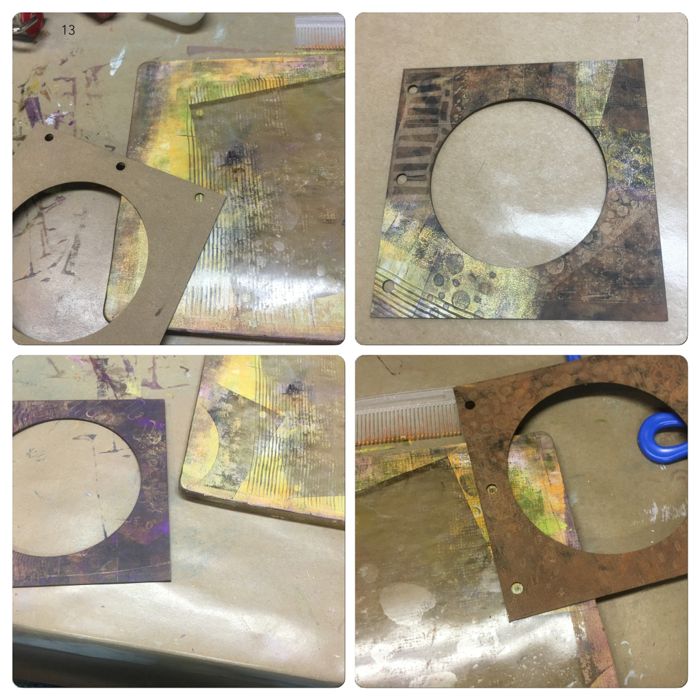
I picked up the paint along the edges on a few of the pieces of chipboard I had already printed on.
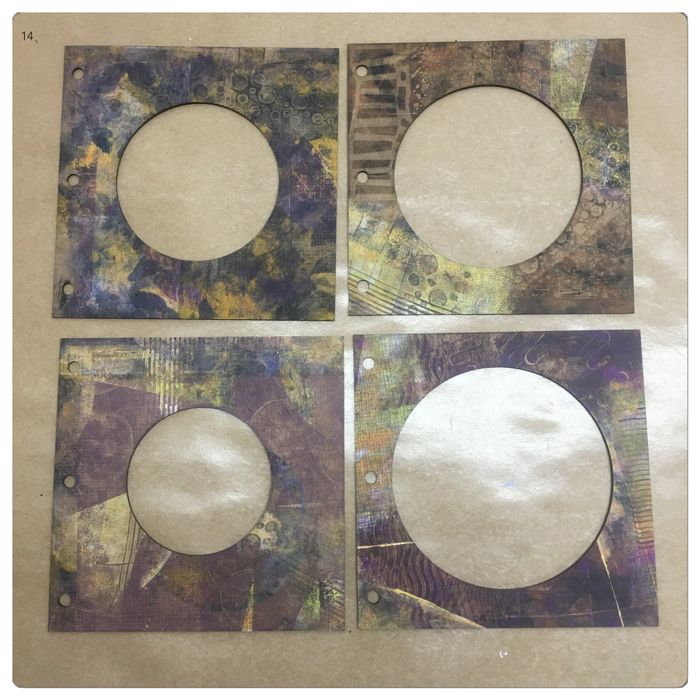
These I’m very happy with. I will keep these as is.
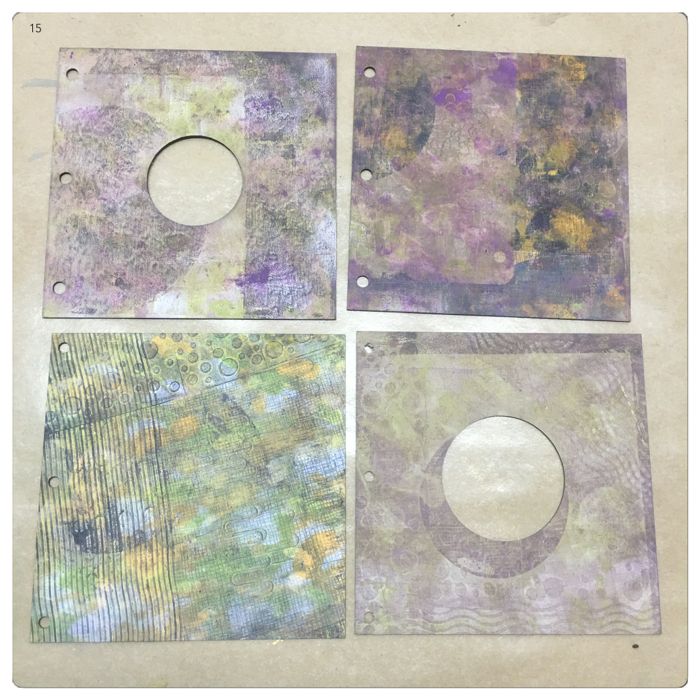
These?…Not so much…I’ll work on these some more. Remember if you’re not happy with what you have you can always add more layers. And if you TOTALLY hate something just slap a coat or 2 of gesso over it and start over. Nothing is totally ruined! The next few pics are more of the same.
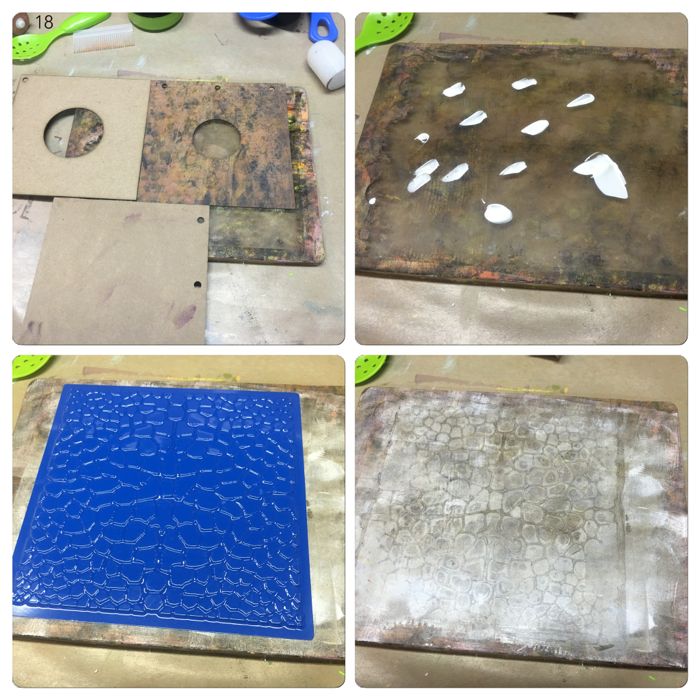
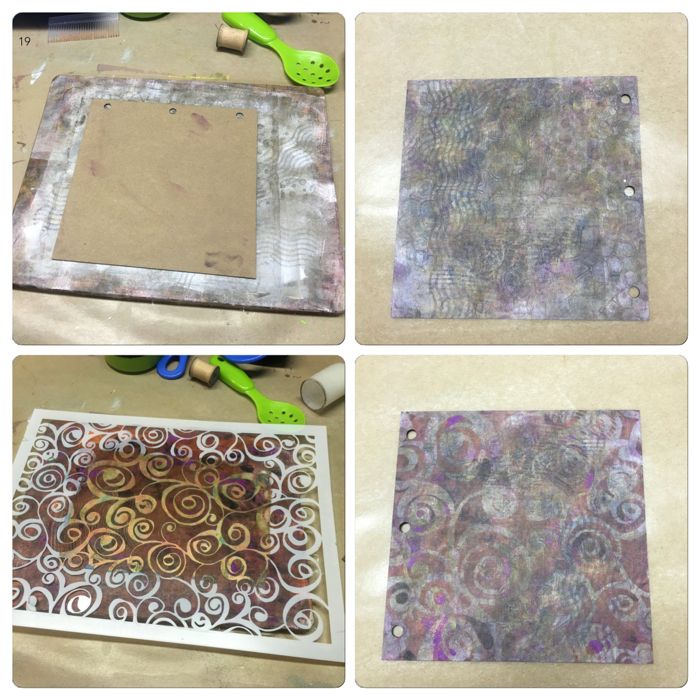
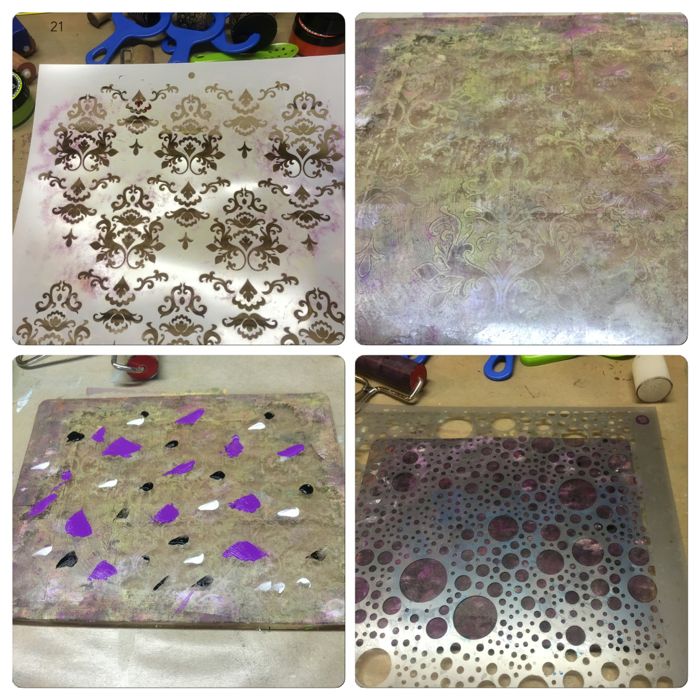
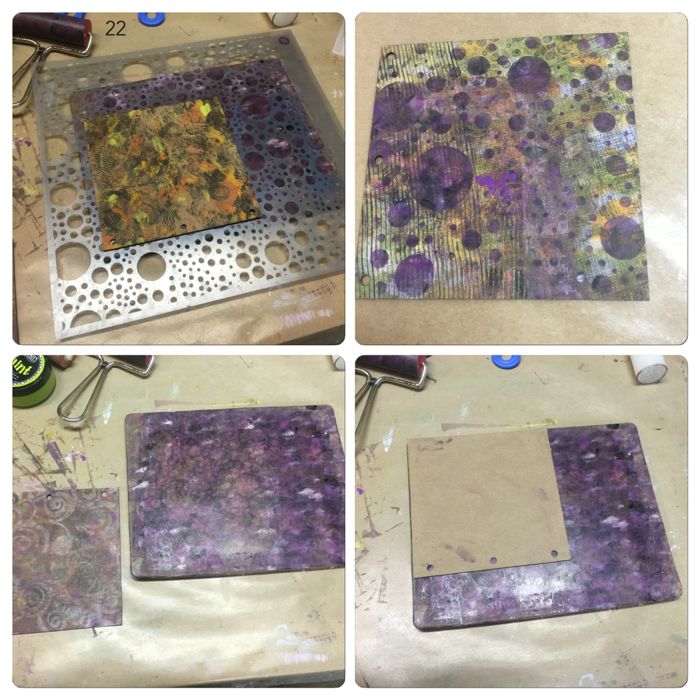
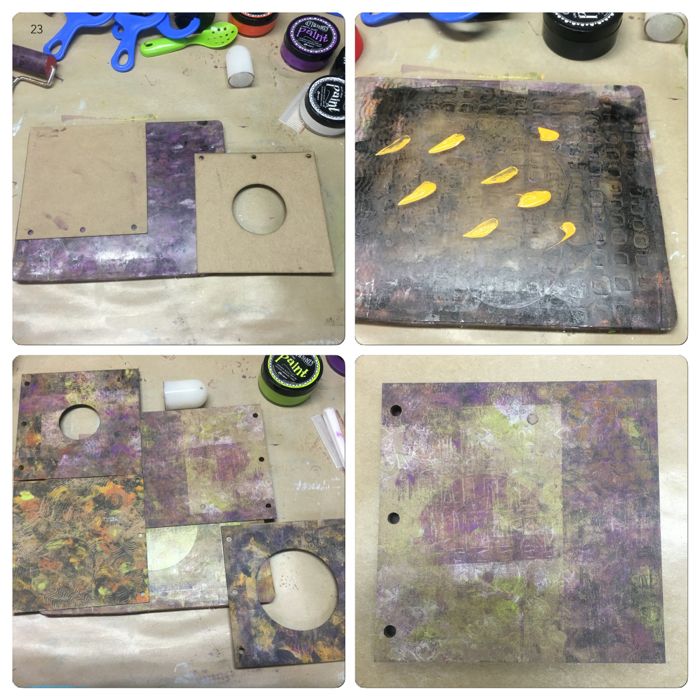
I don’t think I need to give more commentary on these. Other than I did use some stencils on a few of these too.
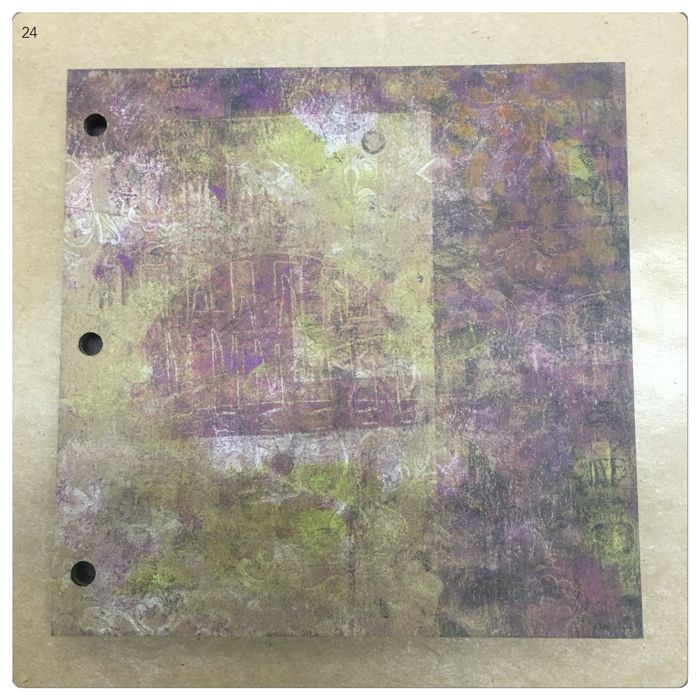
This is the piece that will be the front Cover of the Book.
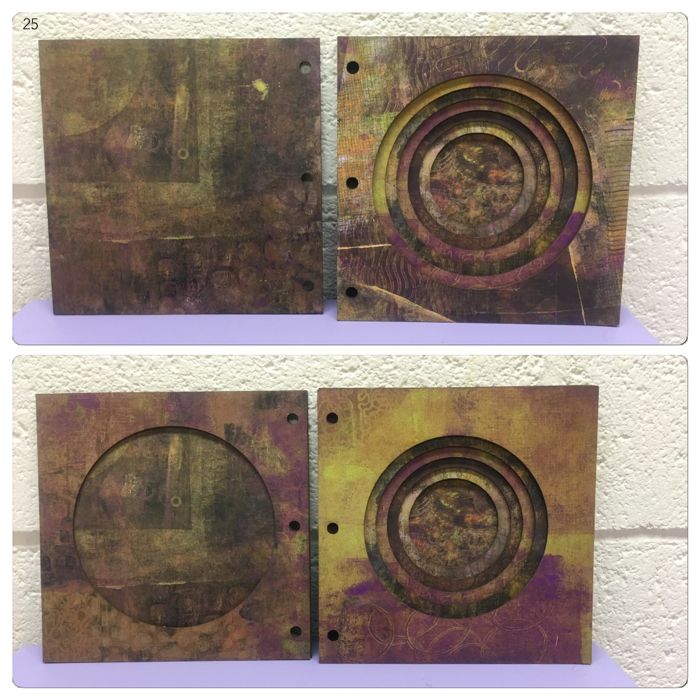
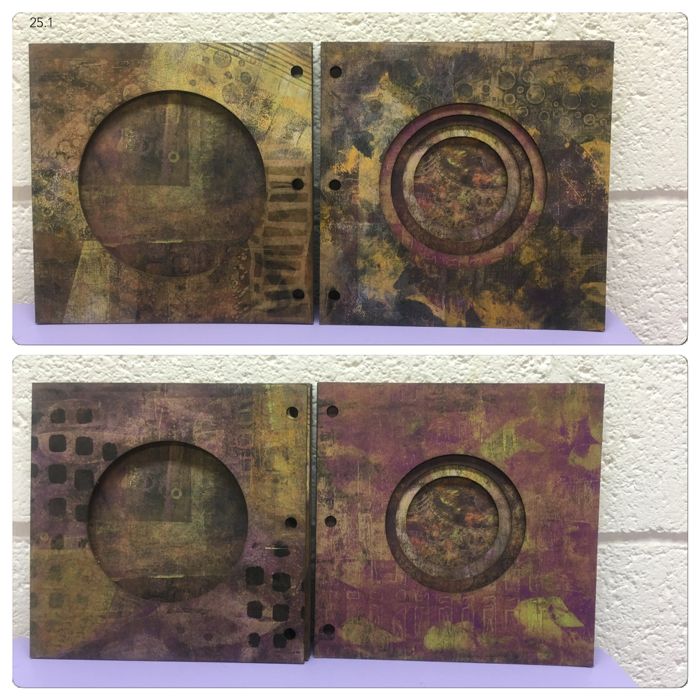
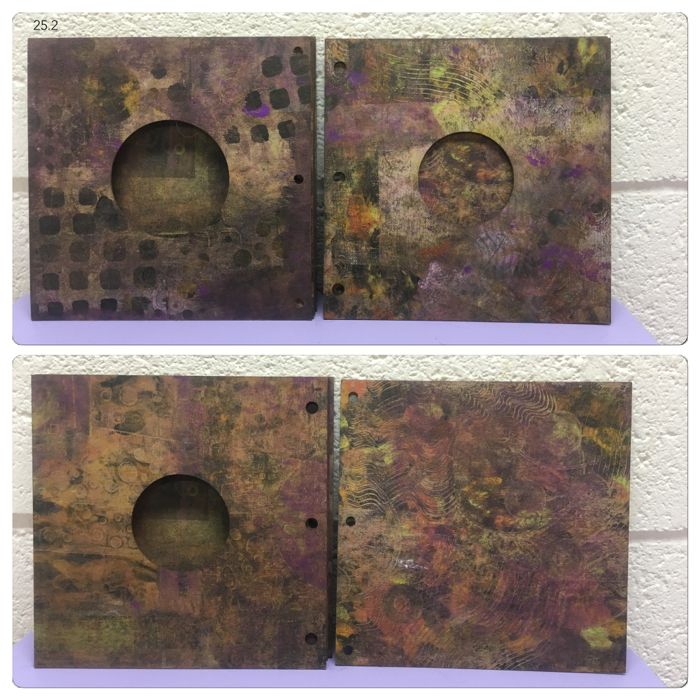
These are the pages once I finished with the Gel Press Printing.
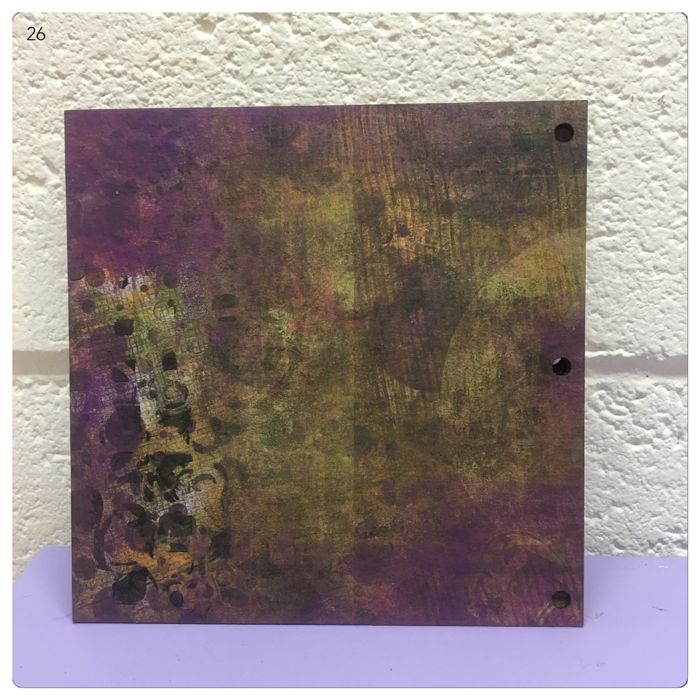
This is the back cover of the book. Set aside to dry. Time to dye the Lace and Fringe.

You will need about a 4 inch piece of Lace. Although here I used a much longer piece not knowing exactly how much I was going to end up using for this project. That’s ok, I’ll use it for another project. And I used about a 2 inch piece of Fringe.
Dylusions Ink Sprays – Crushed Grape, Squeezed Orange and Slate Gray. Tim Holtz Distress Paints – Frayed Burlap & Black Soot. Spray bottle of water.
GLOVES!!!….as you’ll see I did NOT wear gloves….d’oh…slaps self on forehead.
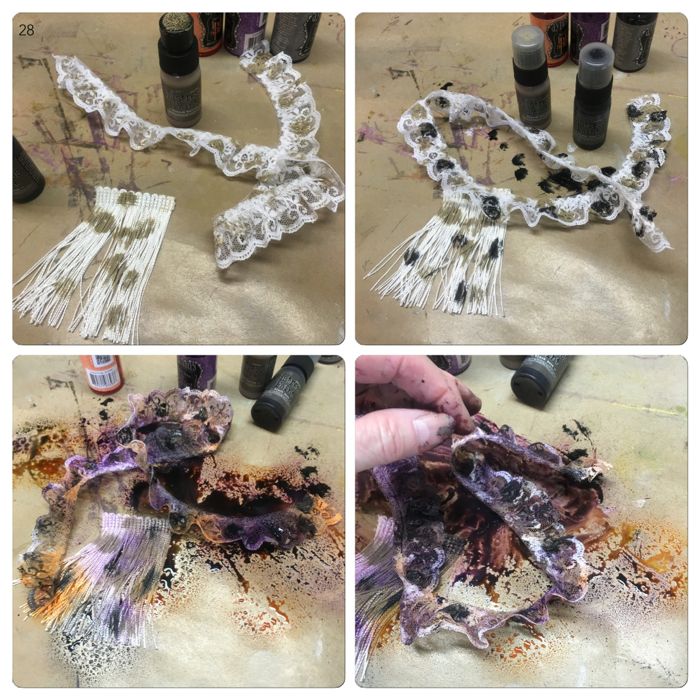
I began by applying some of the Distress Paints, then spraying on the Dylusions Ink Sprays. I then sprayed with a bit of water. It looks like a yucky mess.
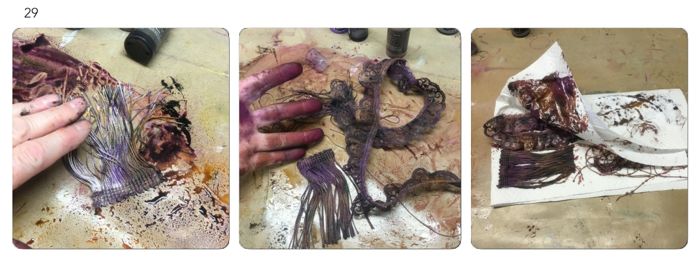
Rub the pieces in the puddle of ink. And REMEMBER to wear GLOVES!!! Place between paper towels and press out most of the liquid.
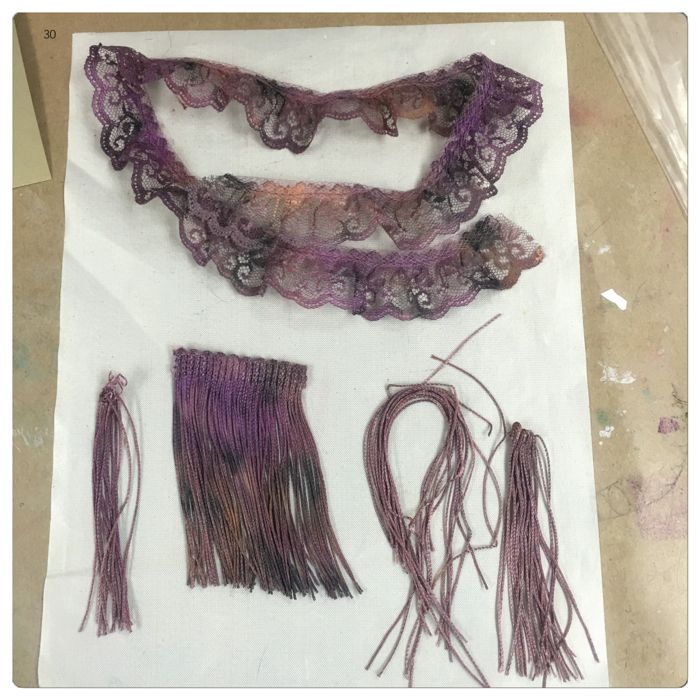
The results. I like it. Set aside to dry thoroughly. Let’s work on the Front Cover.
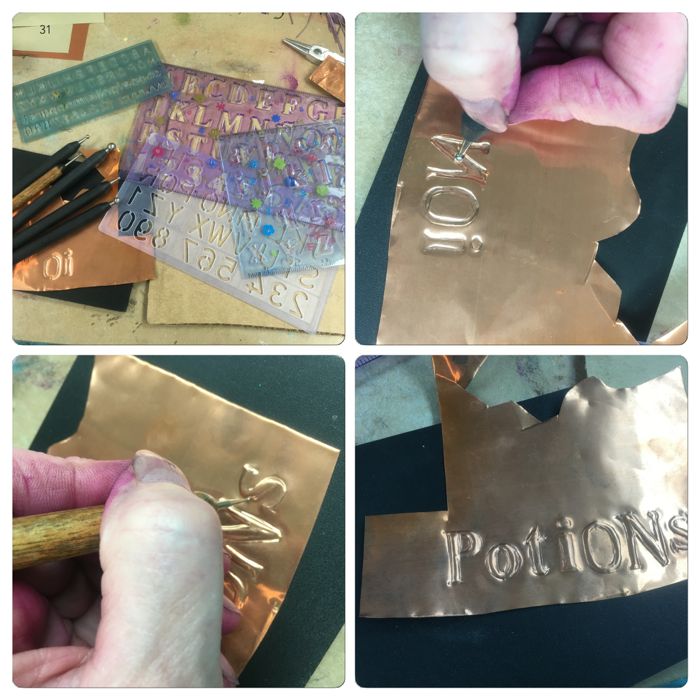
Make the “Potions” sign using a scrap piece of Copper ( or just a piece of Cardstock will work if you don’t have any Copper laying around)
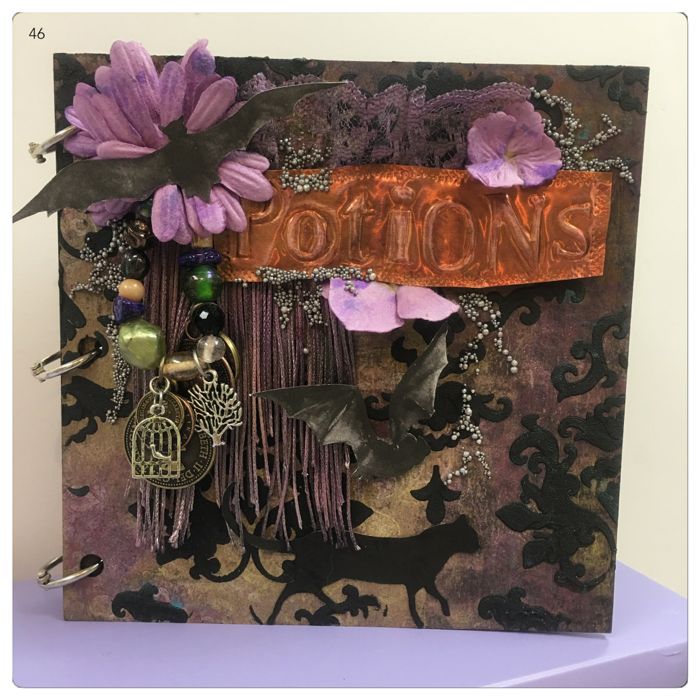
Using some small Alphabet Stencils (or draw them by hand) and a small stylus print the word “Potions” on the Copper. Using a medium tip stylus manipulate the letters from the back to give a 3-D effect on the front. Again take the small tip stylus to outline the letters and give them more dimension.

Cut out the “sign” using not so straight lines. I used a metal tool to make a border on the Copper. But you can just use the stylus to do this if you don’t have a metal tool. Next I heated the Copper using a heat gun. I love how the heat changes the color of it.
CAUTION!!! – If you heat the Copper be sure to hold it with a pair of tweezers or needle nose pliers. IT GETS VERY HOT!!!! Do not over heat it or it will turn to a silver color. Heat it just enough to get the oranges and purples.
Once it is cooled spray it with a fixative. Handling it will remove the “coloring”. And if you look you can see mine no longer has the awesome coloring on the cover that it had here. I forgot to coat it…. 🙁 (see next pic)
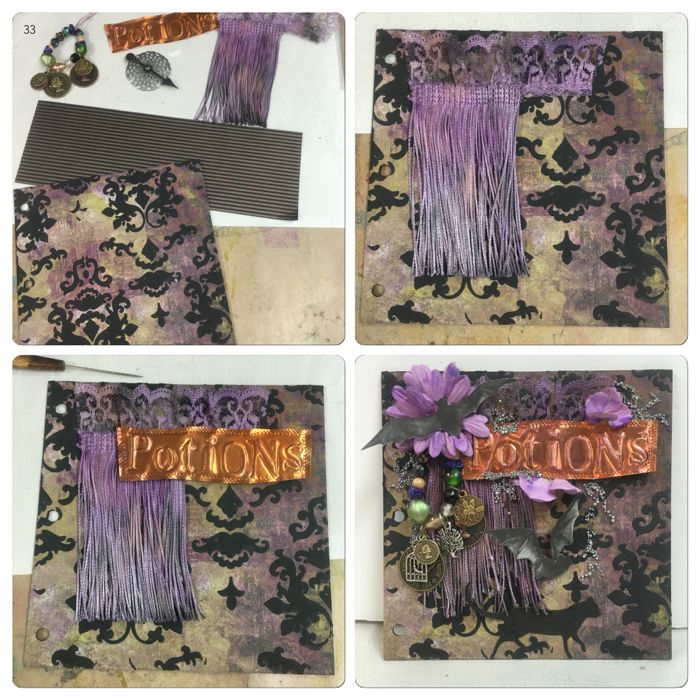
Using Black Artist Paste and a Brocade Stencil add texture to the Front Cover. Set aside to dry.
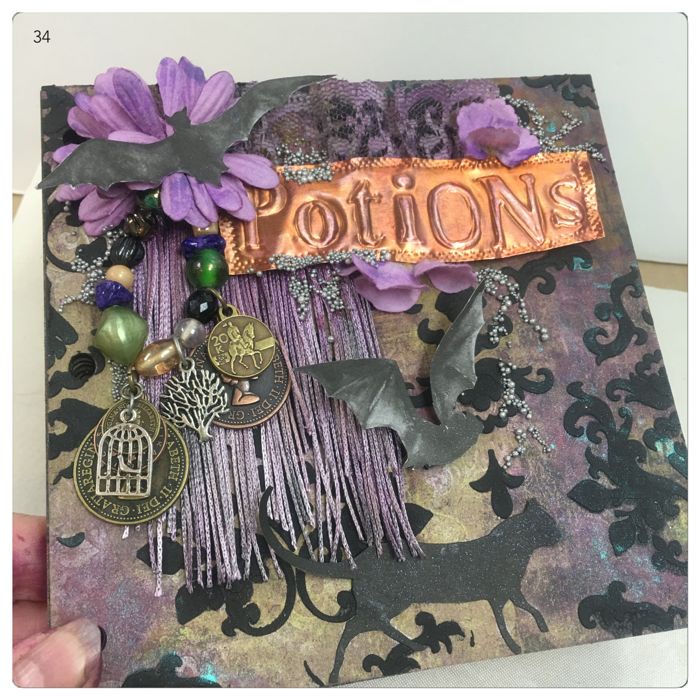
String some beads and charms onto twine or embroidery floss. Tie ends together. ( My pic shows some striped paper and a medallion – I did not use either of these )
Using hot glue attach the Lace across the top and layer the Fringe over the bottom of the Lace to the left.
Position the “Potions” sign over the bottom of the Lace and partly over the Fringe. Attach using Black Foam Tape. I didn’t care for the Fringe being so straight cut on the bottom, so I randomly cut the ends to be jagged. Attach the string of Beads and Charms using hot glue to the left of the “Potions” sign. Attach a few Faux Flowers using hot glue.
Cut out some Bats and the Walking Cat from the Joggles Collage Sheet – Bats and Cats and Trees Oh My.
I attached the center bat using Black Foam Tape. The bat on the Flower I attached using hot glue and the cat I attached with white glue. I did not glue down the Cats tail or head. Randomly squiggle some clear glue on the cover and sprinkle with Silver Prills.
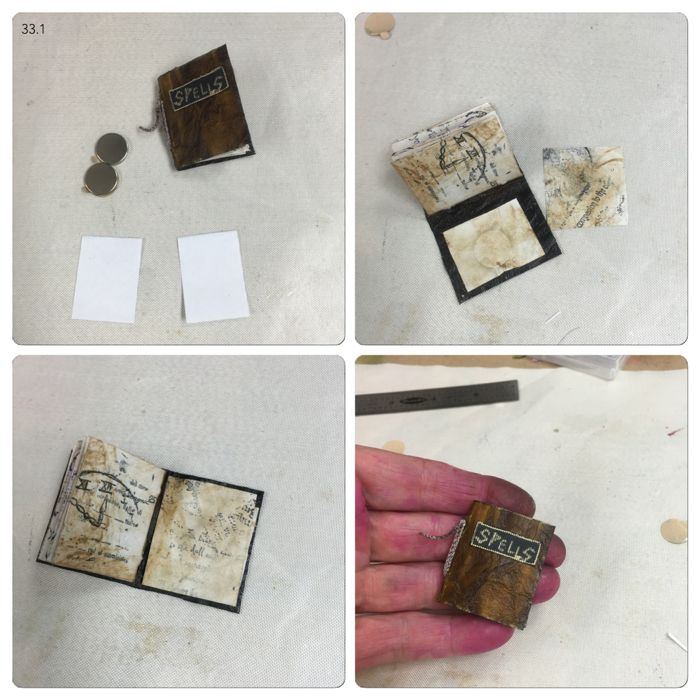
To make the “Spells” Tiny Book I used a piece of Faux Leather Paper for the cover. Cut to 1.5” x 2.5”. Folded in half it will give you a 1.5” x 1.25” Book Cover. I cut 4 pieces of Copy Paper 1 3/8” x 2 3/8”. Fold in half you will have Book Pages 1 3/8” x 1 3/16”. Before assembling the Book I distressed the pages using Tim Holtz Distress Ink pad – Antique Linen.
Assemble the Tiny Book using a large tapestry needle and a piece of twine ( I used one of the strands from the Fringe I used on the Front Cover). With the Cover folded in half and the pages folded in half, insert the pages into the cover. Pierce two holes in the fold, each about 1/4” from the top and bottom. We will call the top hole “A” (not to be confused with A-hole). And the bottom hole will be “B”.
With the needle threaded, insert the needle up through “A” from the outside of the Book. From the inside go down through “B”. Again go up through “A” and once again down through “B”. Tie off the ends on the outside of the Tiny Book. Trim ends, but not too short.
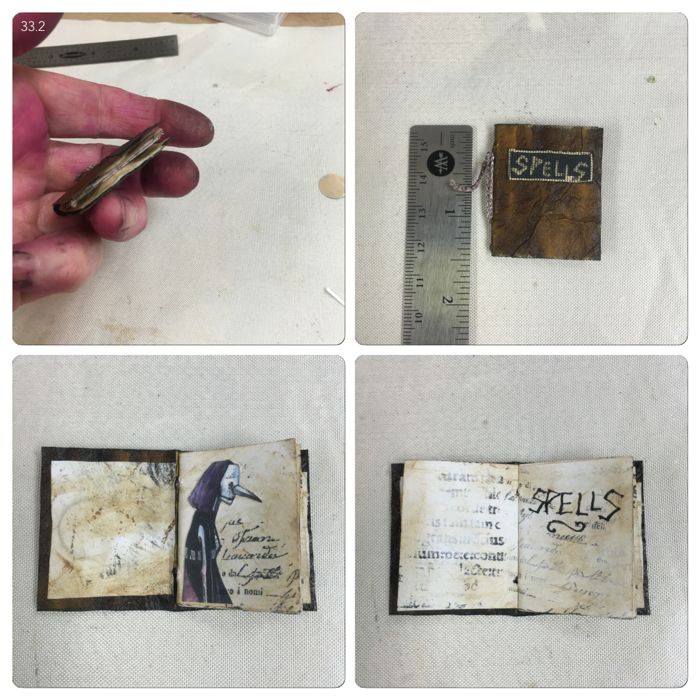
Stamp some small text on the pages. Cut out some images from the Joggles Collage Sheet Halloween IV Minis. Using just parts of a few of them add them to the pages. I hand wrote in the Title “Spells” and also made a “Spells” Title for the front of the book using a Gold Gel Pen and Black Cardstock.
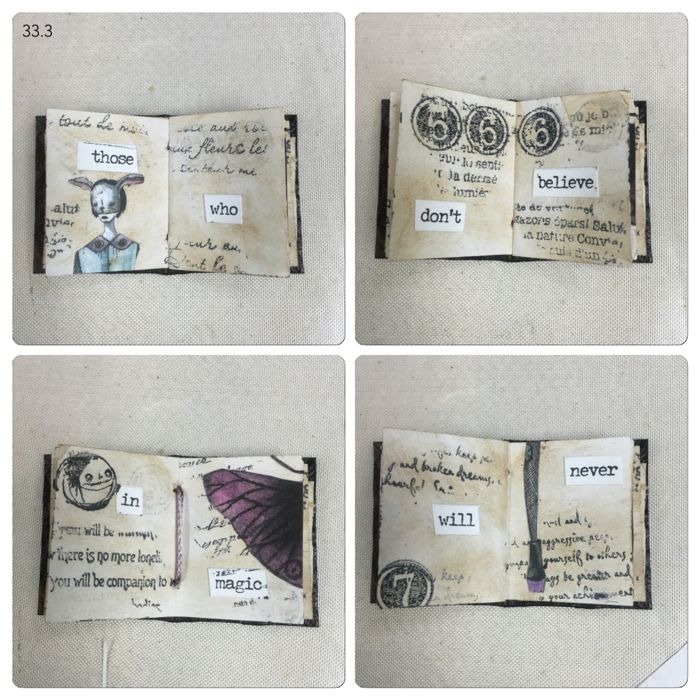
I also used Tim Holtz idea-ology Small Talk – “those who don’t believe in magic will never find it”. I cut them into single words and placed each one on their own page. These pics don’t show it, but I used a charcoal pencil to shade around each of the words and images I placed in the book.
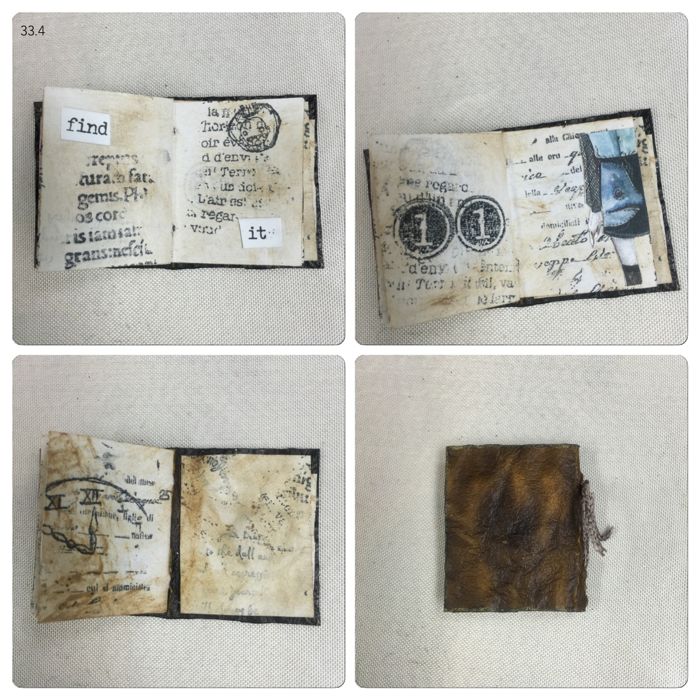
Once I had the Tiny Book made, it wouldn’t stay closed…..grrrrr. So I attached small flat magnets to the back and front of the book and covered them with additional pieces of copy paper. Also distressed and stamped. Problem solved!!! OK….back to the Tunnel Book Pages.
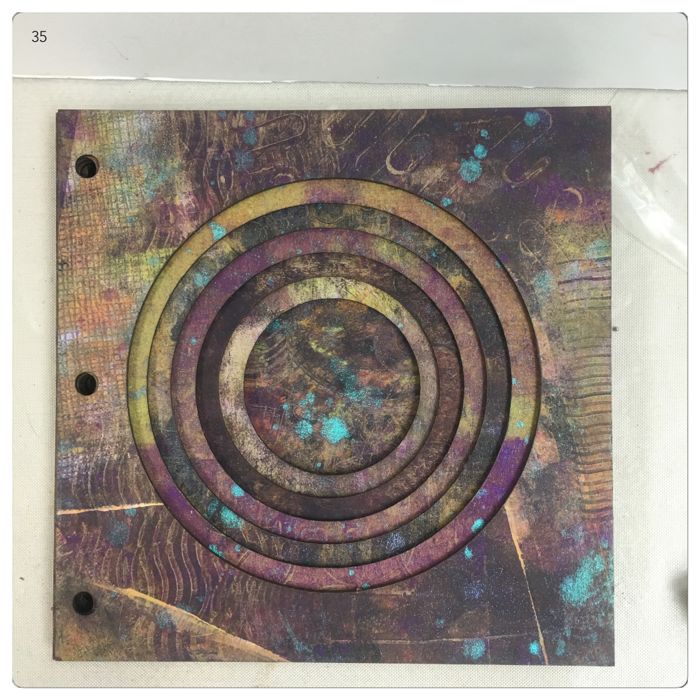
Using Lindy’s Stamp Gang Starburst – Teapot Purple and Sweet Violet Purple Teal – I sprayed and dripped the colors on the “pages”. And since I had the cover finished already I just put some on my fingers and smeared it on the cover. Not showing each and every page here, just them stacked so you can see the Lindy’s sprays on them.
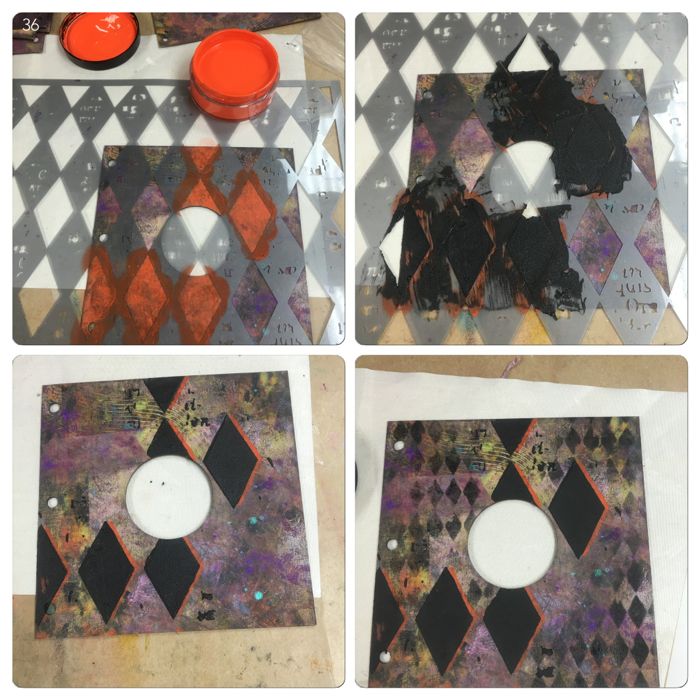
Ok on to adding more “texture” to the pages. On this page I used a larger Harlequin Stencil and both Dylusions Paint – Tangerine Dream and Black Artist Paste. I staggered and overlapped the design. I also used Tim Holtz Harlequin Stencil.
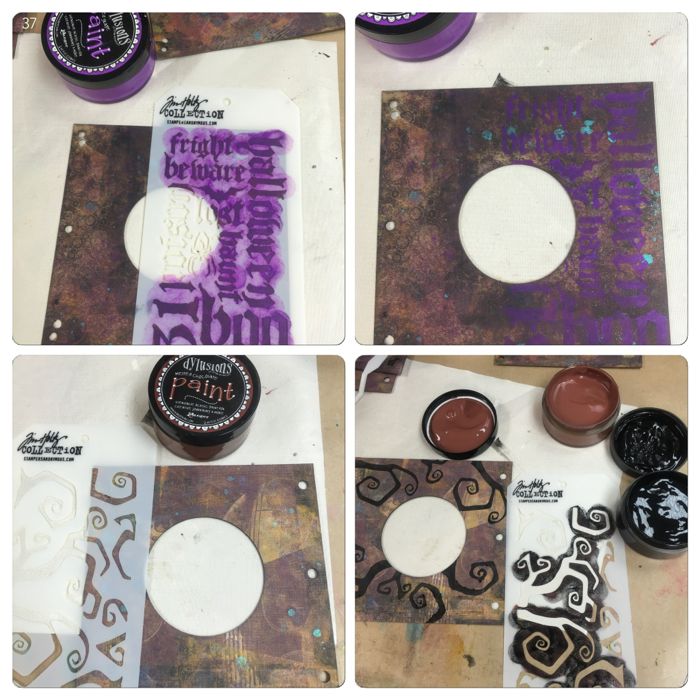
A couple more examples of some stenciling I added.

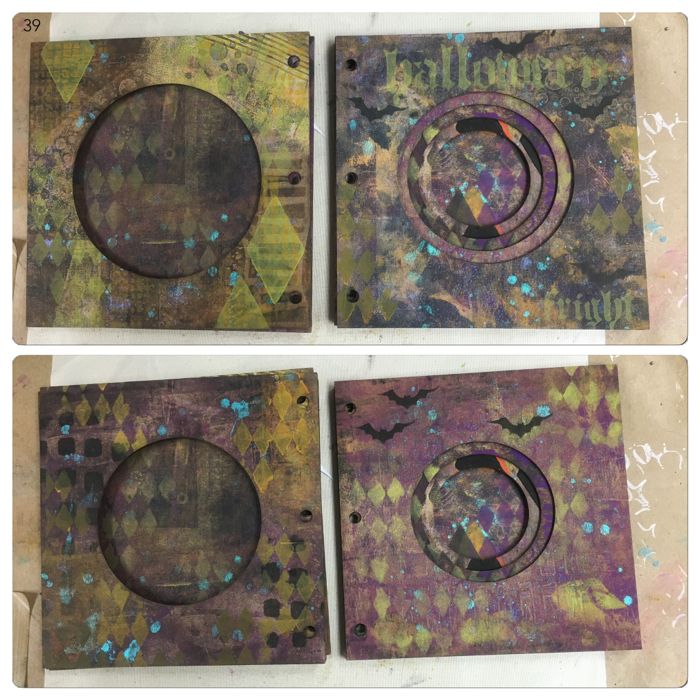
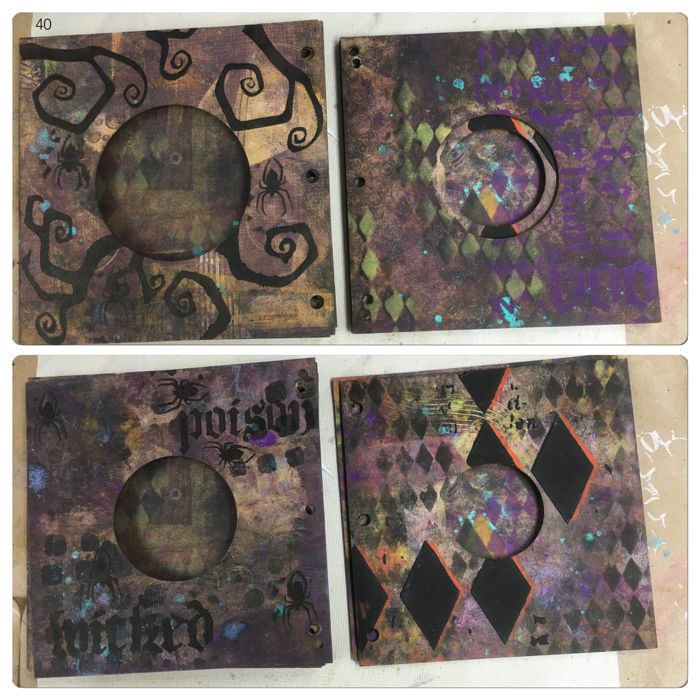

The results of all the texturing I added using Stencils.
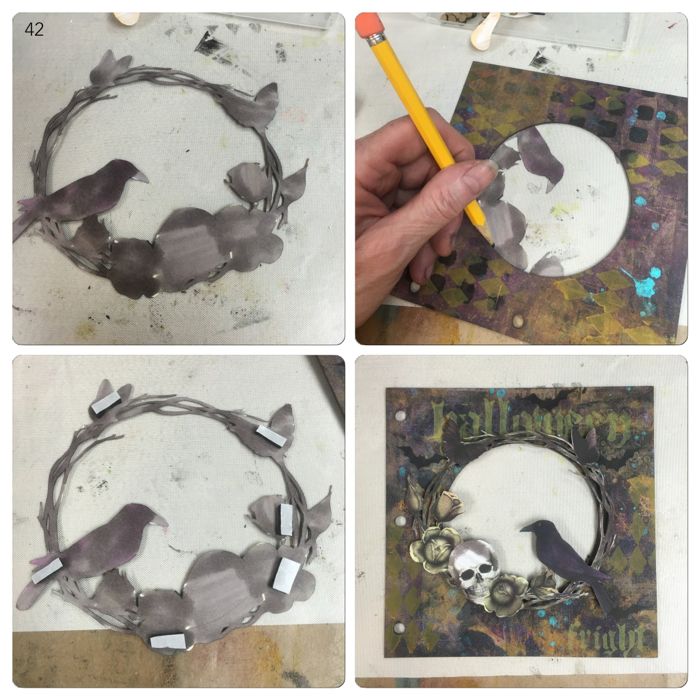
I added a bit of extra color to the Collage Sheet images using Pale Orange, Pale Green, Pale Gray, Pale Purple. Cut out designs from the Joggles Collage Sheets -Halloween IV Minis (401132), Cats and Bats and Trees Oh My (401066), Halloween Shades of Grey I (401125), Halloween Shades of Grey II (401129).
NOTE: I wanted more depth than the Tunnel Card provides on its own, so most of the images are attached using Black Foam Tape. I wanted it to appear as though you are looking deep into a Haunted Forest.
Another NOTE: Any of the images that will be showing through the cutout I “colored” (sorta) on the backside so it wouldn’t just be plain white paper when you turned the pages. Here I lined up where I wanted to place the image. Carefully holding it in place I turned it over and drew a pencil line so I would know where to place my foam tape.

Front and Back of page with images (sorta) colored on the backside.

This one I lightly drew some lines on the pumpkins and added the gold glitter dots to the backside.
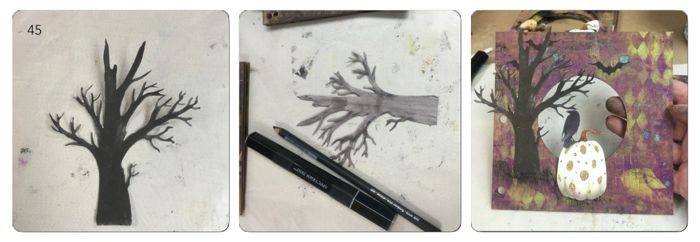
I cut out the tree and colored the backside using a Pale Gray Marker and used a Charcoal Pencil to add some texture. Once I glued it to the page I trimmed off the pieces overhanging the edges. The pumpkin is attached using Black Foam Tape. That’s the basics.
Next are the pics of the entire Book showing the placement of all the elements I used. Remember I attached most of the images using Black Foam Tape to give it more depth.
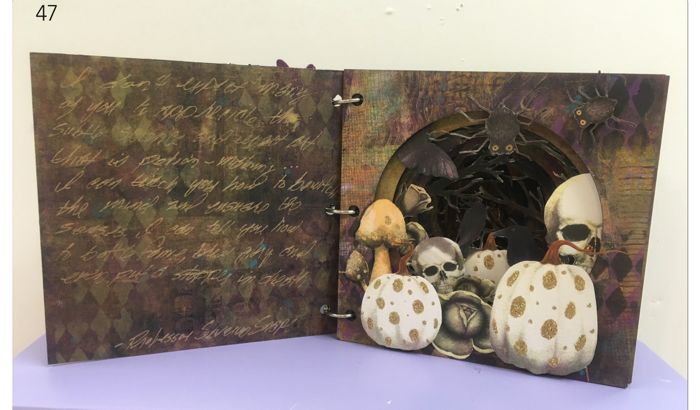
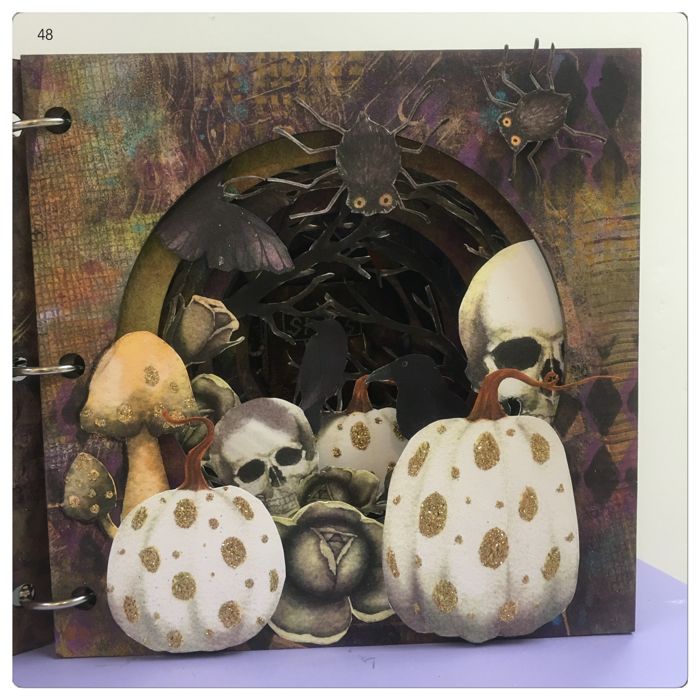
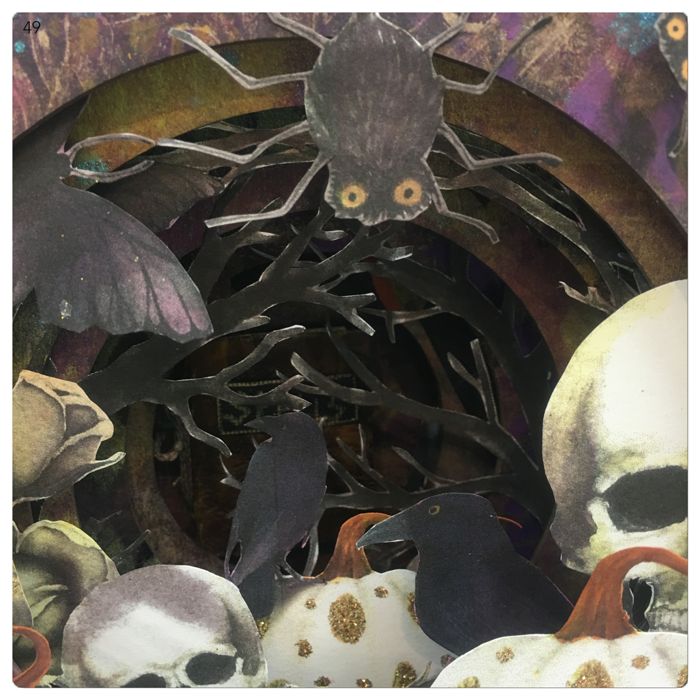
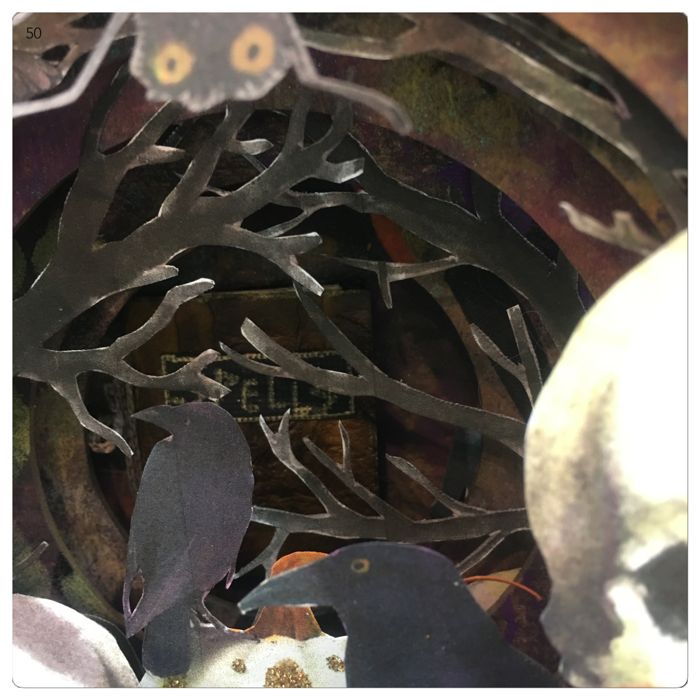
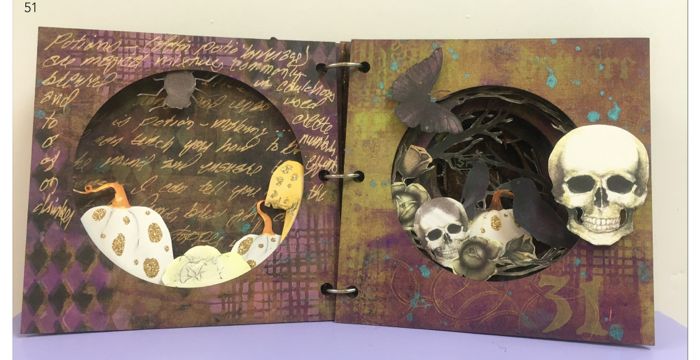
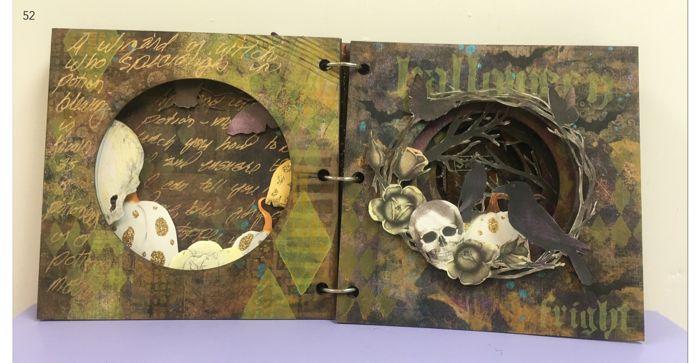

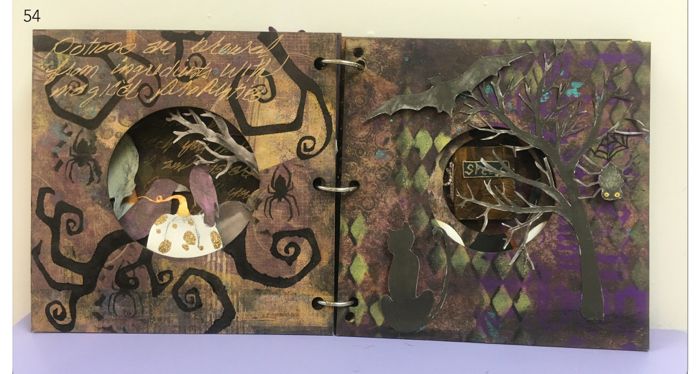
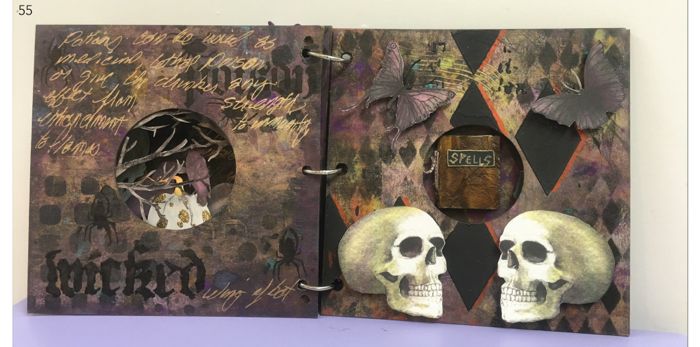
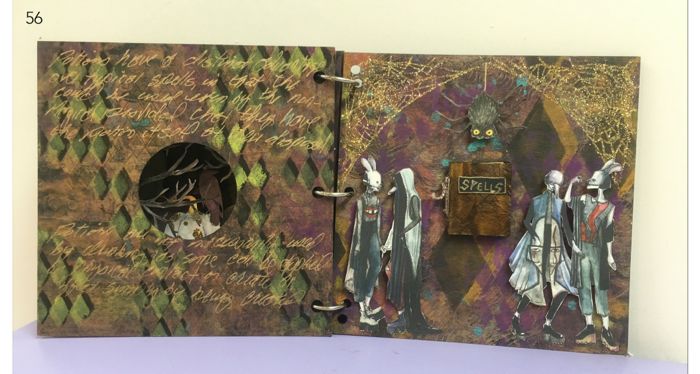
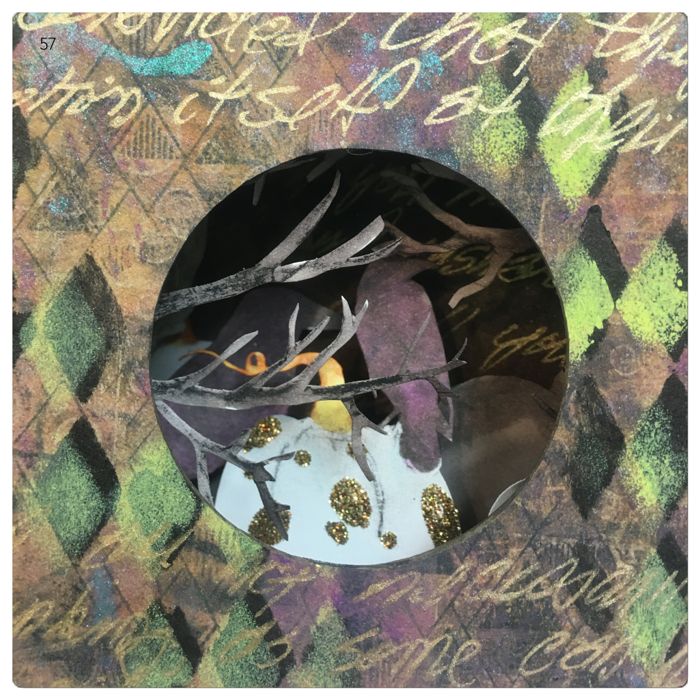
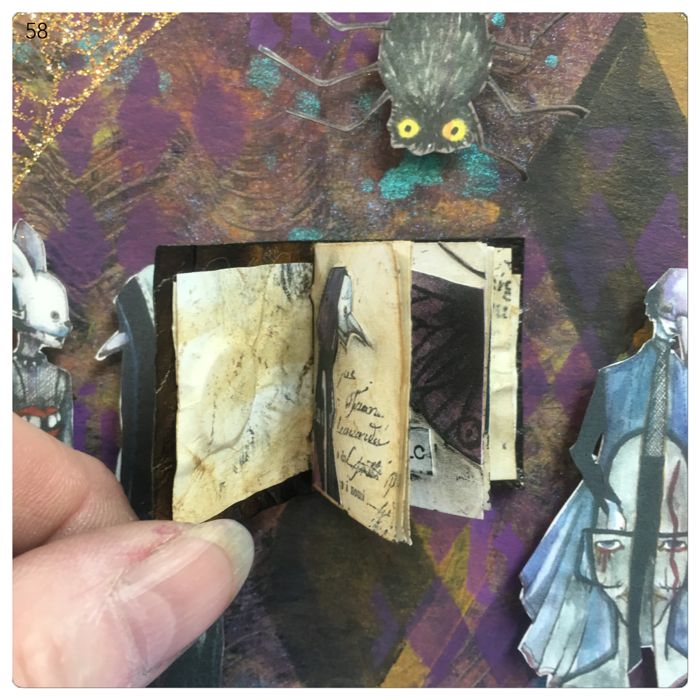
Notice I added some writing on the left side pages using a Gold Gel Pen. I found some stuff online about Potions and used that.
NOTE: The Rings provided with the Tunnel Book do not quite work using my method of added depth. I ended up using keychains to hold the book together.
I know this tutorial is a bit lengthy but, I hope you all enjoyed it.
V








19 Comments
Incredible book! I am amazed. What an accomplishment. I tried a small simple version of a tunnel book years ago and it was not for prime time viewing!!
Can you give me info on the blue handled rollers?
Lorraine….I purchased the texture rollers from School Specialties….here is the link
https://store.schoolspecialty.com/OA_HTML/ibeCCtpItmDspRte.jsp?minisite=10206&item=514841&utm_source=acton_7day_opencart&utm_medium=email&utm_campaign=ssi_opencart_2016&utm_content=cta1
Took me a bit to find it…I thought I had purchased them from Dick Blick…but couldn’t find them on the site….ended up having to go through my mail trash bin to find where I got them from.
This tutorial was long….lots of pics…but it didn’t take nearly as long to put together as it may appear to have.
The Gel Press Printing went pretty quickly. The most time consuming was fussy cutting the Collage Images.
V
Spooky and inspirational!
Thanks Pat…It was really fun to make.
This is just fabulous! I love the look you were able to achieve – definitely a spooky forest! I purchased the book and want to create a Halloween in Wonderland theme. Have been trying to figure out how to color the pages and you have given me the answer. Thank you so very much for sharing all these great ideas – would never have thought of using the gel press to do this – totally awesome. And I love the tiny spell book at the center. Now I am truly inspired.
Thanks Faye….this book was a joy to create….and didn’t take nearly as long as the tutorial would suggest….I’m happy to have given you some ideas and inspiration….would love to see your Halloween in Wonderland creation when you finish with it.
I forgot to say that I think your cat is beautiful. She definitely wanted to oversee the project and add her creative talent to the book!
Thank you Faye….I will pass on the compliment to her…..(shhhh……she is such a pest when I’m trying to craft!!!!)….but love her just the same….I have 3 cats…but she is the only one that “needs” to be in the thick of things.
What a fantastic book! Your pics are very great for showing the process. How big is your work space?
Thank you Gracie….I always worry about providing too many pics….don’t want to bore people…but on the other hand I want to make sure people understand what I’m trying to explain.
How big is my work space?….Hmmmmm…..do you mean the intended work space or the space that is actually open enough to work on?….lol
I built a 16′ x 19′ craft room in my basement a couple of years ago…it wasn’t long before i felt I was out of room….I originally put in a “work space” that was 4′ wide and 2′ deep….and there is lots of counter space (all totally covered now)….it wasn’t long before I added an additional table 6 ft x 30 inches to “work” on….but it seems I’ve only about a 2 ft x 20 inch work space on it at any given time….oh the life of a crafter…..then a few months ago I added more craft space to another part of my basement….I keep this area for painting, stenciling, spraying of inks, etc…..I set up two 8 ft x 30 inch tables in that area….one I use for setting out stuff to dry…the other is the “work space”….again….I am limited to just a small section for working on….lol…..amazing how things just pile up….can’t imagine how that happens….hmmmm
Such creativity, it’s just awesome to see what you did with holes in some boards, paper, fringe etc. Not to mention the labor of LOVE that went into it. I applaud you Barb and Bonnie. I know there are more fantastic things to come, such a gifted group. I think you cat is just beautiful, looks like she’s on the front cover?
I just love Sundays and Wed-d’s. I’m so glad I stumbled onto Joggles!!!
Thanks much Jean….I did Love creating this one.
Ms Fiona (my cat) thanks you for the compliment…..(she will be difficult to live with for the next few days now)….and she was the one that insisted that I place that cat on the front cover….she demanded I tell everyone it is her….she has such an ego.
Happy Crafting!!!
WOW!! This looks amazing. I love all your layers of color and texture. Also, the spells book is just too cute. P. S. I have one of those ‘helpers’ too.
Thanks so much Patricia….This book was so much fun to create….now I’m afraid I will be on a chipboard book kick.
Those “helpers”….aren’t much of a help are they?….lol
This book is absolutely amazing with all the work and all the detail, right down to the illustrations in the incredible, iddy-bitty book of spells. I really love it. Thank you for taking the time, Virginia, to make and share another one of your inspirational pieces of art with us.
Thanks so much Cheryl…..it’s always a pleasure to inspire people.
Tunnel Books: I do not own a gell press. I would like to paint the pages or cover them with decorative paper. Should I use gesso first? I see that hot glue is being used so much now, but for years teachers told us this tends to “let go” in time. What is your opinion. I ordered two books and can’t wait to get started. Thanks!
You do not need to have a Gel Press Plate. However you want to decorate the pages is up to you. If you are going to cover all of the pages with paper you don’t need to gesso them first – unless the paper is very thin and sheer. Hot glue is up to you. I don’t use it, but Virginia does and has no difficulty with it.
Thank you so much!