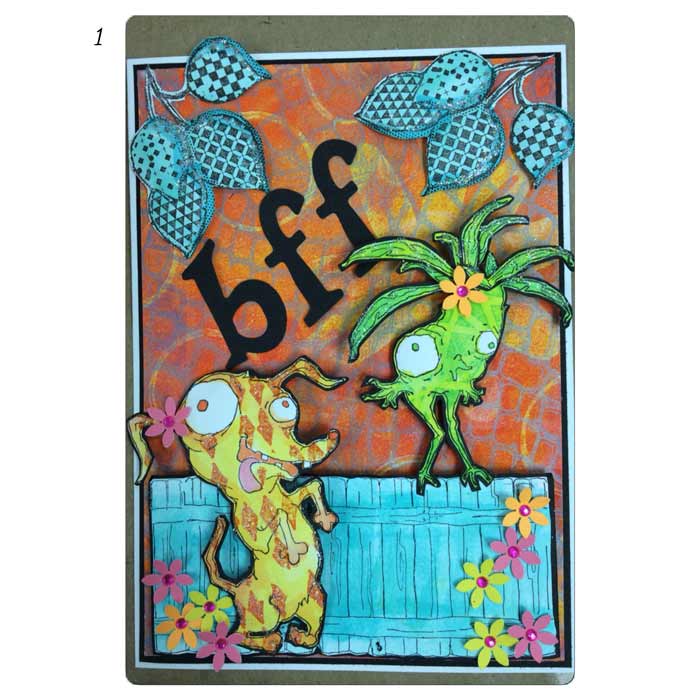
Virginia is back today, working with the newest Bloobel Cling Stamps. She’s created a fun card named Best Friend’s Forever and it’s stellar, as always. Cuz, that’s just what she does – create awesome art. Please join me in thanking Virginia for her creativity and for being so willing to share her process!
Best Friends Forever
Supplies:
10 x 7 White Card Stock – Scored and Folded to make a 5 x 7 Card
Mixed Media Paper
Black Paper or Card Stock
Background Paper
Joggles / Bloobel Stamps: Sir Pantsalot & Potato Head
Art Impressions – Fence P-1499
Unity Stamps – Leaf Spray
Dylusions Stamps from: Basic Backgrounds & Graphic Backgrounds
StazOn Black Ink Pad
Dylusions Ink Sprays in Detail Water Brushes: Lemon Zest, Pure Sunshine, Tangerine Dream, Fresh Lime, Cut Grass, Vibrant Turquoise
Spectrum Noir Marker – PP3
Tim Holtz Distress Ink Pad – Spiced Marmalade & Cracked Pistachio
Small Flower Punch
Small Adhesive Backed Gems
Clear or White Glitter
Clear Glue
White Glue
ScorTape or Double Sided Transfer Tape
Foam Tape
1 1/2” Letters – b f f
Sheet of Craft Foam
Stylus – Small and Medium

Using StazOn Black Ink Pad stamp out:
2 images of Sir Pantsalot – Note: One will be used for the Card and One will be cut up to use for masking.
3 images of Potato Head – Note: One will be used for the Card, One for extra head feathers and One will be cut up to use for masking.
2 images of Fence. I stamped mine close together to make one long fence.
2 images of the Leaf Spray
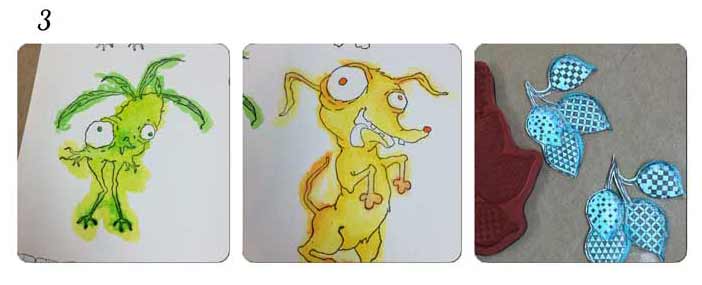
Color Images using Dylusions Ink Sprays in Water Brushes.
I used Lemon Zest, Pure Sunshine and Tangerine Dream to color Sir Pantsalot. Then used the Spectrum Noir Marker – PP3 to color his tongue.
The Fresh Lime and Cut Grass was used to paint Potato Head
I used the Vibrant Turquoise to color the fence and Leaf Sprays. I did dilute this color quite a bit.
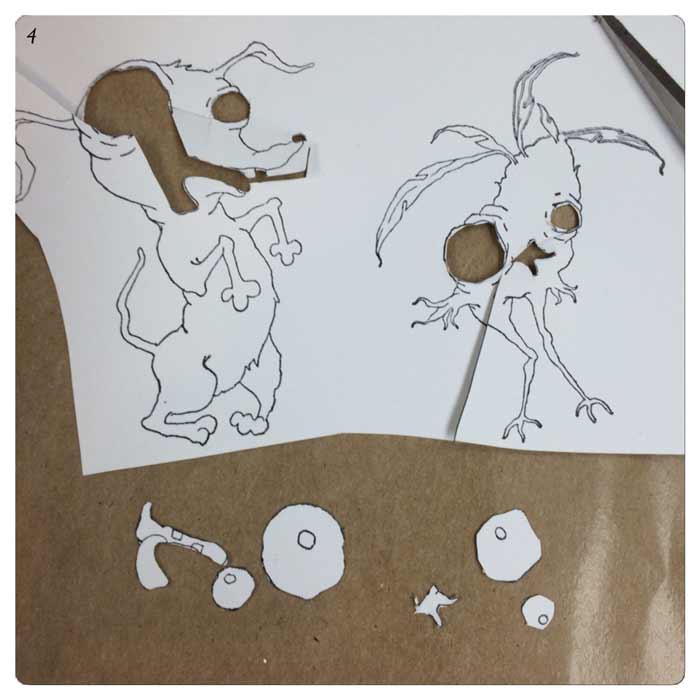
Next I cut out the Eyes, Mouths and Feathers to use for masking on the images.
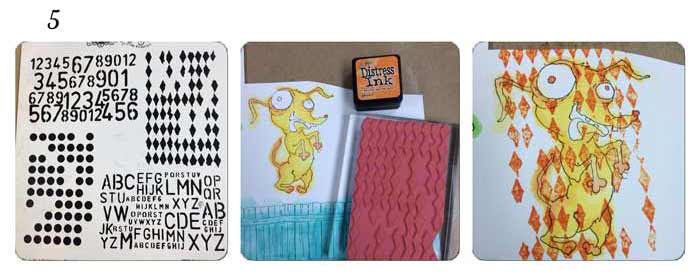
Next to add texture to Sir Pantsalot I used the Diamonds Background from the Dylusions Basic Background Set and Tim Holtz Distress Ink Pad Spiced Marmalade and stamped over the entire image….Be Sure to Mask off the eyes and mouth before you stamp using the pieces you cut out in the last step.
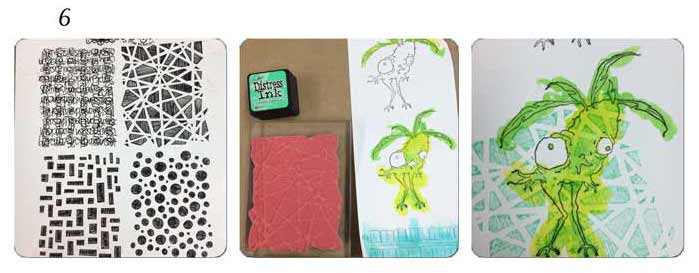
Add texture to Potato Head in the same way. Using the Cracked looking stamp from the Dylusions Graphic Background Set and Tim Holtz Distress Ink Pad Cracked Pistachio. Again remember to mask off the eyes, beak and the head feathers before you stamp over it.
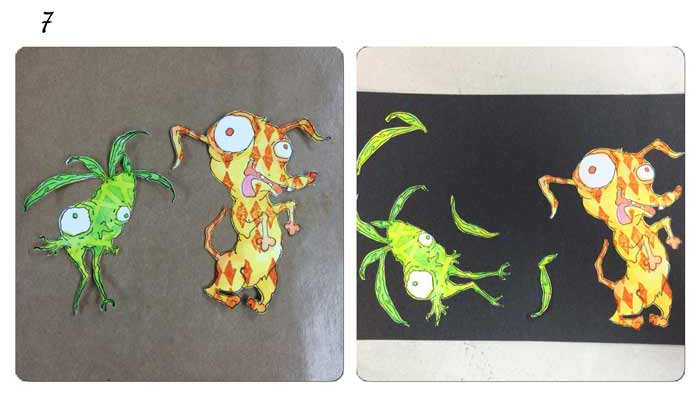
Cut out images and glue them to the Black Paper or Card Stock.
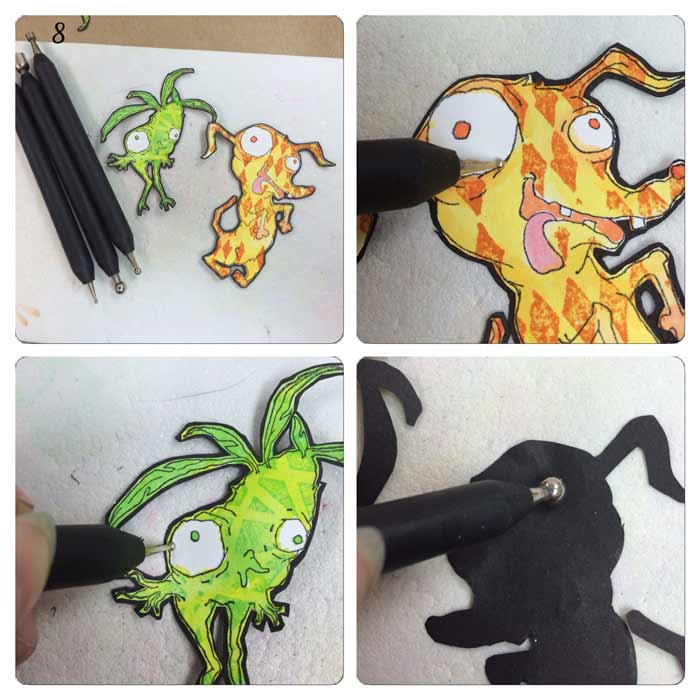
Cut out images leaving a narrow Black shadow around them. Add dimension to the Eyes, Tongue and Beak by using the Sheet of Craft Foam and Stylus. Place the images on the Craft Foam. I indent from the front of the images around the eyes, tongue and beak using a small tipped stylus. I then flip the images over and add dimension using a medium sized stylus.
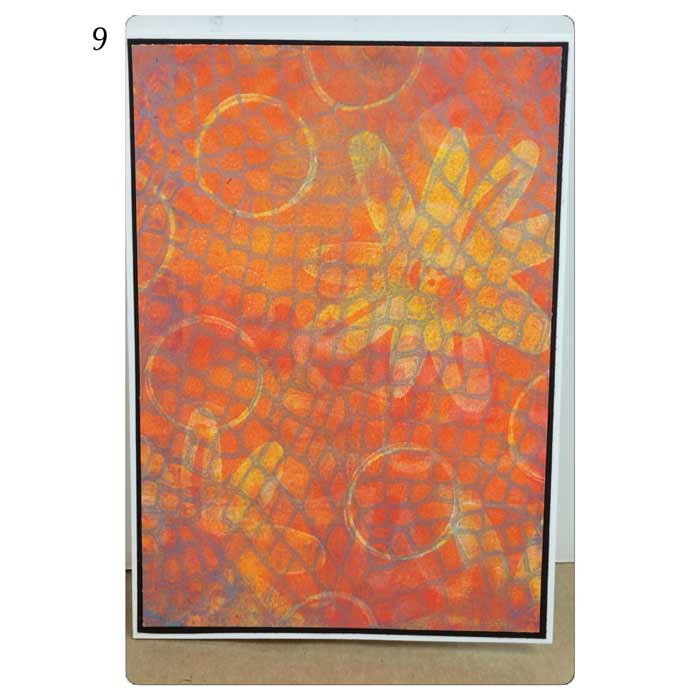
For my background I used a sheet I created using the Gelli Press. Sorry I don’t have pics or instructions for this. I did this awhile back. But you can watch some of Barb’s videos on the how to for Gelli Press Printing. Or just use any background that you’d like.
Layer the background papers/card stock.
Top: Background Paper / Card Stock (4 3/4 x 6 3/4)
Middle: Black Paper / Card Stock (4 7/8 x 6 7/8)
Bottom: White Card (5 x 7)
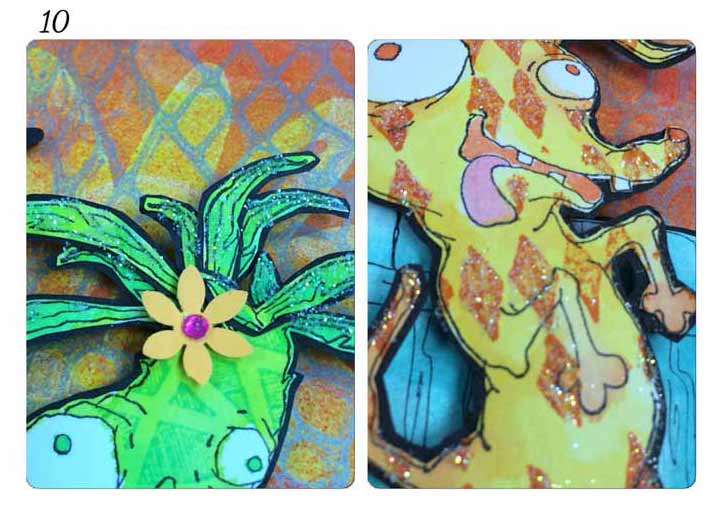
Add some glitter to the Leaf Sprays, Sir Pantsalot and Potato Head.

Time to assemble the Card.
Attach Foam Tape to the back of the Fence, Sir Pantsalot and Potato Head.
Decide the placement of the images and adhere to the Card.
Punch out some Flowers and glue them to the card. Add small gems to the centers.
Attach the “b f f” and you’re finished.
2 Comments
As always Virginia has done a remarkable job. Love the use of stamping to add texture to the figures. Again congrats Virginia – I have to go now and use the inspiration to send a card to my BFF.
Thanks much Bette Jo….it’s always a pleasure to inspire people.