

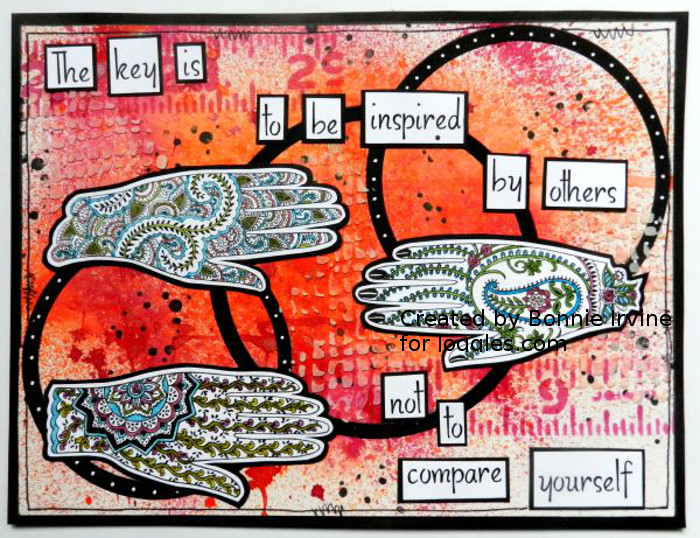
The minute I saw the Joggles Collage Sheet Mehndi Hands, I knew that I wanted to colour them to bring out the details. They are beautifully intricate and remind me that art and the opportunity to express oneself are everywhere. Art comes in so many forms and each day is filled with possibilities for learning/trying something new. I was so inspired by these gorgeous hands and couldn’t decide which to feature and which to leave out so I created two journal pages at the same time following the same steps.
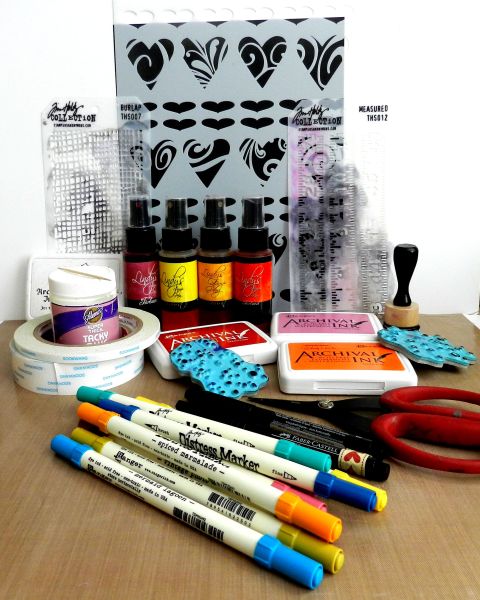
Supplies Used:
Joggles Collage Sheet – Mehndi Hands
Strathmore 300 Series Watercolor Paper 9 inch x 12 inch 140# Cold Pressed – 10 sheets
Tim Holtz Distress Markers: Mustard Seed; Picked Raspberry; Worn Lipstick; Mowed Lawn; Vintage Photo; Mermaid Lagoon; Peacock Feathers; Faded Jeans; Crushed Olive; Spiced Marmalade
Lindy’s Stamp Gang Two Toned Starburst Sprays: Hag’s Wart Orange; Cheshire Cat Cherry; Yellow Rose of Texas; California Poppy Gold
Archival Ink Pad – Jet Black; Vermillion; Tiger Lily; Magenta Hue
Ranger Inkssentials Mini Ink Blending Tool
Joggles Stencil – Heart’s Delight
Tim Holtz Layering Stencils – Measured; Burlap
Scor Tape: 0.25 inch; 1 inch
Joggles Cling Mounted Rubber Stamp – Background Noise – Circles
Joggles Cling Mounted Rubber Stamp – Background Noise – Dots
Aleene’s Super Thick Tacky Glue
Faber Castell Pitt Artist Pen – (S) Super Fine Tip – Black
Faber Castell Pitt Artist Pen – (B) Brush Tip – Black
Inkssentials Non Stick Craft Sheet
Tim Holtz/Tonic Studios – NonStick Micro Serrated Scissors 7 inch
Other: black cardstock; white cardstock; computer generated wording; toothpick; palette knife; white pen; ruler; circle dies.
Here is my process:
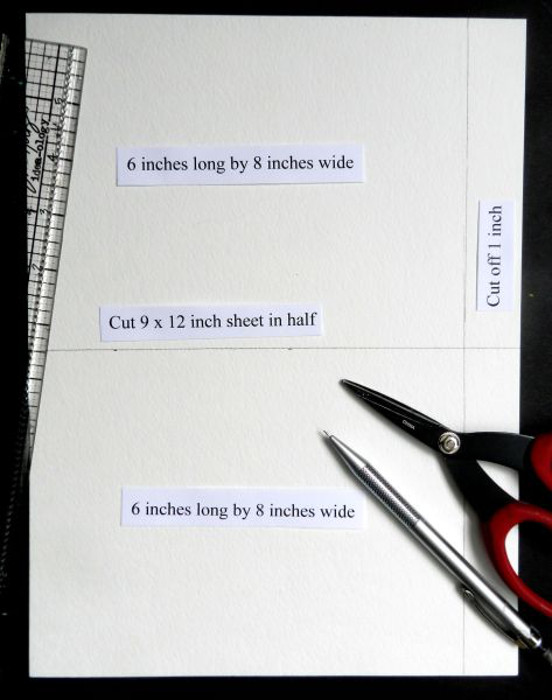
I cut the 9 x 12 inch sheet of Strathmore 300 Series 140 # cold pressed watercolour paper in half horizontally and trimmed one inch off the one short side of each to get two 8 x 6 inch pieces. It’s a size I like to work with and since I bind my journal pages together, I keep the size consistent if I am working with loose pages.
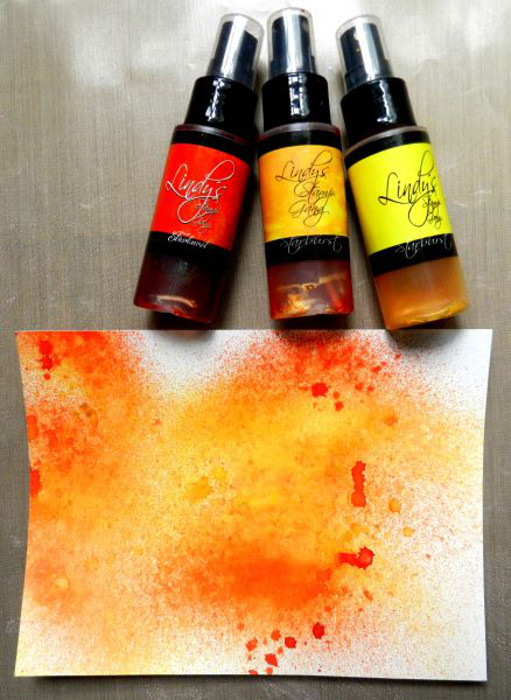
The first half sheet was spritzed with Hag’s Wart Orange, Yellow Rose of Texas and California Poppy Gold Lindy’s Stamp Gang Two Toned Starburst Sprays along with a little water to help things move and blend.
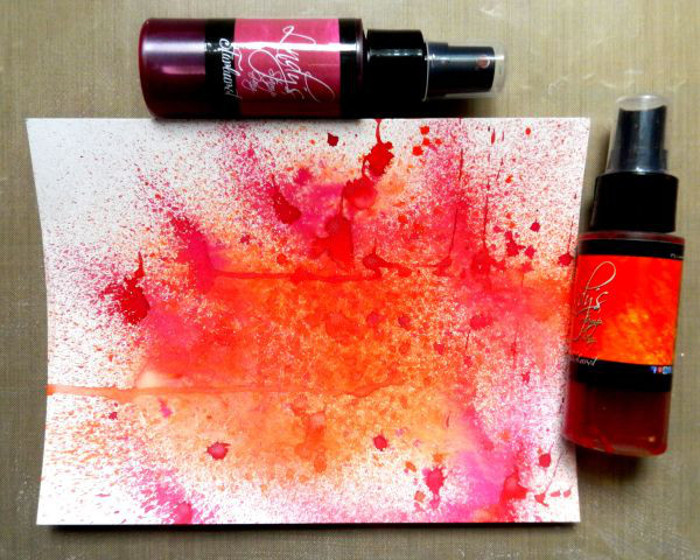
The second half sheet was spritzed with Hag’s Wart Orange and Cheshire Cat Cherry Lindy’s Stamp Gang Two Toned Starburst Sprays, again with a little water. By tipping the page in different directions, you get lovely runs and mixing. I purposely left some white space from the background uncoloured although the tipping does fill some of that in.
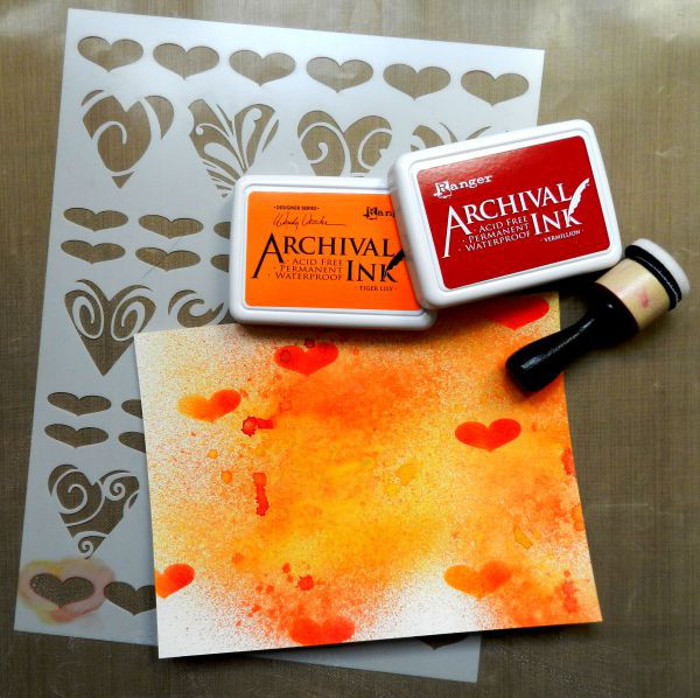
On the orange and yellow background, using a Ranger Inkssentials Blending Tool, apply Tiger Lily Archival Ink through Joggles Stencil – Hearts Delight. I used one of the solid smaller hearts and scattered the hearts randomly around the page. I then deepened the right side of each heart by applying Vermillion Archival Ink over top of the Tiger Lily.
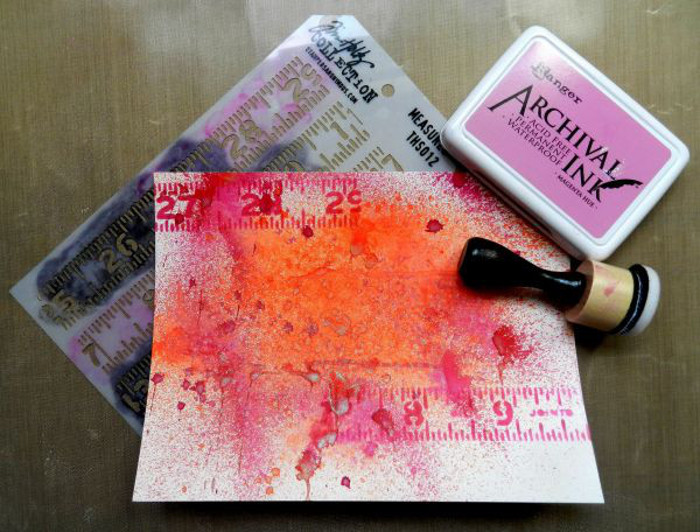
On the orange and cherry background, using a Ranger Inkssentials Blending Tool, apply Magenta Hue Archival Ink to the top left and bottom right sections through the Tim Holtz Layering Stencil – Measured.

From a sheet of black cardstock,cut a strip of paper 8 inches long by 7/8 inch wide and a second one 8 inches long by 3/8 inch wide.Adhere these horizontally across the yellow and orange background using .25 Scor Tape.
Cut or punch three rings from the rest of the black cardstock. I used dies cutting the outside edge with one size and the inside edge with the next smaller size. Using punches of graduated sizes or tracing and cutting circles from a template or circular objects would work the same. Using a toothpick and Aleene’s Super Thick Tacky Glue, adhere the three rings of black on the diagonal with the largest in the center and the other two overlapping it.
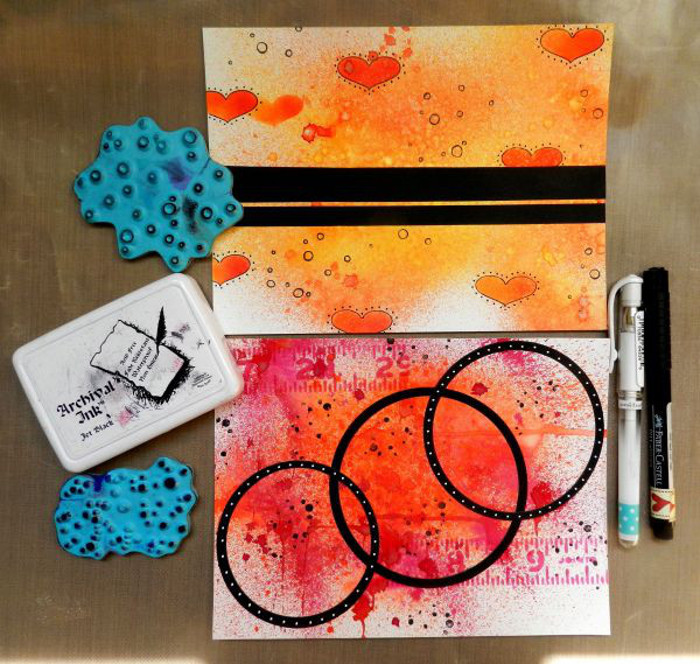
Using a Black Faber Castell Pitt Artist Pen (S) Superfine, outline the stencilled hearts on the yellow and orange background, adding detail dots around each one for emphasis. Using Jet Black Archival Ink, stamp Joggles Cling Mounted Rubber Stamp – Background Noise – Circles to create pattern and texture on the background.
Time to repeat the process on the orange and cherry background, only this time use Joggles Cling Mounted Rubber Stamp – Background Noise – Dots to add the Jet Black Archival Ink.
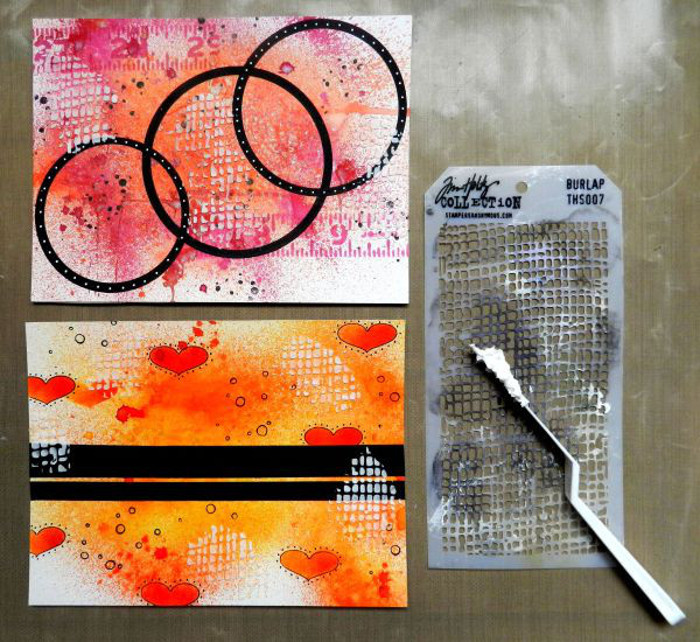
I love the effect of Ranger Texture Paste scraped through a stencil. When layered on top of Starburst Sprays, it will pick up some of the colour from the sprays in a way that is slightly unpredictable and always fun to see. I used Tim Holtz Layering Stencil – Burlap as the stencil to scrape it through on both pages.
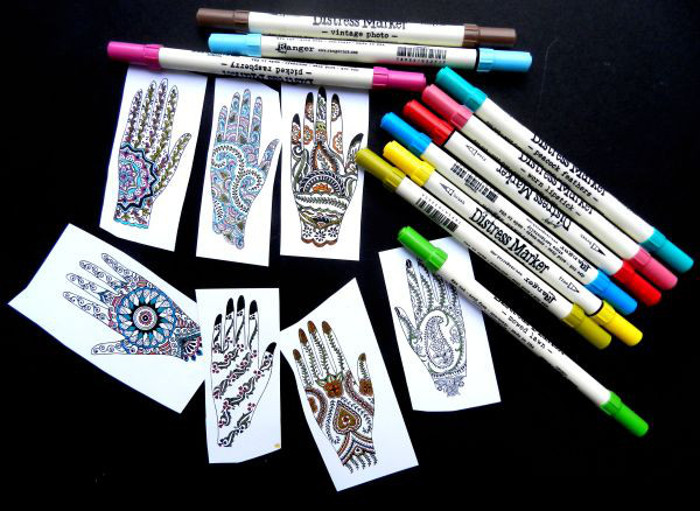
Before colouring the individual hands from the Joggles Collage Sheet – Mehndi Hands, I cut them apart. I find that I have better luck keeping them clean and oops-proof plus they are easier to turn as I colour. I used Tim Holtz Distress Markers in the colours listed in the Supplies section above to colour in the details. I kept three in one colour family and three in another, repeating the colours on every hand but in different amounts so they would coordinate but not match. The seventh one on the sheet, I just coloured separately. They were all cut out leaving a narrow white border around them and then matted with black cardstock before trimming them again. This allows them to stand out against the busy backgrounds and frames them to give them more visual weight.

The sayings for the pages were generated in on the computer and printed on white cardstock. They were then cut into single words , each of which was matted with black cardstock. Scor Tape – .25 inch was used to adhere the white cardstock to the black.
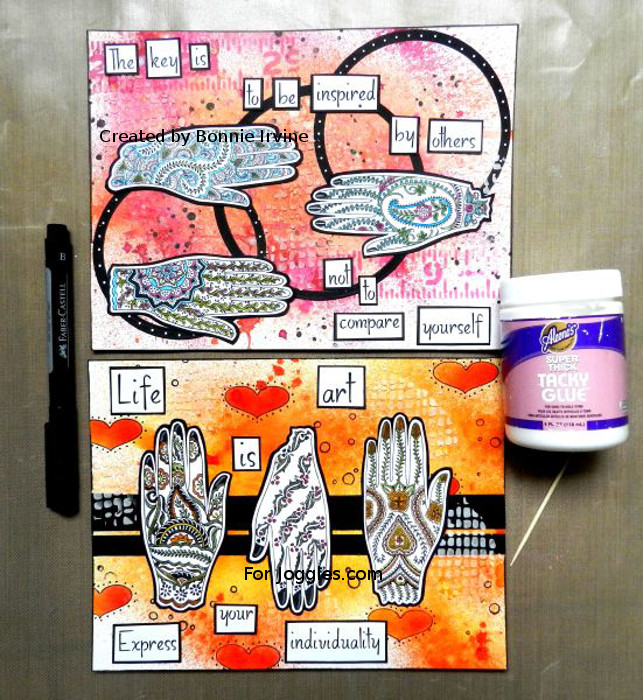
To adhere the hands and the words to the background, Aleene’s Super Thick Tacky Glue was used. This is a very strong glue which helps both adhere to the Texture Paste as well as the watercolour paper. A Black Faber-Castell Pitt Artist Pen – (B) Brush was used to edge the backgrounds to get rid of the white from the watercolour paper. A simple border was drawn on both pages with the Small Faber Castell Pen (S) used earlier.
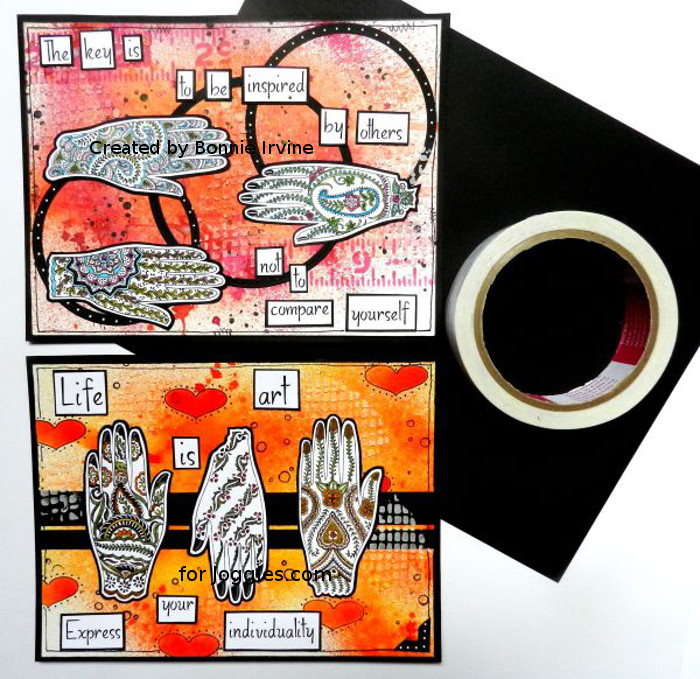
The final step for both journal pages was to adhere a black cardstock mat to the back of each. I like the way this frames the page and also lends strength to each one so they stand up better once bound in a journal.
Thanks for joining me today. I hope I inspired you to play with colour and gave you an idea or two for using these fabulous Joggles Collage Sheets in your art.








4 Comments
Beautiful as always! And what a wonderful way to use the collage sheet. Thank you for sharing your ideas, your process, and your work.
These pages are so well thought out Bonnie. The color’s are rich, love the use of markers. The black circles are so cool,, they give stability to the page. So very cleaver.
You know Bonnie I could go on and on but in the end it always comes back to beautiful.
I think I might give this project a go, you have inspired me.
Very creative. Vibrant and balanced. Lovely.
I really enjoy your work! Can you share with us how you bind your pieces into a journal??
Thanks for sharing!