
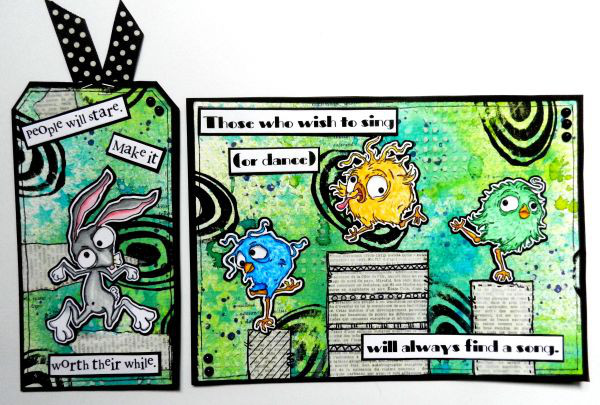
Bonnie’s newest tutorial features a “master board”, a large-ish (9″ x 12″) piece of watercolor paper she prepares with a choice of techniques, more or less as though she were creating a background for any project. Where she diverges from the usual process is that this master board is not meant to be used as a whole sheet, but rather cut down into smaller pieces, with each becoming the basis for something else.
Bonnie says “I don’t over think the mixed media process since I’m unaware of where the division lines are as I’m creating.”
What a fantastic idea. How often have you caught yourself pondering the placement of all of the stuff you usually add to a background, trying to artfully arrange and align them for that “perfect” look? I’m not suggesting some of that isn’t necessary, or even a good idea, but what if you could take away some of the angst and just create that large sheet with the knowledge that you may need to tweak it a bit once you cut the shapes from the sheet?
I like it!
A huge (freakin’ HUGE) shout out to Bonnie for sharing her art and her expertise. Thank you Bonnie!
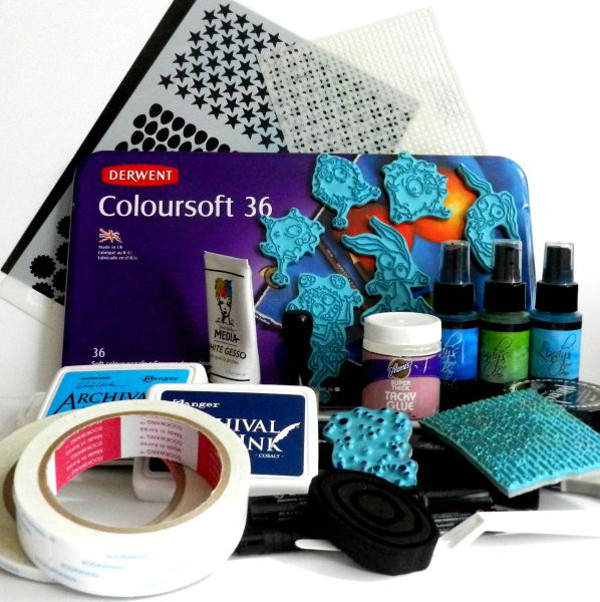
Supplies Used:
Strathmore 300 Series Watercolor Paper – 9 x 12 inch 140# Cold Pressed – one sheet *
Lindy’s Stamp Gang Two Toned Starburst Sprays: Drop Dead Gorgeous Green, Delphinium Turquoise, Bachelor Button Blue
Inkssentials Mini Mister
Archival Ink Pads: Forget-Me-Not, Deep Purple, Cobalt, Jet Black
Ranger Inkssentials Mini Ink Blending Tool
Joggles Stencil – Punchinella Trio 2
Joggles Cling Mounted Rubber Stamp – Background Noise – Dots
Ranger Texture Paste
Dina Wakley Media Stencil – Plastic Canvas
Dina Wakley Media Palette Knife
Dylusions PAINT – Black Marble
Joggles Foam Stamp – Wonky Layered Ovals Small
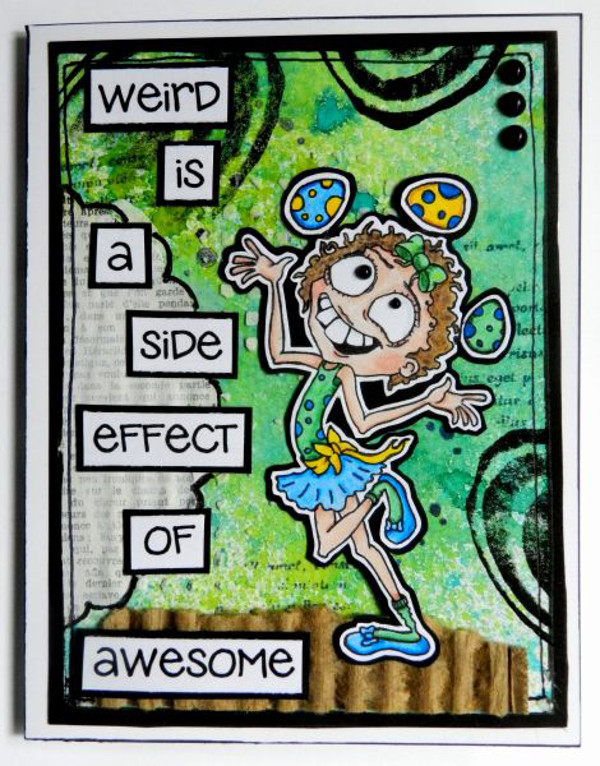
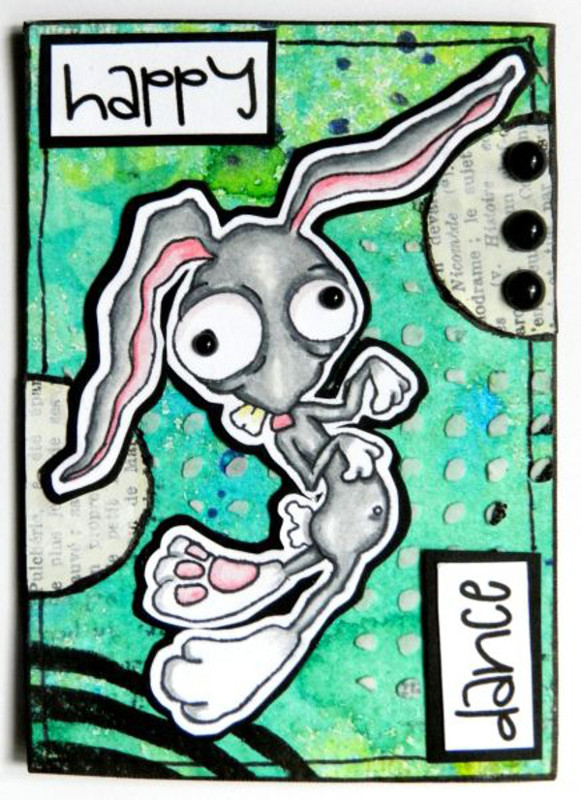
Joggles/Bloobel Cling Mounted Rubber Stamps – Funny Bunny #1, Funny Bunny #2, Quirky Bird #1, Quirky Bird # 2, Quirky Bird # 3, The Egg Juggler
Joggles Cling Mounted Rubber Stamp – Nonsense Latin Text
Derwent Coloursoft Pencils – Set of 36 (or choose colors from the open stock pencils which you’ll find here)
Scor Tape – 0.25 inches, 0.625 inches
Aleene’s Super Thick Tacky Glue
Faber-Castell Pitt Artist Pen – XS Extra Super Fine Tip – Black
Inkssentials NonStick Craft Sheet
Dina Wakley Media White Gesso – 2 oz. Tube
Other: ruler, pencil, scissors, white and black cardstock, stamp block, toothpick, old book text, small stapler
*I actually used a quarter of a sheet from the 18 x 24 inch Spiral Bound Pad of the same paper.
I love creating a master board using a 9 x 12 inch piece of Strathmore 300 Series Watercolor Paper because it gives me several surfaces once it’s divided up. It also means I only get supplies out one time and ensures that I don’t over think the mixed media process since I’m unaware of where the division lines are as I’m creating. Sometimes I will create a masterboard and leave it uncut so that I have it ready to go if I need a project in a hurry. I created a masterboard to feature six of the new Joggles/Bloobel Cling Mounted Stamps which I was dying to try out.
Here is my process:
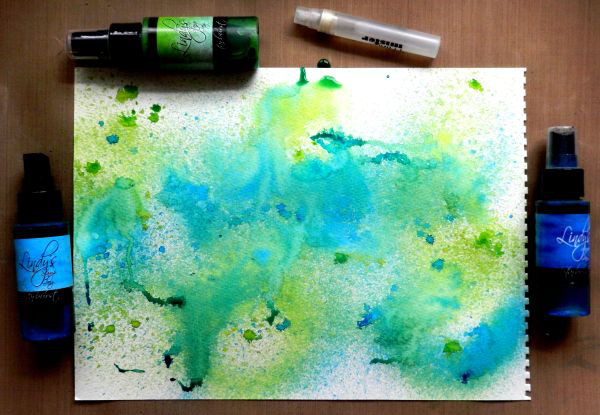
Spritz the 9 x 12 inch watercolour paper with Delphinium Turquoise and Drop Dead Gorgeous Green Lindy’s Stamp Gang Two Toned Starburst Sprays leaving some white space. Holding the pump only partially down to create drips rather than spray, apply Bachelor Button with a light hand. Using an Inkssentials Mini Mister, spritz the paper to allow the Starburst Sprays to blend in some places. Create runs by tipping the paper in different directions. Allow to dry.
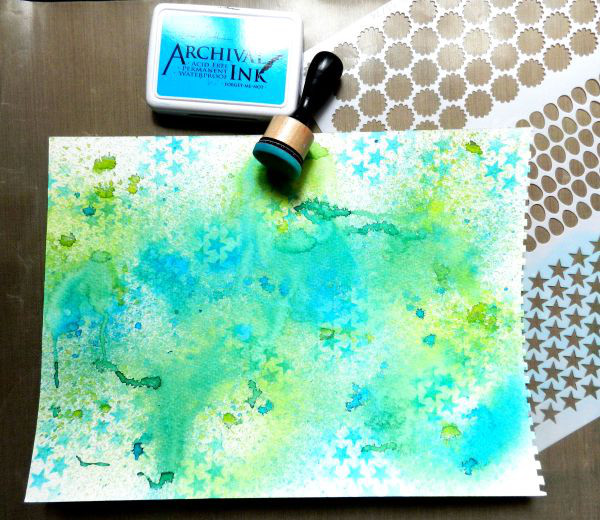
Using a Ranger Inkssentials Mini Ink Blending Tool, apply Forget-Me-Not Archival Ink through the stars portion of Joggles Punchinella #2 Stencil in several places on the background.
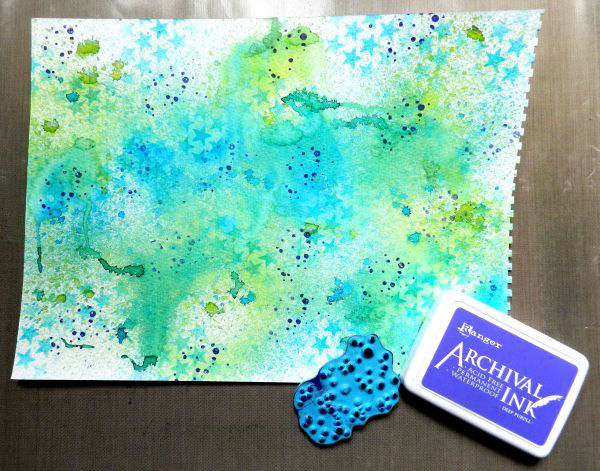
Add more pattern and texture using Archival Ink – Deep Purple – and Joggles Cling Mounted Rubber Stamp – Background Noise – Dots. Be sure to spread this out over the background so that all areas have a little.
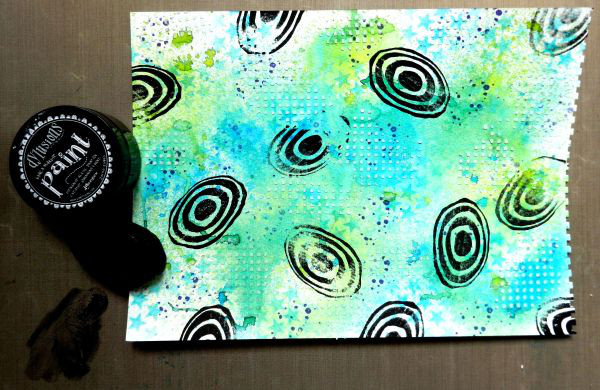
Spread a little patch of Dylusions Paint – Black Marble onto Inkssentials NonStick Craft Sheet to use as a palette. Tap Joggles Foam Stamp – Wonky Layered Ovals Small lightly into the puddle of paint and apply to the background. You will likely get more than one impression each time you load it. Be sure to rinse it off when finished so the paint doesn’t dry on it.
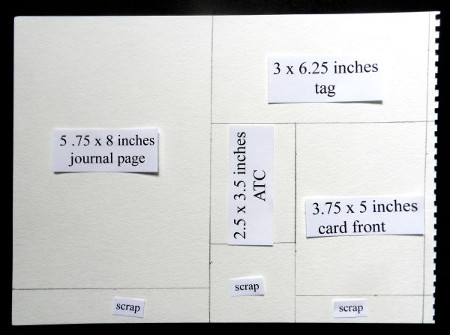
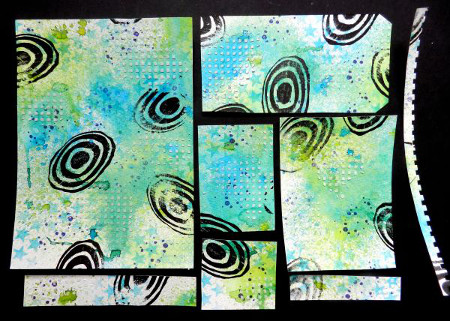
Following the measurements given on the template, cut up the master board using scissors, a craft knife, or a rotary cutter and ruler. The lines for the journal page, tag, card front, and ATC can be penciled onto the back side so they don’t show on the finished background. Keep the scraps for future projects… nothing goes to waste.
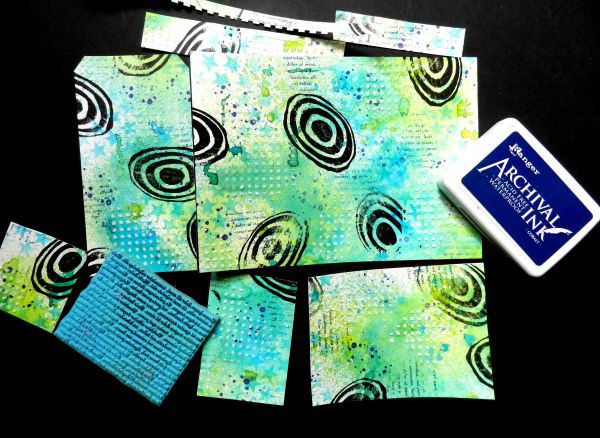
Decide which is the top of each section of background. I like to add a text stamp but I also like it to be facing the correct way. With Archival Ink – Cobalt, ink up Joggles Cling Mounted Stamp – Nonsense Latin Text and add it to each section in a few places.
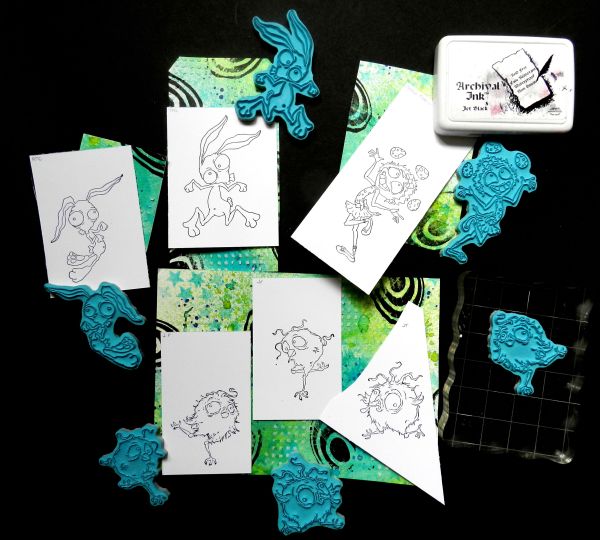
At this point you will need to decide how you will add colour to the stamped images because that will determine what paper you will stamp them on. I knew that I was using coloured pencil, a dry medium, so I could use regular cardstock rather than something that would stand up to a wet medium. Apply each of the six Joggles/Bloobel Stamps listed above, one at a time, to a stamp block and ink with Archival Ink – Jet Black. I auditioned the stamped images on the different sized and shaped backgrounds to see what fit best.
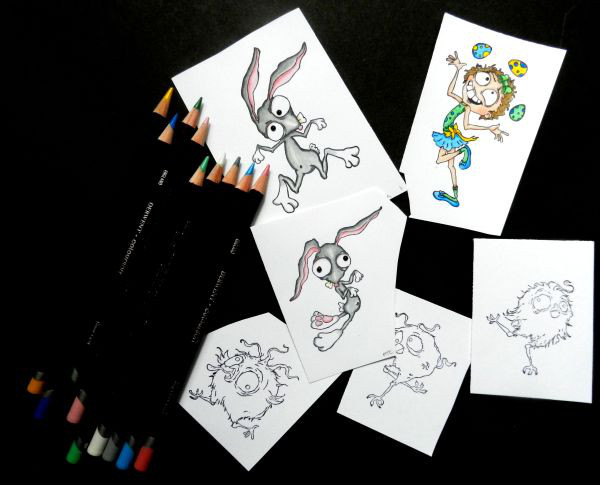
Once the ink is thoroughly dry, add colour to each stamped image with Derwent Coloursoft Pencils or the medium of your choice. Fussy cut the images leaving a narrow white border around each. This adds strength to the skinny pieces and helps the image stand out.
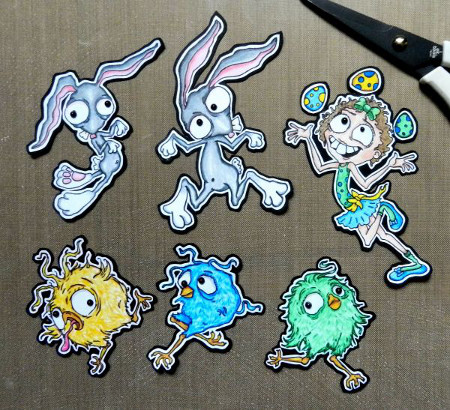
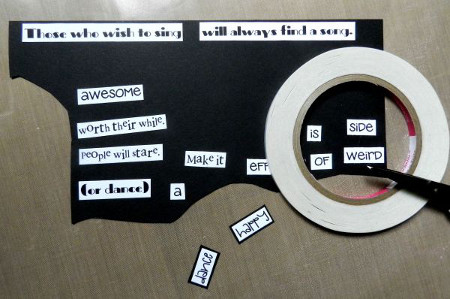
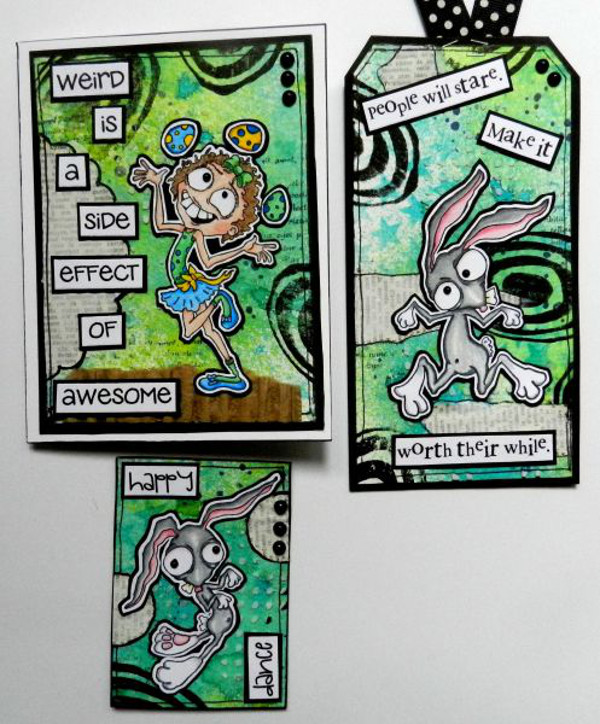
Print the sentiments from your computer onto white cardstock and trim close to the words. Adhere the images and the single words onto black cardstock. I used Scor Tape for the words and Aleene’s Super Thick Tacky Glue for the images. Fussy cut the black leaving a narrow border for both the images and the words. Again, this helps them stand out from the busy background.
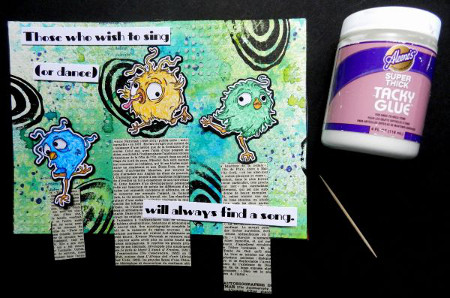
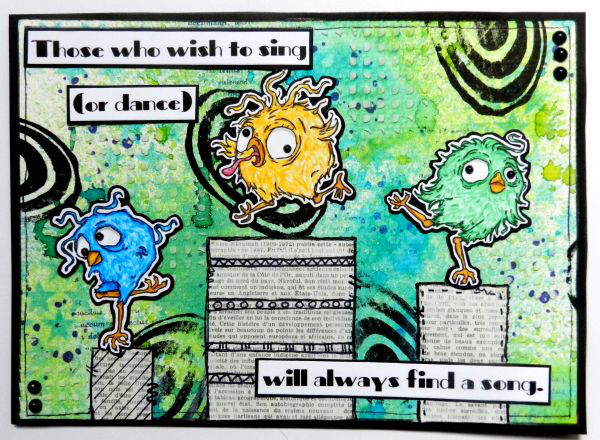
Tear, punch, or cut old book paper into shapes and strips to break up the background, add texture, create repetition, and help ground the images. Apply Dina Wakley Media White Gesso to the book text to knock it back so the text is not so visible. I also tore a section of corrugated cardboard to serve as the ground for The Egg Juggler as I wanted something visually heavier than book text. Adhere the images, book paper, and cardboard to the background with Aleene’s Super Tacky Glue, using a toothpick to apply it. With a Faber Castell Pitt Artist Pen XS, outline the book paper shapes and doodle a simple border around each piece. Add black half pearls to each project to finish the designs. The final finishing touches were to add a black cardstock mat using Scor Tape to each piece to serve as a frame and then to adhere the card front to a 4.25 x 5.5 inch card base.
Here are individual photos of each project…all from one master board created in one sitting. I hope you’ll give it a try 🙂









7 Comments
Okay..so this is super freaking fantastic creativity?..love the colors, sentiments, and detailed background!
Thanks so much for sharing these techniques.I often grapple with fussy cutting.The contrast between the image,white and black edges does make the figures pop!! Of course the “Masterboard” idea ROCKS !!! TY
This is fantastic. Love all of it! One of the biggest challenges for me when making pages in my journal is that no matter how hard I try or how careful I am, I wind up getting the color from the page I am working on onto the back of the previous page. Be it gesso or paint or whatever. And I always place papers between the pages so this doesn’t happen. It is so annoying when you have a beautiful page and then it gets messed up when you are doing the next one. I have seen several artists do pages and then insert them into a book. This is a wonderful solution to that problem. Thank you so much for sharing this idea!
Brilliant doing a “masterboard” and cutting it up into smaller segments. I may just start doing more mixed media. Thanks, Bonnie!
How awesome are theses OMG I love it. Not only do you display these cool stamps in such a masterful way you use one sheet of watercolor paper to do it. This is my kind of crafting. Thanks for sharing.
I love, love your segmented and adorable board. The colors, coloring and images are all wonderful.
Is that texture paste through a stencil that creates the small splotches? Also, the fonts that you use are fantastic? Where did you find them?