
Good morning crafters!! Teresa here, and I’m back with another fun project for you all again this week. I was really excited to learn that Joggles was stocking a selection of Shrines and waited excitedly for the postman to deliver me some! I decided to go with the Sunburst design and knew that I wanted to create a bright and blingy Day of the Dead inspired project. This is a great opportunity to rummage through your scrap bag and use up those odds and ends of ribbon, braid, gems, and beads – the brighter, the better, and if they clash….who cares? We are going for a celebration of colour and sparkle!!
Supplies:
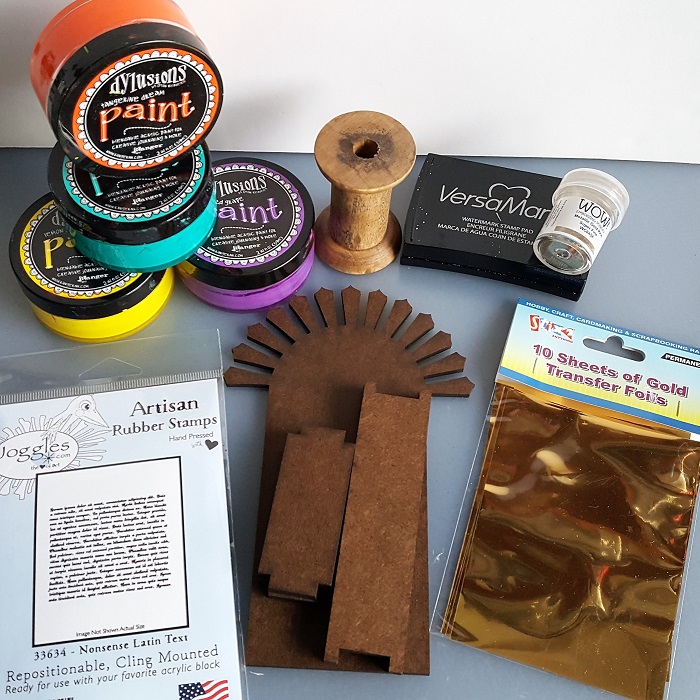
Joggles Shrine – Sunburst Small [57301]
Dylusions Paint by Dyan Reaveley – Lemon Zest; Tangerine Dream; Vibrant Turquoise; Crushed Grape
Joggles Cling Mounted Rubber Stamp – Nonsense Latin Text [33634]
Versamark Watermark Clear Ink Pad
Crafters Companion Stick and Stay (or use 3M Super 77 Adhesive Spray)
Stix2 Gold Transfer Foil (or use WOW! Fab Foil – Gold)
Stix2 Double Sided Tape (or use Scor-Tape – 0.375″ [SP214])
151 All Purpose Glue (or use Aleene’s 7800 Adhesive)
Other: wooden spool; assorted embellishments and trims; narrow masking tape or washi tape; scrap of paper: WOW Powders Superfine Embossing Powder – Rich Gold
Here is my process:

These shrines are really easy to put together – the sides have little tabs to glue and slot into place, then this ‘frame’ can be attached to the back panel to complete the assembly. Any decent all purpose adhesive will do the job! I wanted to paint, stamp and heat emboss a design on what would be the inside back panel of the shrine so I needed to do this before attaching the sides (or I wouldn’t be able to get the stamp in!) I decided to mask off where the sides needed to be glued to the back so that I would have a clean and neat fit. I had some narrow washi tape in my stash that did the job perfectly.
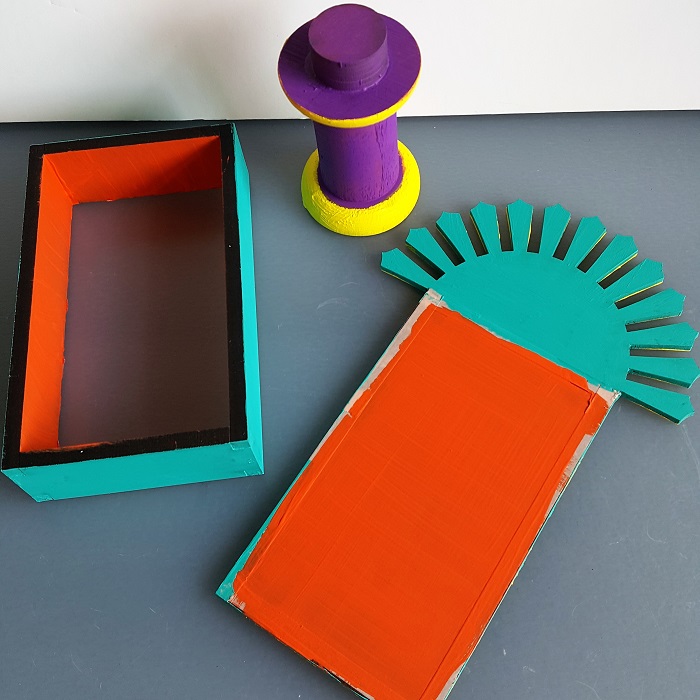
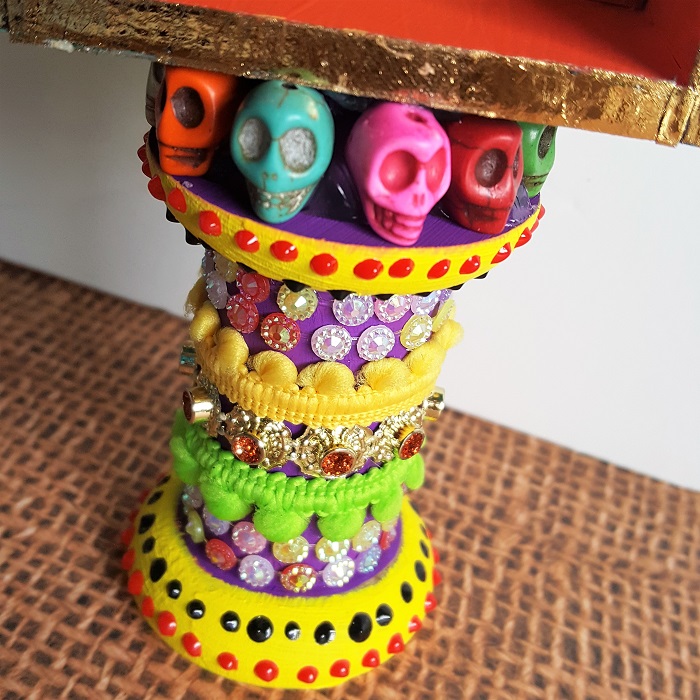
Dylusions Paint comes in many vibrant colours and a couple of coats soon gave me the finish I required. I left the front edges of the side panels bare as I was going to add foil later. I also painted up a wooden spool that I was going to use as the stand.
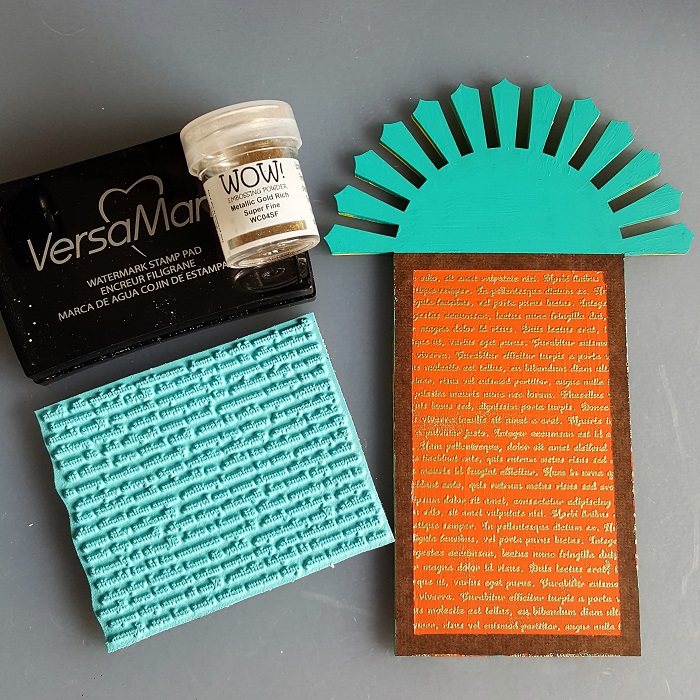
I wanted some gold inside my shrine as well as the foils that I planned to add to the outside, and picked the Joggles Nonsense Latin Text stamp to emboss. This is a great all rounder background stamp, really versatile and unobtrusive – a definite ‘must have’ in my book!! I stamped with Versamark Ink before applying gold embossing powder. Now I could remove the washi / masking tape and glue the sides to the back .
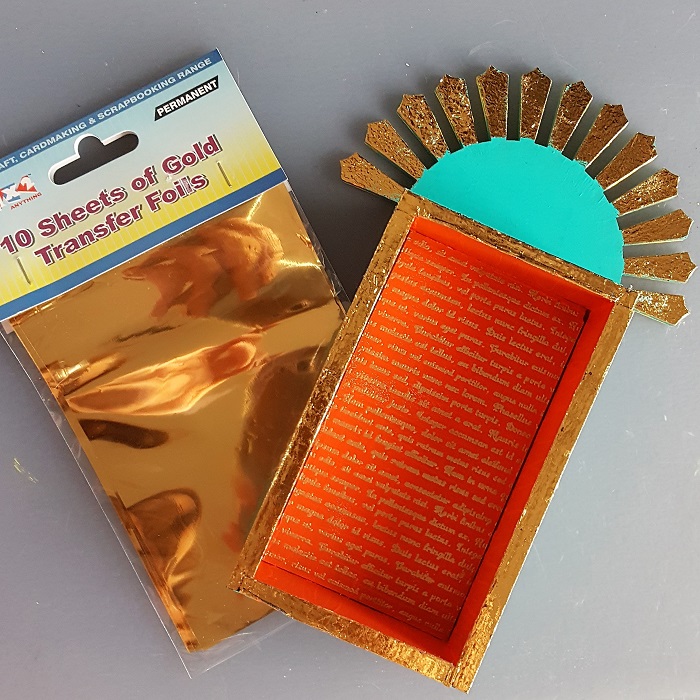
I stuck double sided adhesive tape along the front edges of the shrine then applied the gold foil, rubbing firmly to ensure good coverage. If you miss a bit you can always go back again and add more! To foil the sunburst design at the top, I covered the centre piece with a scrap of paper cut to fit, leaving just the ‘rays’ showing and gave a quick burst of spray adhesive. After waiting 30- 60 seconds, I applied the foil as before.
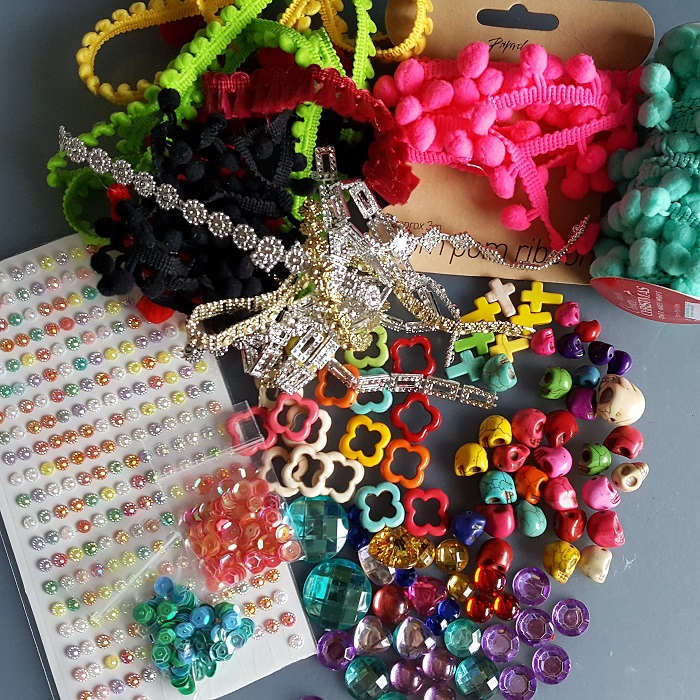
Now it’s time for the fun!! Gather together all your blingy bits and decide what you want to use.
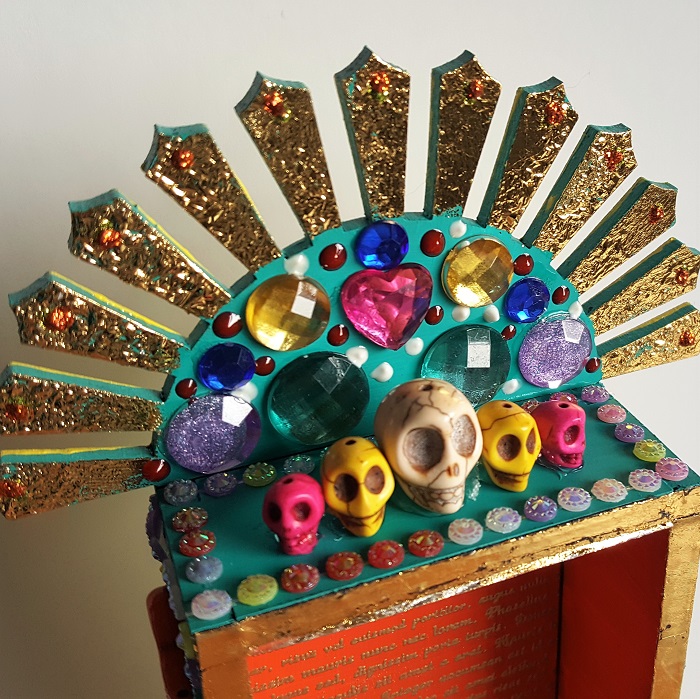
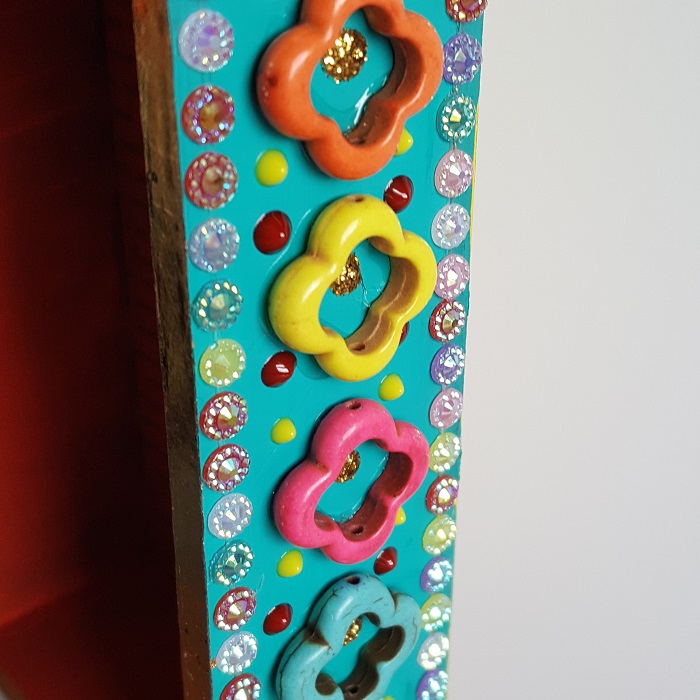
I added decoration to the spool base, the sides and top of the shrine. Little dyed stone skull beads nestle among flat back gems and fancy fibre trims.
Keep going until you are happy (or run out of space!!).
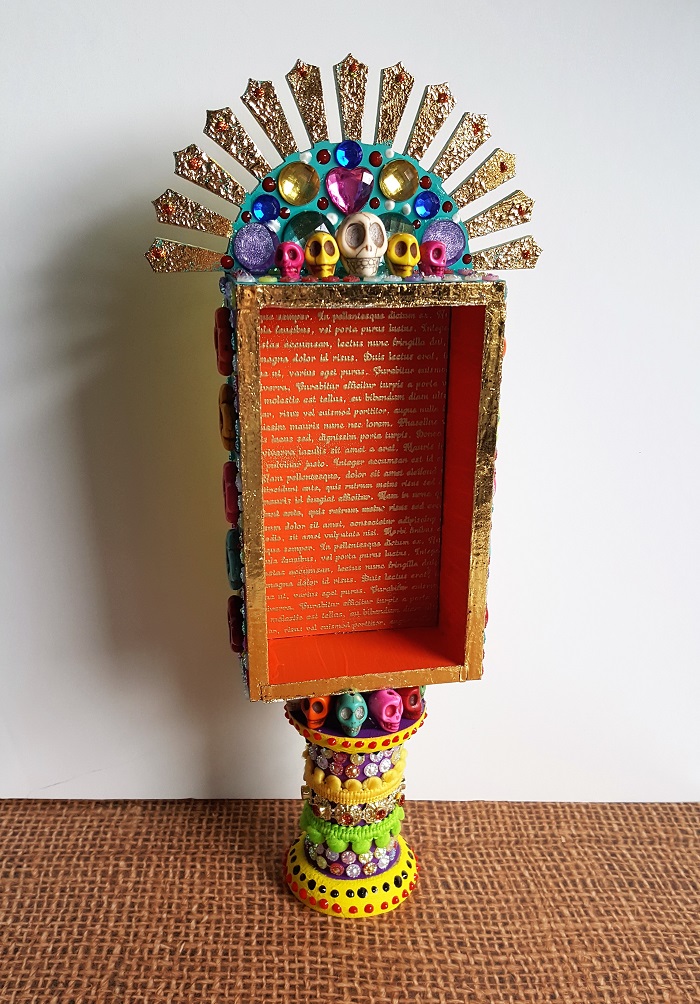
Leave it empty…
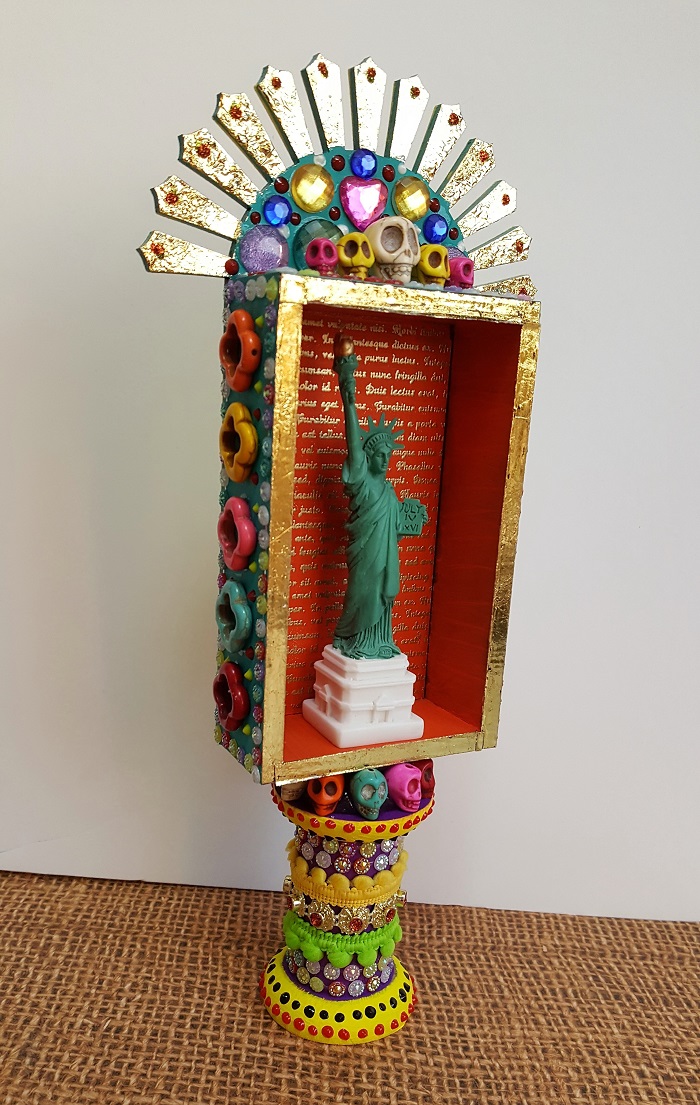
…or find a small ornament to display inside!
Thanks so much for following along with me again today, and I hope I have inspired you to create your own shrine. There are several different styles and sizes in the shop, which one will you choose? Please feel free to leave a comment below – I would love to know your thoughts….come back next week for another inspiring post from the team!
Comment
A fun & funky DOTD shrine, love the bright colour & bling.