
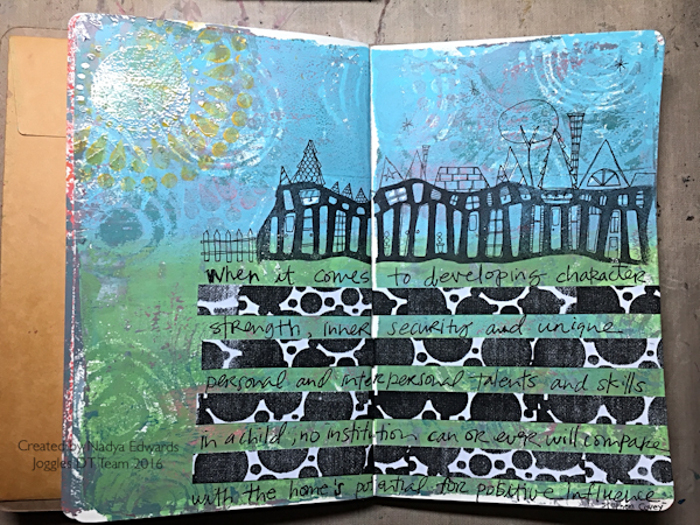
Hi. It’s Nadya here with my first Joggles Design Team post. I have acquired several foam stamps over the years, but when I received the Joggles Foam Stamps I was intrigued! I have been trying to get myself to art journal more, so now was my chance.

Supplies Used:
Gel Press Reusable Print Plate – 8”x 10”
Speedball 2”Rubber Brayer – Soft
Joggles Foam Stamp – Small Wonky Layered Circles
Dylusions Creative Journal- Small
Joggles Foam Stamp – Teardrops in the Round
Ranger Inkssentials Mini Ink Blending Tool
Tim Holtz Distress Paint – Black Soot
Joggles Foam Stamp – Wonky Striped Border
Tim Holtz Distress Paint – Mustard Seed
Dina Wakley Media Brush -1/2”flat
Micron Pigma Pens – 0.005, 0.01, 0.03 – Black
Other: acrylic paints, paper cutter, white cardstock, journalling pen, tape runner, embossing powder
My Process:
Monoprinting has been my passion lately, so it was natural that I would try out the foam stamps with my Gel Press Reusable Print Plate – 8”x 10”.

I started off with 3 colours of acrylic paints on the Gel Plate. I used a Speedball 2” Rubber Brayer to spread the paint in a smooth, blending fashion, until the gel surface was completely covered.
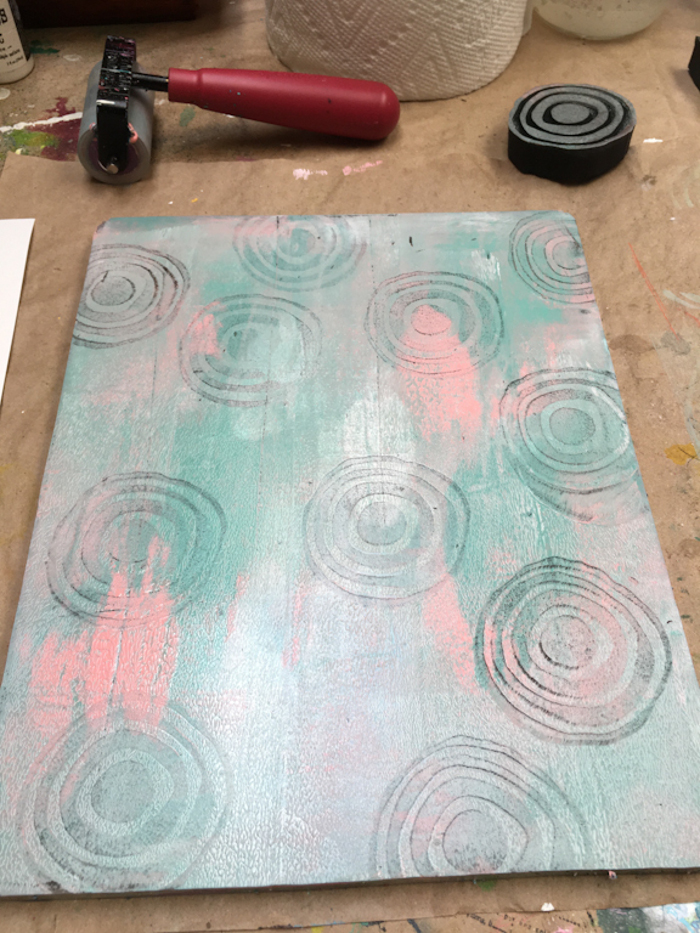
I then pressed the Wonky Layered Circles Foam Stamp onto the wet paint in a random fashion, making sure to press the newly transferred paint from the foam stamp onto scrap paper each time. This allowed the foam stamp to pick up more paint when it was stamped again on the gel plate. (If you are like me, you don’t waste that stamped image but use it on other journal pages, cardstock or on tags for later.)
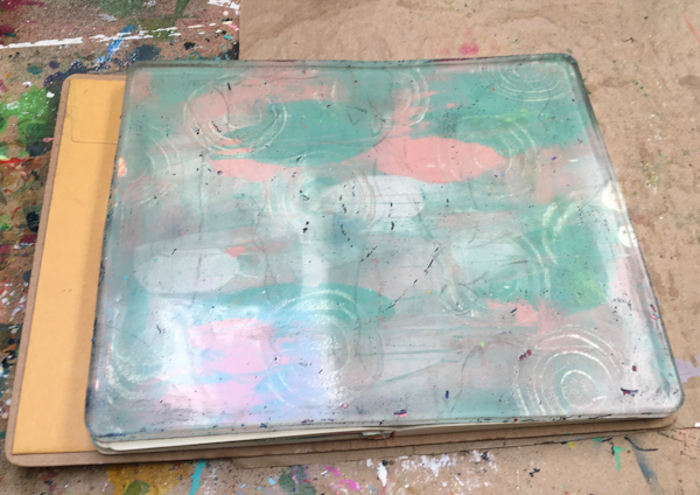
The 8×10 inch gel plate fit perfectly onto my Small Dylusions Creative Journal so I carefully laid it onto a blank two page spread. I pressed on the plate making sure to get it into the crease between the pages.
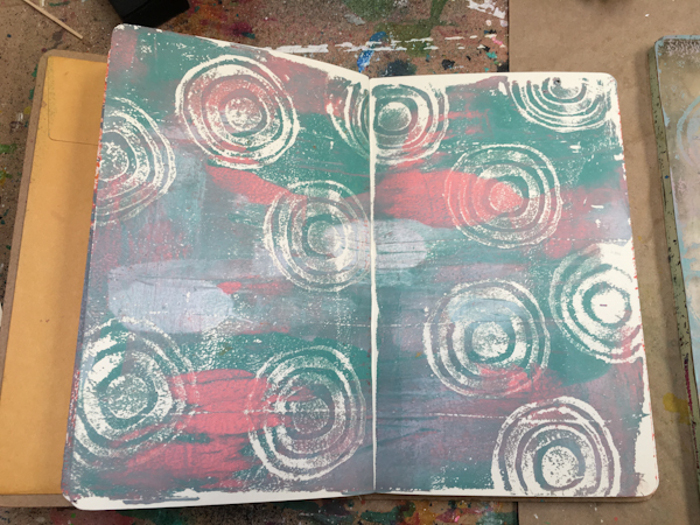
Pulling the gel plate off, I had effectively transferred a monoprint into my art journal!
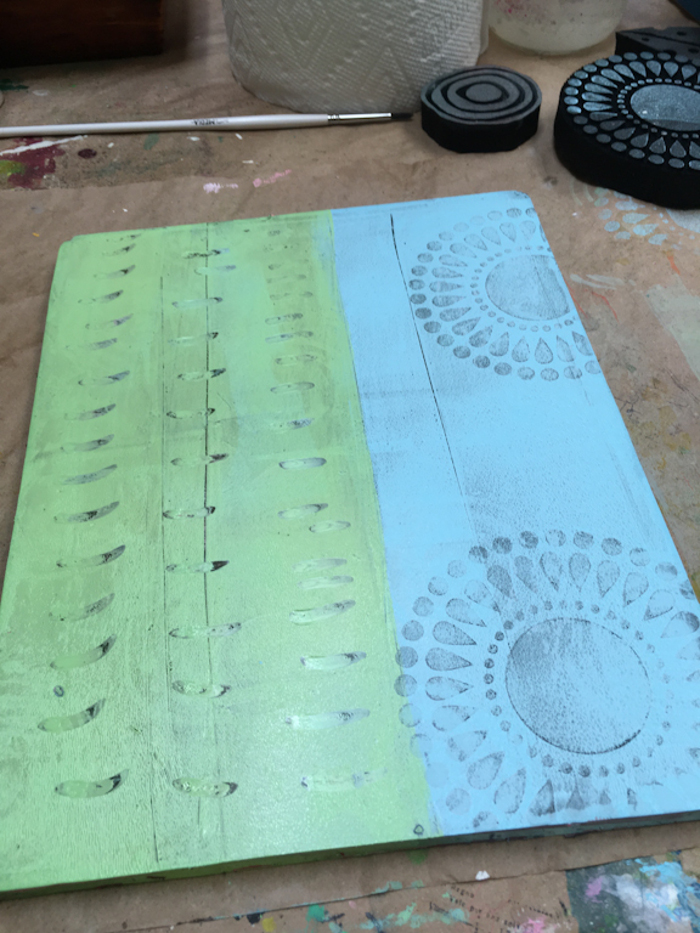
I then added blue & green acrylic paint to the plate but instead of mixing them, I kept them separate, thinking that I wanted a blue sky, green land layout. I stamped the Teardrops in the Round Foam Stamp into the blue paint and used the end of a paintbrush to make marks in the green. Then I once again layered it onto the art journal, making sure that the blue was on top.
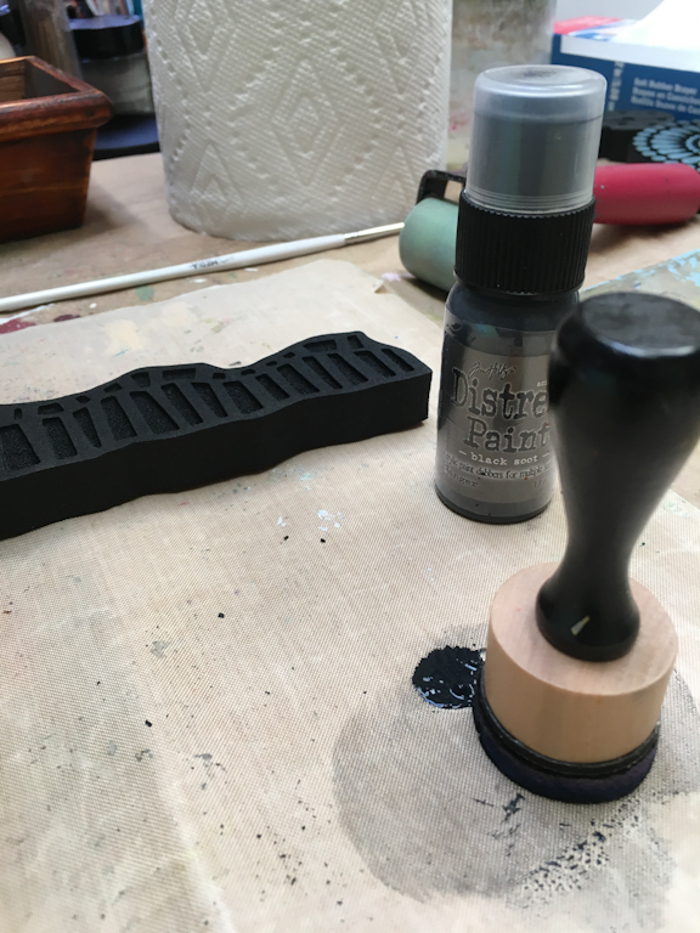
Using my Ranger Inkssentials Mini Ink Blending Tool, I applied Tim Holtz Distress Paint – Black Soot to the Wonky Striped Border Foam Stamp.
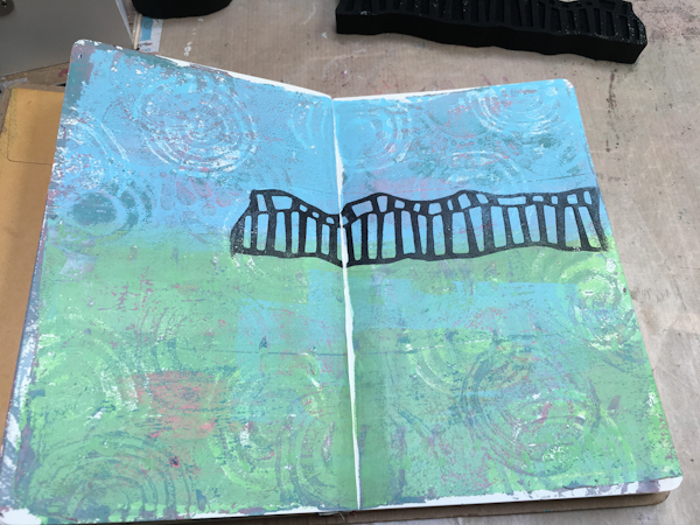
I then stamped it on the edge between the blue and green. I envisioned this stamp as a row of houses.
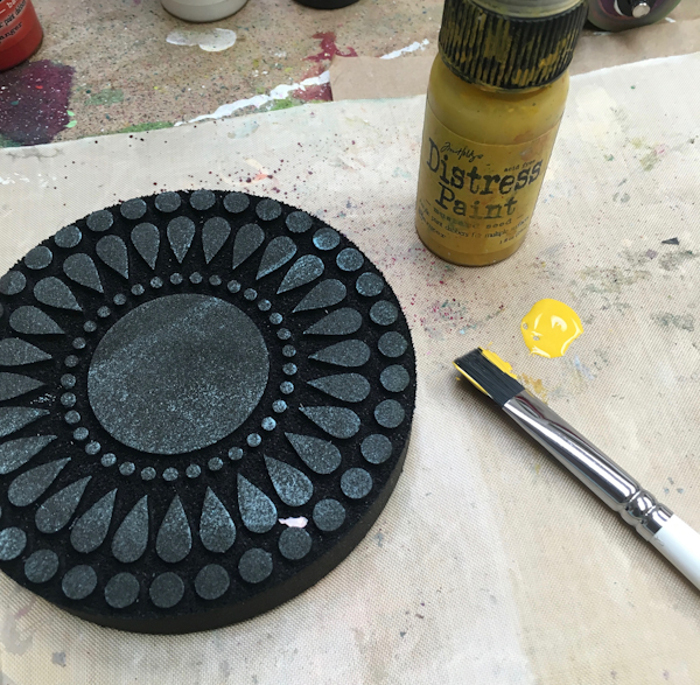
I went back to Teardrops in the Round Foam Stamp and added Tim Holtz Distress Paint – Mustard Seed using the Dina Wakley Media 1/2”flat brush. I stamped it in the left top corner of the spread to make it look like the sun.
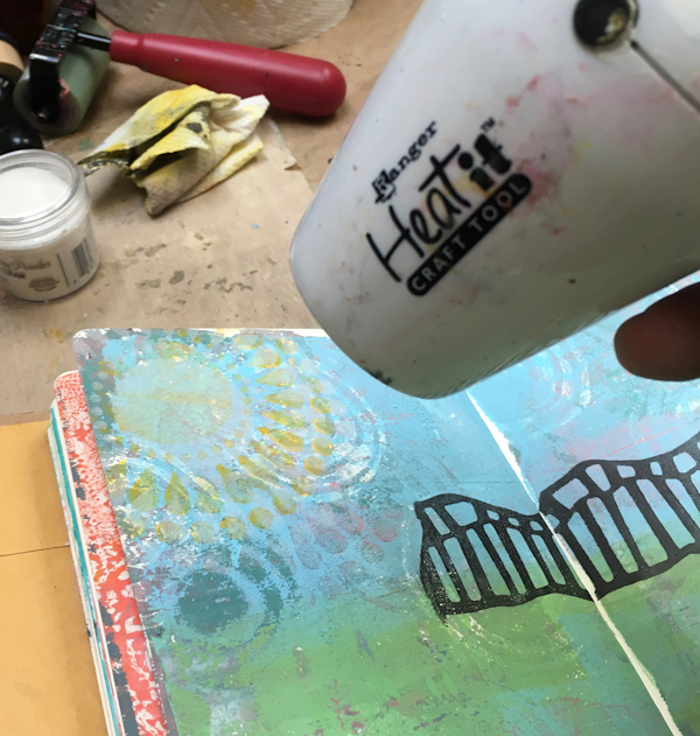
It did not stand out as much as I had intended so after I cleaned the foam stamp and let the page dry, I embossed to add some texture. I inked the Foam Stamp using an embossing pad and tried to position it back as closely to the original as I could (without fretting too much over it). I then sprinkled Ranger Clear Embossing Powder over the stamped image and tapped off the excess powder into its container. Using my Ranger Heat It Craft Tool, I melted the embossing powder.
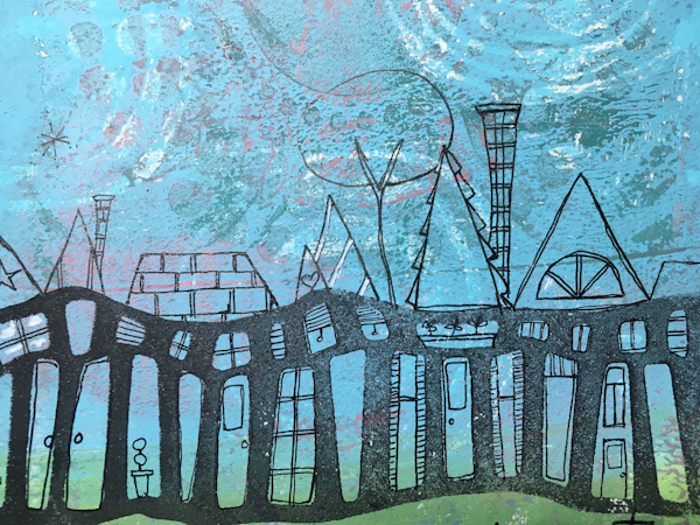
Now is was time to play! Using my Micron Pigma Pens (0.005, 0.01, 0.03 in Black), I doodled in house peaks, windows & doors. To highlight, I used a Uni Ball Signo Broad – White on the roof, in the windows, and doors.
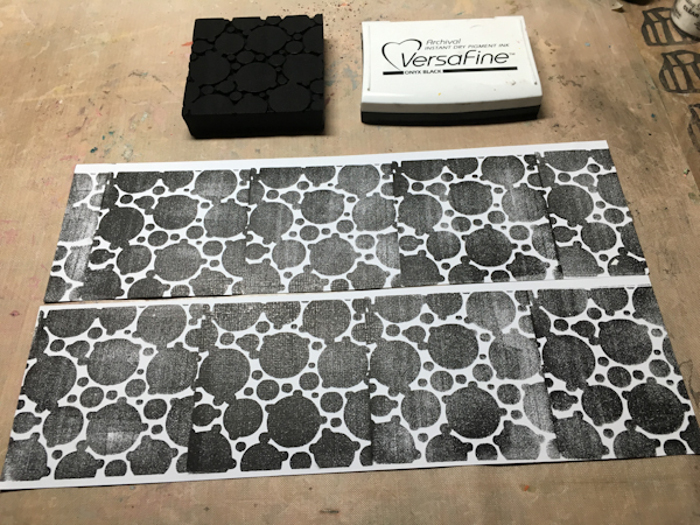
At this point, I knew I wanted to write below the village but the space looked a little too big. Using the Joggles Bubbles Foam Stamp, I stamped several images side by side on white cardstock using Jet Black Archival Ink.
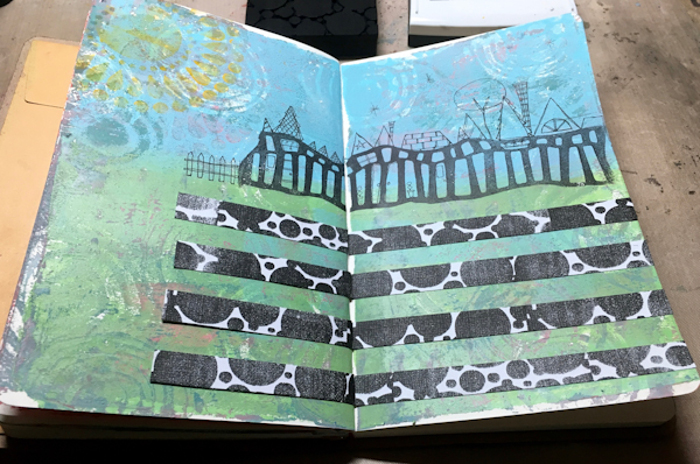
I then cut 1/2 inch strips from the cardstock and glued them below the houses, leaving 1/2”spaces in between.
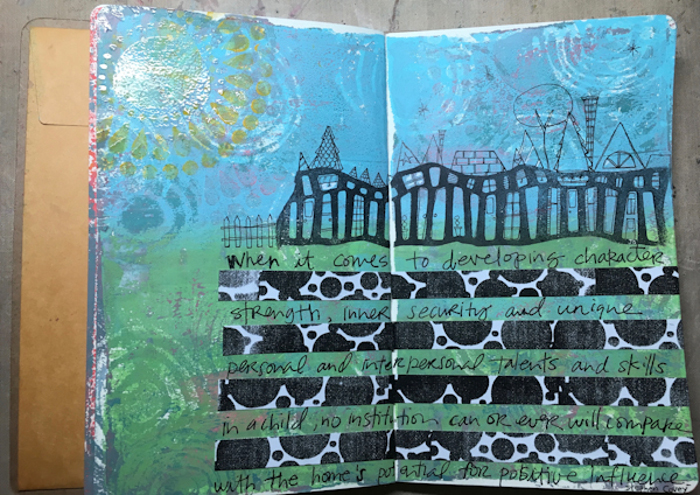
In the space below the houses, I used a great quote by Stephen Covey but started running out of room so I had to shorten it by a few words. I could have used typed words, rub-ons or stickers but I wanted to force myself to use my handwriting, hence the human error of running out of room!
Thank you for visiting. I really enjoyed using the Joggles Foam Stamps. I found they were quick and easy to use with minimal clean-up. I think my journal page turned out really well. What do you think?








12 Comments
Fabulous! I would never have thought of printing directly from the gel plate onto the journal page. What a great idea and a time saver too! And I love that you used the stamp to create houses. Thank you for sharing all your great ideas!
Thanks Faye!
It’s such a leap of faith to just plop the gel plate down onto the journal page, but why not??! I will definitely be using that foam stamp to create more villages!
Thank you Nadya for your inspiring journal spread. I live how you used the gel plate to print in your journal. And using the border stamp for houses? Great find!! Margarite
Hi Margarite!
Thanks for your kind words! Just another way of looking at our supplies in a different way!
Thanks for the tutorial. I had not used gel plate for printing in a journal. Will defintiely try it out! I really like how you use the border stamp and add to it with the pens. Enjoyed it all!
Thanks Eileen!
I really liked doodling in the village. My version of Zen-drawing!
I love that you turned the Joggles Wonky Strip Boarder into houses! What a wonderful idea. I will look at all the stamps in a new light.
Hi Ruean!
Exactly! Thanks for commenting!
Really enjoyed this. Thought the border stamp would make a great wonky railroad bridge. Just draw in a wonky train. I would not have thought of this if I had not seen your stamp used as a stand alone image high on the page. Thanks.
Hi Bette Jo!
A railroad would be awesome! While playing we find new ways to use supplies and do things…
Wanna know what I think!!!?? With huge pleasure I wish to Thank You for this VERY Fun, informative, creative and lovely piece of work. Positively LOVE how you used the wonky strip boarder … it was an “ah ha” moment and has my mind thinking of what others we (I) can use just thinking outside of the box. Thanks again for sharing your talents with us.
Hi Barbara!
Why THANK-YOU!!! You just made my day!