
Hello Joggles Fans,
Leigh here and I’m about to take you down the rabbit hole again on a fun new Alice in Wonderland adventure! I’m featuring Tunnel Books today. Joggles has a wonderful selection of 6” x 6” square tunnel books with assorted shaped openings and a 6” x 9” rectangle tunnel book with rectangular openings.
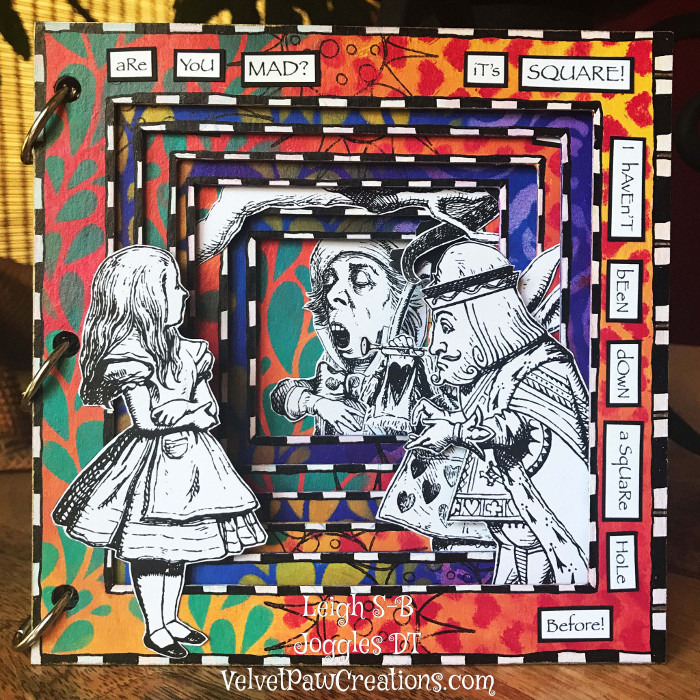
With an Alice in Wonderland theme for my tunnel book, I had to go totally wackydoodle…I just had to! So I chose the 6” x 6” Square Tunnel Book with square openings because my muse thought “Tea for Two” which lead me to “sugar lumps” which are square you see ;0) Everyone is used to rabbit holes being round so why not square for a change? See… there is logic to my madness… bwahahaha ;0)
Let the adventure to Wonderland begin. Alice has a Tea Party to go to….

“Join Us for Tea”
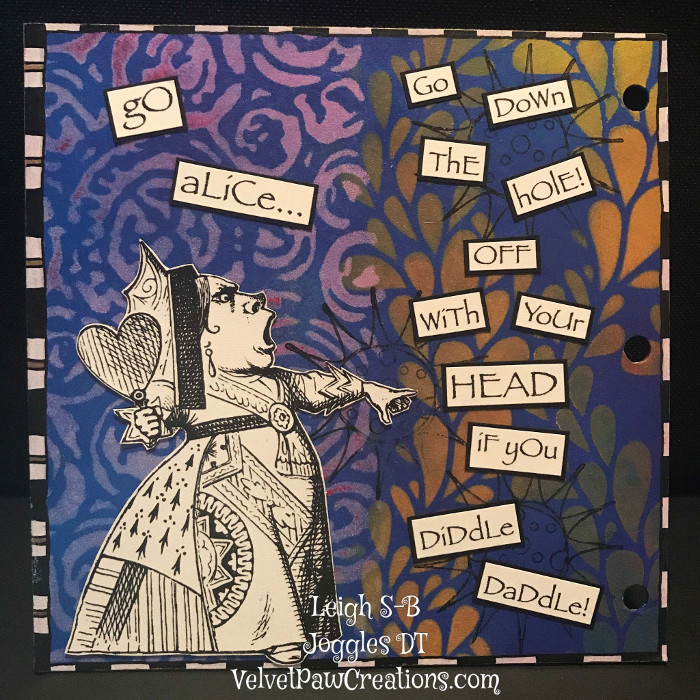
“Go Alice…Go down the hole! OFF with your HEAD if you diddle daddle!”
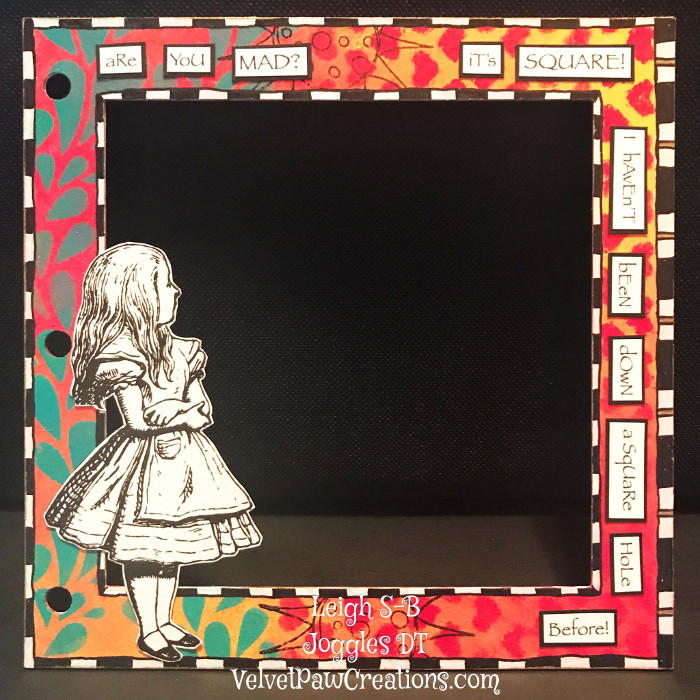
“Are you MAD? It’s SQUARE! I haven’t been down a square hole before!”

“Yes, quite MAD…It’s the same as”

“round but different you see…”
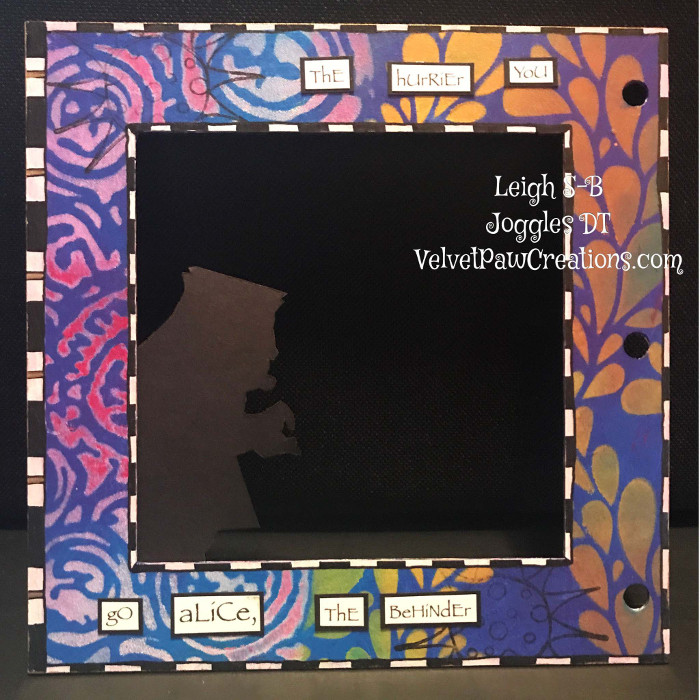
“The hurrier you go Alice, the behinder”
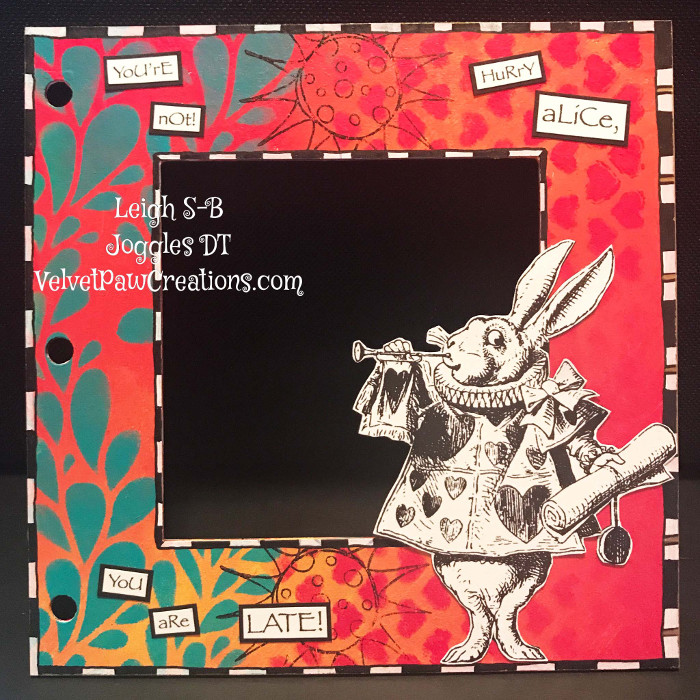
“You’re not! Hurry Alice, you are LATE!”
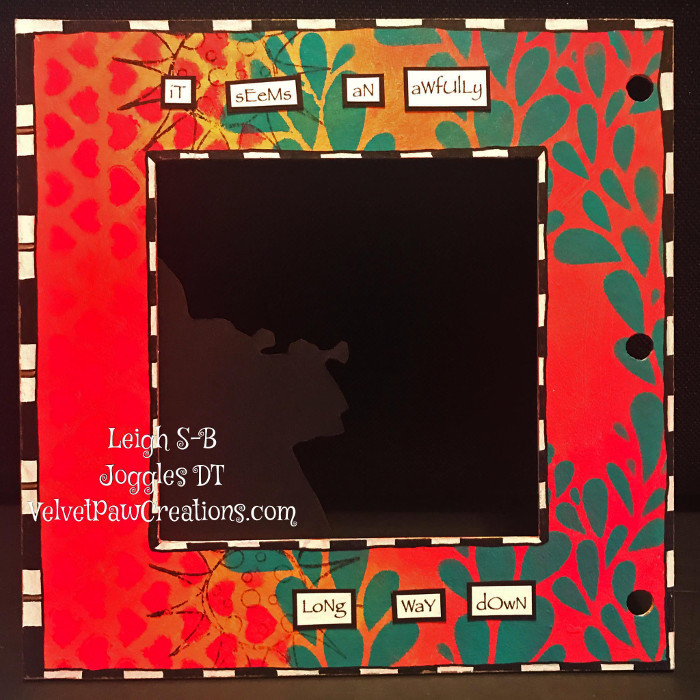
“It seems an awfully long way down”
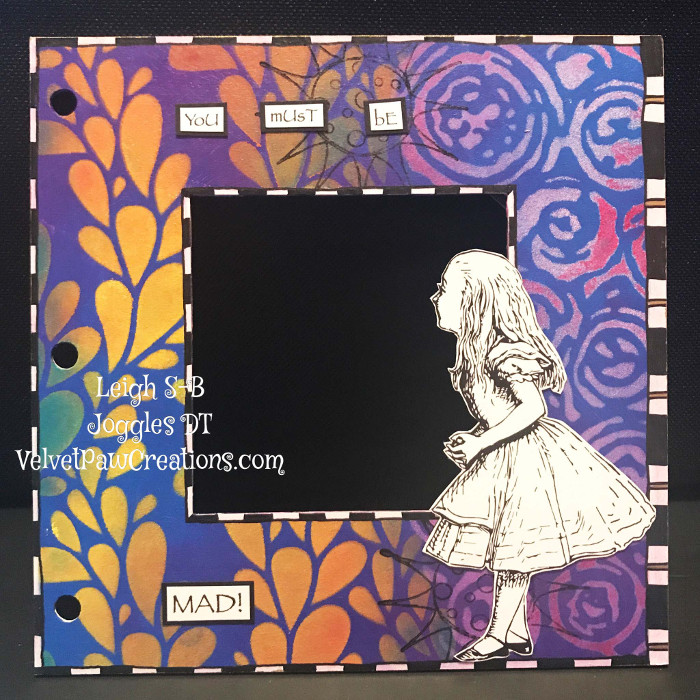
“You must be MAD!”
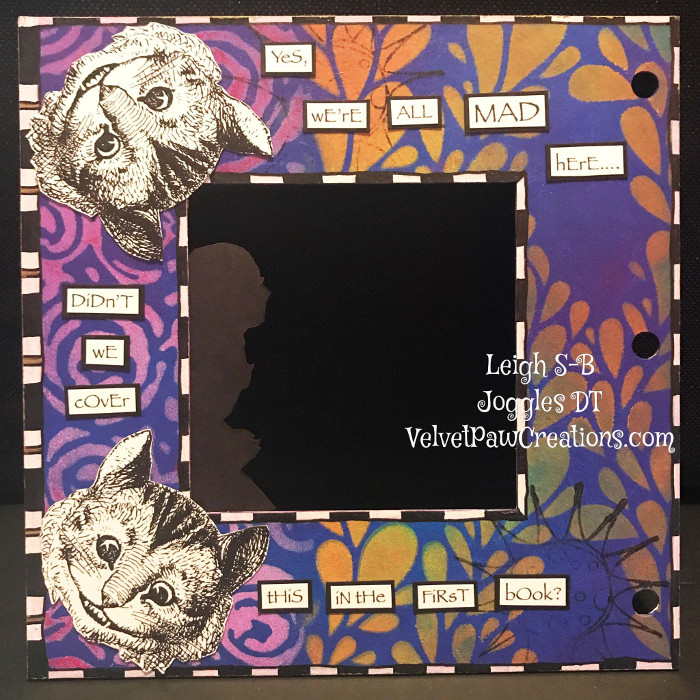
“Yes, we’re ALL MAD here…Didn’t we cover this in the first book?”
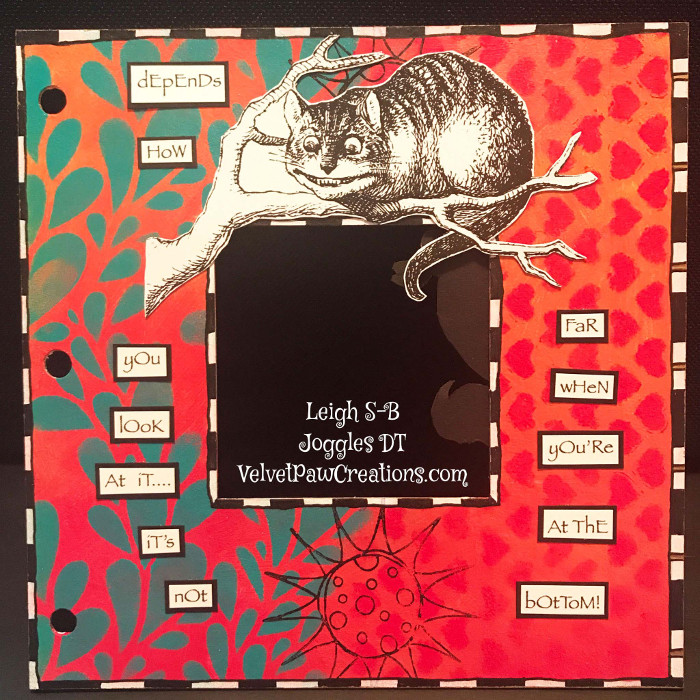
“Depends how you look at it….It’s not far when you’re at the bottom!”
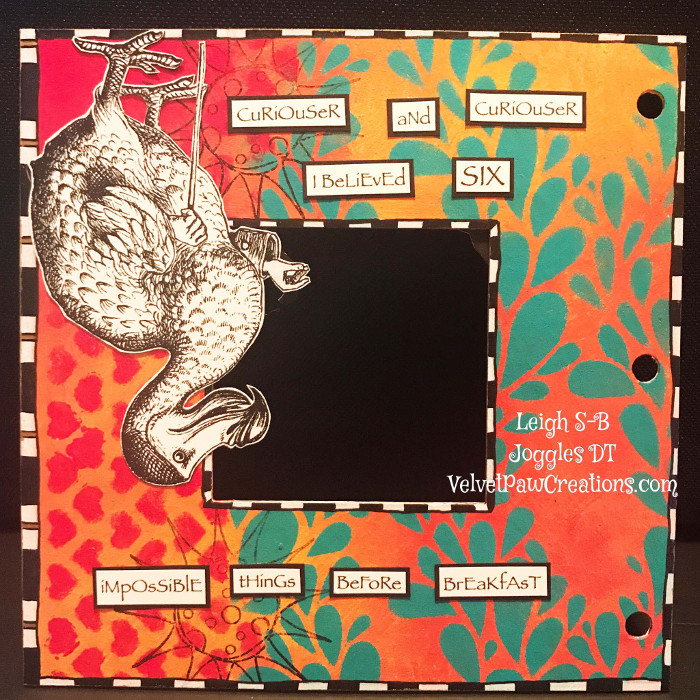
“Curiouser and Curiouser. I believed SIX impossible things before breakfast”
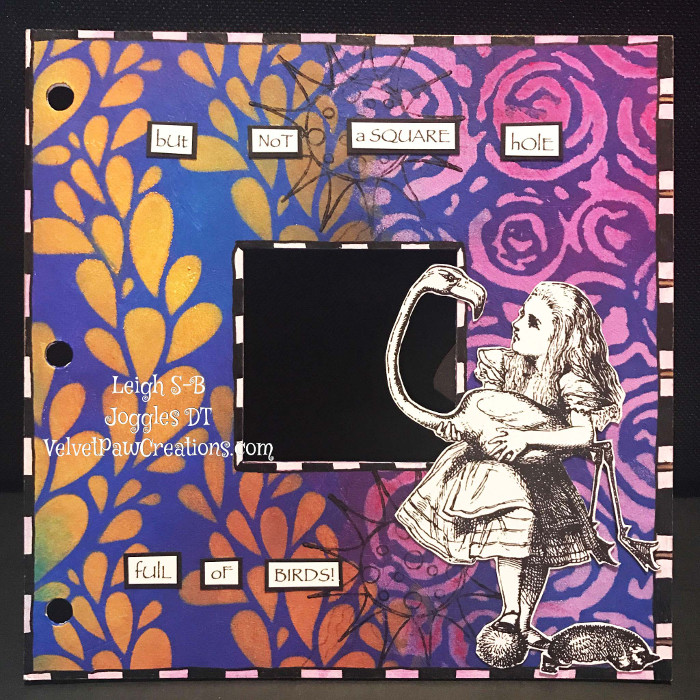
“but not a SQUARE hole full of BIRDS!”
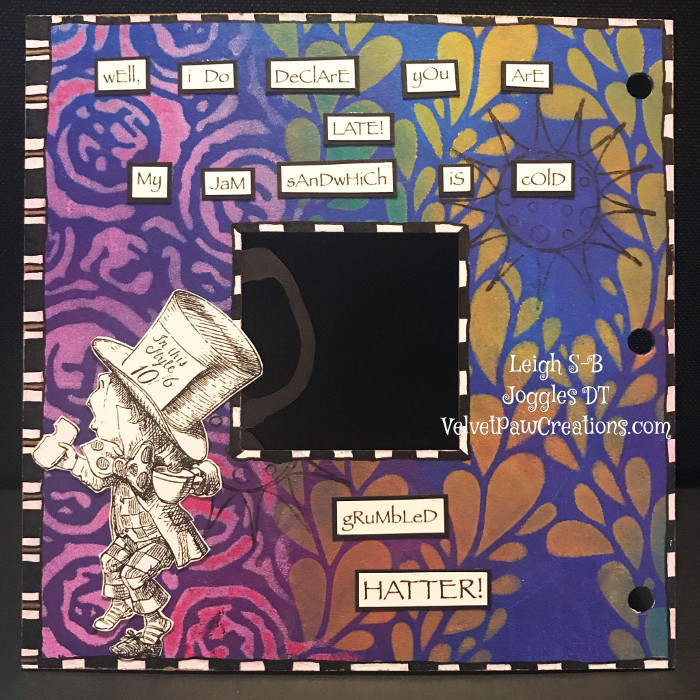
“Well, I do declare you are LATE! My jam sandwich is cold,” grumbled HATTER!”
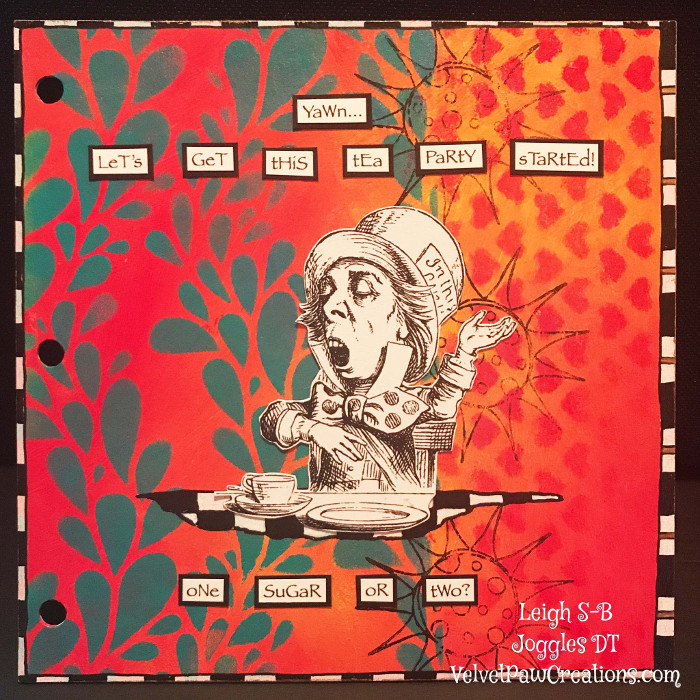
“Yawn…Let’s get this tea party started! One sugar or two?”
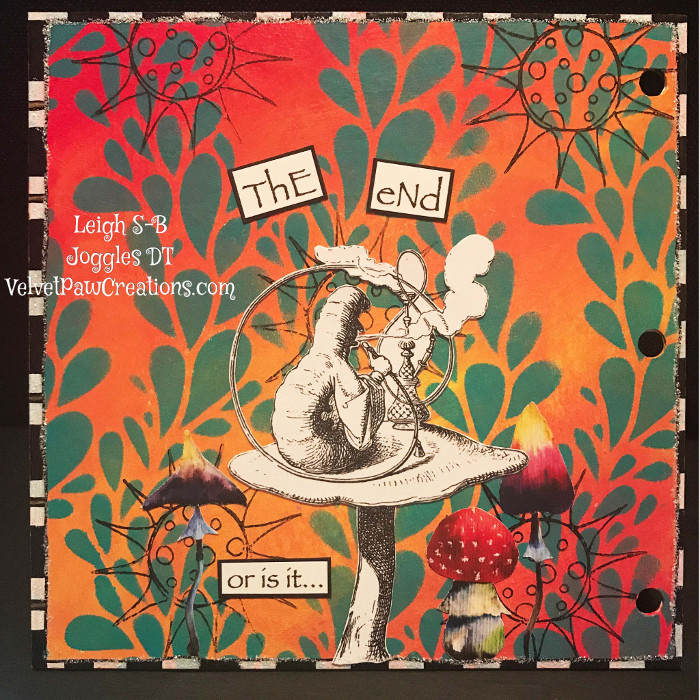
“The End or is it…”
I had an absolute ball creating this tunnel book and I hope you enjoyed the latest chapter in the Wonderland story ;0) Now, let me show you how you can make your own!
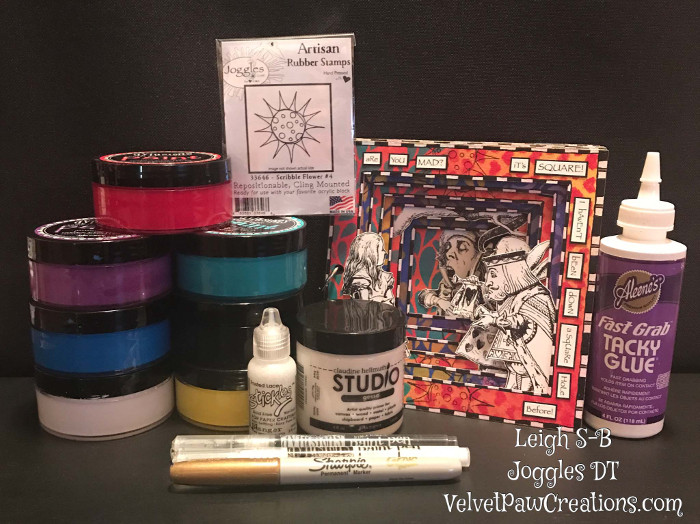
Supplies
Joggles 6” x 6” Tunnel Book with Square Tunnel
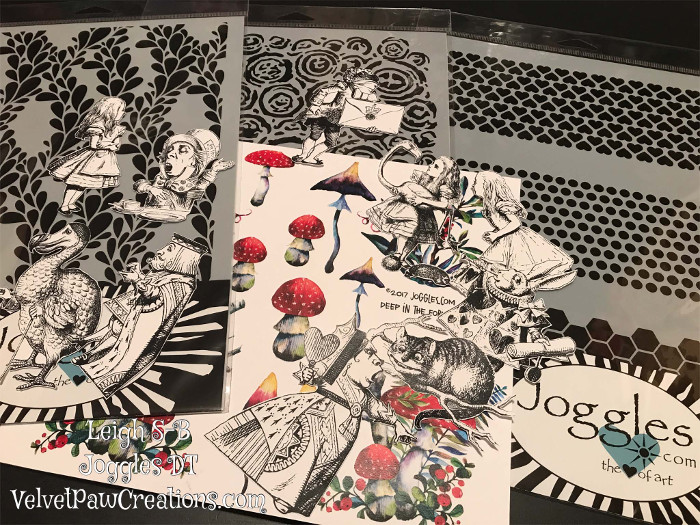
Joggles 9” x 12” Stencils: Curvaceous; Woodcuts; Punchinella Trio 1
Joggles Collage Sheets: Alice in Wonderland in Black and White 1; Alice in Wonderland in Black and White 2; Deep in the Forest 2
Joggles Cling Mounted Rubber Stamp – Scribble Flower #4
Dylusions Black and White Paint Pens
Dylusions Paint by Dyan Reaveley: Vibrant Turquoise; London Blue; Crushed Grape; Lemon Zest; Cherry Pie; White Linen; Black Marble
Dina Wakley Media White Gesso – 2 ounce tube
Stickles Glitter Glue – Frosted Lace
Ranger Inkssentials Mini Ink Blending Tool
Tim Holtz/ Tonic Studios Retractable Craft Knife
Inkssentials Nonstick Craft Sheet
Other: Gold Sharpie; DecoColor metallic gold paint pen; paint brush; paper towel; scissors; Xyron and 9” permanent adhesive
Tutorial
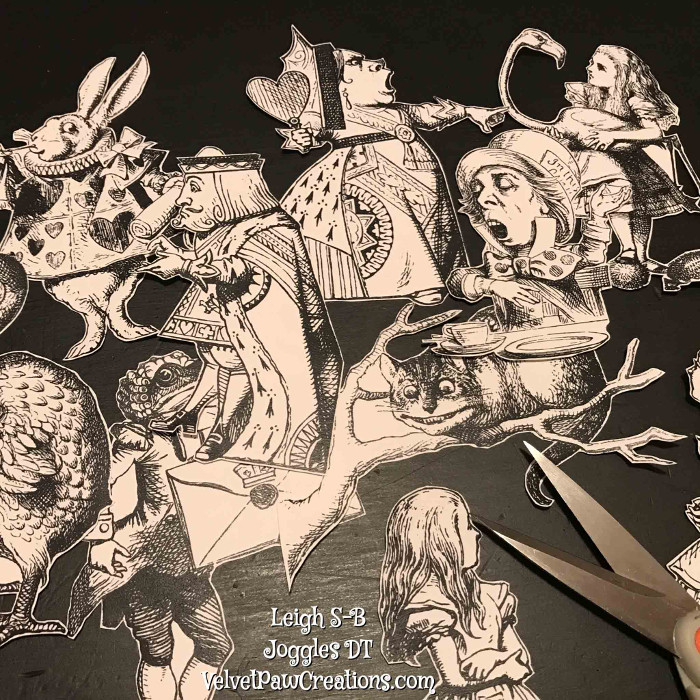
Run both of the Alice in Wonderland Black and White collage sheets through a Xyron to add permanent adhesive and adhere them to black cardstock. Fussy cut all of the images with scissors and use a craft knife for the inside areas you want to remove, too.
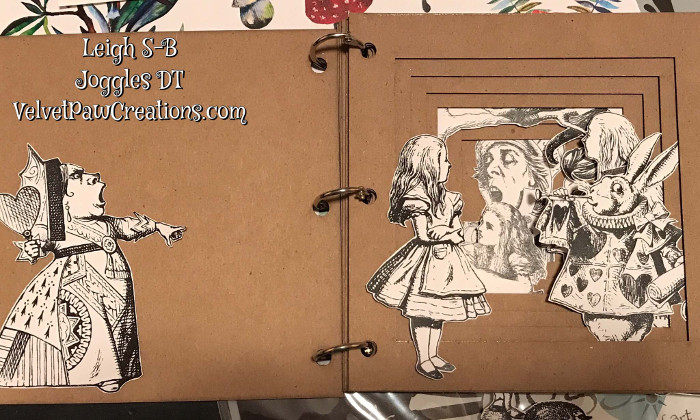
I wrote up my little story and then planned out which images would be used on each page of the tunnel book.
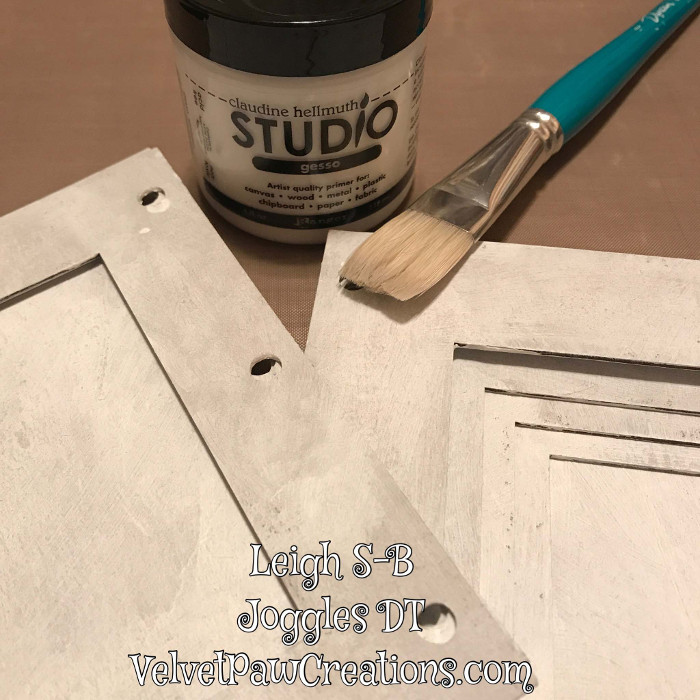
Basecoat the entire tunnel book with white gesso. I used Claudine Hellmuth’s gesso but you can get Dina Wakely’s gesso in 3 sizes at Joggles depending upon your needs. I applied only one coat of gesso with a brush. Total coverage isn’t needed but you can do a second coat, if you prefer, once the first coat is dry.
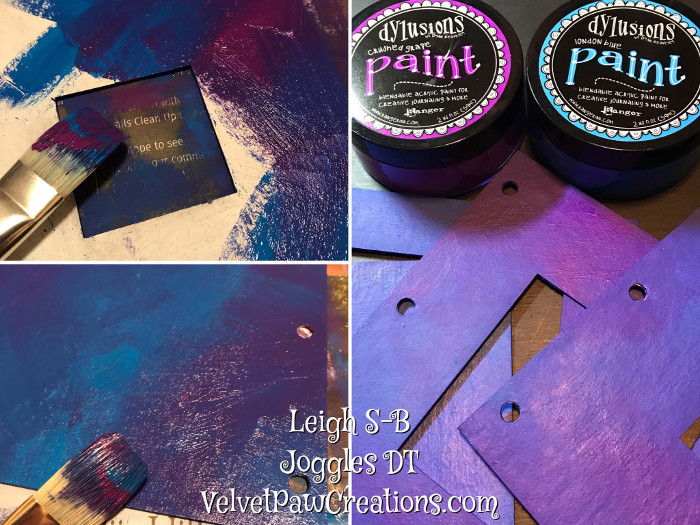
To make the black and white Alice in Wonderland illustrations really pop, I decided to go with a bright and bold explosion of colour for my tunnel book pages. The square tunnel book has 8 pages so I painted 4 alternating pages with a combination of Dylusions Crushed Grape and London Blue, mixing and blending the 2 colours randomly directly on the pages as I painted. This creates a wonderful range of blues and purples.
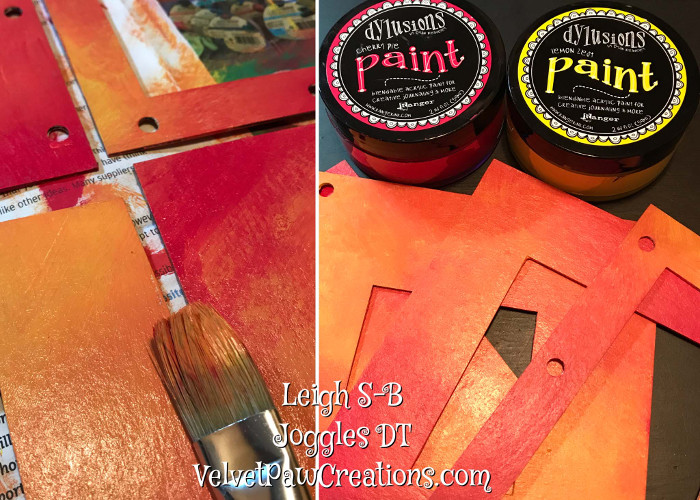
Paint the remaining 4 alternate pages with Lemon Zest and Cherry Pie. This combo creates a wonderful range of yellows, oranges, and red.
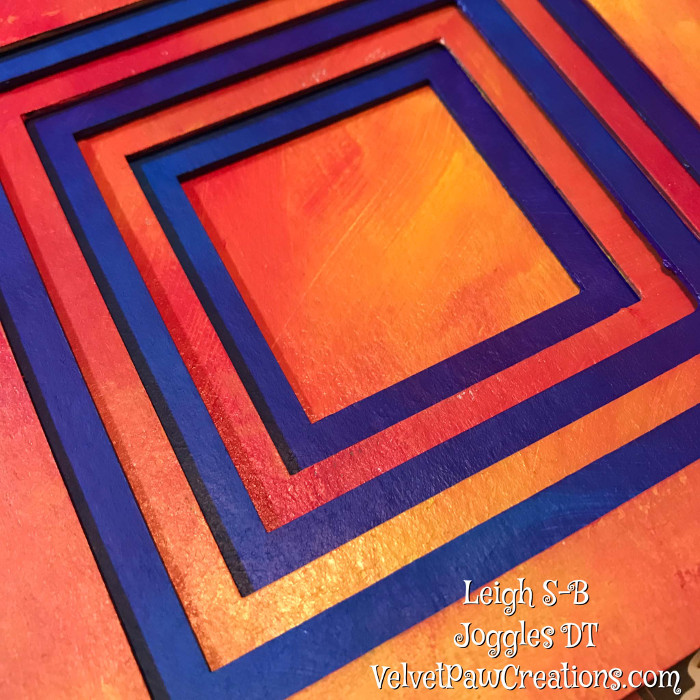
Stack the pages back together to see how it looks so far….so yummy!
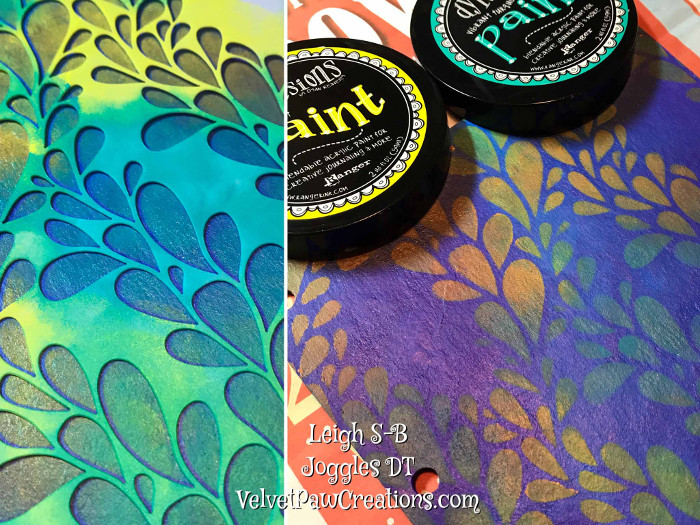
Now the stenciling fun begins! I picked the Joggles 9” x 12” Curvaceous stencil because the patterns look floral AND they look like hearts….couldn’t be more perfect for my Wonderland story! Use a combination of Dylusions Lemon Zest and Vibrant Turquoise paint to stencil the design onto the blue/purple pages with a foam blending tool. As the paints are semi-opaque, they do change colour as they dry depending on the colour that’s beneath them. Stencil the design all over just one side of the first and last pages, i.e. the front and back covers of the book, and then just half of the remaining pages.
You can see how some of my yellows turned more orange in the this photo.

On all the yellow/red pages, stencil the Curvaceous design using only Dylusions Vibrant Turquoise.
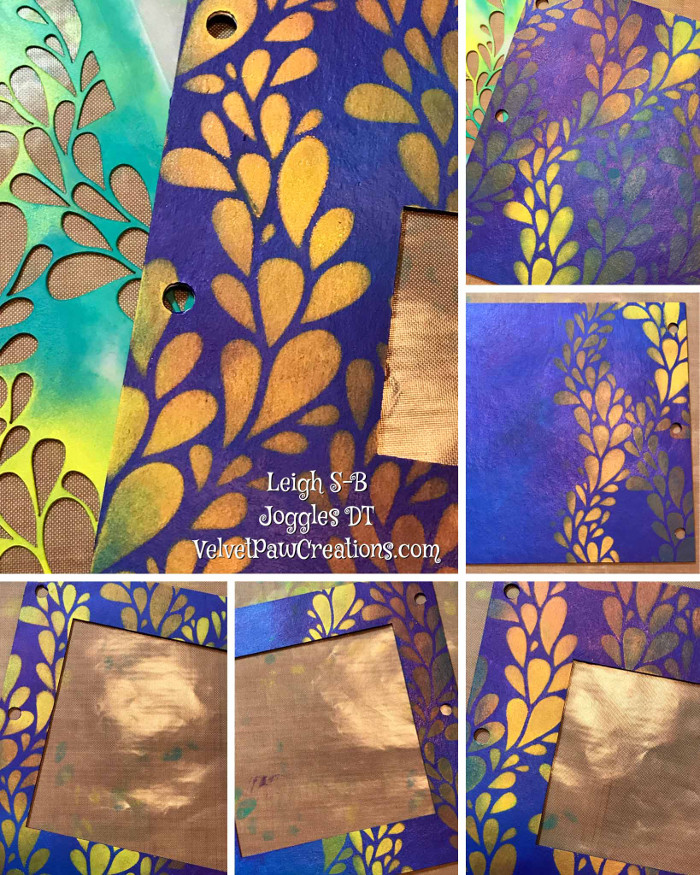
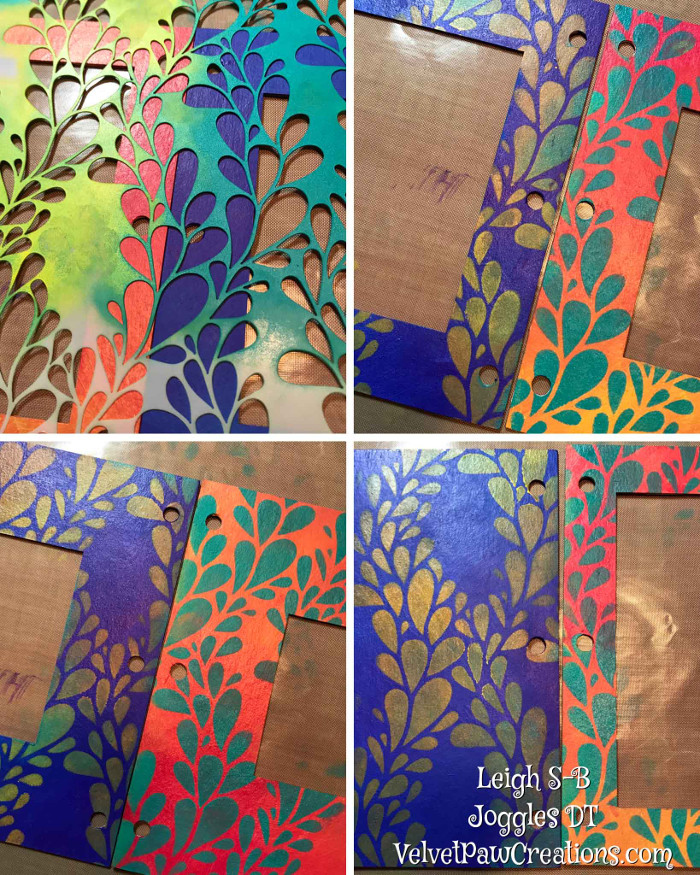
Allow the stenciling to dry or speed up the process with a heat tool and apply more Lemon Zest to some of the stenciling on the blue/purple pages to make some of floral design pop. I love how gorgeous it looks.
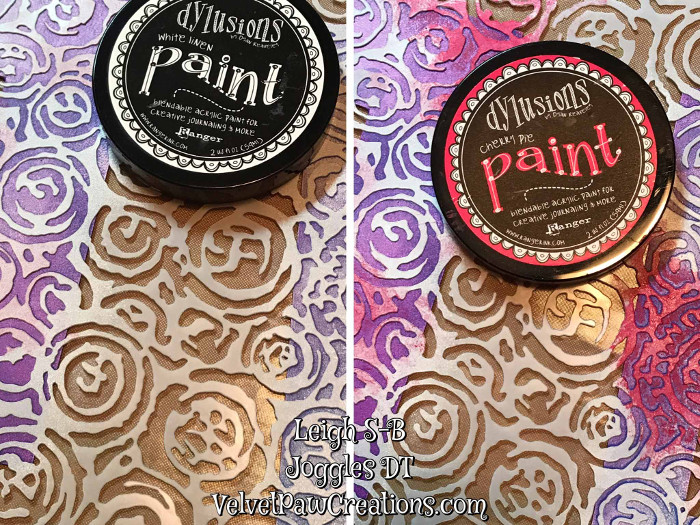
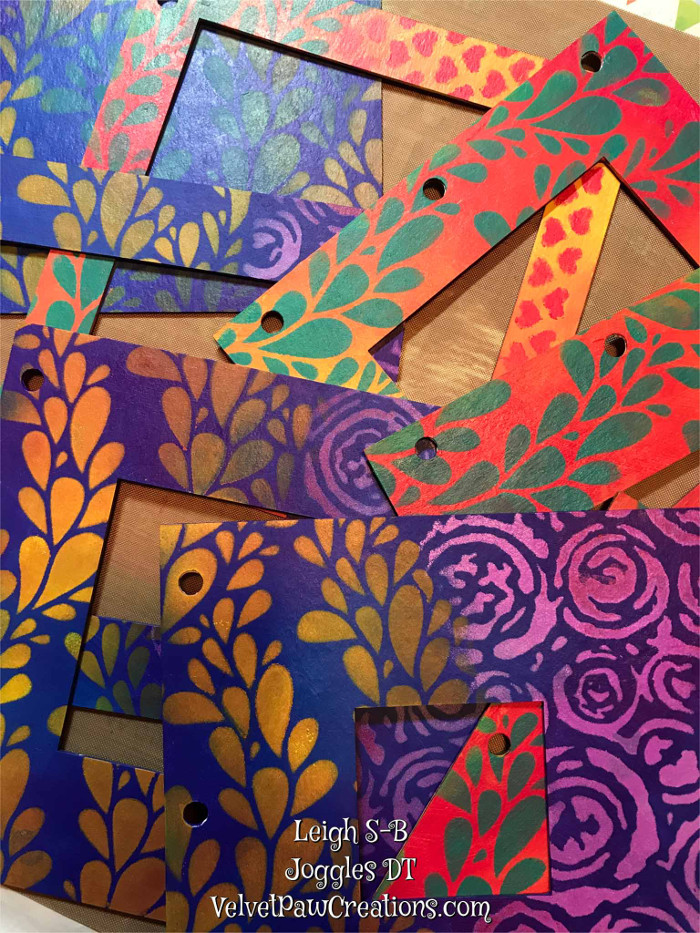
The next 9” x 12” stencil I chose is called Woodcuts but I think they look like roses…again, perfect for Wonderland, right ;0) Stencil the “roses” on all the blank areas of the pages in Dylusions White Linen paint. Then while the stencil is still in place, scrunch up a piece of paper towel and apply Cherry Pie paint randomly to the “roses”. The paper towel makes the application look more splattered.
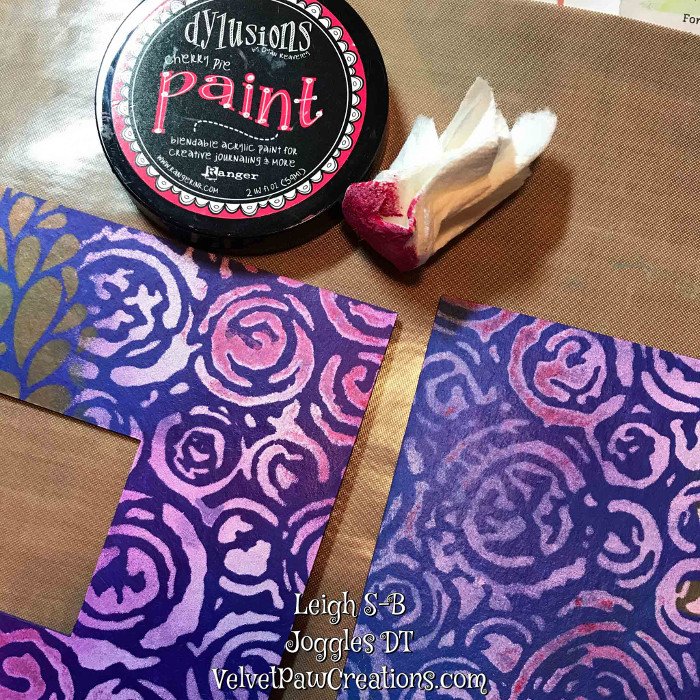
In this photo, you can see how the paint dried and created some pinks, too. It all depends on the thickness of the paint application, how wet the white paint was when I applied the red paint, and the colours beneath.
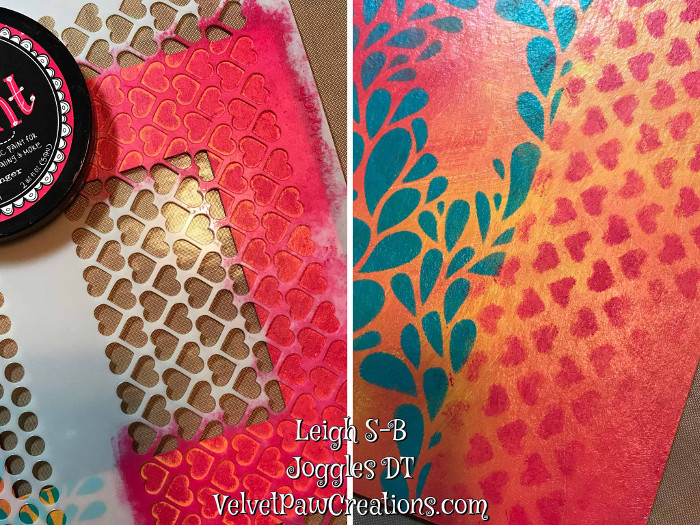
I couldn’t have a Wonderland project without hearts so I chose the Hearts design from the 9” x 12” Punchinella Trio 1. Stencil the heart design onto all the yellow/red pages in Dylusions Cherry Pie. Move the hearts in about 1/4 inch from the right hand edge on each page too, you’ll see why soon ;0)
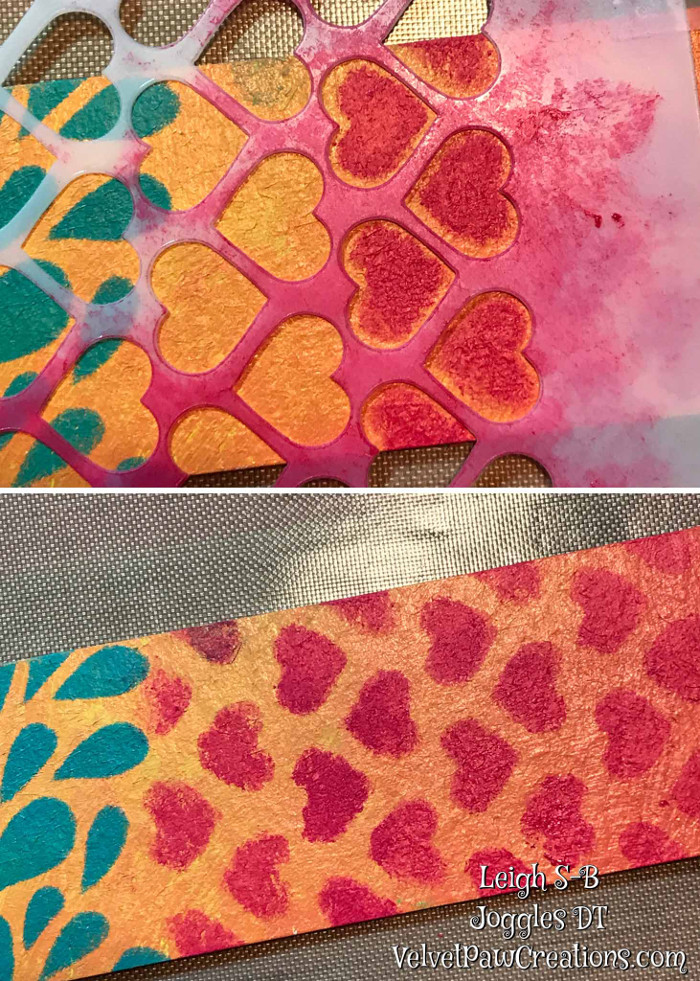
The Hearts is a narrow stencil pattern so on one or two pages I needed to extend the design to cover the areas. Don’t worry… it’s super easy to do. Just move the stencil over and line it up with the hearts already there and continue applying paint.
 and
and 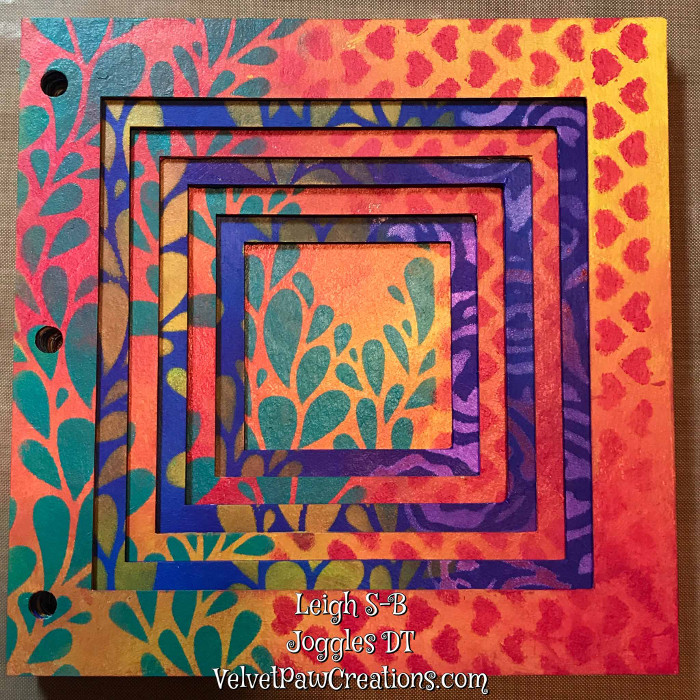
All the stenciling is looking amazing. Stack all the pages again to see how the project is coming along…you could easily stop here if you wanted and still have a gorgeous tunnel book.
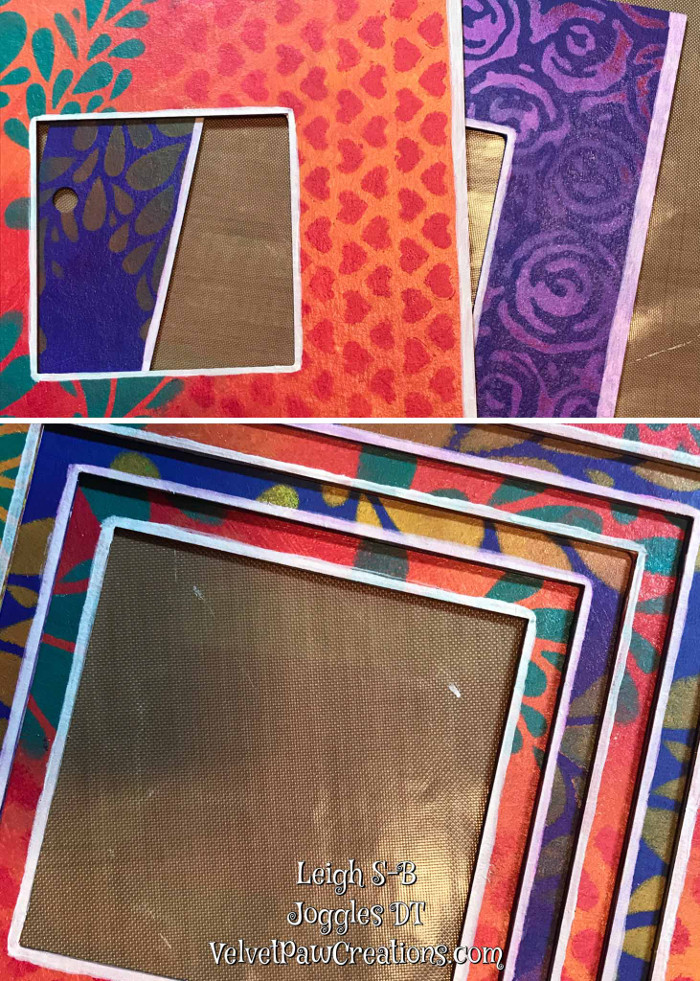
The next step is to add narrow white borders to all the openings and the edges of each page. All the borders are narrow except for the right hand side of each page which I left blank, remember, when stenciling the heart design. I did this to make sure that a whole Heart design was visible and not covered up by the border. Apply Dylusions White Linen paint with a small paint brush or use a broad point water based paint pen. Allow to dry and depending on the thickness of paint application, you will need to do 2-6 coats…you decide how white you want the white borders to be. If you absolutely MUST have opaque pure white borders then I’d suggest you tape off the areas after painting the pages with gesso and before applying the coloured paint.
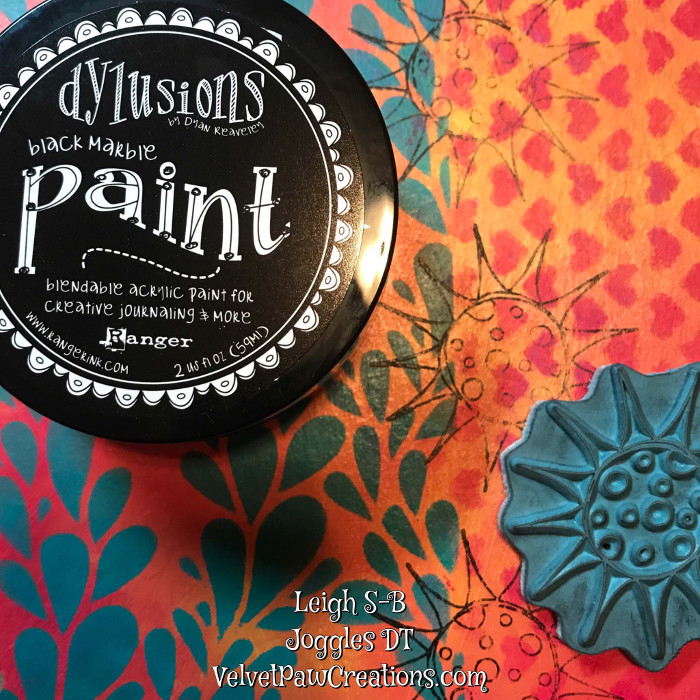
While doing all the coats of white paint on the borders from the step above, break up the monotony and get some rubber stamping in! I randomly stamped the fun Joggles Scribble Flower #4 in Dylusions Black Marble paint onto all the pages….got to have some flowers in Wonderland after all! I put some paint onto my craft sheet, smeared it thinly with my finger, and tapped the stamp into it. Then I tapped once on scrap paper just to make sure there weren’t any paint blobs before stamping onto the pages.
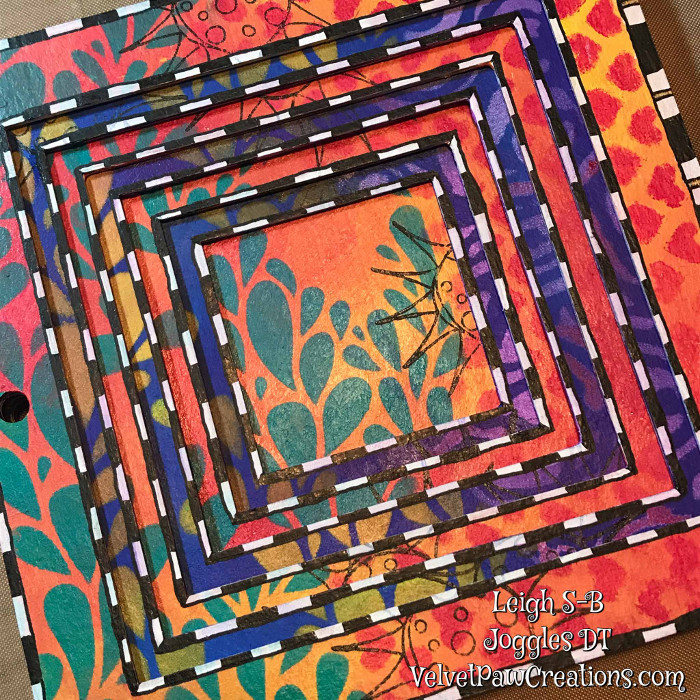
Back to the white borders….add black with a Dylusions paint pen to create the checkerboard stripes.
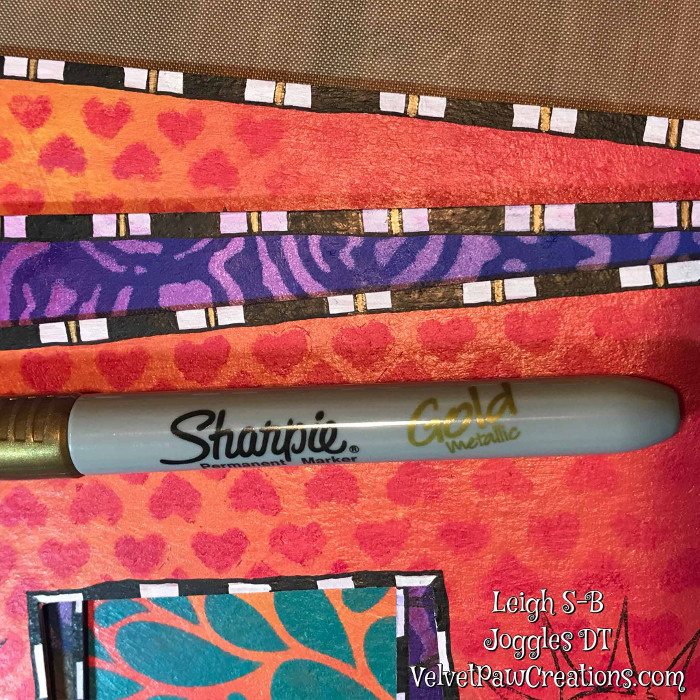
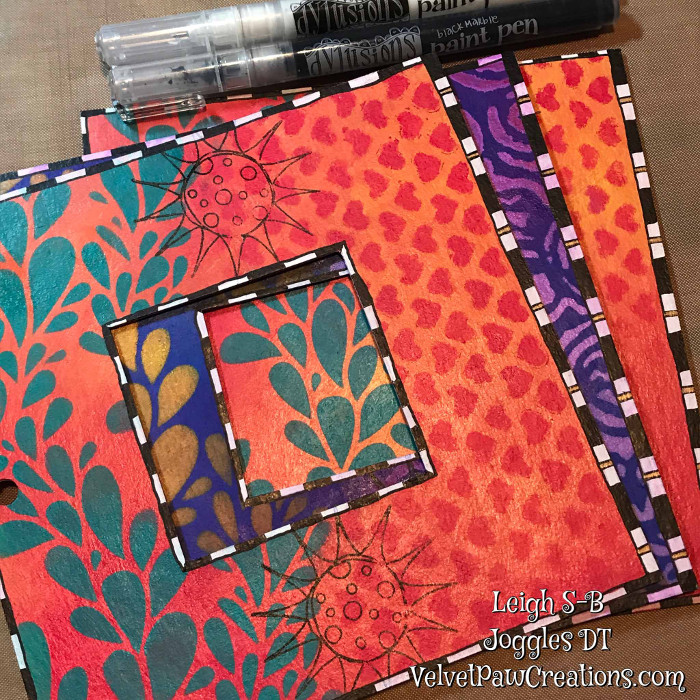
Add extra black stripes to just the right hand side borders and add a stripe of metallic gold.
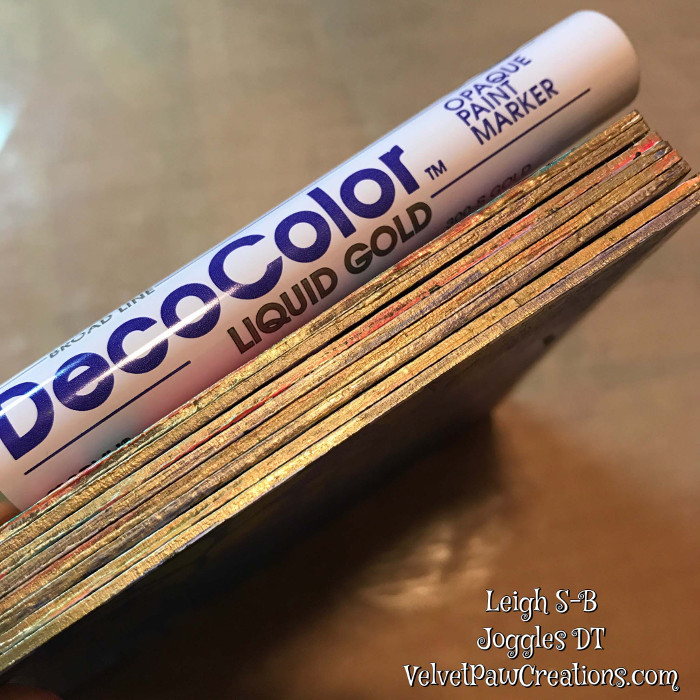
The tunnel book is coming along nicely and now, as it is a Wonderland story, all the page edges need to be gold… it’s a classic after all. Hold all the pages in your hand, squeeze the edges together firmly with your fingers, and apply metallic gold to all four sides of the tunnel book with a DecoColor Liquid gold broad nib paint pen.
Now it’s time to type up the Wonderland story….
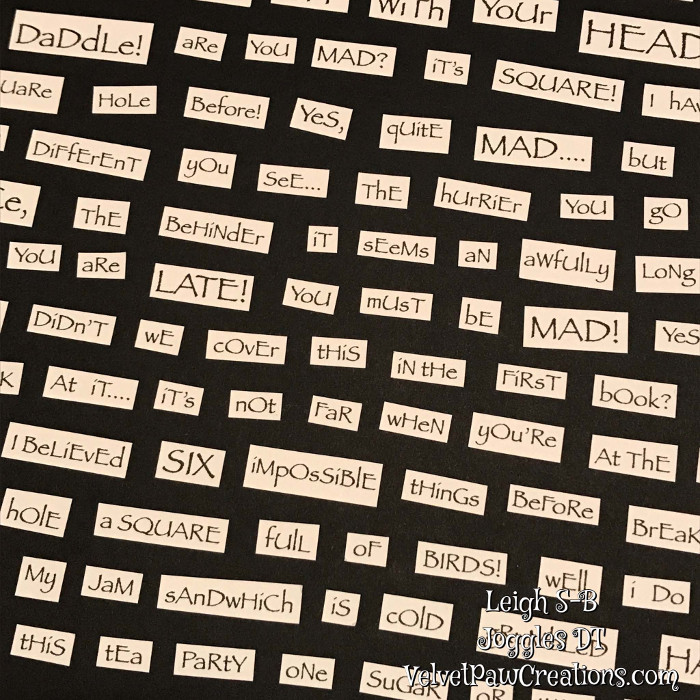
Type the text leaving large spaces between each word. I used the papyrus font and alternated the letters between lower and upper case to further enhance the wacky doodle theme of my book. I also alternated the font size between 12-18 pt. Print out the text, run them through a Xyron to add permanent adhesive and then cut each word out. Scor Tape would also work well here. You’ll notice I paired some of the smaller words like “I” with another so those weren’t too fiddly to cut out. Adhere all the words to a sheet of black cardstock and cut them all out leaving a narrow black border around each text box.
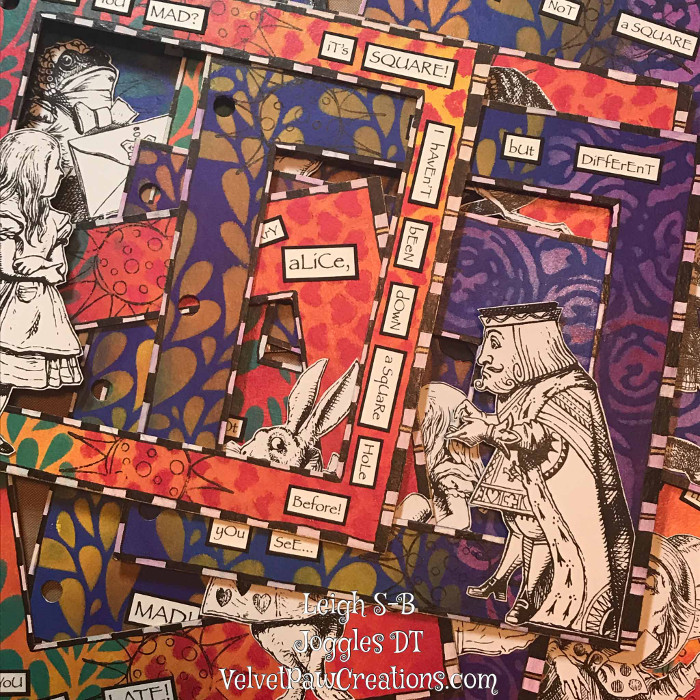
Now to assemble all your hard work! Adhere all the images and the story text to the tunnel book pages with Aleene’s Fast Grab tacky glue.
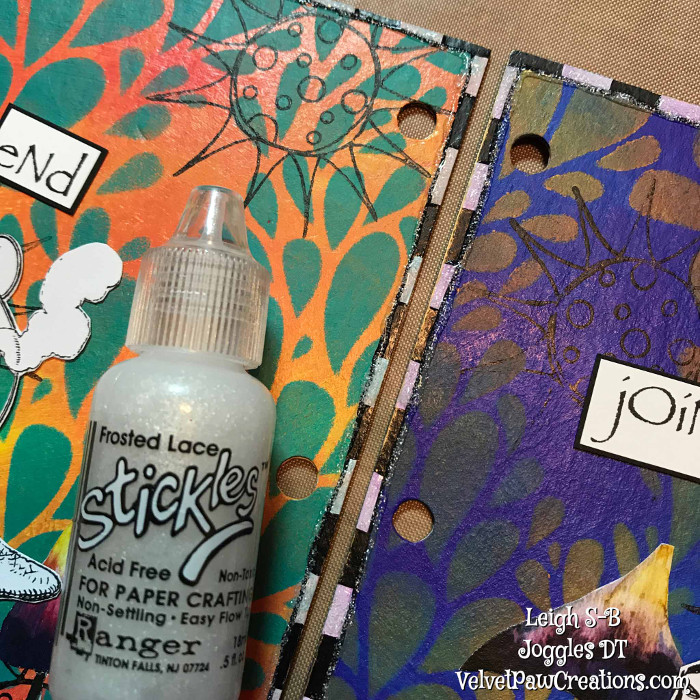
Apply a thin border of Frosted Lace Stickles Glitter Glue to the front and back covers and the white areas of the stripe down the right hand side. “Why?” you ask…because it looks like sugar ;0)
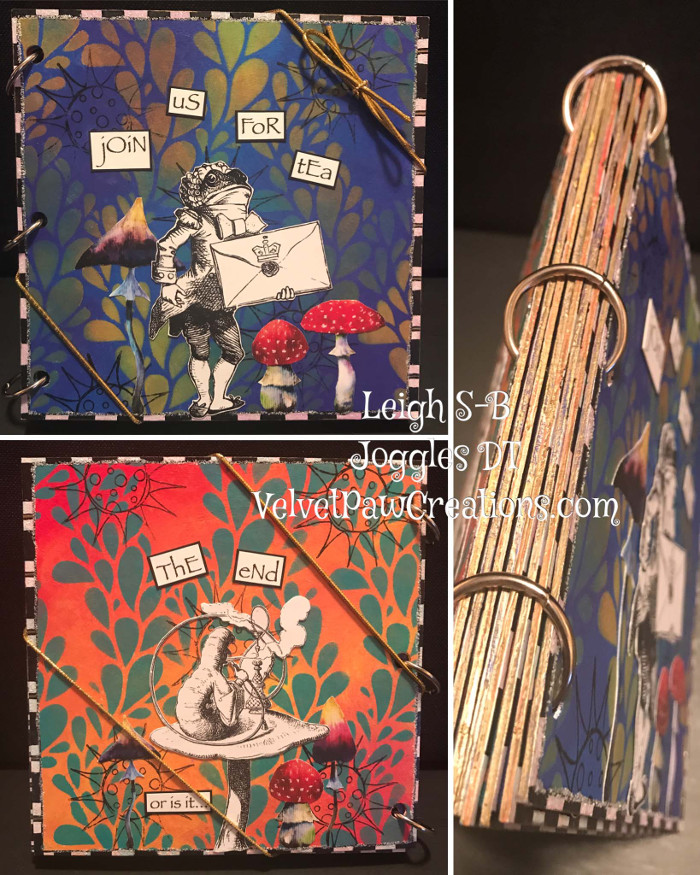
Assemble the tunnel book with the 3 binder rings that come with it and create a closure from a length of metallic gold elastic cord with the ends tied together in a bow. Hook the bow end over the front cover top right corner and bring the elastic around the back and hook it over the bottom left corner to hold the book closed. It’s the perfect presentation if you’re giving the book as a gift.
Happy Stamping!
Leigh S-B
The Sharpie Domino Queen
29 Comments
This project is FANTASTIC… mind-blowing even! Love every part of it. Thanks for the amazing tutorial…
Thank you so much Anne😊
Love this ! It put a big smile on my face 😀 Thanks
Thank you so much Julia, I’m so pleased my AIW book made you smile😊
I am in awe. Speechless.
Thank you, I’m thrilled you like my AIW book😊
Might I just say, “Wow!” absolutely beautiful. Every touch adds a wonderful new visual. So well done.
Thank you so much Gracie, I’m pleased you enjoyed every detail😊
Well this turned out fantastic. And why add stickles? No need to explain… Because stickles are fabulous and sparkly. Love the colors, the stencils. I just did a tunnel l book so I know how long this took you and kudos for a yummy fun project.
LOL, so true, no one needs a reason for Stickles! Thank you so much, it did take a long time to make but totally with it😊
Wow, what a great story book you have created. Made me happy to read it and look through it. And it looks like you’ve used everything in your stash as well. Great!
Thank you so much Betty, I’m pleased it brought you so much joy…that makes all the hard work so worth it😊
So bright and happy! Makes me smile. Thanks for sharing your process!
Thank you so much Faye, I’m delighted it made you smile😊
This is just wonderful! How fun is that story 🙂
Thank you so much Diana😊
Love the vibrant colours and stencilling on this project – totally amazing!
Thank you so much Teresa😊
Wow….this is wonderful in fact FANTASTIC….I love everything about it….you have put a lot of work into this fabulous book…love the story words too!!!
Thank you so much Val, I’m thrilled you love it😊
Absolutely spectacular tunnel book! Thank you for the wonderful tutorial!
Thank you so much Linda😊
Gorgeous tunnel book. Thanks for the tutorial too!
Thank you so much Pat😊
Absolutely fabulous!!! Thank you for such a wonderful tutorial!
Thank you so much Christy😊
Absolutely outstanding work and tutorial! WOW!
Thank you so much Patricia :0)
Just a shouting WOW!! Such really hard work in it, and it’s just simply stunning, every single detail of it. Marvellous!!