Hello Joggles fans! It’s Kim here today. I am so very excited to share with you my very first design team project for Joggles! This month I was asked for my take on some of the famous Wonky Wood Houses from Joggles.

I love these wonky houses. They come in many different shapes and sizes and are open to interpretation by each artist. Here is a list of all the things you will need to make houses like mine.
Joggles Products Used:
Wonky Wood Houses ~ #3, #4, #5
Silks Acrylic Glaze by Luminarte – Iridescent Blue and Guatemalan Green
Joggles Stencils – Branches [30-33714]
Dina Wakley Media White Gesso – 4oz Jar
Inkssentials Glossy Accents 2 fl. oz.
Stampendous Crushed Glass Glitter – Oceanic
Tim Holtz® Distress Spray Stains – Evergreen Bough
Idea-ology by Tim Holtz – Plaquettes
Idea-ology by Tim Holtz – Philosophy Tags
Idea-ology by Tim Holtz – Mini Numerals
Other Items Used:
Paper Clay and Molds; Idea-ology by Tim Holtz Industrious Stickers – Borders or Lace Trim could be substituted
Prima Number Plates
Prima Mechanical Numbers
Tim Holtz Metal Numbers
Wood Sentiments & Twine From my Stash
Ken Oliver Scrapbooking Paper or paper of your choice
Glue gun & glue
Palette knife or scraper

To start off my houses, I prepped them with gesso. When that was dry, I added some fun scrapbook paper from my stash in some colors I liked, using Mod Podge to adhere them.
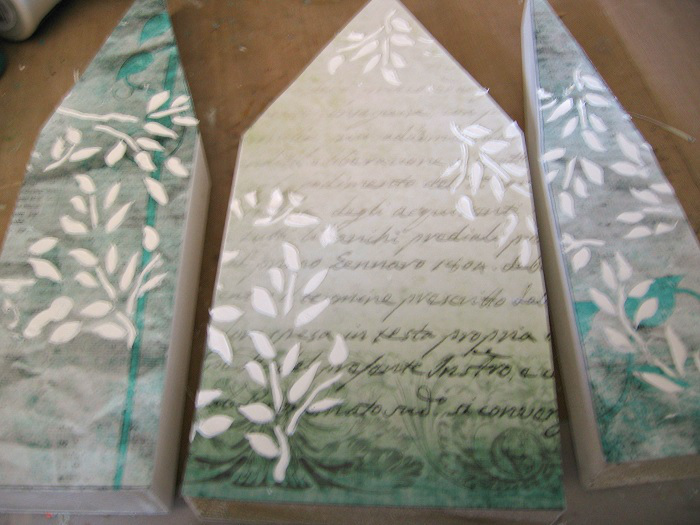
Once the Mod Podge was dry, I got out my Branches Stencil from Joggles and scraped Texture Paste through the openings to add some pretty dimensional images in a few different areas. You can choose any kind of stencil here that will go with the theme of your houses.
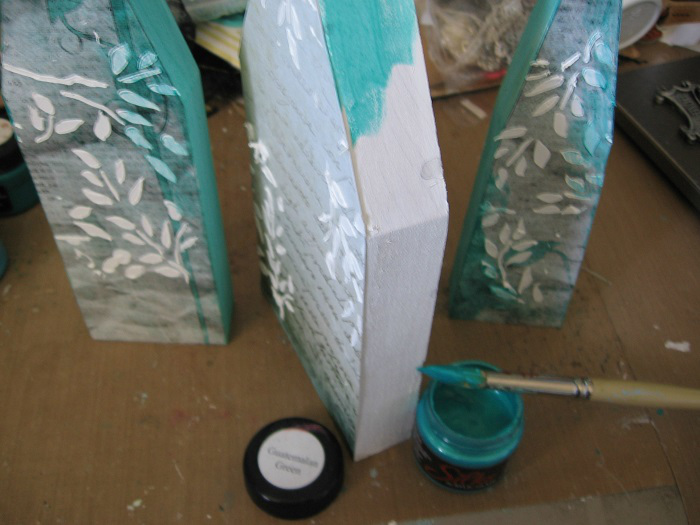
Next, I got out some Silks Acrylic Glaze in Guatemalan Green and painted the sides of the houses. Joggles has a huge selection of Silks. They are some of my favorite items to use on my mixed media projects.
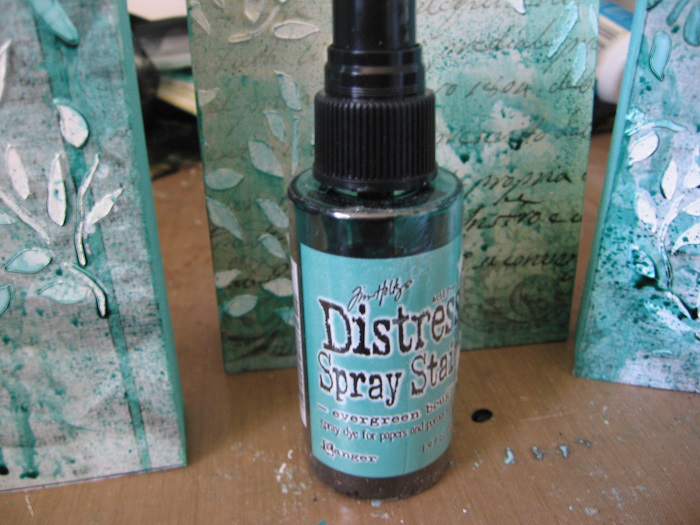
Once everything was dry, I got out my Evergreen Bough Distress Spray Stain and gave some random shots of spray to the houses. This is where the Texture Paste comes in handy, as the spray collects in the crevices and drips down the houses for a fun and shabby look. Use your own creative eye to see where you want to add the sprays to your piece.
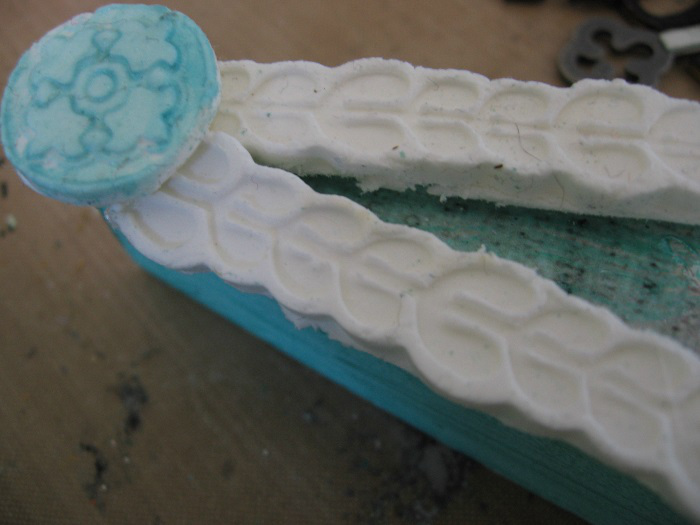
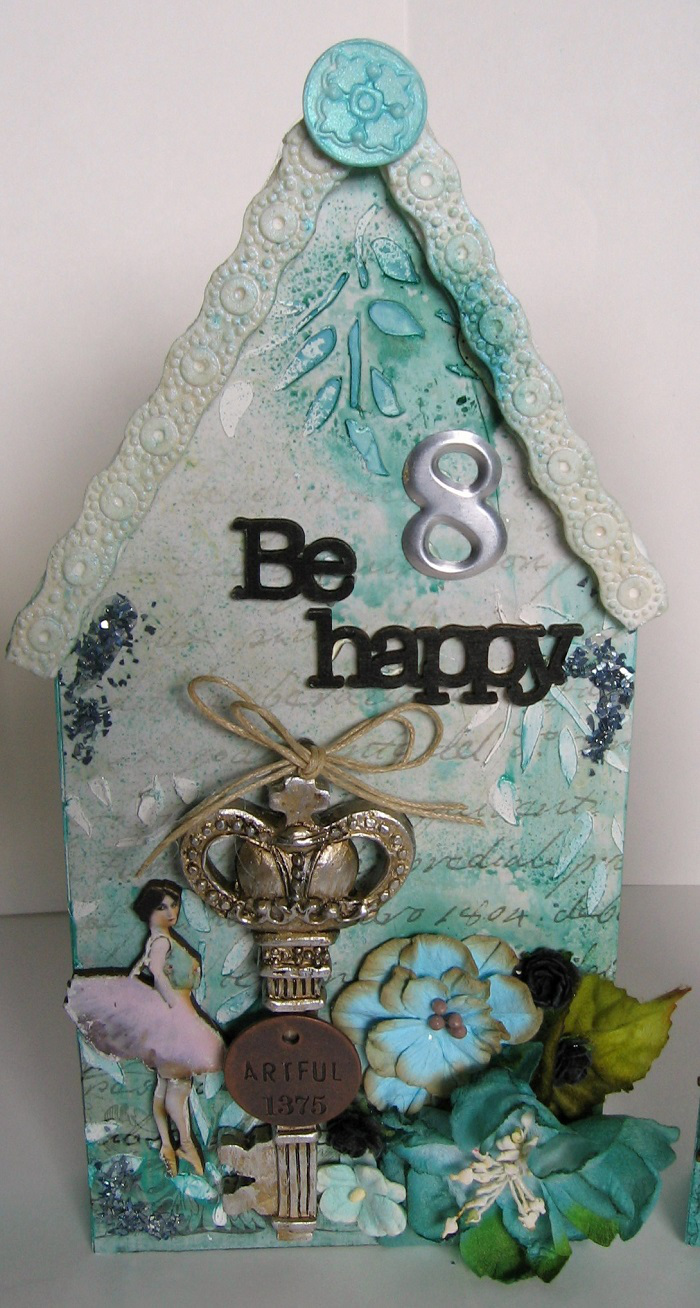
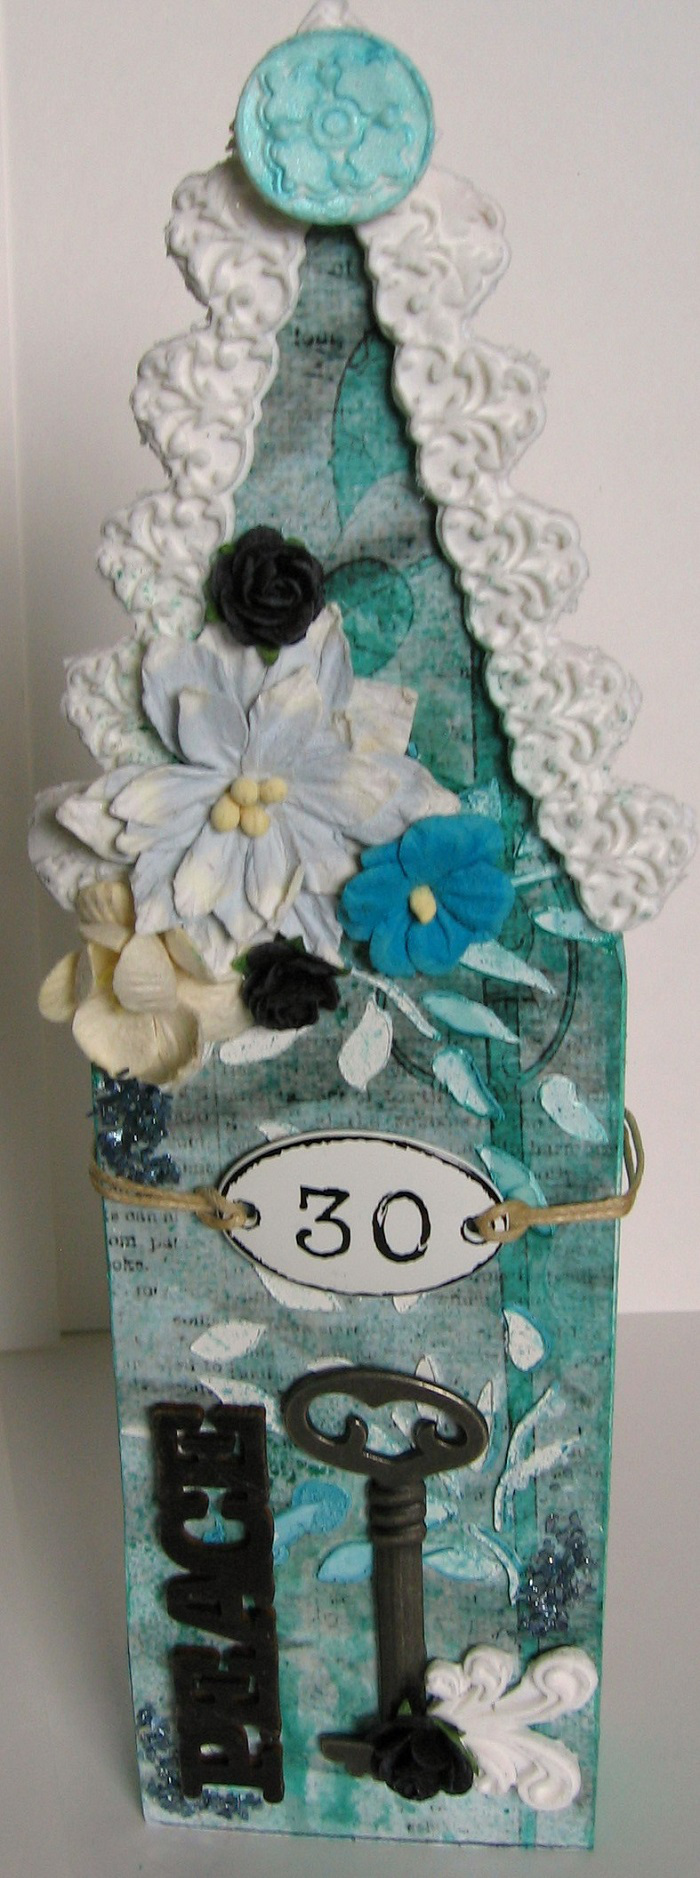
I wanted to create the impression of a roof on top of the houses, so I got out some of my paper clay from my stash and used some molds I have to create the pieces for the roof and the little medallion at the top. I painted the medallion with Silks Acrylic Glaze, using the same color as the sides of the houses, and gave the longer pieces a coat of the Iridescent Blue. This gave the clay a lovely shimmer.

I glued the clay pieces down with hot glue and added some pretty flowers, metal embellishments and some word sentiments, which I adhered with Glossy Accents. I also used Glossy Accents to glue Glass Glitter to some areas of the houses to give them some sparkle. Where you place your embellishments is again up to you. See what looks good and what doesn’t. It’s good to play around with things before you commit and glue them down.
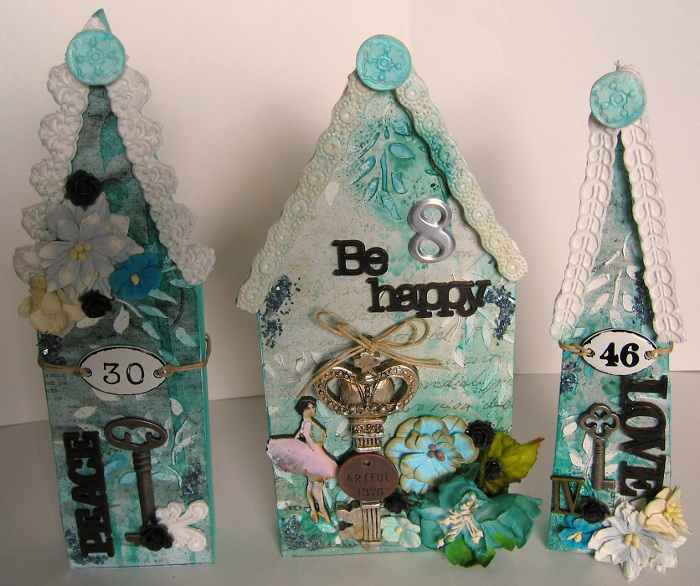
You can see my finished pieces in the photo above. You can decorate your Wonky Wood Houses anyway you like. That is the beauty of these…they can transform into anything. I plan on making more of these little houses in the near future. I hope you will make some and share your Wonky Wood Houses with me!
Thanks so much for stopping by today, and don’t forget to check out the Joggles Store for lots of fun products for all your scrapbooking, mixed media and artistic needs.
2 Comments
These are stunning Kim! Love the whimsical feel of these wonky houses with the gorgeous textures and embellishments. xx
Kim,
Between you and Karen and your Wonky House designs today, I’ve received lots of wonderful ideas.
Thanks so much.