• Blog Home
  • Joggles Store
  • Categories
    • 5 Minutes Of Fun
    • Barb’s Random Art Stuff
    • Design Team
    • Guest Posts
    • MidWeek Muse Video Tutorials
    • Promotions & Giveaways
    • Store Happenings
    • Uncategorized
      • Blog Home
      • Joggles Store
      • Categories
        • 5 Minutes Of Fun
        • Barb’s Random Art Stuff
        • Design Team
        • Guest Posts
        • MidWeek Muse Video Tutorials
        • Promotions & Giveaways
        • Store Happenings
        • Uncategorized
      DT Post – Karen Sessions’ Whimsical Funky Flowers
      July 29, 2016

      Karen Sessions - Funky Flower Stamps - July 29 - 20 logo

      Hello Joggles Fans. It’s Karen here and today I’ll be sharing a tutorial to create some whimsical and colorful flowers using Joggles Funky Flower Stamps and Tim Holtz Distress Inks.
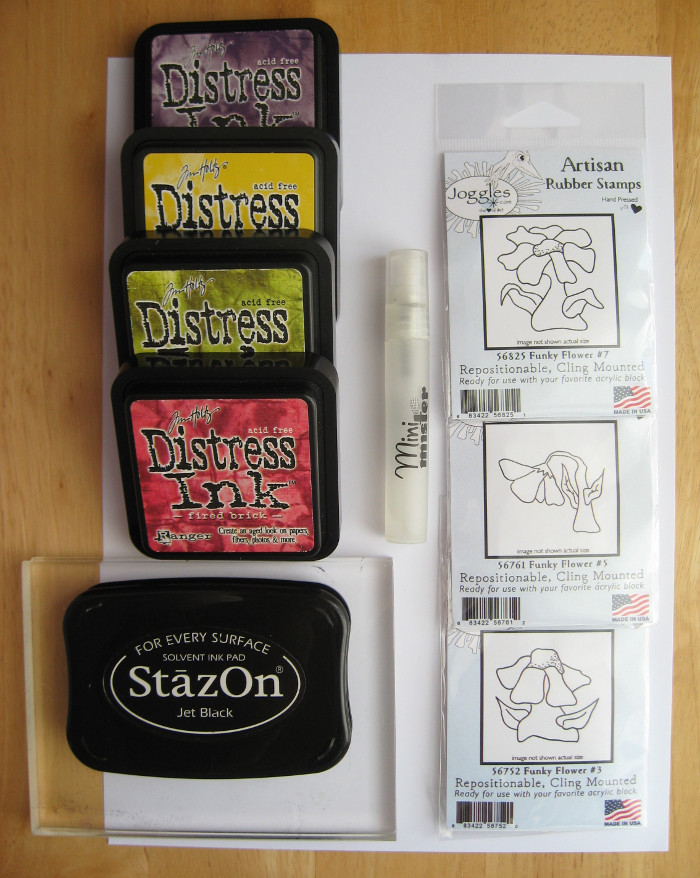
      Karen Sessions - Funky Flower Stamps - July 29 - 1

      Supply List:

      Joggles / Virginia England Cling Mounted Rubber Stamp – Funky Flower #3 [56752]

      Joggles / Virginia England Cling Mounted Rubber Stamp – Funky Flower #5 [56761

      Joggles / Virginia England Cling Mounted Rubber Stamp – Funky Flower #7 [56825]

      Tim Holtz Distress Ink Pads  – Aged Mahogany; Fired Brick; Mustard Seed; Spiced Marmalade; Shabby Shutters; Peeled Paint; Dusty Concord; Worn Lipstick

      Inkssentials Mini Mister

      Inkssentials Non-Stick Craft Sheet

      StazOn Ink Pad  – Jet Black

      Joggles Clear Acrylic Stamp Mounts

      Ranger Heat It Craft Tool

      Other Supplies: white cardstock, card base (5×7″), newspaper, White Gelly Roll Pen (Sakura), sentiment rubber stamp (unknown), yellow dotty cardstock – Seen & Noted – Take Note – 751321 (Pebbles Inc), permanent marker black (Sharpie), Bracket Paper Punch (Martha Stewart)

      Supplies for Additional Card Designs: paper doily, burlap fabric scrap, baker’s twine, crochet lace trim, cork circle 3″, yellow striped paper

      Other Supplies: white cardstock, card base (5×7″), newspaper, Gelly Roll Pen -white (Sakura), paper doily, hessian (burlap) fabric scrap, baker’s twine, lace, cork circle 3″, sentiment rubber stamp, yellow striped cardstock, permanent marker black (Sharpie), Bracket Paper Punch (Martha Stewart)

      Directions:

      Cut white cardstock into 2×8″ strips. Five strips will be enough to create 15 flowers. Cover your work surface with a Non-Stick Craft Sheet. Swipe 2 colors of Distress Inks directly onto the craft mat as detailed below. Please note that the ratio of color for the blossoms is not 50/50 but is 2 to 1 which you can see in the photos below. There are 3 colors for the stems of which there are 2 wide swipes of green and 3 narrow streaks of yellow ink. Mist the inked craft mat lightly with water. Drag a strip of white cardstock over the inks blending the shades and absorbing all the droplets. Repeat this process of inking and misting until the desired intensity of color is achieved. Set aside to dry or use a heat gun to speed the drying process.

      Karen Sessions - Funky Flower Stamps - July 29 - 2

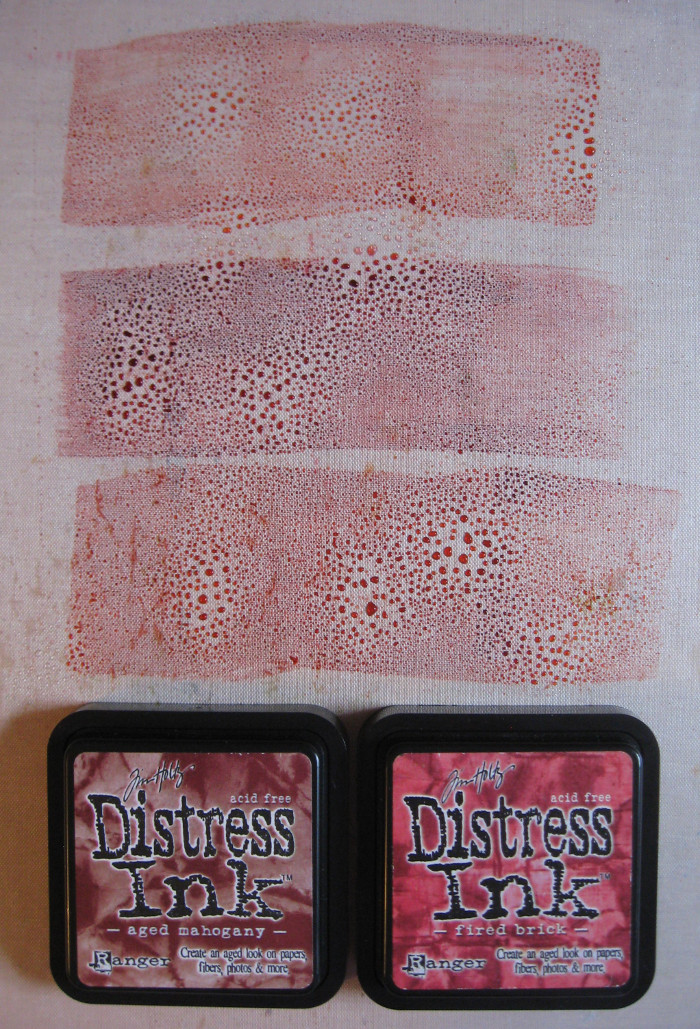
      Red Blossoms – Aged Mahogany & Fired Brick (1 strip)

      Karen Sessions - Funky Flower Stamps - July 29 - 3

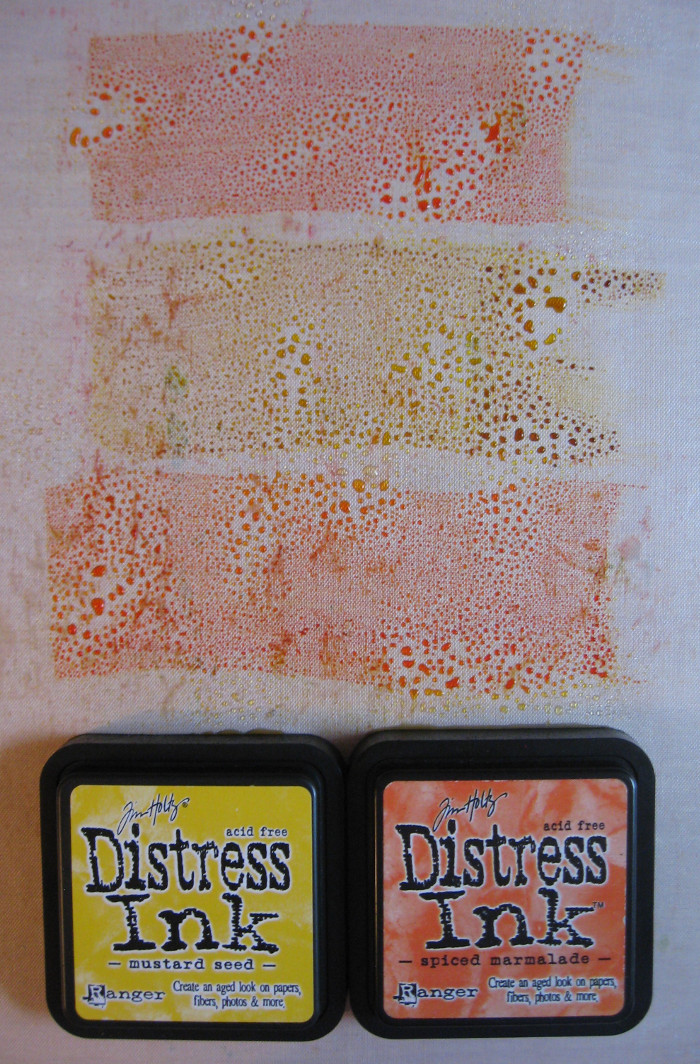
      Yellow Blossoms – Mustard Seed & Spiced Marmalade (1 strip)

      Karen Sessions - Funky Flower Stamps - July 29 - 4

      Purple Blossoms – Dusty Concord &Worn Lipstick (1 strip)

      Karen Sessions - Funky Flower Stamps - July 29 - 5

      Green Stems – Shabby Shutters & Peeled Paint & Mustard Seed (2 strips)

      Karen Sessions - Funky Flower Stamps - July 29 - 7

      This is an example of what your strips will look like once they are dragged through the colours. Allow to dry.

      Karen Sessions - Funky Flower Stamps - July 29 - 8

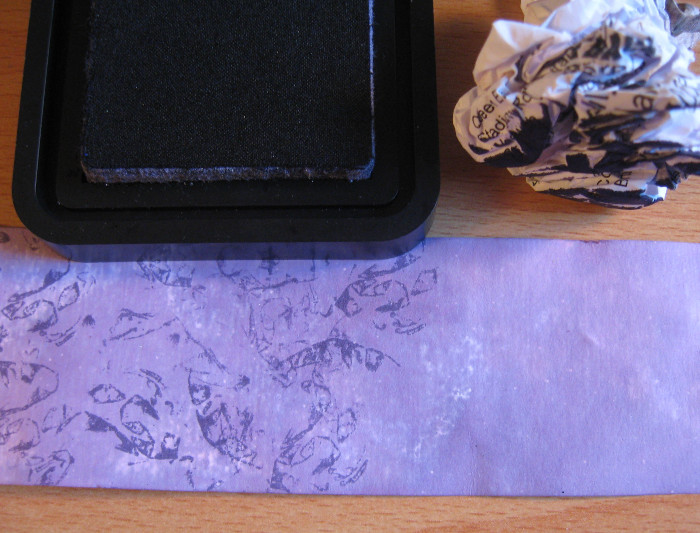
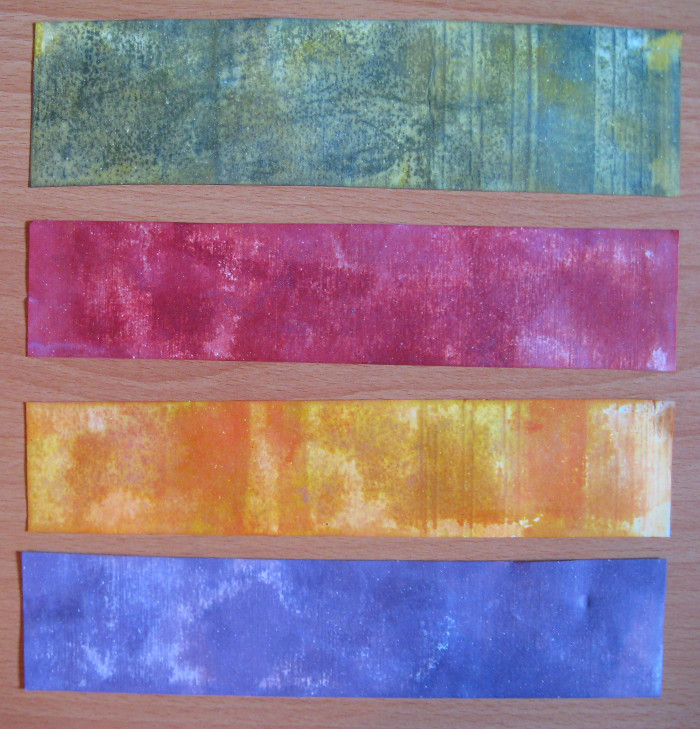
      Create random texture on the Distress Inked strips. Scrunch up a piece of newspaper or copy paper into a ball about the size of a golf ball. Use the crumpled paper as a stamp. Tap it onto the ink pad and press it to the paper strip. Re-position the newspaper ball and stamp again without re-inking to get a lighter impression which adds more depth to the design. Stamp the newspaper ball over the strips covered with Distress Ink, twisting your wrist in different directions for each new impression so that a pattern does not develop. Aim to create a random unpredictable texture.

      Background Texture Distress Ink Color: Red Strip –  add Fired Brick ; Yellow Strip – add Mustard Seed; Purple Strip – add Dusty Concord; Green Strip – add Peeled Paint

      Karen Sessions - Funky Flower Stamps - July 29 - 10

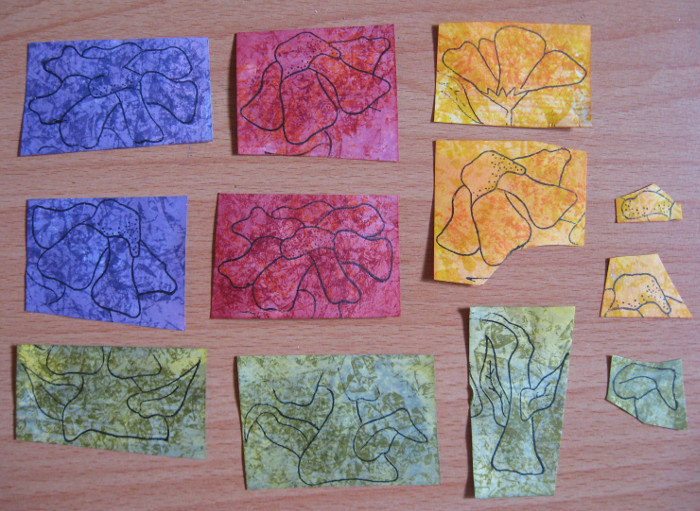
      Use StazOn Jet Black Ink to stamp the Funky Flower stems onto the green strips. Also, stamp just the leaves. Next, stamp the Funky Flower blossoms onto the red, yellow, & purple strips. Stamp the flower centers onto the yellow strip.

      Karen Sessions - Funky Flower Stamps - July 29 - 11

      Fussy cut all the stems and blossoms. At this stage, I decided they still needed more contrast so I used the newspaper ball and re-applied ink to add more defined texture. I applied darker inks on the red and yellow and added more impressions to the purple and green images.

      Background Texture Distress Ink Color: Red blossoms – add Aged Mahogany; Yellow blossoms – add Spiced Marmalade; Purple blossoms – add Dusty Concord; Green blossoms – add Peeled Paint

      Karen Sessions - Funky Flower Stamps - July 29 - 12

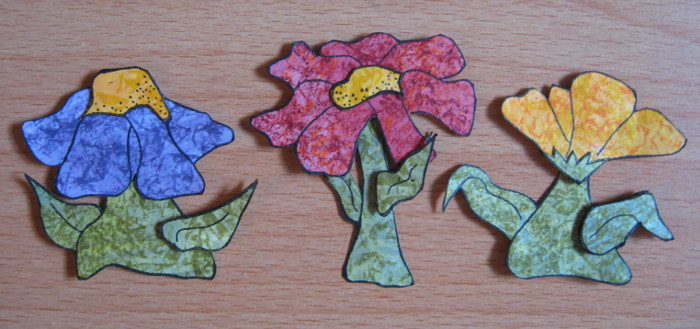
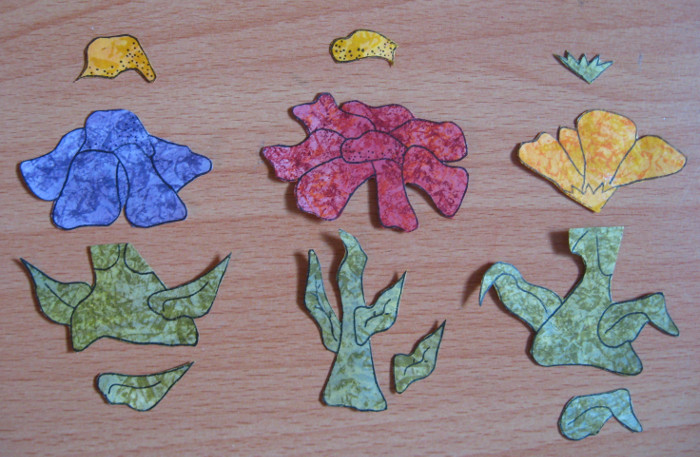
      When building the flowers, you can interchange blossoms and stems so that there is even more variety than the three original stamp designs. Attach the flower’s center and adhere the leaves with dimensional foam tape.

      Karen Sessions - Funky Flower Stamps - July 29 - 13 logo

      Assemble the card by attaching a strip of pattern paper across the card horizontally 1/2″ from the bottom edge. Use scallop edge scissors to cut a white cardstock strip (1×7″) and slip it under the pattern paper so it is just peeking out.

      Karen Sessions - Funky Flower Stamps - July 29 - 15

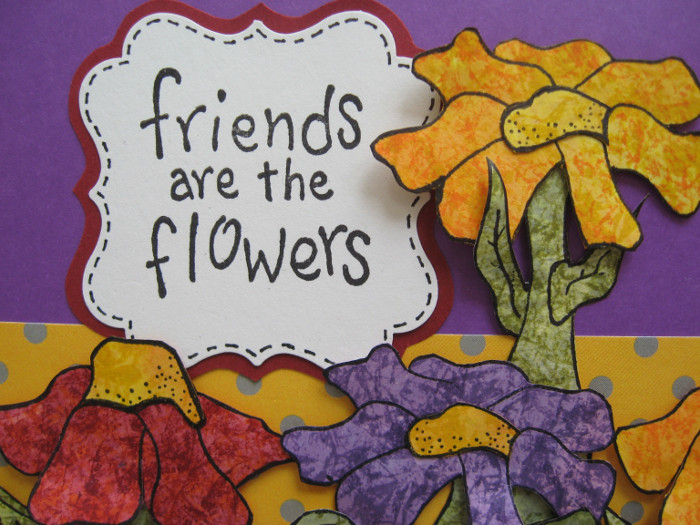
      Use black ink to stamp the sentiment onto white cardstock. Then use a 2″ bracket paper punch to cut it. Mat the sentiment with red cardstock and adhere it to the upper left. Attach 5 Funky Flowers of varying heights using dimensional foam tape and slightly overlapping images. Embellish the lower edge by adding faux stitching with a white gel pen. TIP: Tidy up the raw edges after cutting out the pieces. Use a permanent black marker to cover any white paper that may be exposed. It is also possible to touch up the outline if the stamped impression is too faint.

      Karen Sessions - Funky Flower Stamps - July 29 - 20 logo

      I hope you have enjoyed my tutorial using Funky Flower Stamps (#3, #5, & #7) I made three more cards to inspire you because I had made so many flowers. These cards are perfect for a summertime get well or thank you card and all having a charming country feel to them.

      Karen Sessions - Funky Flower Stamps - July 29 - 21 logo

      Be on the look out for banners, burlap, and bows of crochet lace trim to add variety and embellish your designs.

      Thanks for visiting! Have a great day!

      Card MakingDistress InksRubber StampingVirginia England
      Share

      Design Team

      Bonnie Irvine

      You might also like

      Just For You, A Free AALL & Create Stamp Set Named Lovely Bubbly!
      April 3, 2024
      Shape Your Card Style With Our Shaped Panel Cards To Match Elizabeth’s Long Stemmed Botanicals!
      October 6, 2023
      NEW Lisa Horton Cloud 9 Interference Ink Pads – 12 More Dual Colors For Twice The Fun!
      August 9, 2023

      6 Comments


      Virginia England
      July 29, 2016 at 8:06 am
      Reply

      Karen I absolutely Love your coloring technique on these flowers….it’s always fun to see how each artist chooses to color elements for use in their projects.
      Your projects are Awesome!!!


        Karen
        July 29, 2016 at 4:03 pm
        Reply

        Thanks, that is so kind of you to say.

      Faye Touve
      July 29, 2016 at 12:17 pm
      Reply

      These are so bright and cheerful. I agree with Virginia, your coloring technique is wonderful and so very creative! Thank you for sharing your talent with us!


        Karen
        July 29, 2016 at 4:04 pm
        Reply

        Thank you, I’m glad you enjoyed them.

      Kay
      July 29, 2016 at 3:57 pm
      Reply

      Karen, I just love how you have created all this!!!! All my Funky flower stamps are out and I am cutting the paper. Missing one of the little guys………so I am off to order it. Love Virginia England’s stamps. Thanks -both of you for sharing your creativity.


      Karen
      July 29, 2016 at 4:07 pm
      Reply

      Thank You! I’m happy you’ve been inspired to give them a try.


      Leave a Reply Cancel reply

      Your email address will not be published. Required fields are marked *

      • Follow Us

        FacebooktwitterpinterestyoutubeinstagramFacebooktwitterpinterestyoutubeinstagram
      • Share This Page

        FacebooktwitterredditpinterestlinkedintumblrmailFacebooktwitterredditpinterestlinkedintumblrmail
      • Recent Posts

        • Our New Mixed Media Specimen Cards – 2 Window Styles + 4 Surfaces To Create On! April 29, 2026
        • Uniquely Creative Haul – check it out! April 26, 2026
        • Creating Gel Prints With Our Tiny Corrugated Cardboard April 22, 2026
        • Erin Bishop’s New Mini Blooms And Stems Clear Stamps! April 17, 2026
        • Gel Print Tests: Crepe Style Medical Exam Paper April 17, 2026
      • Search The Joggles Blog

      • Subscribe To The Joggles Blog!

        Enter your email address to receive a notification when there’s a new blog post.

      • Categories

        • 5 Minutes Of Fun
        • Barb's Random Art Stuff
        • Design Team
        • Guest Posts
        • MidWeek Muse Video Tutorials
        • Promotions, Sales & Giveaways
        • Store Happenings
        • Uncategorized
      • Tags

        Accordion Books Alcohol Inks Art by Marlene Art Journaling ATCs Bloobel Stamps Book Making Card Making Cat Kerr Collage Sheets Cosmic Shimmer Deli Paper Dina Wakley Distress Inks Distress Oxide Inks Doodles & Tangles Dylusions Elizabeth St. Hilaire Finnabair Art Alchemy paint Foam Stamps Freebies Gel Press Plates Gel Printing Glittery Stuff Holiday Inks & Sprays Itty Bitty ATC Stencils Joggles Products Marabu Margaret Applin Mixed Media Product Spotlight Ranger Rebekah Meier Rice Paper Rubber Stamping Scrapbook Papers Stampotique Originals Stencils Sticky Snippets™ Tim Holtz Tunnel Books Video Tutorial Virginia England Wonky Wood Houses
      • Archives

        • April 2026
        • March 2026
        • February 2026
        • January 2026
        • December 2025
        • November 2025
        • October 2025
        • September 2025
        • August 2025
        • July 2025
        • June 2025
        • May 2025
        • April 2025
        • March 2025
        • February 2025
        • January 2025
        • December 2024
        • November 2024
        • October 2024
        • September 2024
        • August 2024
        • July 2024
        • June 2024
        • May 2024
        • April 2024
        • March 2024
        • February 2024
        • January 2024
        • December 2023
        • November 2023
        • October 2023
        • September 2023
        • August 2023
        • July 2023
        • June 2023
        • May 2023
        • April 2023
        • March 2023
        • February 2023
        • January 2023
        • December 2022
        • November 2022
        • October 2022
        • September 2022
        • August 2022
        • July 2022
        • June 2022
        • May 2022
        • April 2022
        • March 2022
        • February 2022
        • January 2022
        • December 2021
        • November 2021
        • October 2021
        • September 2021
        • August 2021
        • July 2021
        • June 2021
        • May 2021
        • April 2021
        • March 2021
        • February 2021
        • January 2021
        • December 2020
        • November 2020
        • October 2020
        • September 2020
        • August 2020
        • July 2020
        • June 2020
        • May 2020
        • April 2020
        • March 2020
        • February 2020
        • January 2020
        • December 2019
        • November 2019
        • October 2019
        • September 2019
        • August 2019
        • July 2019
        • June 2019
        • May 2019
        • April 2019
        • March 2019
        • February 2019
        • January 2019
        • December 2018
        • November 2018
        • October 2018
        • September 2018
        • August 2018
        • July 2018
        • June 2018
        • May 2018
        • April 2018
        • March 2018
        • February 2018
        • January 2018
        • December 2017
        • November 2017
        • October 2017
        • September 2017
        • August 2017
        • July 2017
        • June 2017
        • May 2017
        • April 2017
        • March 2017
        • February 2017
        • January 2017
        • December 2016
        • November 2016
        • October 2016
        • September 2016
        • August 2016
        • July 2016
        • June 2016
        • May 2016
        • April 2016
        • March 2016
        • February 2016
        • January 2016
        • December 2015
        • November 2015
        • October 2015
        • September 2015
        • August 2015
        • July 2015
        • June 2015
        • May 2015
        • April 2015
        • March 2015
        • February 2015
        • January 2015
        • December 2014
        • November 2014
        • October 2014
        • September 2014
        • August 2014
        • July 2014
        • June 2014
        • May 2014
        • April 2014
        • March 2014
        • February 2014
        • January 2014
        • December 2013
        • November 2013
        • October 2013
        • September 2013
        • August 2013
        • July 2013
        • June 2013
        • May 2013
        • April 2013
        • March 2013
        • February 2013
        • January 2013
        • December 2012
        • November 2012
        • October 2012
        • September 2012
        • August 2012


          © Copyright Joggles.com, Inc.