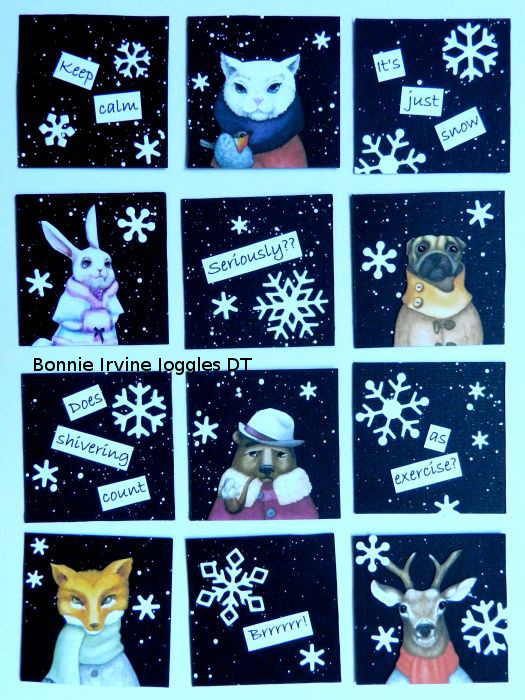
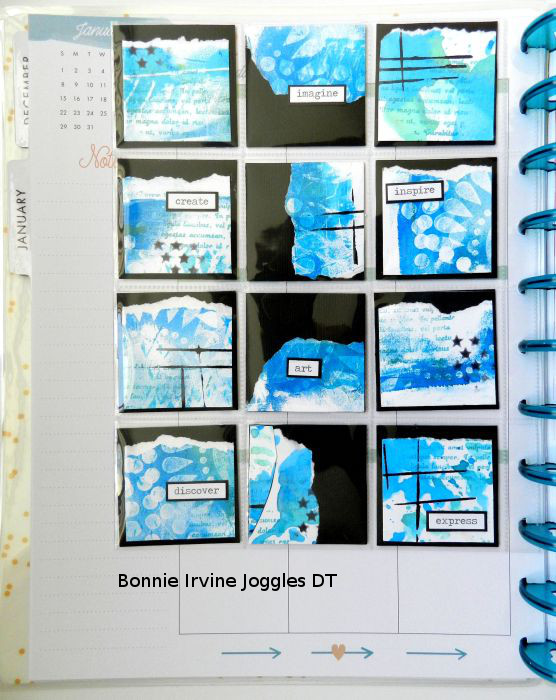
Hi everyone. It’s Bonnie here today with something a little different. As this year comes to a close and the winter season has just officially begun here, I like to get my Create 365 Classic Happy Planner ( which just so happens to be on sale this week) ready for a new year, season, and month. I love to include art in my planner so that it’s fun to open and to keep current so I have created a mini Pocket Letter using one of the Create 365 page protectors with which has 12 2×2 inch openings or pockets. Usually Pocket Letters are created with ATC size (2.5×3.5 inch) pieces of art but I love creating twinchies (2×2 inch pieces of art) and I am smitten with the Snowy Portrait and Winter Animals Collage sheets.
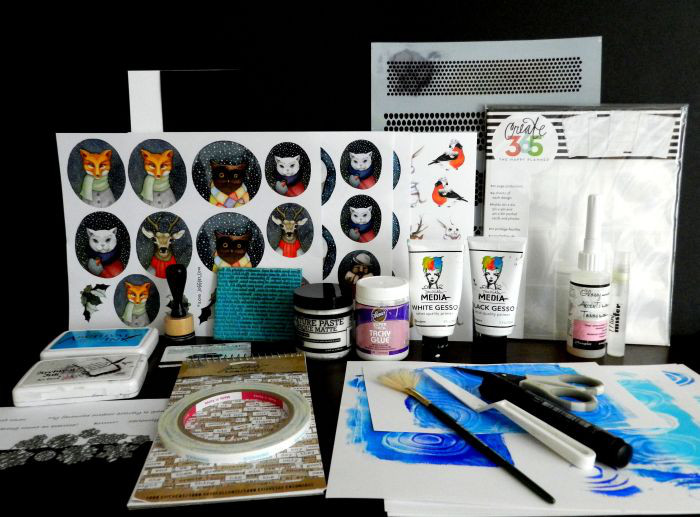
Supplies:
Create 365 Happy Planner Page Protectors
Joggles Collage Sheets – Snowy Portrait 1; Snowy Portrait 2; Snowy Portrait 3; Winter Animals;
Faber Castell Pitt Big Brush Pen – Black
Aleene’s Super Thick Tacky Glue – 4 oz. jar
Inkssentials Glossy Accents 2 oz. bottle
Dina Wakley Media : White Gesso; Black Gesso; Palette Knife;
Princeton Watercolor Brush – #4 Fan
Idea-ology by Tim Holtz – Chit Chat Stickers
Joggles Cling Mounted Rubber Stamp – Nonsense Latin Text
Joggles Stencil – Punchinella Quintet Minis
Archival Ink Pad – Forget-Me-Not
Ranger Inkssentials Mini Ink Blending Tool
Inkssentials NonStick Craft Sheet
Other: black card stock; white card stock; scissors; toothpick; snowflake die or punches; computer generated sayings; “mop-up” paper scraps and gel prints; plastic gift or credit card;
Here is my process:
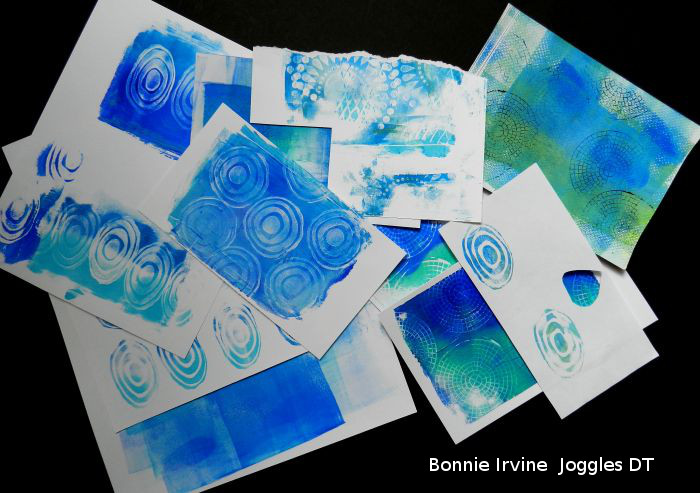
I wanted my pocket twinchies to be double sided so that there would be a fun view coming and going so I chose to use some of my mop-up papers and gel print scraps from previous projects for the backs. I always keep a stack of ATC size (2.5 x 3.5) pieces of white card stock on my table and use them to mop up extra spray or paint from my craft sheet. Also, when I am using my brayer to apply paint to a project, I spread the paint on my Gel Press Plate instead of my craft sheet. Then when I am finished brayering paint onto stamps or background, I use foam stamps on the left over paint to leave an impression and then pull prints on white card stock or printer paper for later use. Above is a photo of some papers with similar paint and spray colours which I grabbed for this project. What I didn’t use here will show up in later art journal pages or in some collage work.
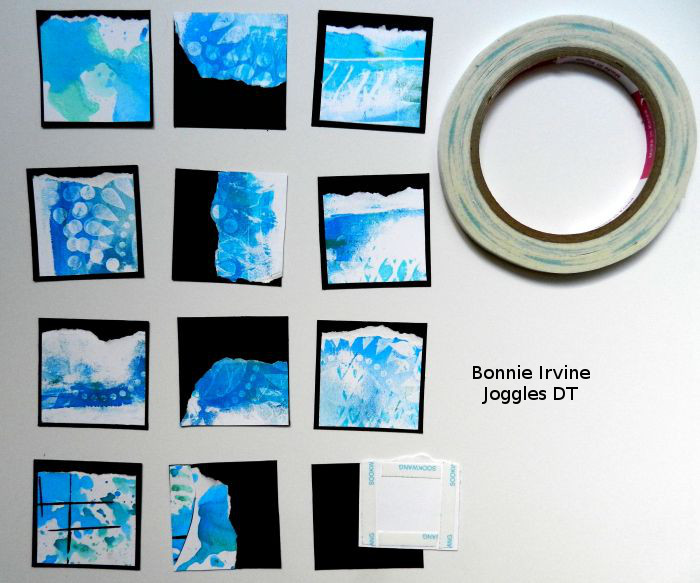
To begin, I cut black card stock into 2×2 inch squares. This would form the foundation for the art. I decided to do the reverse side of the twinchies first because I knew it would be messier and I didn’t want stray paint and ink to get on the side with the images. I cut the gel printed and mop-up papers into 1 7/8 inch strips and then tore the top edge of each to allow some of the black background to still show. For the middle column twinchies, I tore the pieces smaller but left the width the two full inches. You can see where they are aligned with the one edge of the black. These pieces were attached to the background with Scor Tape.
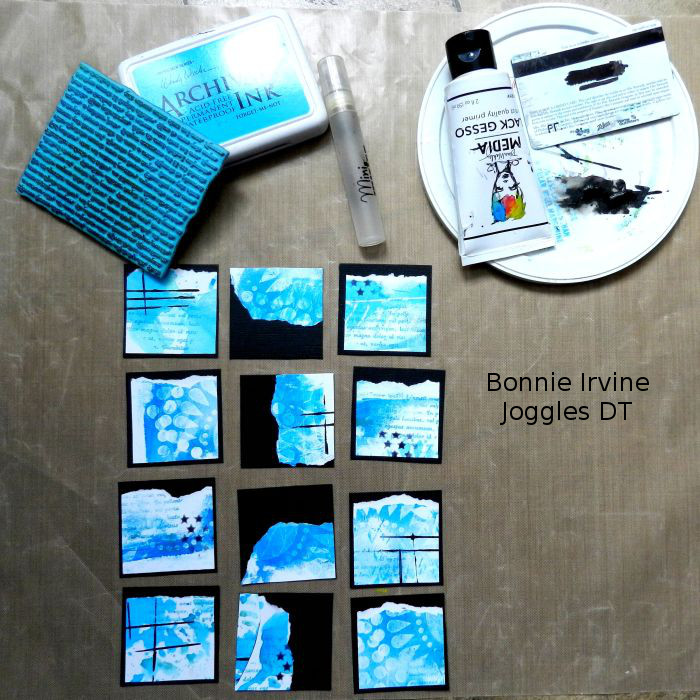
The twinchies didn’t have the layering and depth I wanted so I added some stamping on some with Joggles Nonsense Latin Text Cling Mounted Rubber Stamp and Forget-Me-Not Archival Ink. I also misted a little Dina Wakley Media Black Gesso on my NonStick Craft Sheet to make it ink-like consistency and used an old plastic gift card to create some lines on a few of the twinchies.

Jet Black Archival Ink was applied through the stars on the Joggles Punchinella Quintet stencil using a Mini Ink Blending Tool. You will notice that some of the squares have no additional black gesso or ink. I left the ones with my favourite patterns untouched, partly to add variety to the twinchies and partly to allow the great prints to stand alone. These had originally been done with 3 colours of blue Liquitex Basics Acrylic Paint and Joggles Teardrops in the Round Foam Stamp.
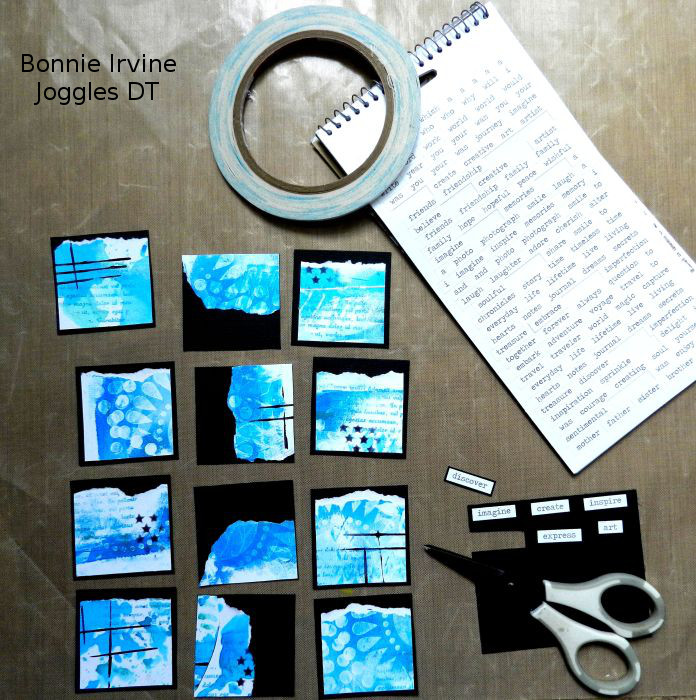
Favourite words were chosen from Tim Holtz Chit Chat Stickers and adhered to black card stock. They were then cut leaving a narrow black mat and adhered to some of the individual squares using Scor Tape.
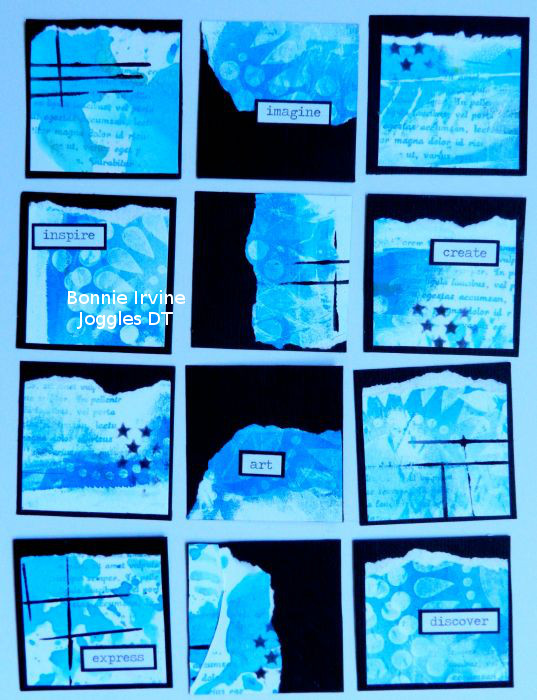
One side finished!
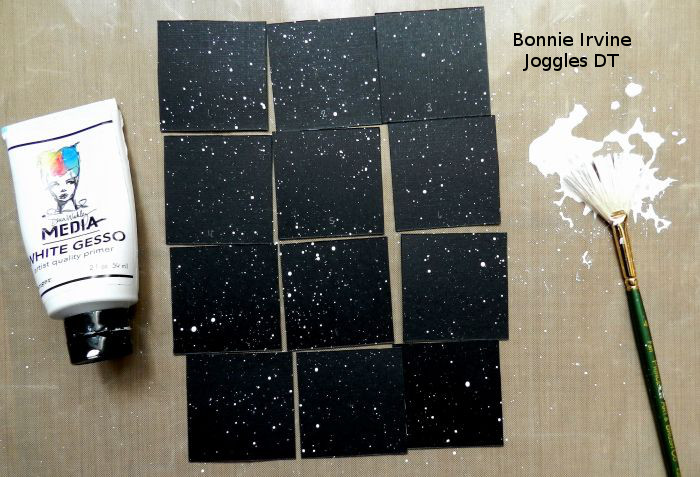
To begin the front of the twinchies, white gesso was placed on the NonStick Craft Sheet and spritzed with a little water to make it a bit runnier. A #4 fan brush was loaded with the gesso and then tapped over the plain black card stock backgrounds of the twinchies to replicate the snowy effect which I would be trimming away from the collage sheets.
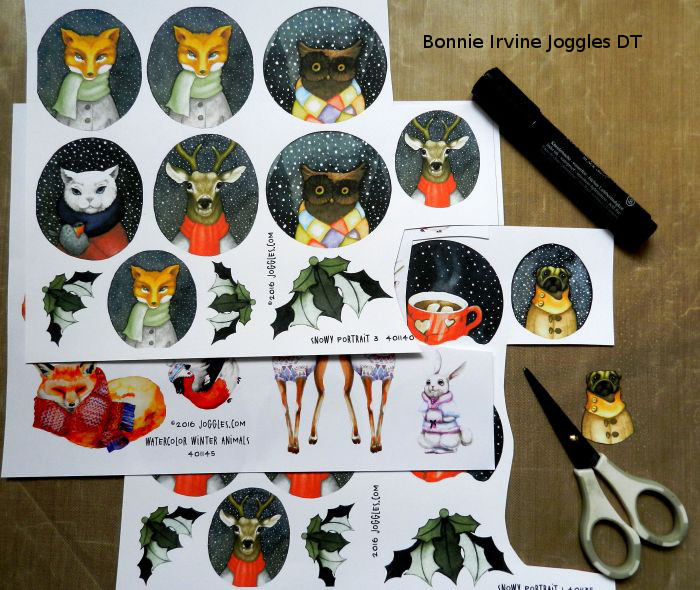
While the gesso was drying, 6 of the smallest animals from the Snowy Portrait 1, 2 & 3 and the Winter Animal Collage sheets were fussy cut. For the deer, I tapered his antlers so they weren’t squared off where they had touched the top of the circle. Black Big Brush Pen was used to edge each image to get rid of the distracting white edges.
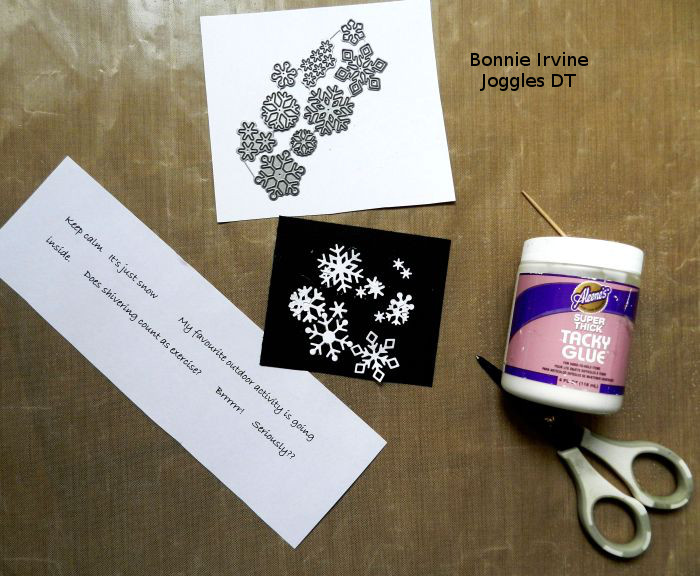
Four winter sayings were printed onto white card stock and the words cut apart individually. White snowflakes were die cut and the animals, words, and flakes were added to the snowy backgrounds with Aleene’s Super Thick Tacky Glue and a toothpick.
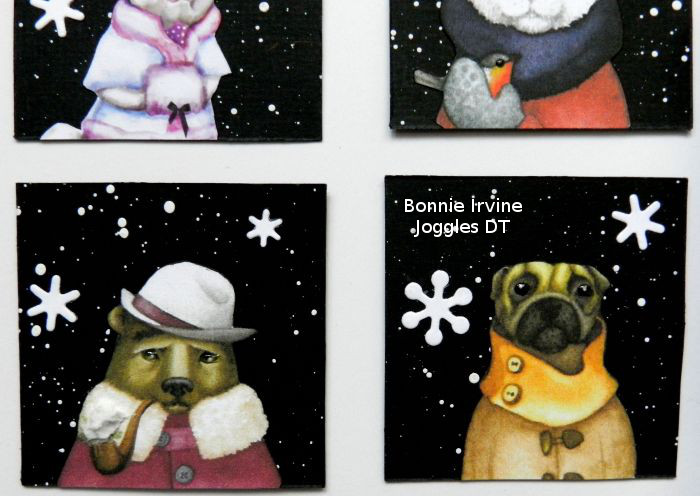
Glossy Accents was added to all of the eyes to create dimension and shine. The bear had some greenery coming from his pipe which I felt was too Christmas-y for my purposes so I added some Ranger Texture Paste over that with a palette knife…snow or smoke…works for me 🙂
Now that both sides were completed, it was a matter of inserting the twinchies into their pockets and inserting the page protector into my planner.

The best part is I can move it along through the weeks and months until spring arrives and with it, a new page protector filled with different art.
If you don’t use a planner, you could also do a similar page with ATCs and the hockey card page protectors. Or how about creating a little twinchie book with binder rings as a gift to someone to brighten this lonnnggg season.
As for me, I’m moving on to decorate my dashboard and monthly spread for January. Merry Christmas and Happy Holidays to all who celebrate at this time of year. Thanks from all of the Design Team members for your support, lovely comments, and friendship throughout this past year. We have loved every minute of it!
Leave A Reply