

Hi everyone! It’s Bonnie here today sharing a tag book I created featuring some of the GirlItude Collage Sheets images as well as several of Joggles/Margaret Applin Designs Cling Mounted Rubber Stamps. I have also used a binding method that I often use for my individual art journal pages.
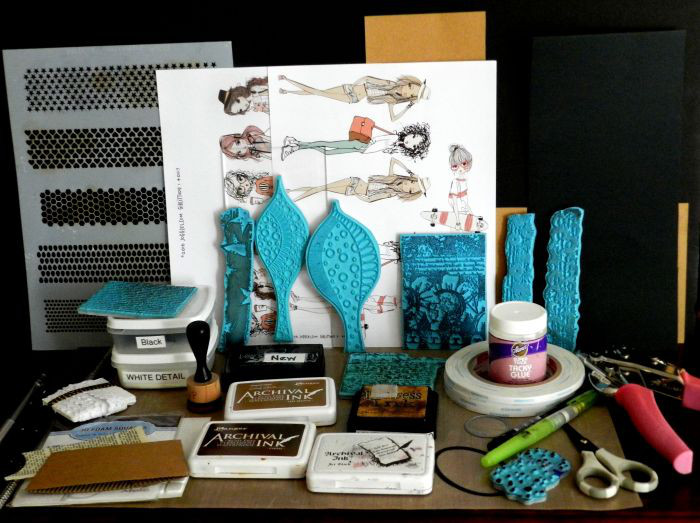
Supplies:
Joggles Collage Sheets: GirlIttude 1; GirlItude 2
Joggles Cling Mounted Rubber Stamps: Jurassic Leaves #3; Jurassic Leaves #5; Nonsense Latin Text; Background Noise – Dots
Joggles/ Margaret Applin Designs Cling Mounted Rubber Stamps: Garden Collage; Poeme Floral Border; Grunge Spots Border; Grunge Stars Border; Vintage Correspondence
Joggles Clear Acrylic Stamp Mounts
Joggles Stencils – Punchinella Quintet – Minis
Archival Ink Pads: Tree Branch; Jet Black; Coffee
Tim Holtz Distress Ink Pad – Vintage Photo
Ranger Inkssentials Mini Ink Blending Tool
Scor Tape: 0.5 inch; 0.25 inch
Versamark Watermark Clear Ink Pad
Aleene’s Super Thick Tacky Glue – 4 oz. jar
Scrapbook Adhesives 3D Self Adhesive Foam Squares – .5 x .5 inches
Faber Castell Pitt Artist Brush Pen – Black
Faber Castell Pitt Artist Pen – (F) Fine Tip Black
Tim Holtz Water Brush by Ranger – Fine Detail Nib
Other: book text paper; coffee sleeves; white card stock; black card stock; kraft card stock; ruler; scissors; hole punch; heat tool; white embossing powder;black embossing powder; 2 x 3 inch oval die; 1.5 inch circle die; pencil; 3.75 inch lace scrap;Post-it notes for masking; two .75 inch binder rings; sewing machine and white thread.
Here is my process:
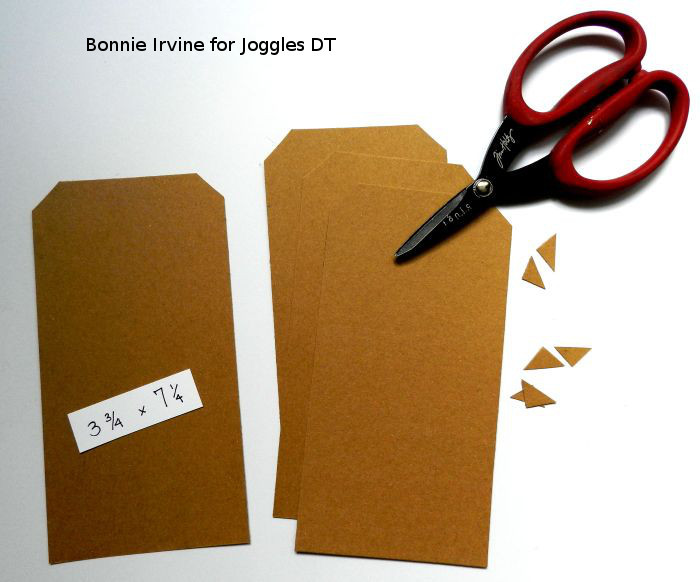
From kraft coloured cardstock, I cut 6 rectangles measuring 3.75 inches wide by 7.25 inches tall. I cut a triangle from one corner to begin the tag shape and then used to same triangle as a template to cut along for the opposite corner. The first tag then became the template for the rest so they would all align.
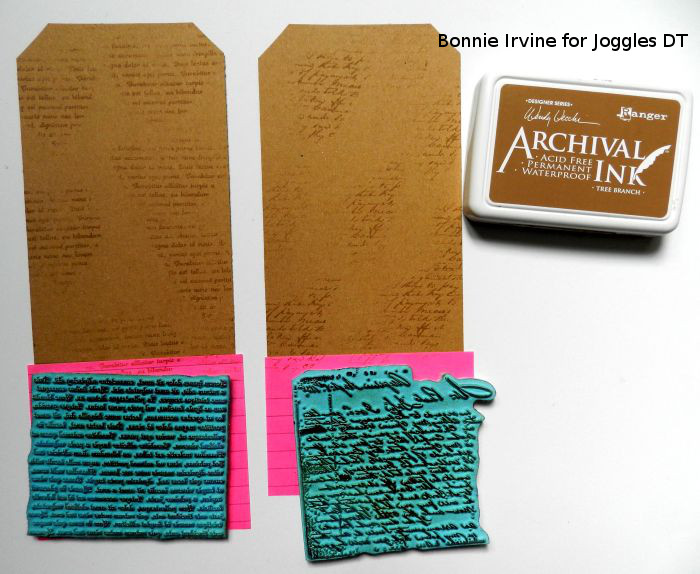
Post-It Notes were used to mask off the bottom inch of 4 of the tags. Using Tree Branch Archival Ink, three were stamped randomly with Joggles Nonsense Latin Text Cling Mounted Rubber Stamp and the other three with Joggles/Margaret Applin Designs Vintage Correspondence Cling Mounted Rubber Stamp. These were rolled onto the kraft tags rather than using a stamp mount and the pattern on the front and back cover tags went right to the bottom since we didn’t mask off those tags. Once dry, the Post-It note masks were then reversed so they covered the area above the bottom one inch.
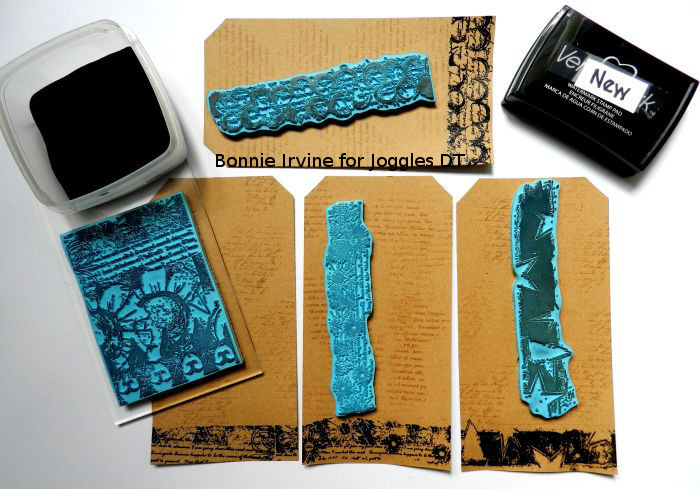
Using Versamark Ink, stamped borders were created within the one inch sections which had been previously masked off with the Post-its. Each Joggles Margaret Applin stamp was used on only one tag: Poeme Floral Border, Grunge Stars Border, Grunge Spots Border, and the writing and top portion of the Garden Collage stamp. Black embossing powder was then sprinkled over the wet Versamark Ink and the excess tapped off. They were then set with a heat tool.
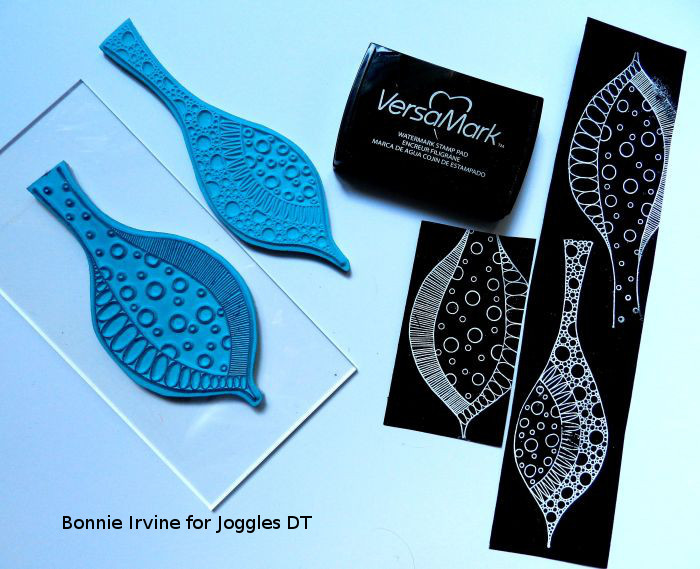
I love the patterns within the Joggles Jurassic Leaves Cling Mounted Rubber Stamps and wanted to find another way to use them. On scraps of black card stock, using Versamark Ink, Jurassic Leaves #3 and #5 were stamped several times, sprinkled with white embossing powder, and heat set. I wasn’t worried about perfect images because these were going to be torn into scraps. Love that contrast!
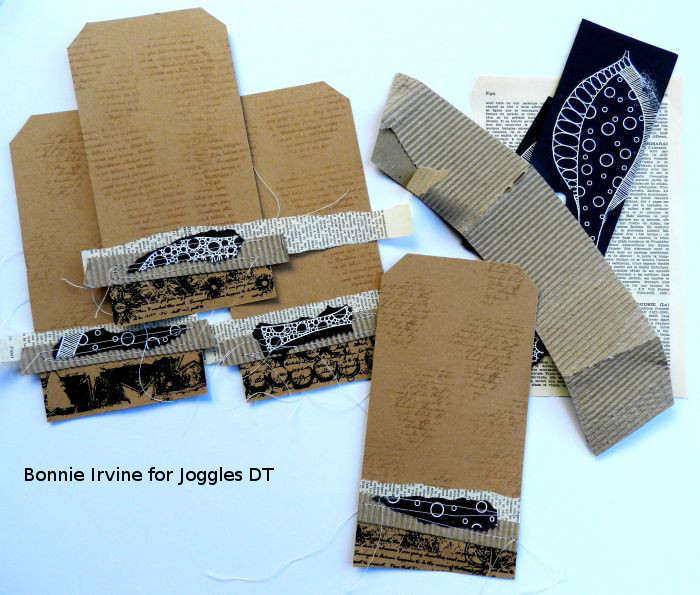
Here is where I headed to my sewing machine because I love the extra texture that sewing on paper provides. I tore strips from old book pages, from coffee sleeves, and from the black embossed card stock. Layering them onto the tags at that 1 inch mark, I stitched across them several times both to catch the papers and to add pattern and texture. The excess paper was trimmed off the tag edges and the thread was poked through to the back and knotted.
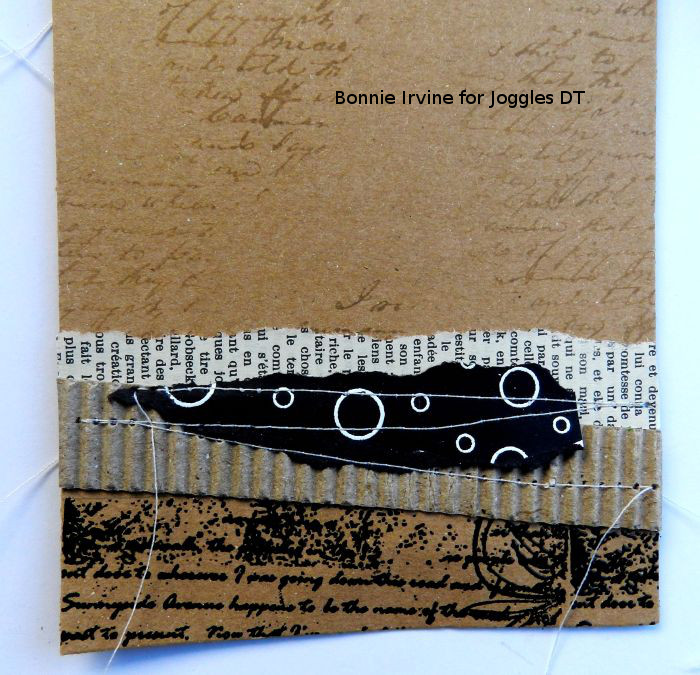
Here is a closer look. If you don’t mind the threads loose on the front, a tiny drop of glue applied to the ends of the stitching will keep it from unraveling and you can then trim the threads to a length you like.
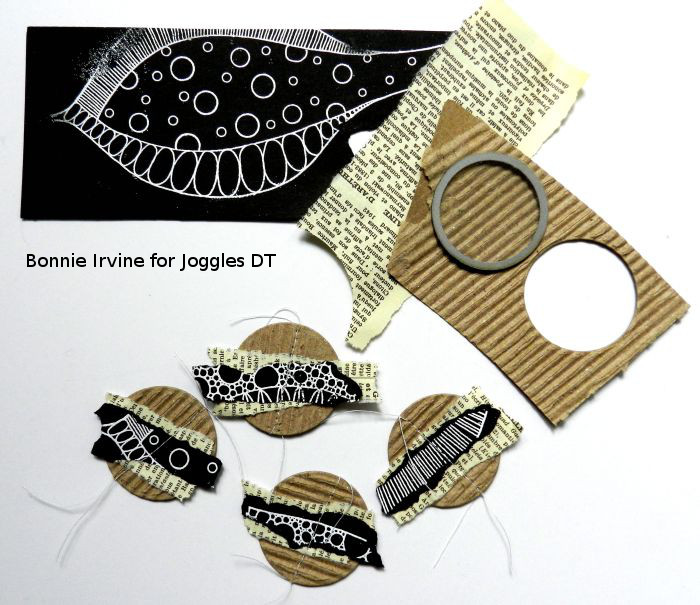
I die cut circles from other coffee sleeves, layered them with book paper and black embossed scraps and stitched a line through the center to create embellishments for the tags and also as a way of repeating the layered and stitched details. Although only four are shown here, I went back and created another two for the back cover so six were created in total. The thread ends were tied in a double knot to secure.
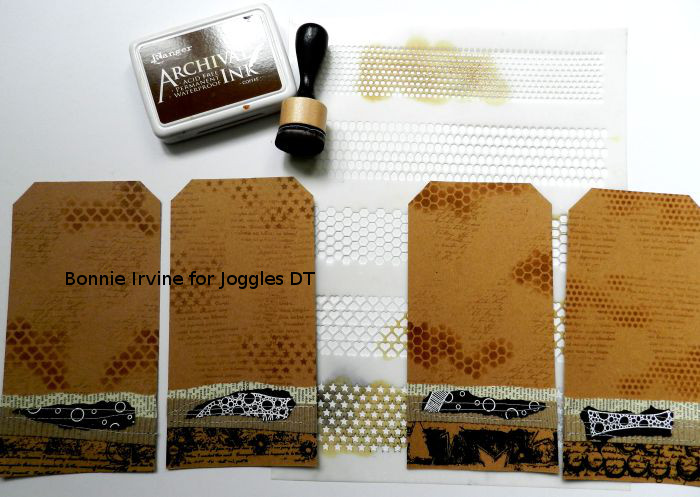
To add more pattern and interest to the tag backgrounds, Coffee Archival Ink was applied through Joggles Punchinella Quintet Minis Stencil using a Ranger Inkssentials Mini Ink Blending Tool. A different pattern from the stencil was used on each of the inside tags. The fifth pattern from the stencil was used on both the front and back covers.
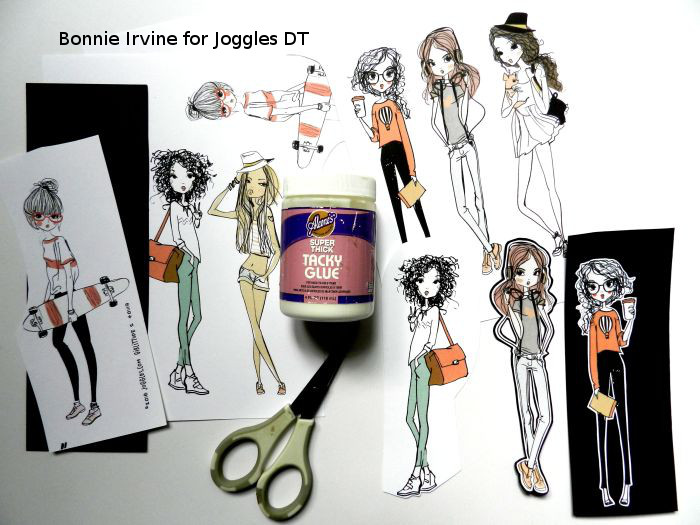
Four of the images were chosen from Joggles Girlitude Collage Sheets I and II. These were fussy cut leaving a narrow white border, adhered to black card stock using Aleene’s Super Thick Tacky Glue, and trimmed out again leaving a narrow black border.
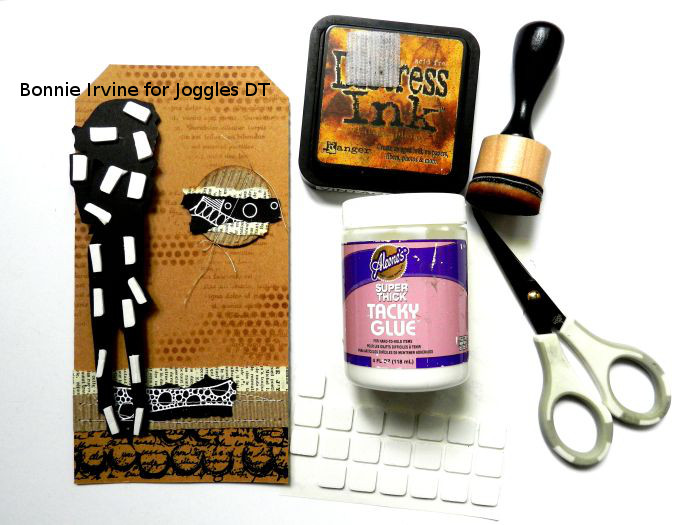
3D Foam squares were used to adhere the images to the tags, cutting the squares to fit. The edges of the circles were inked with Vintage Photo Distress ink. Aleene’s Super Thick Tacky glue was used to adhere the circles beside the images.
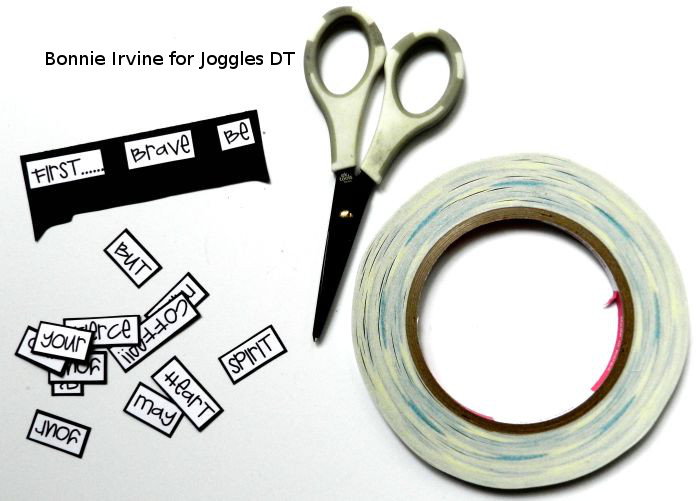
The words for the inside tags, which had been printed on white card stock and cut apart, were adhered to black card stock with .25 inch Scor Tape. They were then trimmed out leaving a narrow black border. This helps them contrast with the background.
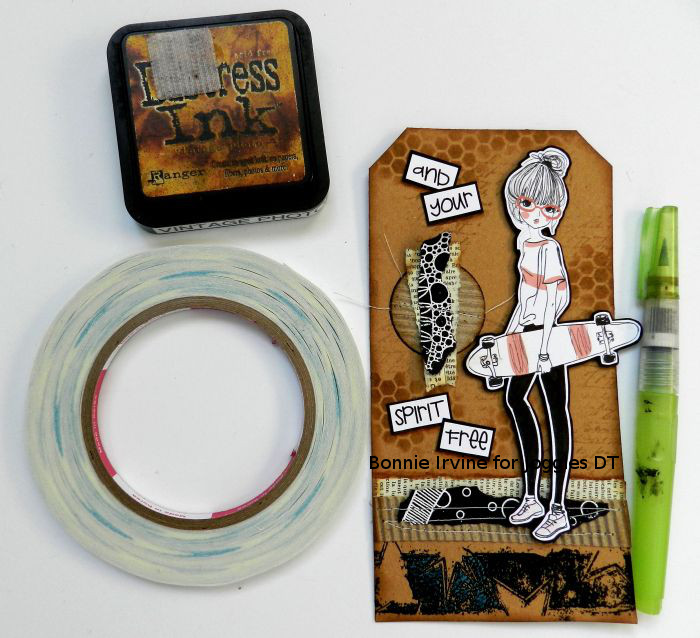
Once the words were adhered to each tag with more Scor Tape, the outside edges of the tags were darkened with Vintage Photo Distress Ink. More of the same ink was smushed onto my NonStick craft sheet and picked up with a water brush. This was then applied above the book text paper to create a shadow. This same line was later outlined with a Fine Tip Black Pitt Artist Pen.
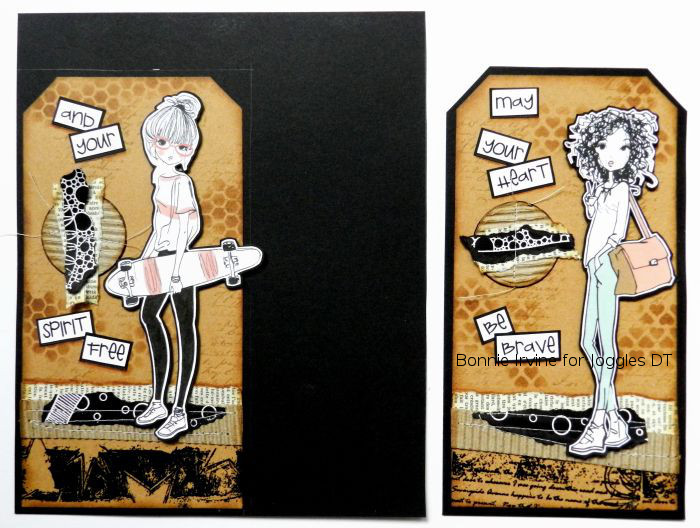
0.5 inch Scor Tape was used to adhere the four bordered tags with images and words to black card stock. Leaving a narrow (1/8 inch) black border on all sides, the tags were trimmed around as you can see in the tag on the right. I like the black frame this provides the neutral tags.
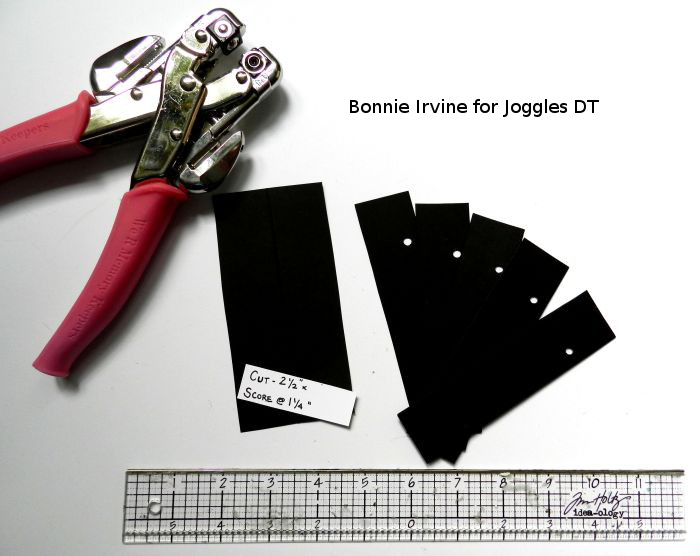
A simple binding was created by cutting five rectangles at 2.5 wide by 5 inches long. (eek! I forgot to put that on the white card) These were each scored and folded in half at the 1.25 mark lengthwise. I used 0.5 inch Scor Tape on the inside of one half to glue them closed. Two holes were punched in each, at approximately 1 and 1/8 inches from the top and bottom. I used the first one I punched as a template for the others so they all lined up.
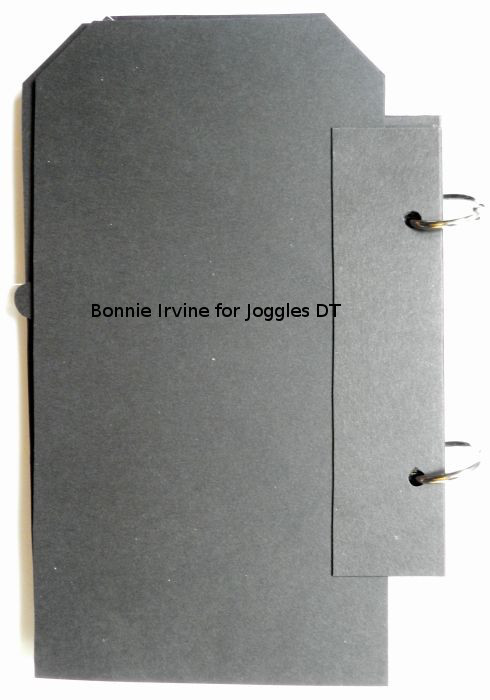
A pencil line was drawn lengthwise on each hinge from the folded edge at the 0.75 mark. The same Scor Tape was lined up with this pencil line on the unpunched portion and each tag was adhered to the binding by placing it along the pencil line over the Scor Tape. You can see above how the portion with the holes over-hangs the tag so the rings can slip in easily.
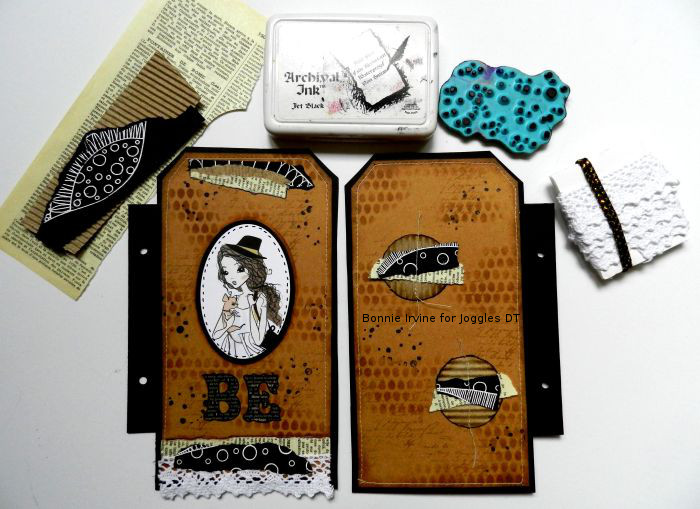
To finish the front, a fifth image from the Girlitude Collage sheets was die cut into an oval shape, matted with black card stock, and faux stitched with a black Fine Tip Pitt Artist pen. Foam squares were used to adhere her to the front cover.
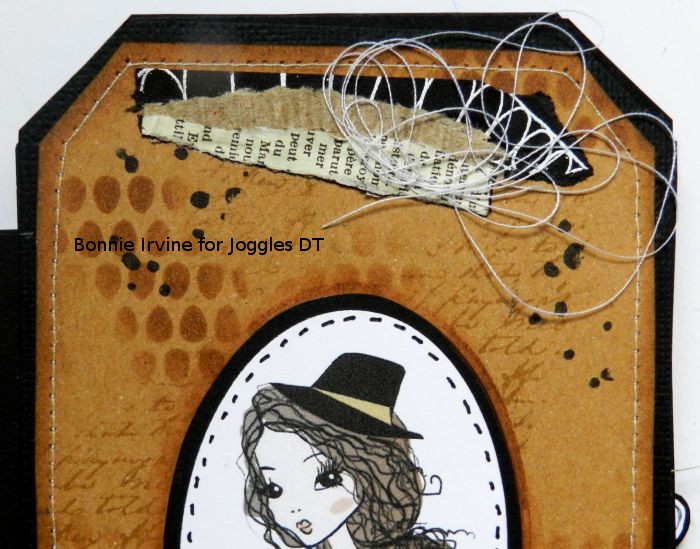
Scraps of the black embossed paper, the book text, and the corrugated coffee sleeve were layered at the top of the tag.
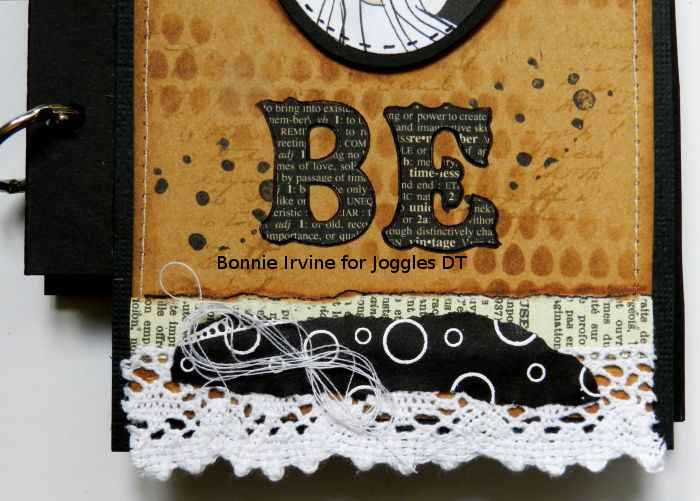
In place of the corrugated scrap for the bottom, a 3.75 inch piece of lace was adhered to the bottom edge of the kraft tag. The front and back tags were machine stitched around. Using Jet Black Archival Ink and Joggles Background Noise – Dots Cling Mounted Rubber Stamp, more pattern was added to both cover tags. Lengths of white thread were wound loosely around my fingers and then adhered over the layers on the top and bottom of the front tag. Sticker letters to make the word Be were adhered to the front below the oval and outlined with Black Pitt pen.
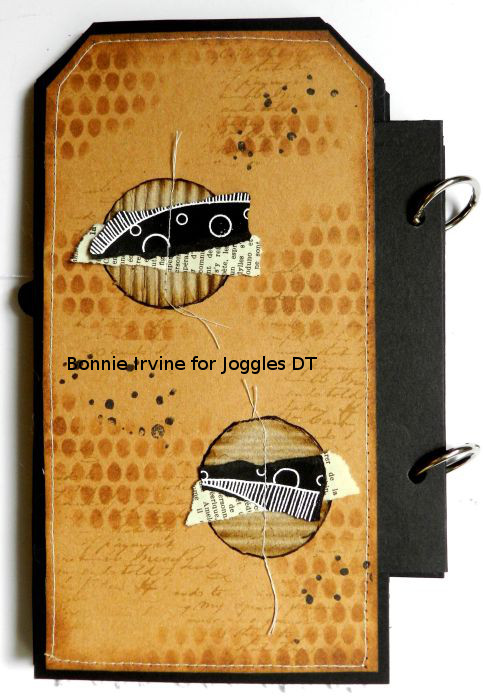
Two more of the layered circles were adhered to the back cover. This tag was than adhered to the back of the final tag featuring an image, making it double sided.
Below are close ups of the finished inside pages of this tag book.
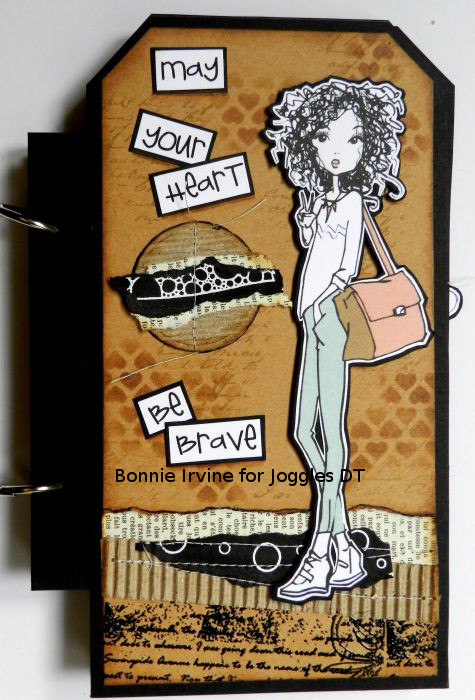
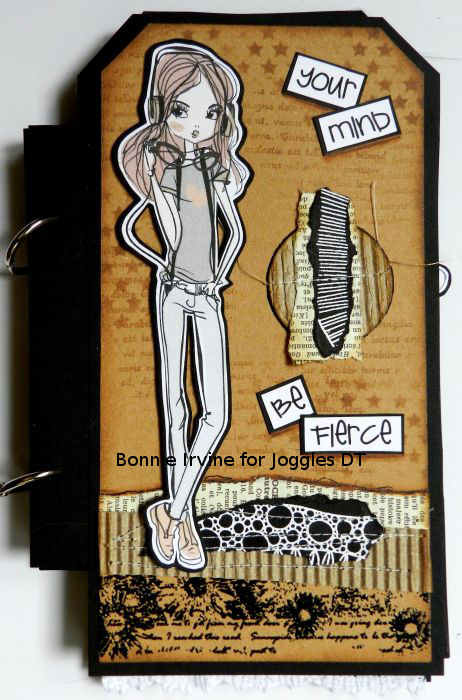
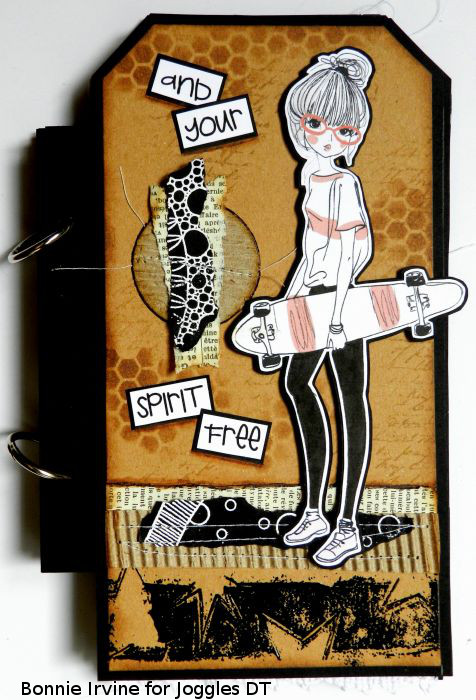
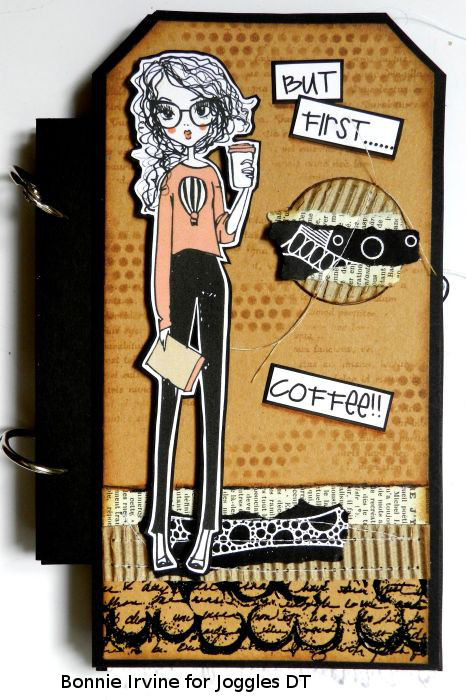
The sentiment makes me smile to think of these brave, fierce, and free young women and all of the wonderful things they will accomplish…right after the first coffee of the day 🙂
Thanks for stopping by today. I had a blast creating this tag book with all of its layers and wonderful images. Maybe you’ll have a go at something like this, too. We would love to see what you create.








Comment
Wonderful! Love everything about it. Thank you for sharing your process for the awesome backgrounds and the ideas for the tag book.