
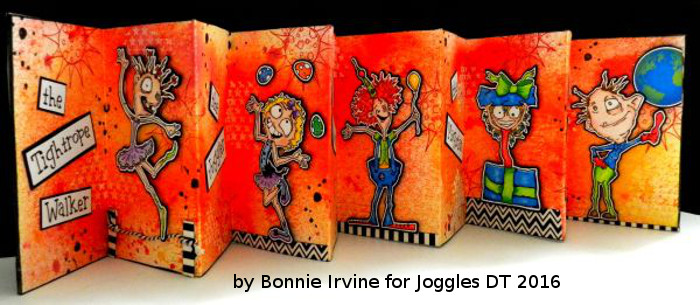
Hello there! It’s Bonnie here today with a tutorial for a project I absolutely loved creating. It combines five of the amazing cling mounted rubber stamp designs by Joggles/Bloobel and one of the 3 x 5 inch Joggles accordion books. The quality of the watercolour paper in these 10 page books is sturdy and wonderful, perfect for mixed media play. Lisa Graham’s quirky stamps never fail to inspire me and when you combine the two…well, I was in a state of creative bliss 🙂 I’m so excited to share it with you.
Supplies Used:
Joggles Accordion Book – 3” x 5” – 10 panels
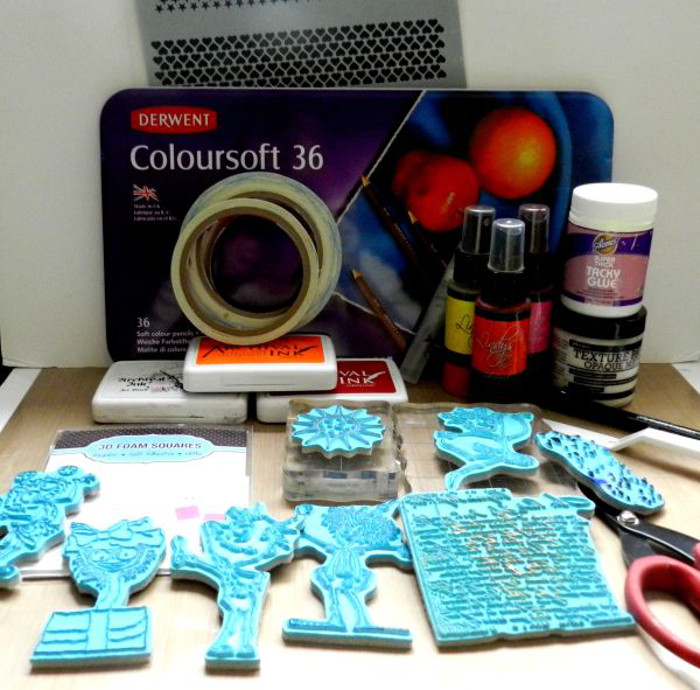
Archival Ink Pads – Tiger Lily; Vermillion; Jet Black
Lindy’s Stamp Gang – Two Toned Starburst Sprays – Yellow Rose of Texas; Hag’s Wart Orange; Hottie Patottie Hot Pink;
Inkssentials NonStick Craft Sheet
Scrapbook Adhesives 3D Self Adhesive Foam Squares
Scor Tape 0.125, .25, .5,
Aleene’s Super Thick Tacky Glue
Dina Wakley Media Palette Knife
Tim Holtz/Tonic Studios NonStick Micro Serrated Scissors – 7 inch
Faber Castell PITT Artist Pen – Brush Tip – Black
Joggles/Bloobel Cling Mounted Rubber Stamps – Clarence B. Britches; Sally Surprise; SeeMore Good; the Egg Juggler; Twinkletoes;
Joggles/Margaret Applin Designs Cling Mounted Rubber Stamp – Vintage Correspondence
Joggles Cling Mounted Rubber Stamp – Background Noise – Dots
Joggles Cling Mounted Rubber Stamp – Scribble Flower #4
Joggles Stencil – Punchinella Quintet – Minis
Derwent Coloursoft Pencils – Set of 36
Other supplies: toothpick; black ribbon; baker’s twine; balloon stamp (Hampton Arts); bunting stamp (Hampton Arts); stamp blocks; washi tape; black cardstock; white cardstock; patterned paper; thin chipboard from packaging; repositionable tape runner; printed wording; tape.
Here is my process:
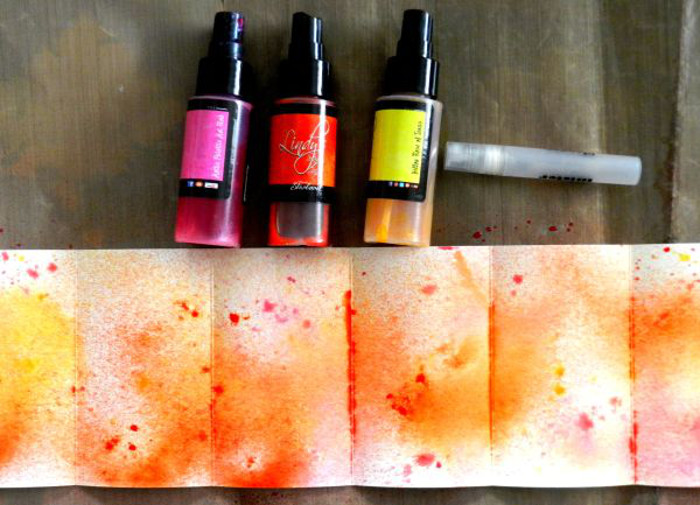
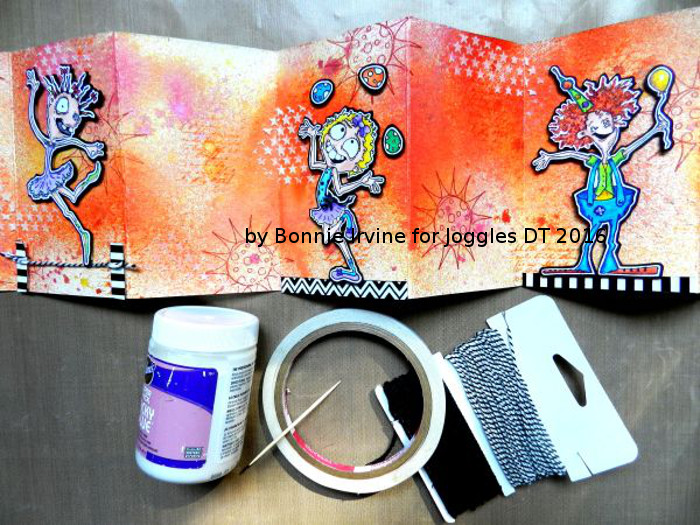
The accordion book was opened fully onto two Inkssentials NonStick craft sheets laid end to end. If you didn’t have two sheets, you could do this in sections. Water was lightly spritzed over the pages using a Mini Mister and then Yellow Rose of Texas, Hag’s Wart Orange, and Hottie Patootie Hot Pink Lindy’s Stamp Gang Two Toned Starburst Sprays were spritzed in patches onto the pages. I made sure that they overlapped in places but also left some white space. By tilting the accordion book in different directions, you can achieve runs, blending, and drips to suit yourself. Allow to dry thoroughly.
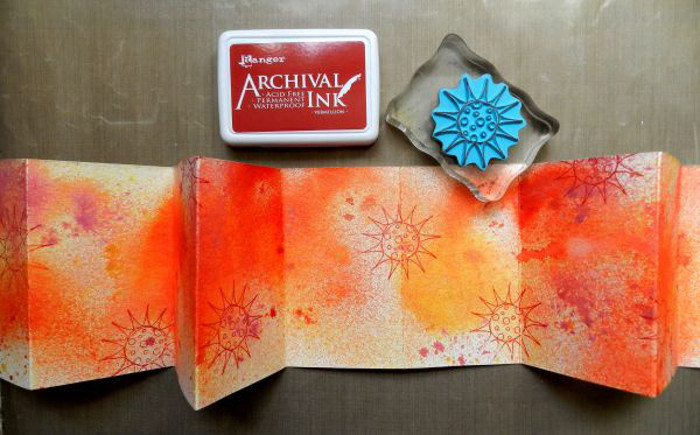
Vermillion Archival Ink was applied to Joggles Scribbly Flower #4 Cling Mounted Rubber Stamp and it was added to the background, varying the placement so that no two panels were identical.
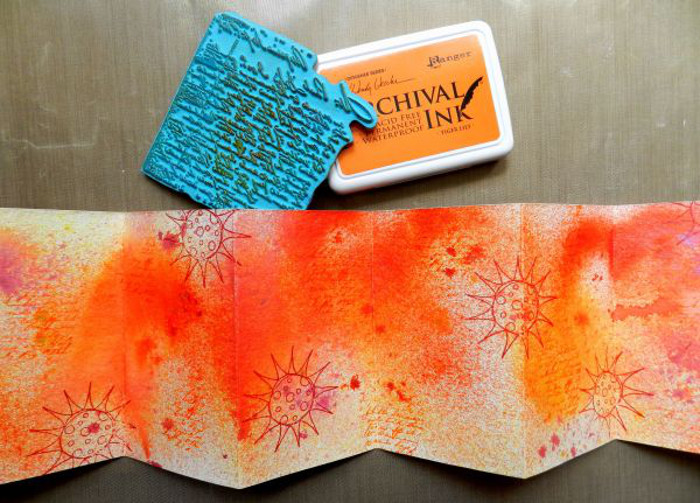
Tiger Lily Archival Ink was applied to Joggles/Margaret Applin Designs Vintage Correspondence Cling Mounted Rubber Stamp and it was rolled onto the background in several places across the book. The rolling gives an imperfect image with no hard edges or lines which is great when you are looking to add texture. This stamp has become one of my favourite ways to add text to my projects.

Ranger Texture Paste was scraped through the star portion of Joggles Punchinella Quintet Stencil in several areas. This is one of my favourite stencils because the patterns are mini and there are 5 to choose from so there’s always something I want to use.
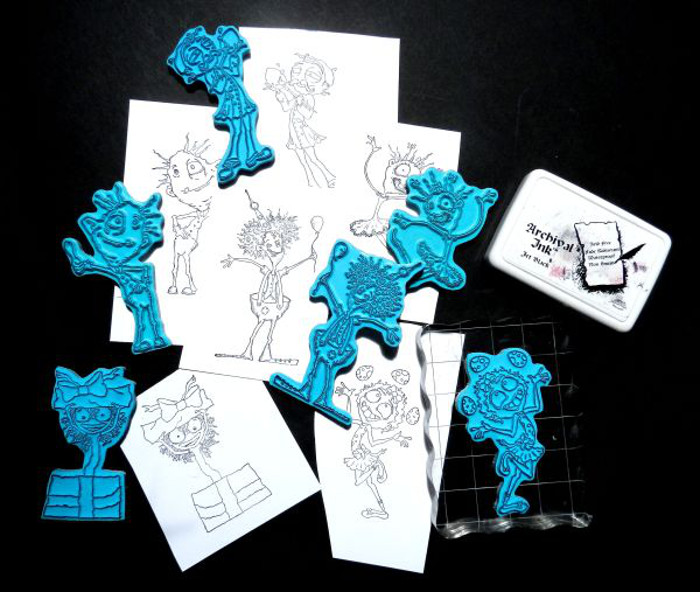
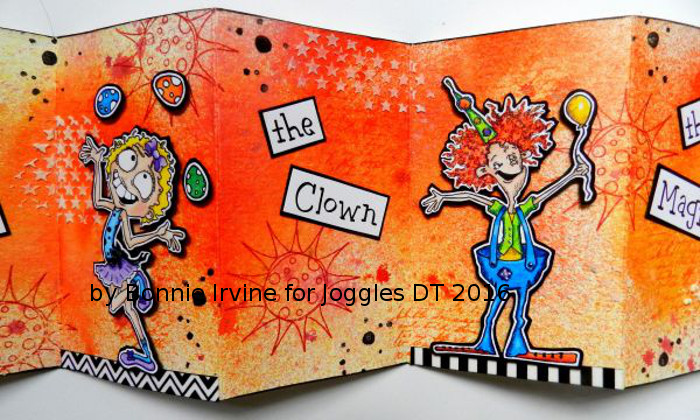
The five Joggles/Bloobel Cling Mounted Rubber Stamps were stamped onto white cardstock using Jet Black Archival Ink and a stamping block. I often use scraps for this or if I stamp them all on one sheet, I cut them apart to make them easier to colour.
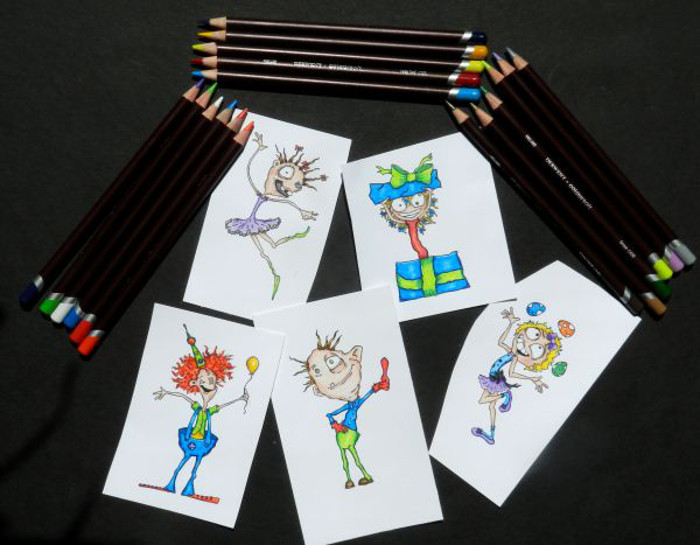
The images were coloured with Derwent Colour Soft Pencils. I love the vibrancy and smoothness of these pencils which make it easy to blend shading and highlighting. Because they are so creamy, they go on quickly with less effort.
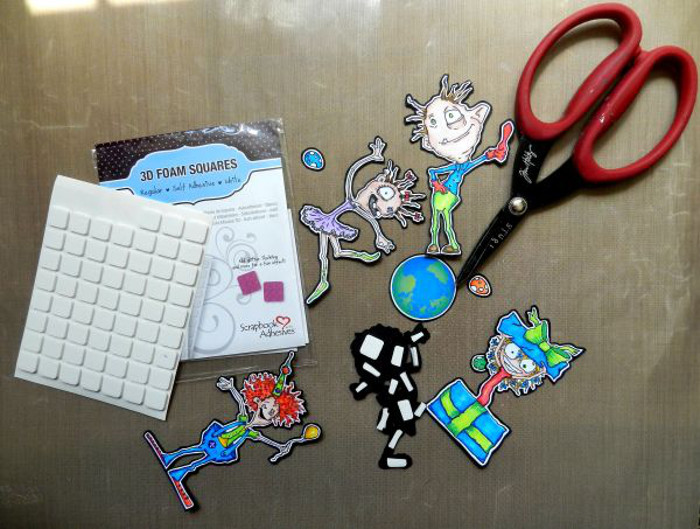
The images were then fussy cut leaving a narrow white border and then adhered to black cardstock using Aleene’s Super Thick Tacky Glue and a toothpick for spreading it.. They were trimmed out again leaving a narrow black border so that they would show up against the busy background. 3D Foam Squares were added to the back, cutting some into smaller pieces to fit the images.
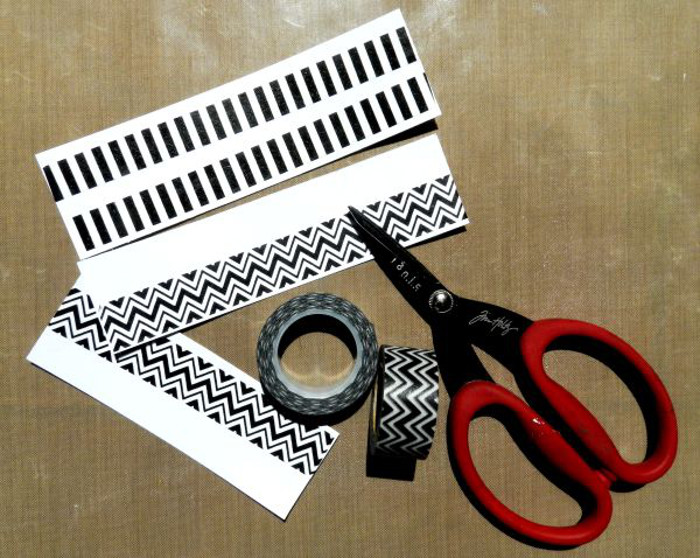
I love to use washi tape as an accent on my pages but I don’t always like the transparency because the mixed media background varies and affects the pattern of the tape when it shows through. I often apply the washi tape to leftover strips of white cardstock, trim the excess away, and adhere the backed tape to my page with Scor Tape. With the white behind, the tape really pops.
Bits of washi tape were added below each circus performer to give them a place to stand and ground them. Twinkletoes, the tightrope walker, was given two washi tape posts which had baker’s twine tied to them to form her high wire. Scor Tape was used to adhere the horizontal strips but Aleene’s Super Thick Tacky Glue was used to adhere the posts and baker’s twine.
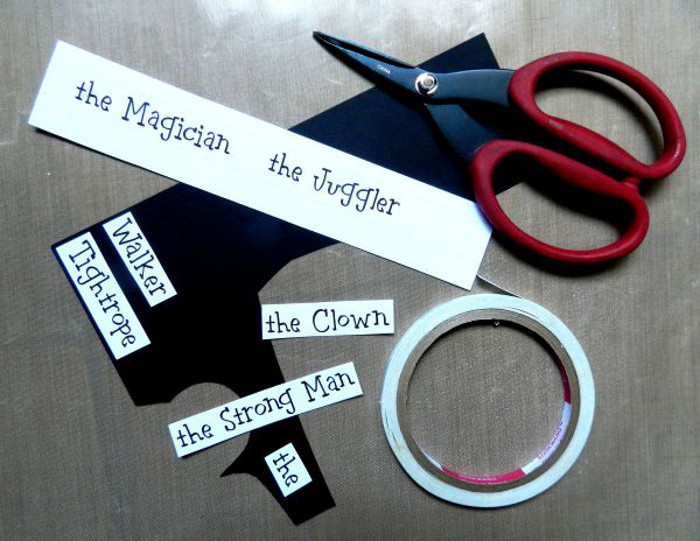
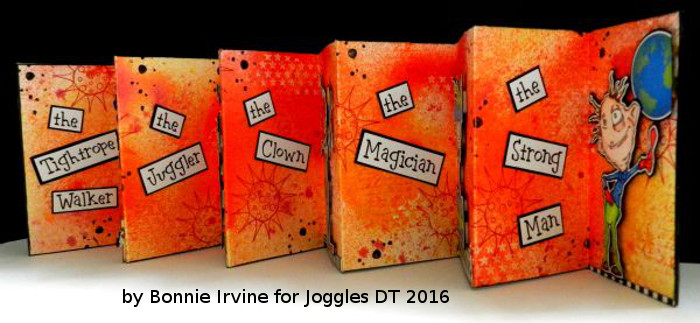
After printing the titles for each page onto white cardstock, they were cut apart and adhered to black cardstock with Scor Tape. The titles were then added to the page opposite each character. I like to glue them at wonky angles to add to the whimsy of the book.
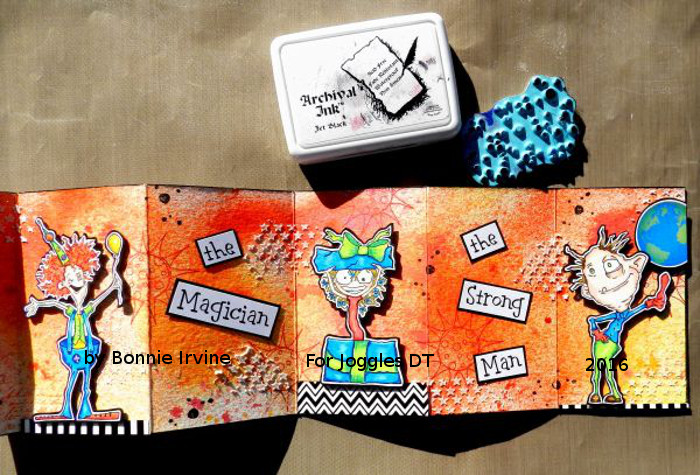
Once everything was in place, I could see where a little more stamping was needed. Jet Black Archival Ink was applied to Joggle Cling Mounted Rubber Stamp – Background Noise – Dots and part of the image was added to break up the colour on each section.

To complete the front and back covers, a piece of recycled chipboard was adhered to the backs of the first and last sections with Scor Tape. This gave the covers strength and stability. Scraps of printed blue cardstock were adhered over the chipboard and the edges were inked around with a black Faber Castell Pitt Artist Pen with the brush tip. The top and bottom edges of the rest of the pages were also inked to help frame them.

The balloon images were stamped onto green, red, and blue scraps of cardstock and mop up papers using Jet Black Archival Ink. The bunting was stamped onto white cardstock with the same ink.

A free circus tent image from the Internet was sized and printed three times onto white printer paper. Three scraps of coloured cardstock were adhered over the printed images with repositionable tape runner and the paper was put through the printer again.These images were then cut apart and parts of each were used to paper piece the tent: red for the roof, blue for the flaps and flag, and yellow for the bottom.
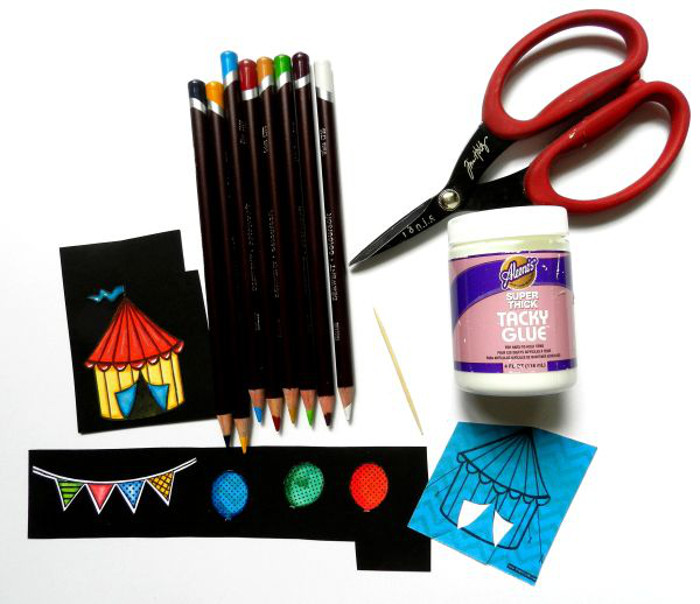
Derwent Colour Soft pencils were used to add shading to the pieces before they were fussy cut and matted with black cardstock. The printed words for the front and back were done in the same manner as the earlier titles.
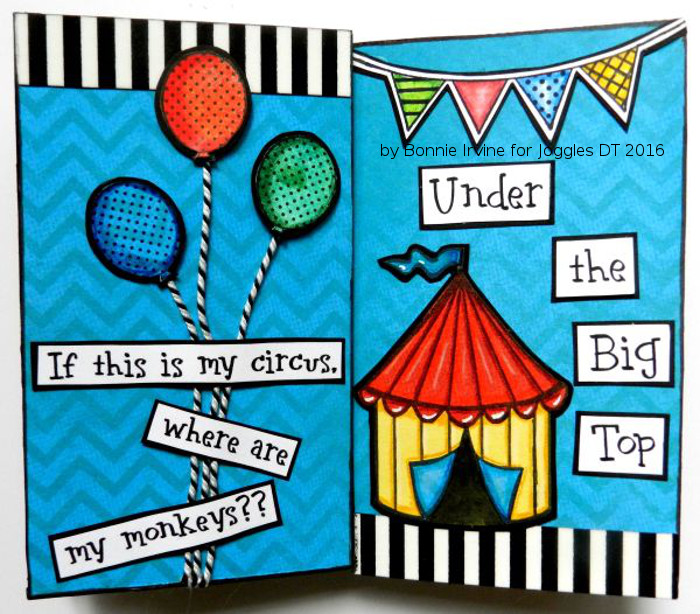
A piece of the same backed washi tape was adhered to the front bottom and back upper edges of the covers. Before the words were added to the back, the balloons had baker’s twine strings taped to their backs and were adhered to the cover with Aleene’s Super Thick Tacky Glue. The words were then glued over the top of the strings with Scor Tape which held them in place as well.

A length of black ribbon was tied around the accordion book as a closure.
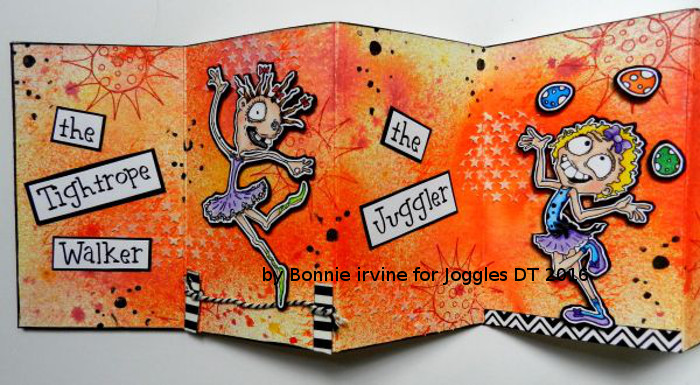
Here are the circus performers up close and personal.

Thanks so much for joining my circus troupe and me today. We are delighted that you stopped by and would love to see what you create with these fabulous accordion books. I have a few more ideas up my sleeve for the other sizes, too.
5 Comments
Awesome Bonnie….I love the bright colors and of course the Bloobel Stamps…I have recently started using the Black outline on some of my projects….it does give the images a nice “pop”….Thanks for your great ideas.
V
I really like the way the book flows Bonnie! I love the Joggles stencils and stamps!
This is FABULOUS! Love, love, love it. Everything about it! The bright colors, the subject and especially the sentiment on the back cover. My mantra for the last two years has been “Not my circus, not my monkeys” so the play on this phrase is too cute! I even have a silver cuff bracelet with this inscription that I wear daily (a gift from my sister)! Thank you for sharing your talent with us.
What a wonderful book! I love how lively it is, with all the bright colors. I may have to do something similar, using my TH Crazy Birds, until I can collect these hysterical characters. Thank you for the clear instructions and clever idea!
Brilliant tutorial, Bonnie! I love your completed book; the colours are so vibrant and the characters are just adorable. Will have to have a go at the black outline; it makes the colours really pop. Thanks for sharing your process. x