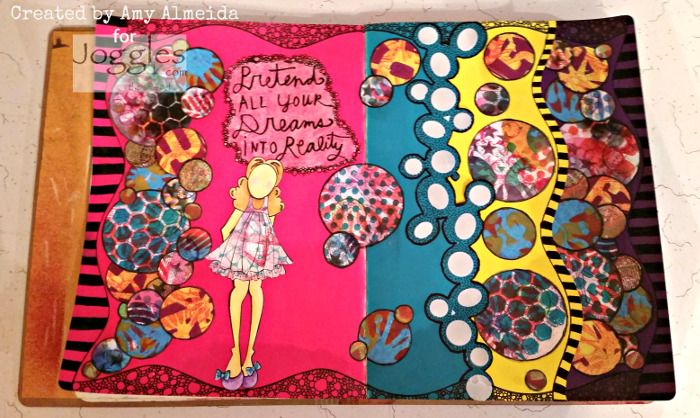
Good Morning, Amy here, and today I have a fun journal page for you which I created using Joggles Sticky Snippets. Sticky Snippets are the perfect mixed media blank canvas, accepting many types of media including paints, ink sprays, glimmer sprays, acrylic inks, glitter paste, and even light coats of gels and mediums. I had a lot of fun creating this Pocket Page journal layout and hope you enjoy it too.
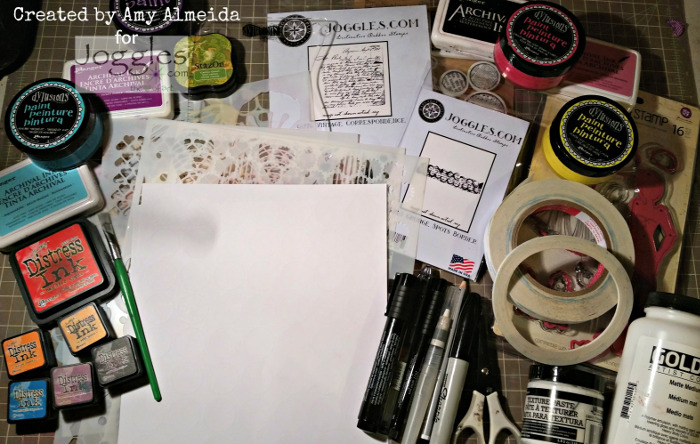
Supply List:
Joggles Sticky Snippets: Joggles Sticky Snippets™ – Large Circles, Joggles Sticky Snippets™ – Medium Circles, Joggles Sticky Snippets™ – Medium Circles, Joggles Sticky Snippets™ – Mini Circles
Joggles Stencils: Number Sparkle Mask, Punchinella Trio 1, Punchinella Trio 2, Skinny Minny Mask – Checkerboard & Rings, Star Flowers, Big Leaves, Mod Circles Mask
Joggles / Everyday Valentine Cling Mounted Rubber Stamp – Pretend Your Dreams
Joggles / Margaret Applin Designs Cling Mounted Rubber Stamps: Vintage Correspondence and Grunge Spots Border
Dylusions Creative Journal – LARGE
Dylusions Journal Block [DYA36999] 9″ x 5″ Acrylic Block
Prima / Julie Nutting Cling Stamps
Strathmore 300 Series Watercolor Paper – 9″ x 12″ 140# Cold Pressed
Tim Holtz Distress Ink Pads : Black Soot, Candied Apple, Fossilized Amber, Mermaid Lagoon, Chipped Sapphire, Seedless Preserves, Abandoned Coral, and Dusty Concord
Ranger Inkssentials Mini Ink Blending Tool
Dylusions Paint by Dyan Reaveley: Postbox Red, Cut Grass, Squeezed Orange, Cherry Pie, Crushed Grape, Lemon Zest, and London Blue used for Gel Plate Printing. Bubblegum Pink, Calypso Teal, Lemon Zest, and Crushed Grape used on Journal Pages.
Dina Wakley Media Palette Knife
Golden Matte Medium (substitute Dina Wakley Media Gel Medium – 4 oz. jar)
Gelli Arts 8”x10” Gel Plate (substitute Gel Press Reusable Print Plate – 8″ x 10″)
Tim Holtz Water Brush by Ranger – Fine Detail Nib
Scor-Tape: 0.25″ and 1″
Faber Castell PITT Artist Brush Pen – [B] Black
Faber Castell PITT Big Brush Pen – Black
Archival Ink Pads: Jet Black, Aquamarine, Deep Purple, and Magenta Hue
Joggles Clear Acrylic Stamp Mount
1” Flat Brush ( similar to Dina Wakley Media Brush – 1″ Flat)
Other supplies: scissors, brayer, tissue paper, Ranger Collage Stick, Black Sharpie, Pilot Black Gel Pen, Aquarelle Watercolor Pencils, Finnabair “Don’t Forget to Fly” Stamp Set.
Here is my process:
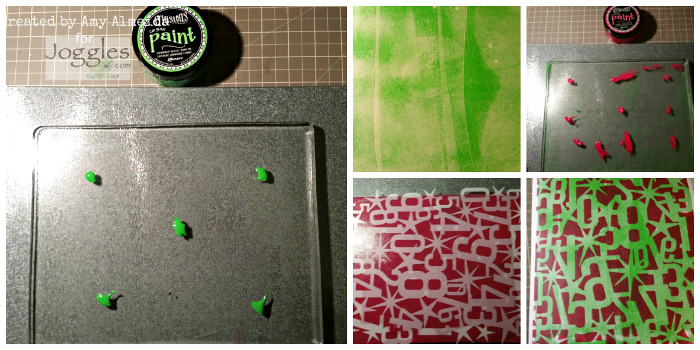
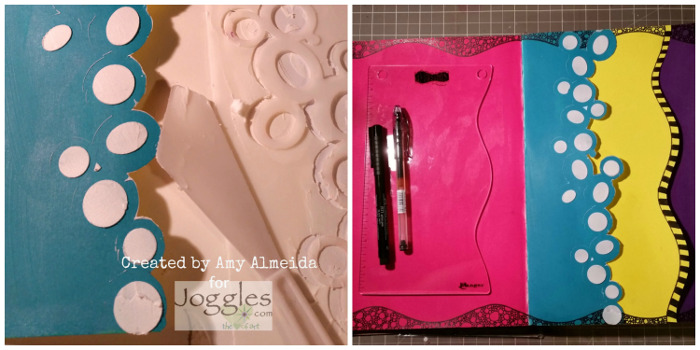
Step 1: Dab on spots of acrylic paint (Dylusions Cut Grass used here) and use a brayer to spread the paint across the Gelli or Gel Press plate. Take a sheet of Sticky Snippets and lay on top of your gelli plate. Press firmly on the back of the sheet and lift off to pull a print. Next add more paint (Dylusions Postbox Red) and brayer it out on your plate. Add a stencil and again lay your sheet of Sticky Snippets down, press firmly, and lift off your plate. You can layer as many patterns and colors as you want on each sheet until you are happy with the design.
HINT: Place your stencils that still have paint on them from the gelli or Gel Press Plate onto a sheet of copy paper, paint side down and transfer the paint and design- don’t waste it! These sheet(s) can be used for future projects like I did in Step 10.

Step 2: You can use different mediums on Sticky Snippets. The possibilities are endless. I applied various colors of Distress Inks through different Joggles Stencils with the Rangers Inkssentials Mini Blending Tool. I layered colors and different stencils until I was happy with the both the color combinations and overall design. Then I added some additional texture to my sheets by stamping Joggles/ Margaret Applin’s “Vintage Correspondence” and “Grunge Spots Border” cling mounted rubber stamps, along with a few Finnabair Stamps using Archival Inks in colors which coordinated with my background.

Step 3: Now select a spot in your large Dylusions Journal that has 3 double pages together. On the first page, I used Bubble Gum Pink Dylusions Paint and spread it onto my page using the Mini Ink Blending Tool. Calypso Teal was used on the second page, Lemon Zest on pages 3 and 4 and Crushed Grape on Page 6. You do NOT need to add any color to page 5 as it will become a pocket for tags…yes tags, which will be explained more in the later steps.
HINT: Use Post-It Note tape to seal opposite pages when painting as it’s easy to peel off as opposed to washi tape which can tear your pages when you remove it.

Step 4: Using the circles mask from the Joggles Skinny Minny Mask – Checkerboard & Rings set, lay it about 2 inches away from the journal binding seam on page 2 (Calypso Teal) of your journal. Trace around the right edge of the mask with a pencil and use scissors to cut around it. This will create our first pocket page for tags.
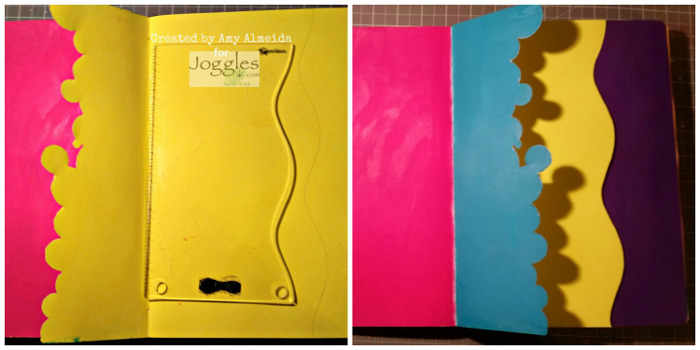
Step 5: Using the Dylusions Journal Block, trace a line vertically across page 4 (Lemon Zest) about 2- 2.5 inches from the outside edge of the page and cut with scissors. This will become our second pocket page for tags.
Step 6: Take the circles mask from the Joggles Skinny Minny Mask – Checkerboard & Rings set and lay it on top of the cut edge of the Calypso Teal page from Step 4. Then place the stencil over the mask to protect the pages from getting paste where we don’t want it. Scrape Ranger Texture Paste through the mask openings with a palette knife. Carefully lift both the stencil and mask off, clean them, and let the Texture Paste on the page dry. Place the Dylusions Journal Block about ¼” from the edge of page 4 (Lemon Zest) and draw a line using a fine line marker (Pilot Gel Pen used here). Create a border using the same technique along all the other edges of all your pages. Doodle some designs in your borders with your fine line marker and color in any bigger designs with a wider tipped Marker- the Brush Black Pitt Pen was used to color in my doodled lines. Those little circles took a long time to do, but I found it relaxing and love how it came out.
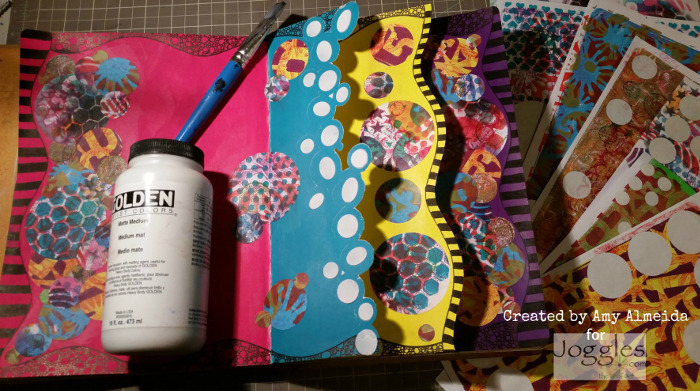
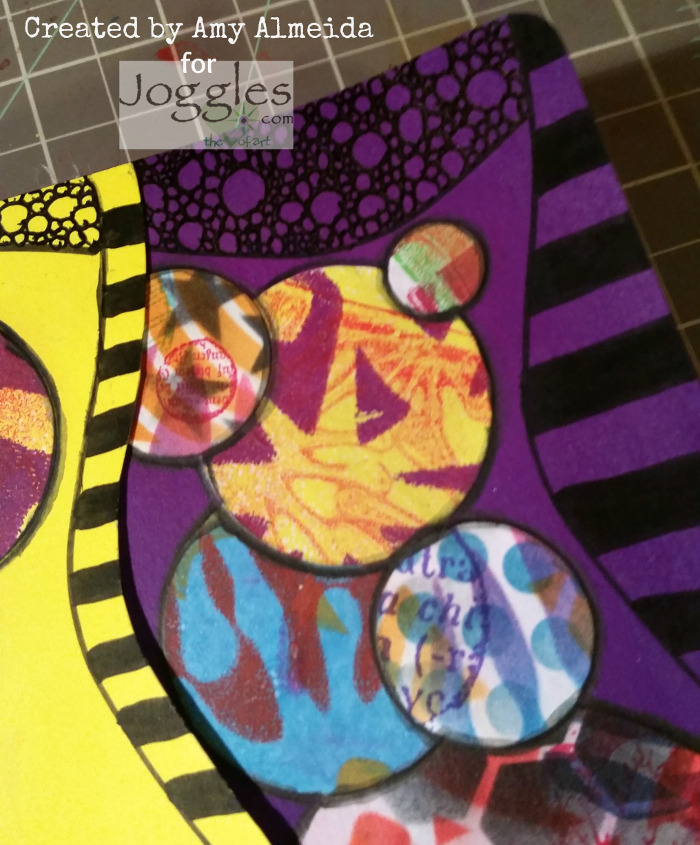
Step 7: Now grab all your Sticky Snippets that you added pattern and texture to in Steps 1 & 2. Although they are self adhesive, I adhered them to the pages with Matte Medium to ensure that they wouldn’t lift over time. These Sticky Snippets come in different sizes and are great for layering.
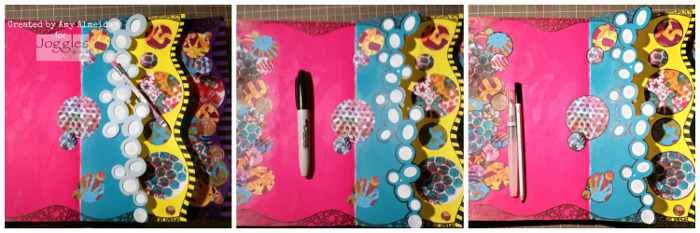
Step 8: Place the Circles Skinny Mask again over the Texture Paste on page 2 (Calypso Teal) and trace the inside edge with a pencil. Trace over the pencil line with a black Sharpie to create a border that goes with our other pages. Using a black watercolor pencil, trace around all of your Sticky Snippets circles and then use a water brush to soften and blend the lines. I love the shadow effects.
HINT: I prefer the water brush versus a brush dipped in water, as the water brush allows more control of the amount of water used for blending.
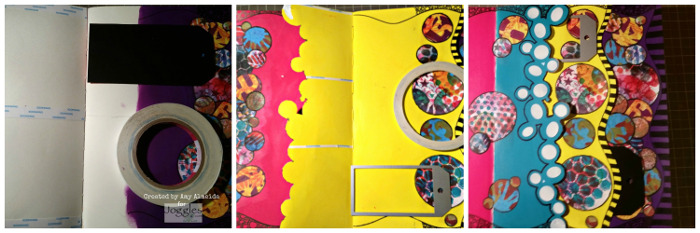
Step 9: Using a #8 tag (3 1/8 x 6 1/4 inches) as a template, place 3 strips of 1” Scor-Tape on the back of the page 5 pocket page as shown in the first photo above. This will create two pockets for the #8 Tag size. Using a smaller tag (or die in my case), place 4 strips of 0.25” Scor-Tape on the back of Page 3 pocket page (see center photo). This will allow for 3 pockets for smaller tags.
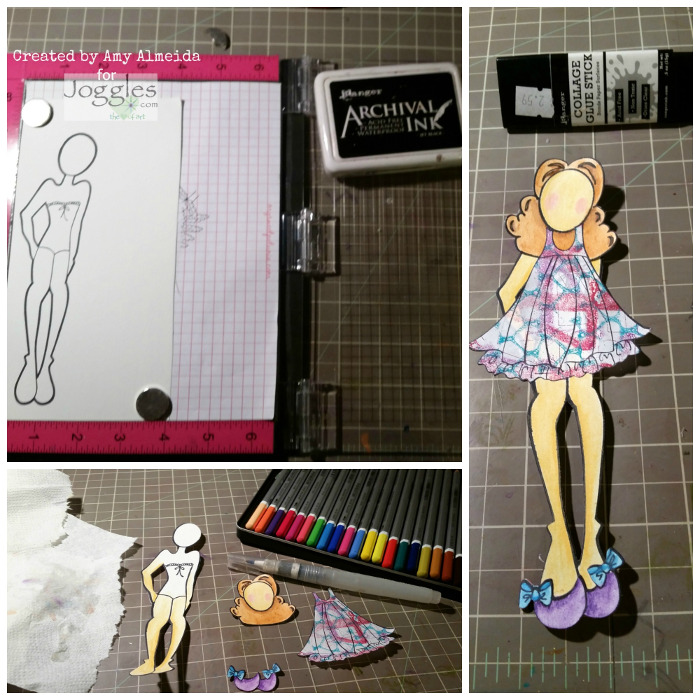
Step 10: Stamp the Prima/ Julie Nutting Doll of your choice onto watercolor paper using Jet Black Archival Ink. Color with Watercolor Pencils (Aquarelle used here) and your water brush. I used the scratch paper sheet I pressed my stencils onto after taking them off the gelli plate to stamp on for her dress so she “matches” the designs on some of the Sticky Snippet Circles. Cut her out, assemble, and set aside for now.
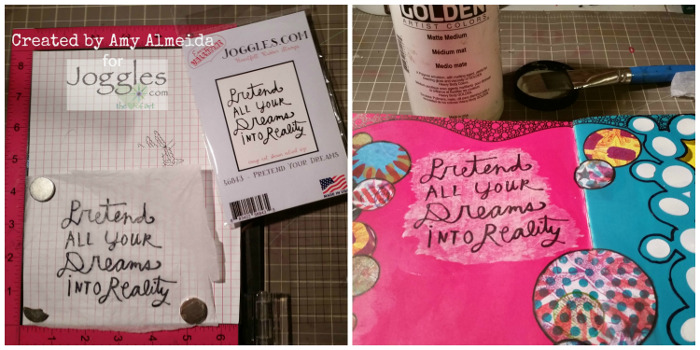
Step 11: Stamp the Everyday Valentine “Pretend Your Dreams” Sentiment onto a piece of white tissue paper with Jet Black Archival Ink. Cut/tear around the sentiment to get rid of excess tissue paper. Glue the sentiment onto page 1 of your journal page with Matte Medium and a flat brush.
HINT: I use my water brush to go around the sentiment and then tear off the excess tissue that way.

Step 12: Using a glue stick (Ranger Collage Stick used here), adhere your Prima Girl from Step 10 below your sentiment.
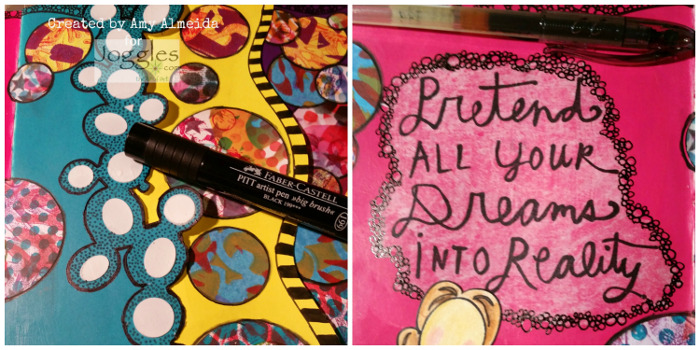
Step 13: Using the Black Big Brush Pitt Pen, add dots inside the traced border of page 2. I just used the tip and made tiny dots as I felt it was too bare and needed something. I finished by adding the same doodled circles around the sentiment to hide the tissue paper edges and to tie it in to the rest of the journal pages.
You’ll notice I didn’t put any tags into my pockets yet…that’s because I’ll be sharing those tags in my tutorial next month (December 30th) when I create some tags using Joggles Stencils. I hope you join me for that tutorial, as well . If you can’t wait, you could also decorate your tags using your left over Sticky Snippets and gelli prints.

Here’s are some closer looks at some of the details:


I hope you had fun creating this fun Pocket Page Journal layout using Joggles Sticky Snippets. Don’t forget Joggles has such a vast array of sizes and shapes available in the Sticky Snippets line that you can have fun using them in your creative journeys!
Thanks for joining me today and happy craftin’!
Amy
Comment
WOW,I love color and that just about every color in the rainbow. Thank you for sharing. That was truly a labor of love. You certainly covered a lot.