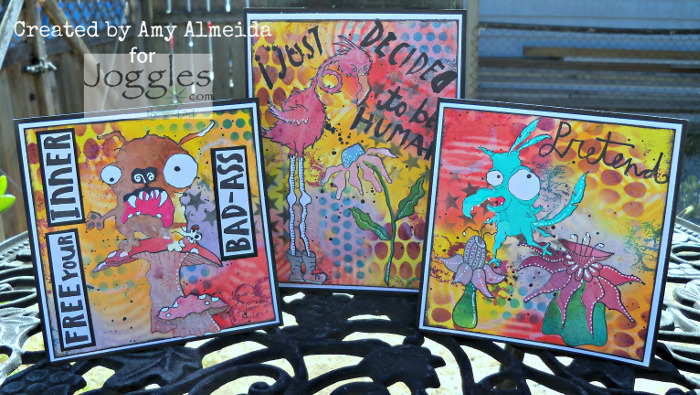
Good Morning! Amy here, and today I’m excited to share with you a few fun and sassy cards I made using a variety of Joggles cling mounted rubber stamps. These rubber stamps are so much fun to play with as they give a crisp impression every time. Barb carries such a fun variety too- there is something for everyone and every occasion!
Here’s my tutorial on using these fun stamps and sentiments to make three cards.
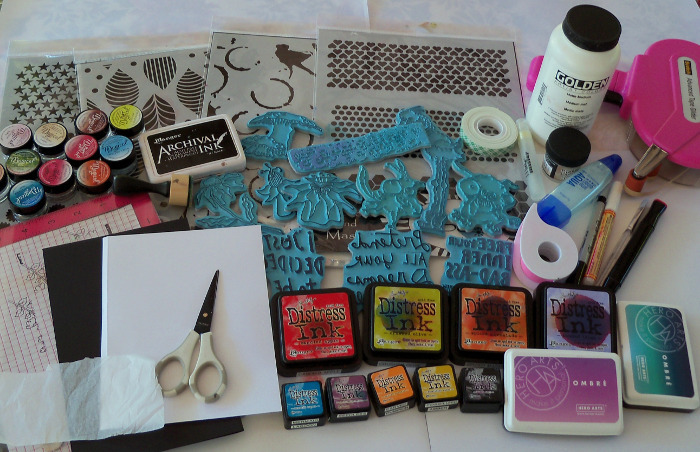
Supplies used:
Joggles Stencils – Punchinella Trio 1
Joggles Stencils – Punchinella Trio 2
Joggles Stencils – Spills & Splatters
Joggles/ Margaret Applin Cling Mounted Rubber Stamps: Grunge Spots Border [56783]
Joggles/Virginia England Cling Mounted Rubber Stamps: Rhonda [56806], Funky Flower #1 [33696], Funky Flower #6 [56770], Funky Flower #8 [56831] & Magic Mushroom 1 [56821]
Joggles/ Bloobel Cling Mounted Rubber Stamps: Sweetums [56802] & Spike [56803]
Joggles/ Everyday Valentine Cling Mounted Rubber Stamps: Decided To Be Human [56822], Free Your Inner Bad Ass Child Screw Your Age [56841] & Pretend Your Dreams [56843]
Strathmore 300 Series Watercolor Paper – 18″ x 24″ 140# Cold Pressed
Tombow Clear Liquid Glue (Substitute Aleene’s Turbo Tacky Glue)
Tim Holtz Distress Micro Glaze
Tim Holtz Distress Ink Pads: Fossilized Amber, Shaded Lilac, Candied Apple, Mermaid Lagoon, Crushed Olive, Spiced Marmalade, Carved Pumpkin, Seedless Preserves, Black Soot
Ranger Inkssentials Mini Ink Blending Tool
Daler Rowney FW Acrylic Ink – Pearlescent Black
Princeton Watercolor Brush – #4 Fan
Molotow Acrylic Pump 1 mm Marker (Substitute Sharpie Waterbased Paint Marker – Extra Fine Tip White)
Golden Matte Medium (substitute Liquitex Matte Medium or Tim Holtz Distress Collage Medium – Matte)
Lindy’s Stamp Gang Magicals: Tibetan Poppy Teal, Curiouser, Ponderosa Pines Olive, Saltwater Taffy, Queen of Hearts Red, Tiffanylou’s Blue, Cape Cod Coral, Cattail Copper Brown, Red Hot Poker Orange
Scotch Advanced Tape Glider (substitute iCraft Sticky Tape Runner – Permanent)
Other Products: MISTI, Spectrum Noir DR2 Alcohol Marker, Sharpie Black Permanent Marker, Hero Arts Ombre Ink Pads (Lilac to Grape Purple & Pool to Navy), 3 mm Foam Tape, Craft Scissors, Black Card stock, White Card stock, Paper Trimmer, Tissue Paper, Baby Wipes, Post-It Notes (for Masking) and Paint Brush
Here is my process:
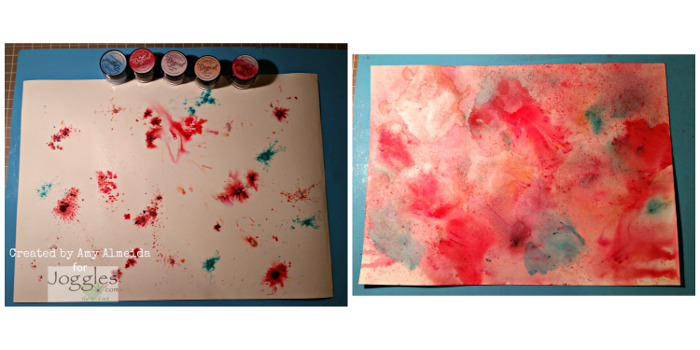
Spritz some watercolor paper using your Inkssentials Mini Mister filled with plain water. Sprinkle some Lindy’s Stamp Gang Magicals (Saltwater Taffy, Queen of Hearts Red, Tiffanylou’s Blue and Cape Cod Coral used here) onto the wet paper. Spritz the sheet again with your Mini Mister to activate the Magicals and dry. Continue this step until desired colors & design are achieved.
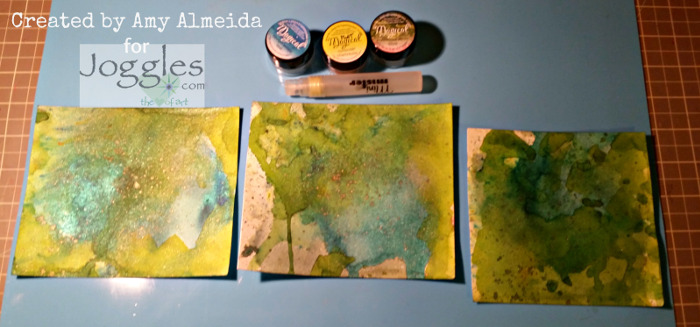
Spritz a different piece (or pieces) of watercolor paper with water using the Mini Mister and sprinkle some green-toned Lindy’s Stamp Gang Magicals (Tibetan Poppy Teal, Curiouser and Ponderosa Pines Olive used here) over the paper. Activate with more water from the Mini Mister. HINT: I used scrap pieces of watercolor paper for this and the following step as it’s a great way to use them up for smaller prints.
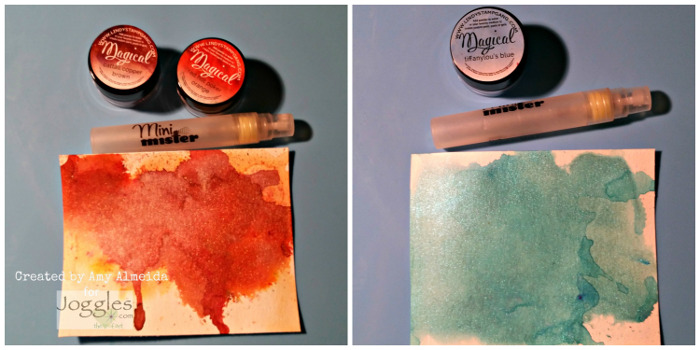
Repeat Step one with brown-toned Magicals (Cattail Copper Brown and Red Hot Poker Orange used here) to create a background for Joggles/ Bloobel Sweetums cling mounted rubber stamp and blue toned Magicals (Tiffanylou’s Blue used here) on another piece for Joggles/ Bloobel Spike stamp.
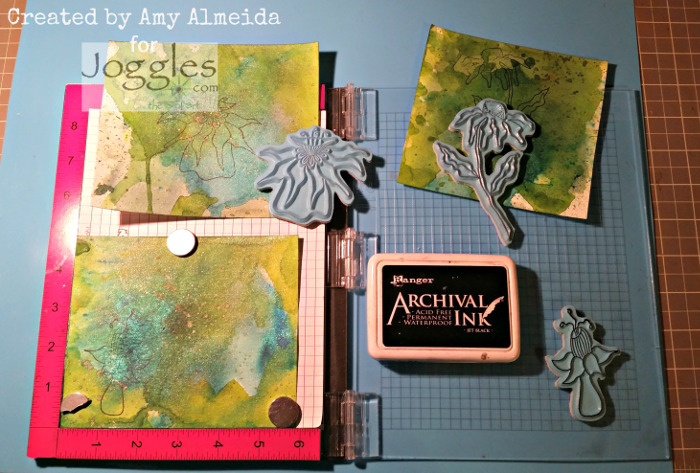
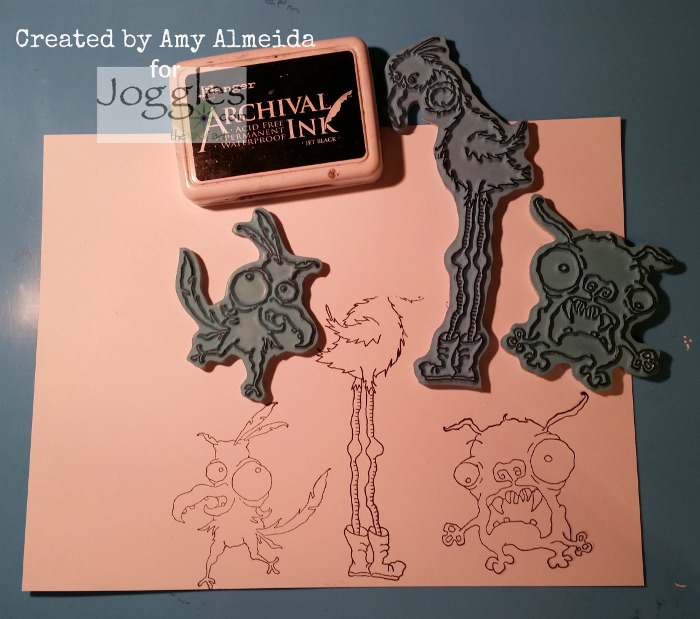
Once all of your watercolor pieces are dry, stamp all the funky flowers leaves/stems onto the green Magicals sheets using Jet Black Archival Ink and fussy cut. I used my MISTI to stamp as I find it helps me to get crisp lines which make it easy when fussy cutting.
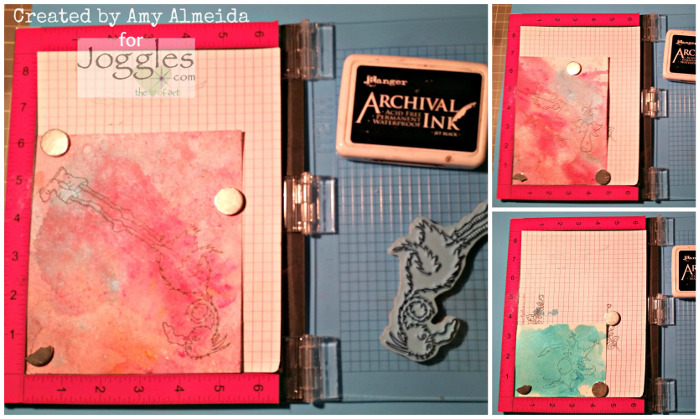
Stamp Joggles/Virginia England Rhonda, Magic Mushroom, and Funky Flowers #1, #6 and #8 cling mounted rubber stamps onto the mulitcolored watercolor sheet from Step 1 using Jet Black Archival Ink. Once dry, fussy cut all the images. NOTE: You only need the flowers petals (tops) as we’ve already stamped and cut the leaves/stems in Step 4. Stamp and fussy cut the Sweetums stamp from the brown watercolor sheet and Spike from the blue watercolor sheet.
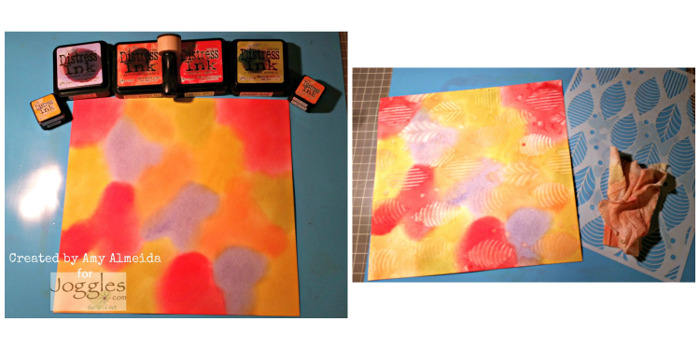
Using a new piece of watercolor paper, randomly blend Distress Inks (Fossilized Amber, Carved Pumpkin, Shaded Lilac, Candied Apple, Spiced Marmalade and Crushed Olive used here) with the Ranger Inkssentials Mini Ink Blending Tool until desired color and design are achieved. Place Joggles Big Leaves Stencil over the Distress Inked paper and remove some of the ink through the stencil openings using a baby wipe. This leaves a nice ghost-like effect on your background.
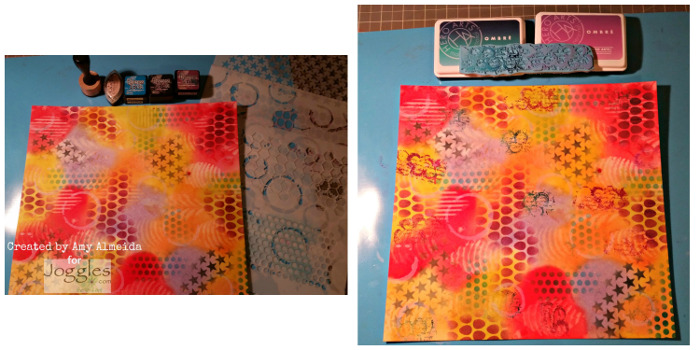
Using the Joggles Punchinella Trio 1 & 2 Stencils, blend Distress Inks (Seedless Preserves, Black Soot and Mermaid Lagoon used here), through the stencils with the mini ink blending tool. Then, using white craft pigment ink, blend thru the Joggles Spills & Splatters Stencil, again using the small blending tool in random spots to soften the design. Ink up the Joggles/Margaret Applin Designs Grunge Spots Border stamp with Hero Arts Ombre Inks (Lilac to Grape and Pool to Navy used here) and stamp randomly in different directions to add a bit of texture to your background.
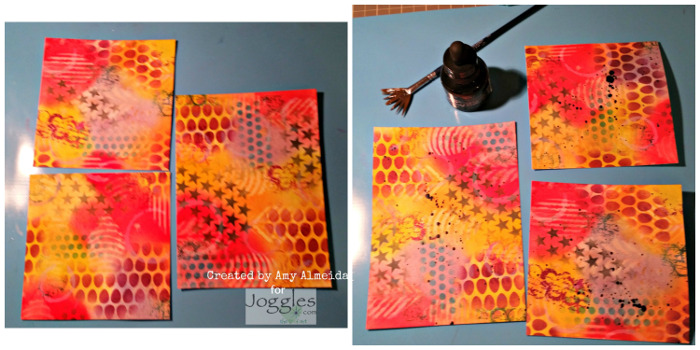
Cut the pieces to your desired card sizes. I cut mine like this: two pieces at 5 x 5 inches and one at 5×7 inches. These sizes will allow for a border piece and card base in our final steps. Using the Daler Rowney FW Acrylic Ink in Pearlescent Black and a fan brush, splatter dots onto your cut card pieces and let dry thoroughly.
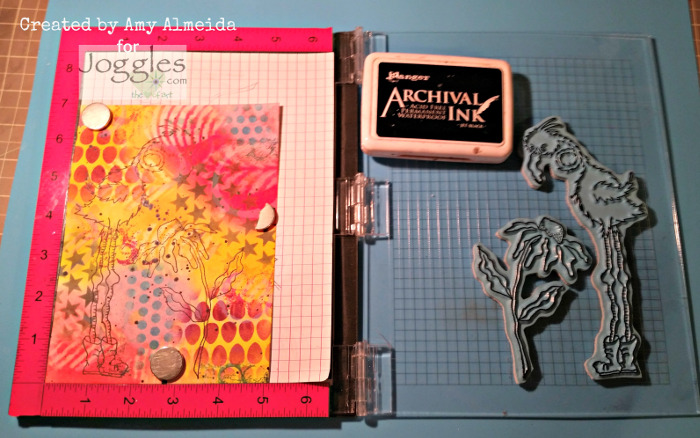
Stamp Rhonda, Magic Mushroom, Sweetums, Spike, and all 3 Funky Flowers images in your desired design onto your card pieces using Jet Black Archival Ink and then paper-piece your images together using the previously fussy cut pieces. I had a lot of fun creating my scenes using these fun Joggles stamps and know you will too! Use the white Molotow pen or Sharpie White Paint Marker to doodle and highlight your images.
Stamp Rhonda, Sweetums, and Spike again onto white card stock with the Jet Black Archival Ink and fussy cut the eyes, mouth and Rhonda’s legs. Adhere these paper pieced white parts onto the stamped backgrounds. I colored the inside of Spike’s and Sweetum’s mouths with DR3 Spectrum Noir Alcohol Marker.

Stamp your desired sentiments from the newly released Joggles/ Everyday Valentine line onto your cards using the Jet Black Archival Ink. I used 3 sentiments in 3 different ways. For this piece with Spike, I just wanted the word Pretend, from the Pretend Your Dreams stamp, so I masked off the rest of the stamp with Post-it Note strips and stamped directly onto the card with the Jet Black Archival Ink.
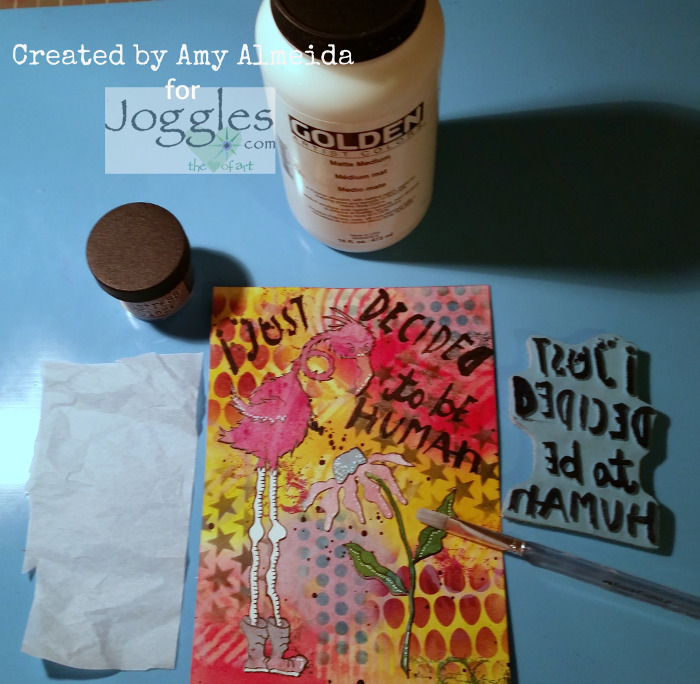
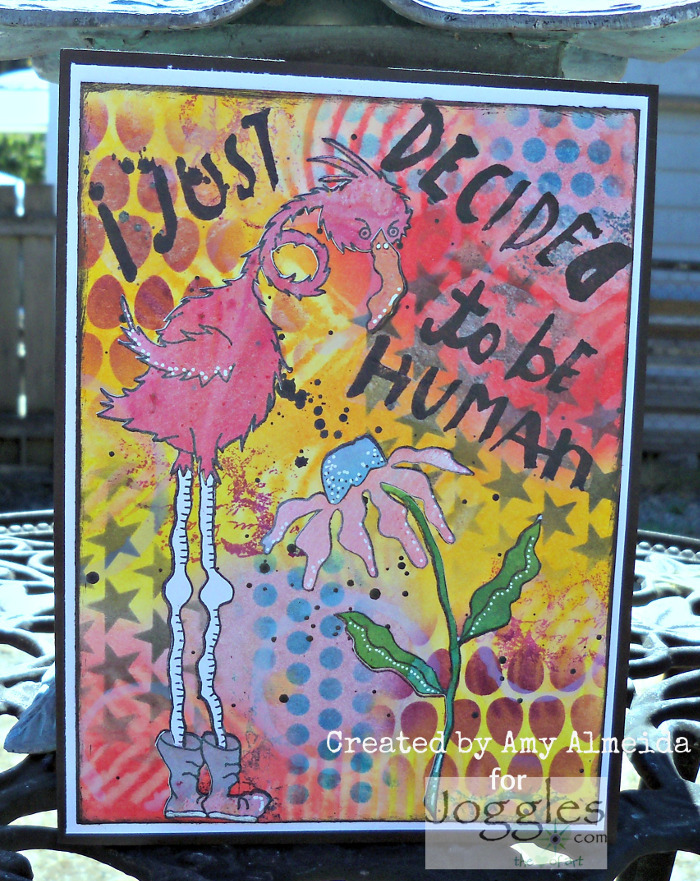
For Rhonda’s card, I stamped the Decided To Be Human stamp onto white tissue paper and cut the sentiment out in pieces. I sealed my card piece with the Tim Holtz Micro Glaze to prevent the Distress Inks from smearing in my background and then glued the sentiment onto my card front with Matte Medium.
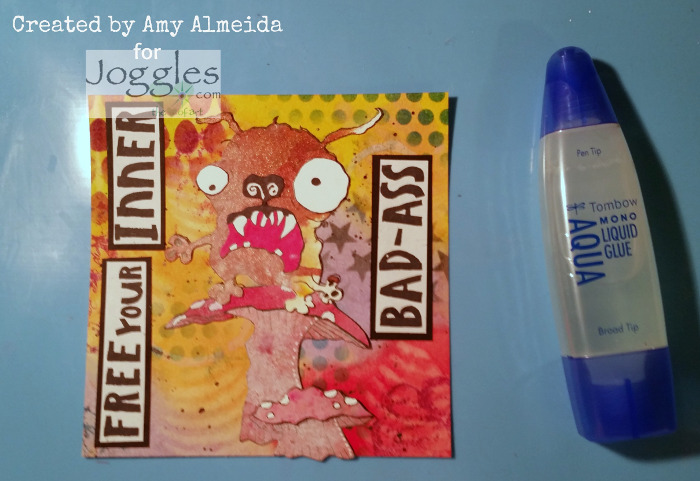
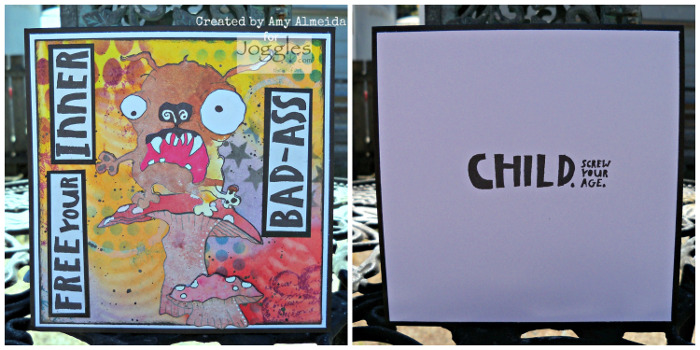
For Sweetum’s card, stamp a portion of the Free Your Inner Bad Ass Child Screw Your Age stamp onto white card stock and cut it out. Layer the pieces onto black card stock and glue onto the card piece with a clear liquid glue. The black matting around the words makes the sentiment “POP”!
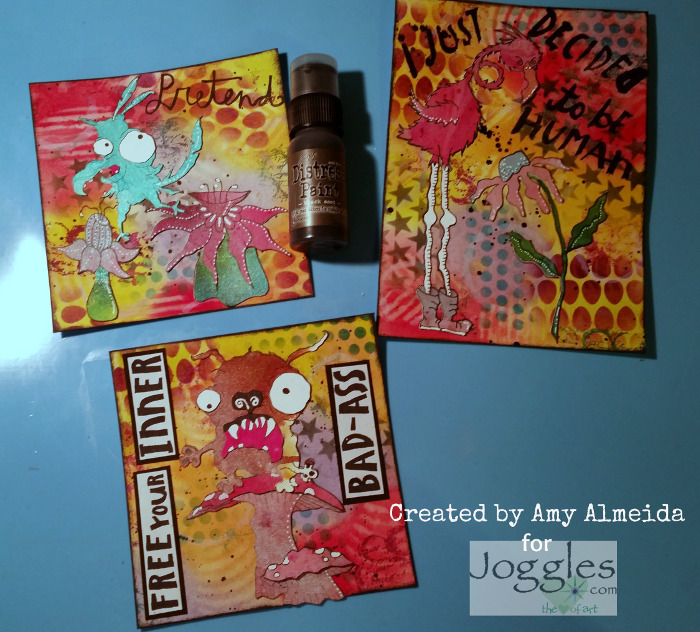
Now that your images are all glued and paper-pieced together onto your cards along with the sentiments, ink the edges of the cards with Black Soot Distress Paint. This makes your pieces pop and balances out the card pieces.
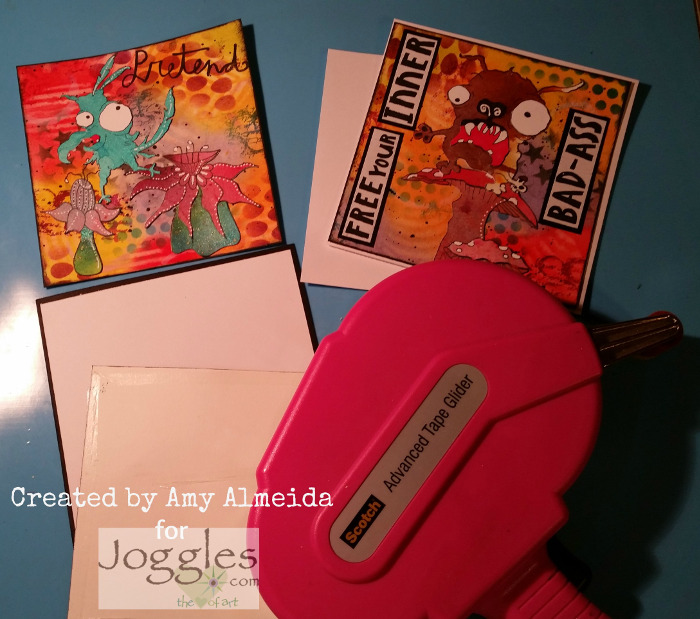
Cut 4 pieces of white card stock: two at 5 ¼ x 5 ¼ inches and two at 5 ¼ x 7 1/8 inches. Then cut one piece of black card stock at 5 ½ x 11 inches and another piece at 7 3/8 x 11 inches. Score both black pieces at 5 ½ inches which allows each card to be folded in half creating a base. Glue your card fronts onto the white mats and then onto your black card bases using your tape runner. Glue the other white card stock pieces to the inside of your card bases.
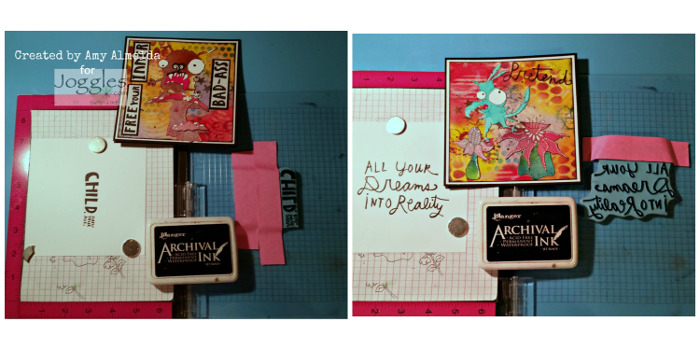
Stamp the remainder of the sentiment from the Pretend Your Dreams stamp and the Free Your Inner Bad Ass Child Screw Your Age stamp onto the white card stock inside your cards by masking off the previously stamped portions used on the front of the cards. These sentiments were too witty and funny not to be used completely as I’m sure they will make the recipient smile. :o)
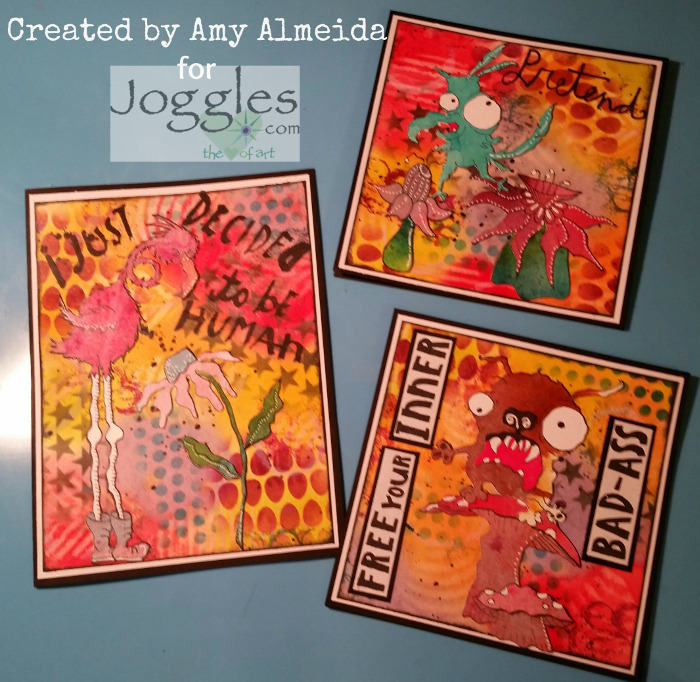
There we have it, three fun and vibrant cards using paper-piecing, stenciling, and sentiment masking. I sure hope you’ve enjoyed this tutorial. Be sure to leave me a comment below with your favorite card. :o)
Here’s a closer look at the outsides and insides of the finished cards:

I sure hope I’ve inspired you to try out some of the cute and quirky Joggles Stamps and the different ways to use your sentiments. Don’t forget to show us your mixed media makes over at the Joggles Art Adventure FB Group; we’d love to see what you create! Thank you for joining me today, and happy craftin’!
Comment
Really cute cards! Thanks for sharing your process.