
• Blog Home
  • Joggles Store
  • Categories
    • 5 Minutes Of Fun
    • Barb’s Random Art Stuff
    • Design Team
    • Guest Posts
    • MidWeek Muse Video Tutorials
    • Promotions & Giveaways
    • Store Happenings
    • Uncategorized
      • Blog Home
      • Joggles Store
      • Categories
        • 5 Minutes Of Fun
        • Barb’s Random Art Stuff
        • Design Team
        • Guest Posts
        • MidWeek Muse Video Tutorials
        • Promotions & Giveaways
        • Store Happenings
        • Uncategorized
      Bonnie’s Laurel Burch Stamps Easel Card
      June 20, 2017

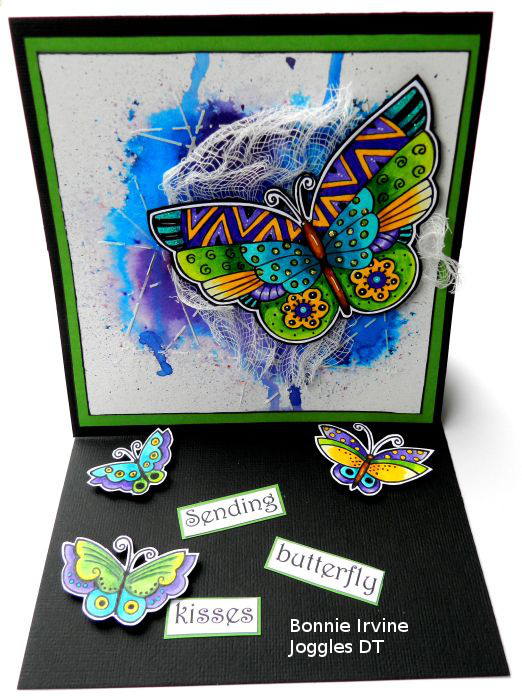
      Hi everyone. It’s Bonnie here with another Tuesday Card Post. Have you seen the amazing Laurel Burch Stamps which Barb added to the shop recently. Oh my word, they are gorgeous…each and every one of them! I was so inspired that I had to colour one up to create an easel card. My biggest problem was choosing only one main image. Trust me…you’ll be seeing more projects with these.
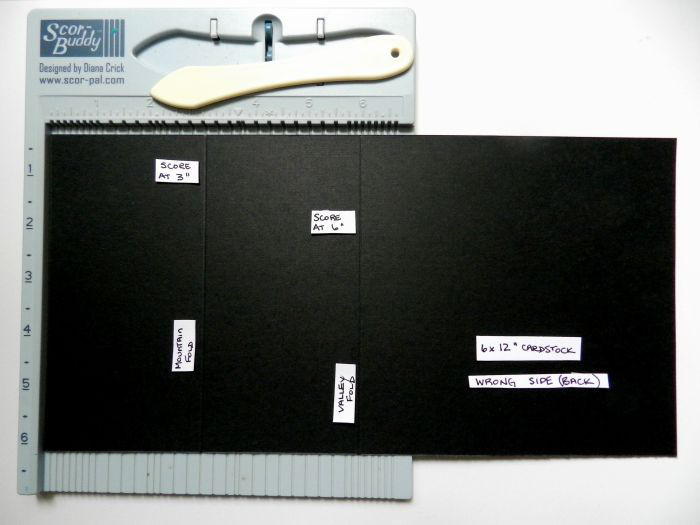
      There are all kinds of variations of easel cards but I decided to stick to the very simple one involving minimal folds and steps. I cut a 12 x 12 inch piece of black cardstock in half to get two 6 x 12 pieces. One of these will become the card base. I then cut the other half into a 6 x 6 piece which will become the card front. Using my Scor-Buddy, I scored the 6 x 12 inch piece at the 6 inch mark and again at the 3 inch mark along the long (12″) edge. Remember to do this on the wrong side or the back of the paper. If your paper is the same both sides, this won’t matter. Fold along the scored lines using a bone folder or the plastic one from the Scor-Buddy. The 3 inch line is a mountain fold and the 6 inch one is a valley fold.
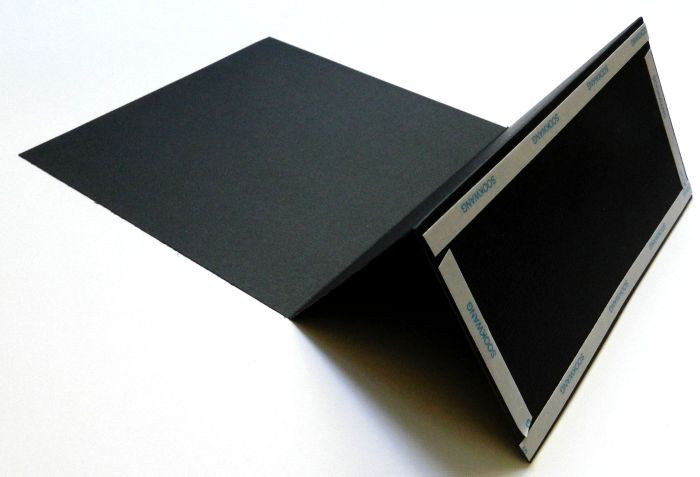
      I put Scor Tape on the four sides of the 3 inch section, making sure that you are applying it to the right side (in my case, the textured side). Collapse the card base along those fold lines so that the 3 inch section is lying flat on top of the 6 inch base (like a zigzag). The top of the 3 inch section is actually the edge that is touching the floor in the photo above. It will be the edge lined up with the 6 inch fold.
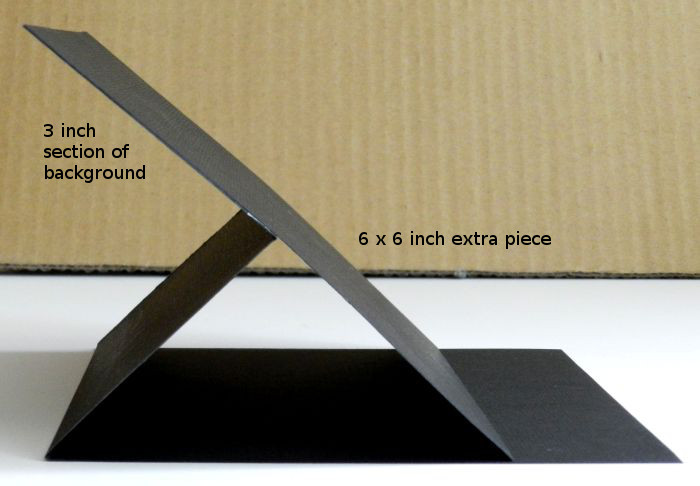
      Remove the Scor Tape and line up the top of the 3 inch section with the top of the 6 x 6 inch extra square cut earlier and adhere. From the side, it will look like the photo above. You can see that when I pushed the card front down flat, it will line up with the other 6 x 6 square of the base.
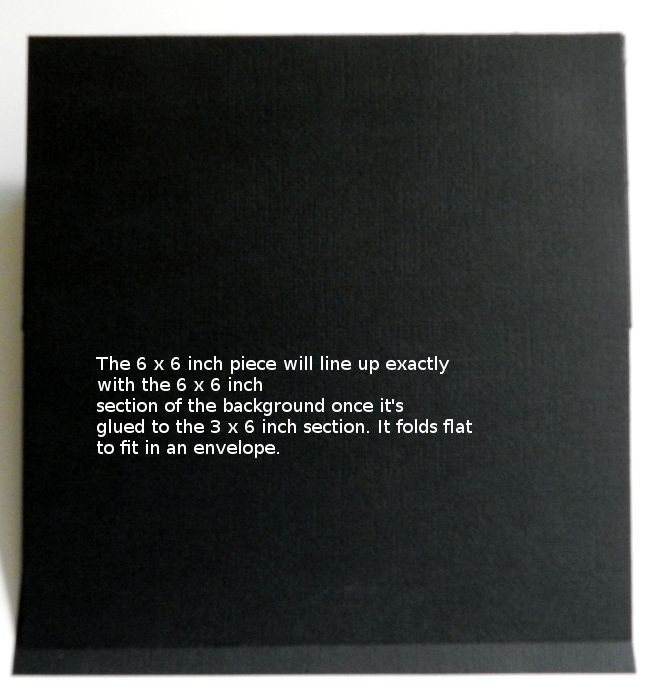
      You can see where the card front is overlapping the card base in this photo. The zigzag fold is now flattened.
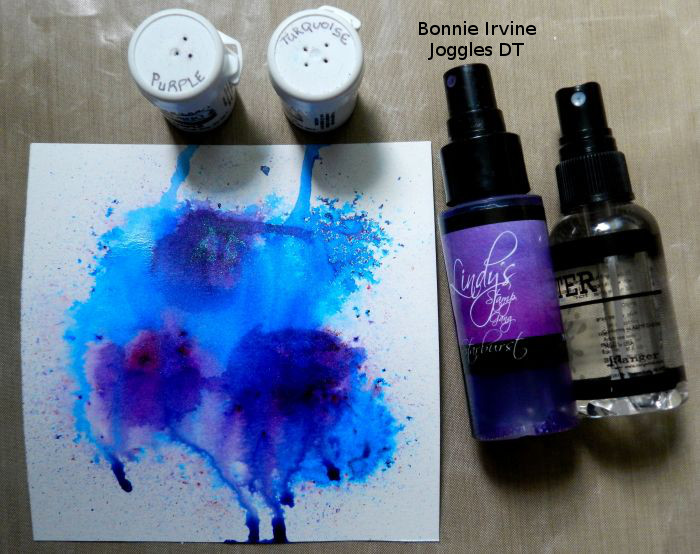
      I wanted the card front to have a white panel as background for the stamped image. I cut a 5.25 inch square of mixed media paper to use for this. Purple and Turquoise Colourcraft Brusho Crystal Colours were sprinkled onto the square and then spritzed with water. When this was dry, I decided I wanted the purple to be more purpley (LOL) so I dabbed some Lindy’s Stamp Gang Witch’s Potion Purple Starburst Spray onto those areas with a brush and then spritzed them with water. I liked that much better plus I now had some shimmer.
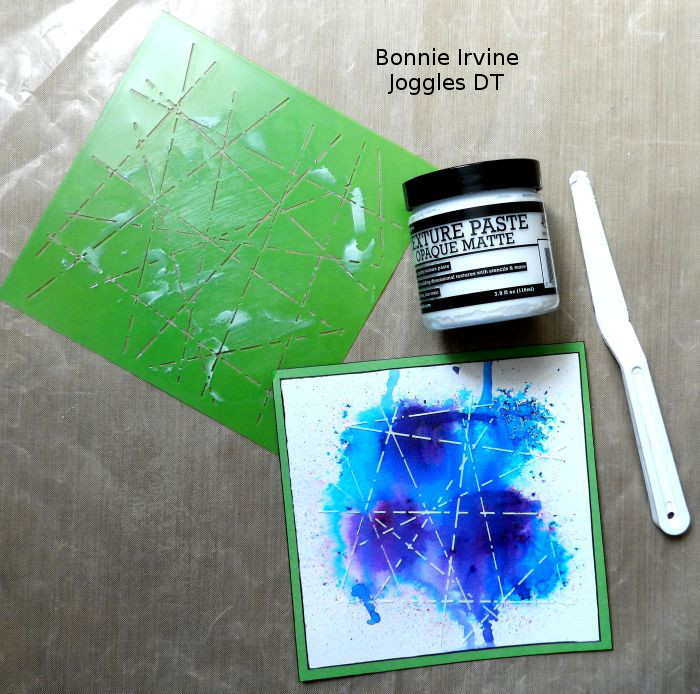
      Once that was thoroughly dry, I edged the square with black Big Brush pen and matted it with green cardstock. To break up the colour and add more interest, Ranger Texture Paste was scraped through Kaisercraft Criss Cross Designer Template.
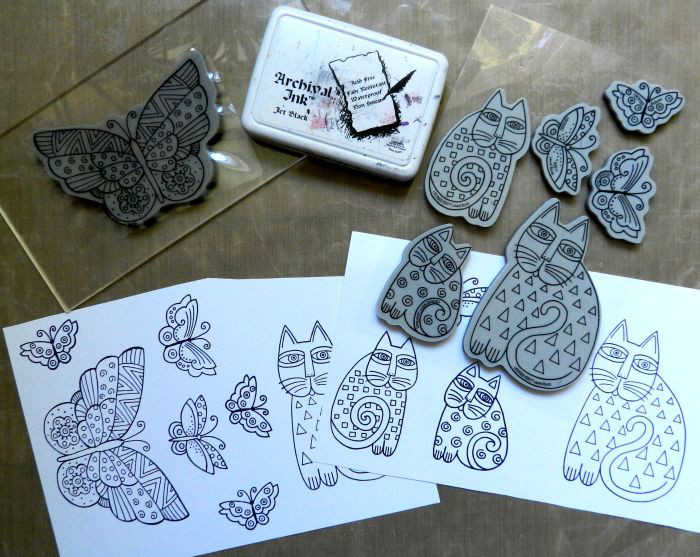
      I stamped all of the images from Laurel Burch Flutterbye Cling Stamp and Laurel Burch Indigo Cats Cling Stamp, some of them twice. I know that I will be using them all for other cards. They were stamped onto white cardstock using an acrylic stamp mount and Jet Black Archival Ink.
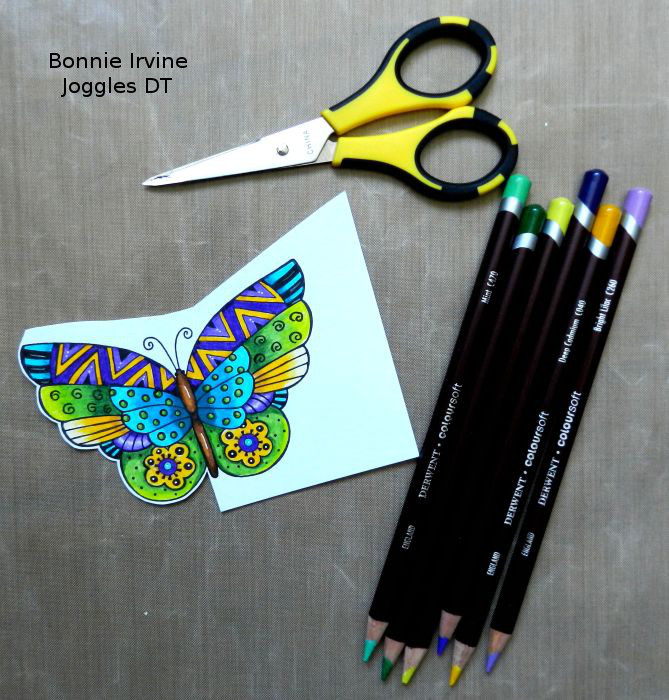
      The Flutterbye image as well as three of the butterflies from the Indigo Cats set were coloured with a mix of coloured pencil brands including Derwent Colour Soft Pencils. They were then fussy cut leaving a narrow white border, both to help them stand out against the black and to make those antennae a little larger and stronger.
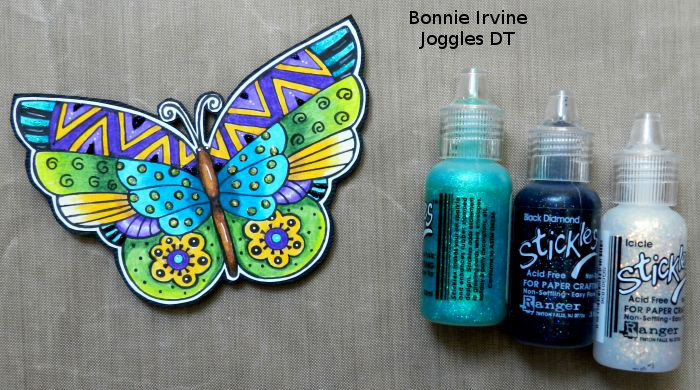
      Peacock, Black Diamond, and Icicle Stickles were added to the large butterfly. Wish I could have captured the sparkle in this photo.
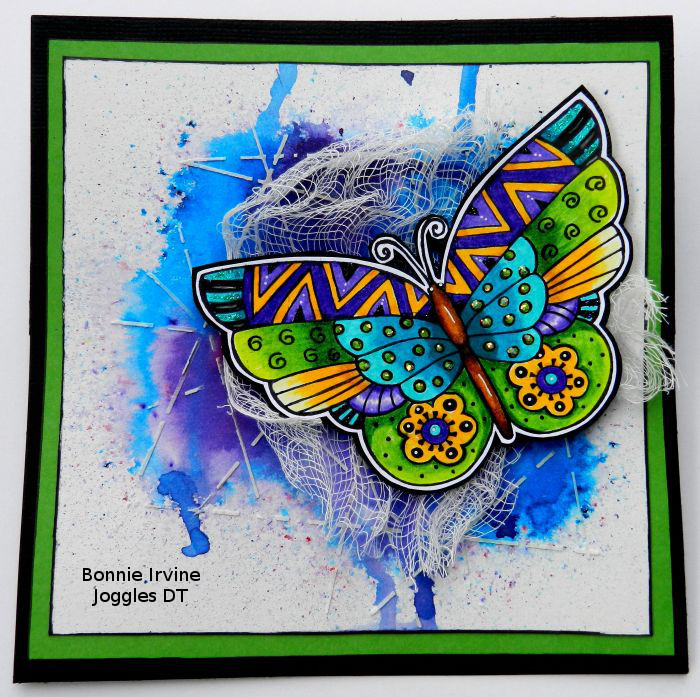
      The butterfly was popped up on foam squares and a length of cheesecloth was added under it to help it show a little better and also to add texture.
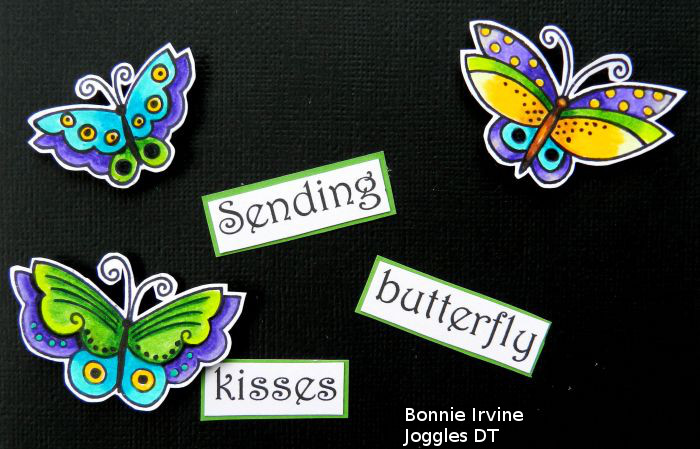
      Here are the smaller butterflies which have to be popped up on foam to make the card work. The sentiment was printed on white, trimmed into individual words, and matted with green. Scor Tape was used to glue the words to the base.
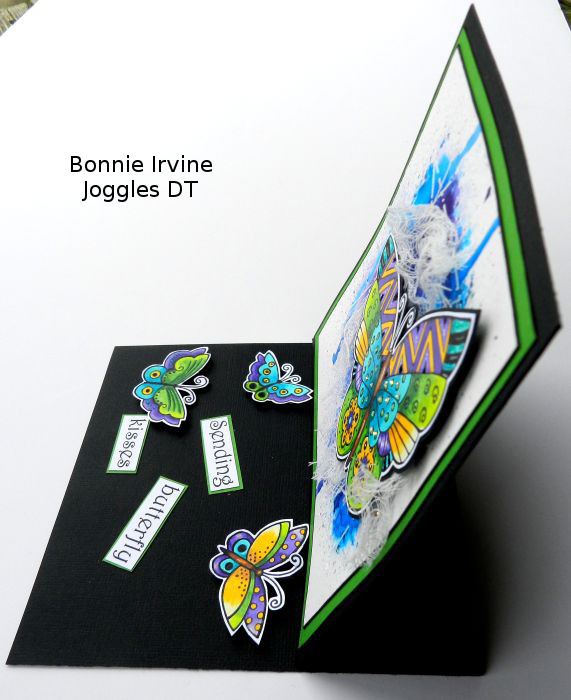
      To determine where to place the butterflies, which are popped up and hold the card front in its upright easel position, I set up the easel with the card front where I wanted it. I held it in place until I could set the butterflies in place to hold the front.
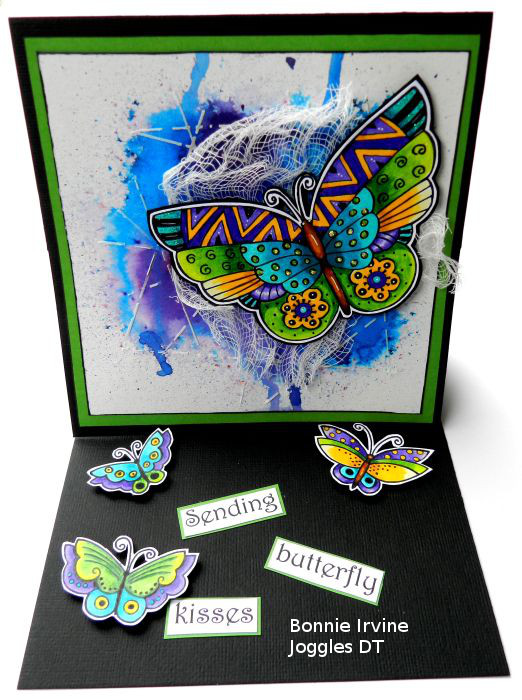
      And here is the finished card still in the easel position. It does fold flat enough to fit into an envelope. Instead of the butterflies being the stoppers for the easel, you can also use flowers, embellies, jewels, or use foam tape on the sentiment. There are many ways to make this type of card work.

      I hope you will give the easel card a go. There are lots of YouTube videos if that’s more your learning style. It looks complicated but it’s easy and sure to impress 🙂

      Adult ColoringCard MakingInks & SpraysRubber Stamping
      Share

      Design Team

      Bonnie Irvine

      You might also like

      Layers Upon Layers With Stencils & Masks
      April 5, 2024
      Just For You, A Free AALL & Create Stamp Set Named Lovely Bubbly!
      April 3, 2024
      Happy Birthday Vincent Van Gogh!
      March 29, 2024

      5 Comments


      Diana Trout
      June 20, 2017 at 8:12 am
      Reply

      Wow! This is a fantastic piece Bonnie. I love the colors and that background is just perfect.


      MJ Geltz
      June 20, 2017 at 10:03 am
      Reply

      I loved how you presented this. Excellent photos that show how to make this card. I think I could do it too!


      Dolores Bennett
      June 20, 2017 at 11:38 am
      Reply

      I’ve never seen that kind of fussy cutting. You give Cricut and SNC a run for their money. Great.

      Your coloring is beautiful. The overwhelming background competeing with the butterfly is a bit much.

      Thanks for the lesson.


      Teresa Morgan
      June 20, 2017 at 3:50 pm
      Reply

      Love the colours you chose for this project Bonnie, you made the butterflies look like stained glass – they are going to fly of the shelves (excuse the pun!!)


      Teresa
      June 20, 2017 at 11:46 pm
      Reply

      I have always loved Laurel Burch’s fabrics for quilting. I am thrilled to see them in rubber stamps and can’t wait to buy some. Loved your card Bonnie.


      Leave a Reply Cancel reply

      Your email address will not be published. Required fields are marked *

      • Follow Us

        FacebooktwitterpinterestyoutubeinstagramFacebooktwitterpinterestyoutubeinstagram
      • Share This Page

        FacebooktwitterredditpinterestlinkedintumblrmailFacebooktwitterredditpinterestlinkedintumblrmail
      • Recent Posts

        • Elizabeth’s NEW Kraft Letters + Numbers Are Font-tastic! May 29, 2026
        • All That Glitters is Gold, Silver, Copper… Kamenskaya Liquid Gilding! May 27, 2026
        • A Study In Sepia: Rebekah Meier’s New Rice Papers May 20, 2026
        • Boogie On Down With Elizabeth’s New Geo Boogie Stencils! May 13, 2026
        • Free Joggles Art Quotes Journals – Happy Mother’s Day! May 8, 2026
      • Search The Joggles Blog

      • Subscribe To The Joggles Blog!

        Enter your email address to receive a notification when there’s a new blog post.

      • Categories

        • 5 Minutes Of Fun
        • Barb's Random Art Stuff
        • Design Team
        • Guest Posts
        • MidWeek Muse Video Tutorials
        • Promotions, Sales & Giveaways
        • Store Happenings
        • Uncategorized
      • Tags

        Accordion Books Alcohol Inks Art by Marlene Art Journaling ATCs Bloobel Stamps Book Making Card Making Cat Kerr Collage Sheets Cosmic Shimmer Deli Paper Dina Wakley Distress Inks Distress Oxide Inks Doodles & Tangles Dylusions Elizabeth St. Hilaire Finnabair Art Alchemy paint Foam Stamps Freebies Gel Press Plates Gel Printing Glittery Stuff Holiday Inks & Sprays Itty Bitty ATC Stencils Joggles Products Marabu Margaret Applin Mixed Media Paint Product Spotlight Ranger Rebekah Meier Rice Paper Rubber Stamping Scrapbook Papers Stampotique Originals Stencils Sticky Snippets™ Tim Holtz Tunnel Books Video Tutorial Virginia England
      • Archives

        • May 2026
        • April 2026
        • March 2026
        • February 2026
        • January 2026
        • December 2025
        • November 2025
        • October 2025
        • September 2025
        • August 2025
        • July 2025
        • June 2025
        • May 2025
        • April 2025
        • March 2025
        • February 2025
        • January 2025
        • December 2024
        • November 2024
        • October 2024
        • September 2024
        • August 2024
        • July 2024
        • June 2024
        • May 2024
        • April 2024
        • March 2024
        • February 2024
        • January 2024
        • December 2023
        • November 2023
        • October 2023
        • September 2023
        • August 2023
        • July 2023
        • June 2023
        • May 2023
        • April 2023
        • March 2023
        • February 2023
        • January 2023
        • December 2022
        • November 2022
        • October 2022
        • September 2022
        • August 2022
        • July 2022
        • June 2022
        • May 2022
        • April 2022
        • March 2022
        • February 2022
        • January 2022
        • December 2021
        • November 2021
        • October 2021
        • September 2021
        • August 2021
        • July 2021
        • June 2021
        • May 2021
        • April 2021
        • March 2021
        • February 2021
        • January 2021
        • December 2020
        • November 2020
        • October 2020
        • September 2020
        • August 2020
        • July 2020
        • June 2020
        • May 2020
        • April 2020
        • March 2020
        • February 2020
        • January 2020
        • December 2019
        • November 2019
        • October 2019
        • September 2019
        • August 2019
        • July 2019
        • June 2019
        • May 2019
        • April 2019
        • March 2019
        • February 2019
        • January 2019
        • December 2018
        • November 2018
        • October 2018
        • September 2018
        • August 2018
        • July 2018
        • June 2018
        • May 2018
        • April 2018
        • March 2018
        • February 2018
        • January 2018
        • December 2017
        • November 2017
        • October 2017
        • September 2017
        • August 2017
        • July 2017
        • June 2017
        • May 2017
        • April 2017
        • March 2017
        • February 2017
        • January 2017
        • December 2016
        • November 2016
        • October 2016
        • September 2016
        • August 2016
        • July 2016
        • June 2016
        • May 2016
        • April 2016
        • March 2016
        • February 2016
        • January 2016
        • December 2015
        • November 2015
        • October 2015
        • September 2015
        • August 2015
        • July 2015
        • June 2015
        • May 2015
        • April 2015
        • March 2015
        • February 2015
        • January 2015
        • December 2014
        • November 2014
        • October 2014
        • September 2014
        • August 2014
        • July 2014
        • June 2014
        • May 2014
        • April 2014
        • March 2014
        • February 2014
        • January 2014
        • December 2013
        • November 2013
        • October 2013
        • September 2013
        • August 2013
        • July 2013
        • June 2013
        • May 2013
        • April 2013
        • March 2013
        • February 2013
        • January 2013
        • December 2012
        • November 2012
        • October 2012
        • September 2012
        • August 2012


          © Copyright Joggles.com, Inc.

