Bonnie was one of the first artists to submit an application for the Joggles Design Team. Hers was beautifully done: well organized and written, and we’ve been corresponding on and off since I received it. She has a lot of great ideas and has been incredible, helping me in a myriad of ways.
Today’s guest blog post is courtesy of Bonnie and I’m excited to share it with you. The project is colorful and fun. Best of all, it’s easy to create. Bonnie’s instructions and photos will walk you through the process so you can too have a version of the Man Of Mystery ATB!
What follows are Bonnie’s instructions and photos. Please join me in extending a big thank-you to her!
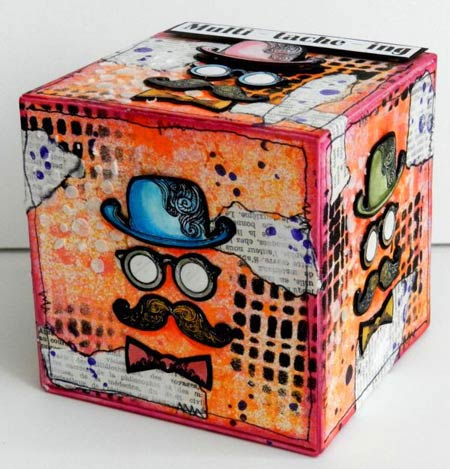
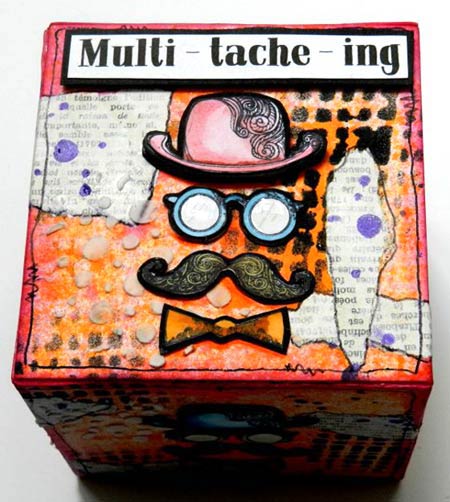
Man Of Mystery Artist Trading Block

Supplies Used:
Joggles Precut Mat Board – Artist Trading Block [Extra Large]
Lindy’s Stamp Gang Two Toned Starburst Spray – Hottie Patottie Hot Pink
Lindy’s Stamp Gang Two Toned Starburst Spray – Marigold Yellow Orange
Dylusions 5×8″Stencil – Blocks
Dylusions PAINT – Black Marble
Ranger Mini Ink Blending Tool
Tim Holtz Layering Stencil – Burlap
Archival Ink Pad – Tiger Lily
Joggles Cling Mounted Rubber Stamp – Background Noise – Spark
Tim Holtz Distress Ink Pad – Picked Raspberry
Scor Tape
Dina Wakley Media Gel Medium – 2oz Tube
Ranger Texture Paste
Dina Wakley Media Palette Knife
Dylusions 5×8″Stencil – Bubbles
Archival Ink Pad – Deep Purple
Joggles Cling Mounted Rubber Stamp – Background Noise – Dots
Aleene’s Super Thick Tacky Glue
Faber Castell PITT Artist Pen – [S] Super Fine Tip – Black
Canson Watercolor Paper – 9″ x 12″ 90# Cold Pressed
Deep Red Stamps – Man Of Mystery
Archival Ink Pad – Jet Black
Tim Holtz Distress Markers – Vintage Photo; Broken China; Black Soot; Scattered Straw; Peeled Paint; Spiced Marmalade, Faded Jeans; Frayed Burlap, Worn Lipstick
Inkssentials Glossy Accents 2 fl. oz.
One of the things I love using as a substrate is Joggles Precut Mat Board – Artist Trading Block [Extra Large] because there is so much real estate to play with. Six sides for painty inky layers of fun! I chose to use one from the package of two to feature this fabulous Deep Red Stamps – Man Of Mystery.
This is my process:
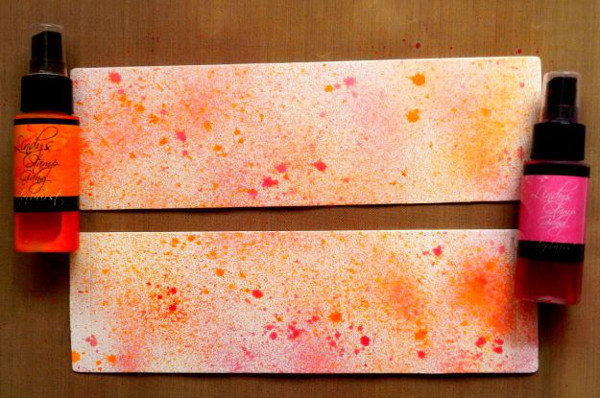
Spritz both Mat Board sections with light layers of Lindy’s Stamp Gang Two Toned Starburst Spray – Hottie Patottie Hot Pink and Marigold Yellow Orange. I don’t blot up the drips or splats…love the extra texture. Let dry or use a heat tool.
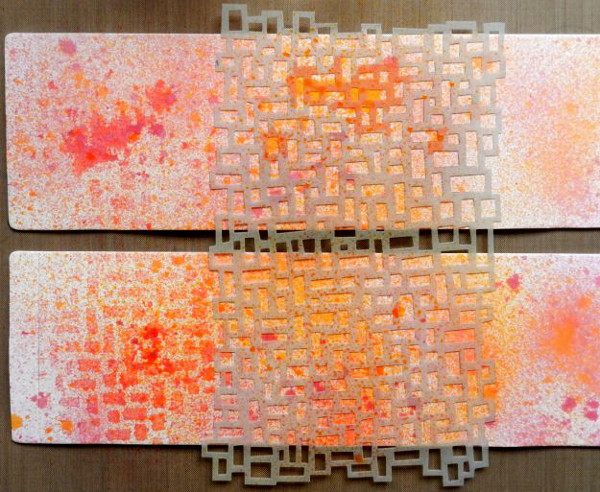
Lay Dylusions 5×8”Stencil – Blocks over the two Mat Board pieces and spray with the same Lindy’s Stamp Gang two Toned Starburst Sprays used above. Move the stencil and repeat. Don’t waste the inky goodness on the stencil or on your craft sheet…mop it up onto watercolour paper scraps or Joggles Deli Paper.

Using a Ranger Mini Ink Blending Tool, apply Dylusions PAINT – Black Marble through Tim Holtz Layering Stencil – Burlap in a couple of places on each of the six faces of the flattened cube. You’ll need very little paint on the applicator to keep it from seeping under the stencil.

Randomly apply Tiger Lily Archival Ink with Joggles Cling Mounted Rubber Stamp – Background Noise – Spark to fill in some of the blank spaces on the background. I tend to load the stamp without using a stamp black, and then roll it onto the background so I’m getting partial impressions. We’re not going for perfection here 🙂
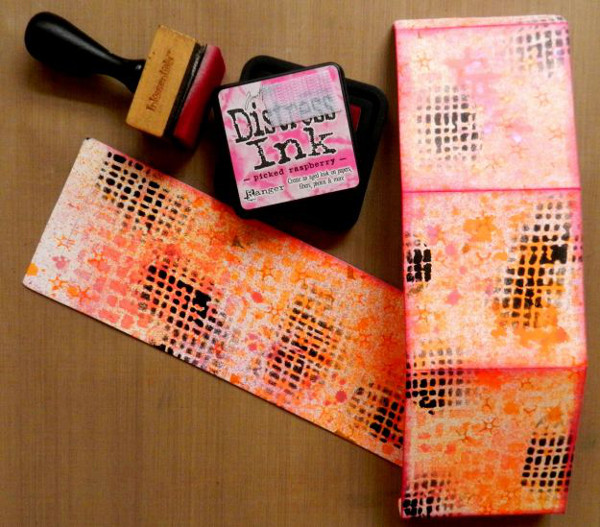
Before joining the two sections together, apply Tim Holtz Distress Ink in Picked Raspberry to all of the edges with an applicator tool. Be sure to fold on the pre-scored lines so that you can get the ink into the creases or you will have white showing. A wet brush can help get it into the deepest parts of the creases.
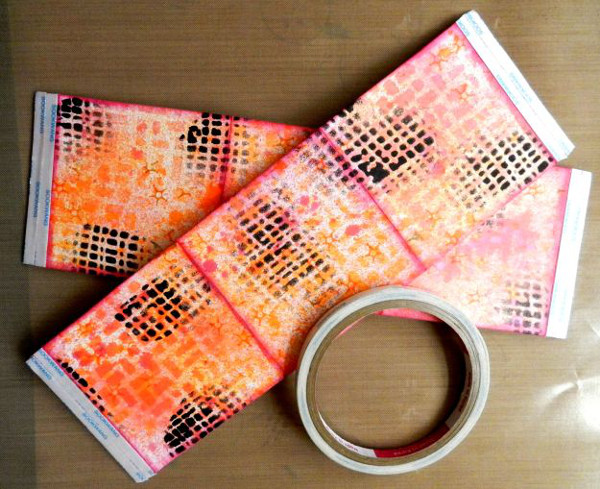
Apply .25” Scor Tape to the outside edges of the two tabs on each section. I’m not going to give you instructions on putting the block together because Barb has a fabulous video demoing this right here It shows you very clearly how to construct one. It’s super easy!
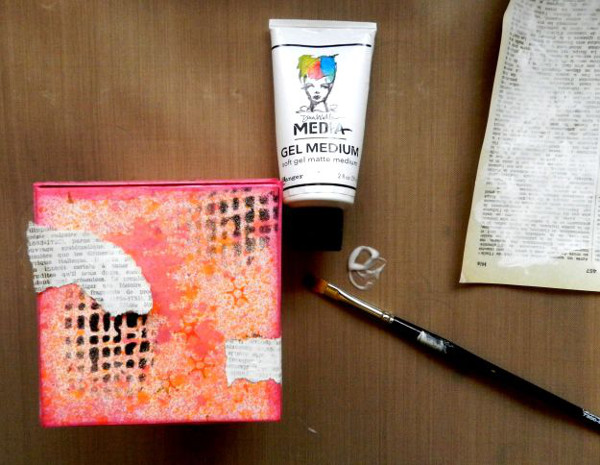
Using your Dina Wakley Media Palette Knife, scrape some white gesso over book text paper and allow to dry. Tear the paper into small scraps and apply to each side of the ATB with Dina Wakley Media Gel Medium. Add a little over the top of each text scrap to make sure it stays put. Once dry outline each scrap using a Faber Castell PITT Artist Pen – [S] Super Fine Tip – Black
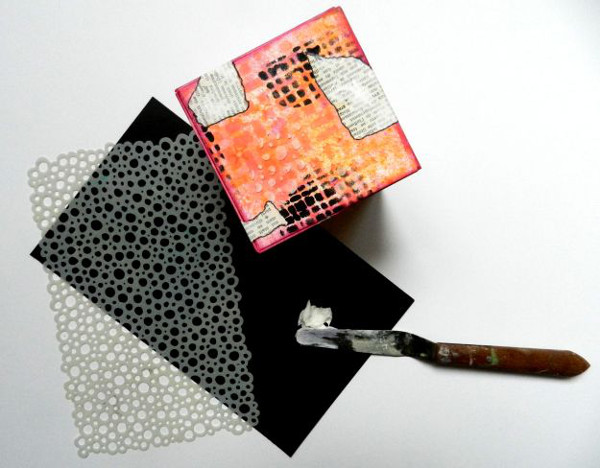
On each side of the cube in two or three spots, scrape Ranger Texture Paste through Dylusions 5×8”Stencil – Bubbles and allow to dry.
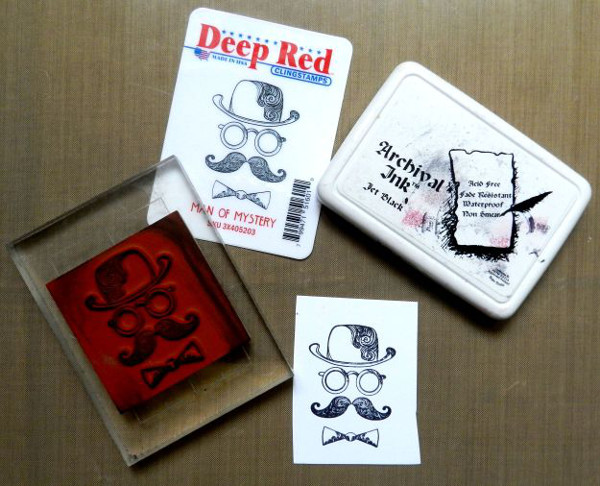
Using Archival Ink in Jet Black, stamp Deep Red Stamp – Man of Mystery six times onto a sheet of Canson Watercolor Paper – 9″ x 12″ 90# Cold Pressed.
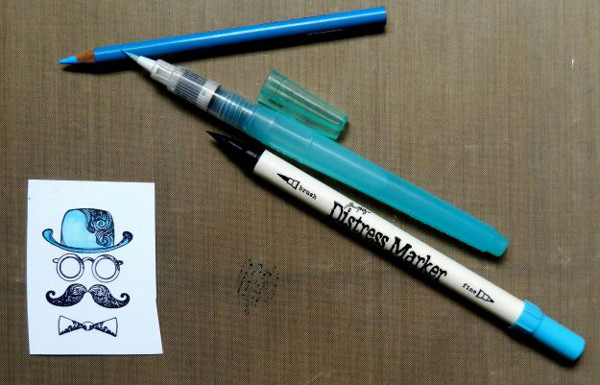
Colour each of the six stamps by scribbling various colours of Distress Markers onto your craft sheet and picking up the ink with a water brush or a brush moistened with water. Shading can be done either by applying a second layer where you want it or by adding coloured pencil once the paper is dry. Add Glossy Accents to each lens of the glasses. Fussy cut and mat each stamped piece to black cardstock and trim again. Adhere the completed stamps to the faces of the block with Aleene’s Super Tacky Glue.
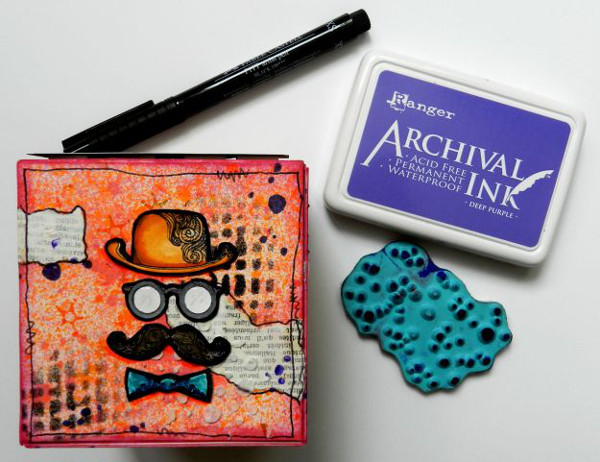
To complete the project, apply Deep Purple Archival Ink to the background using Joggles Cling Mounted Rubber Stamp – Background Noise – Dots to places which look a little bare. I also make sure that some dots overlap both the text paper and the background to tie the two together. Doodle a simple border around each face of the ATB using your black Pitt pen.
Thanks so much for stopping by today. We would love to see your Artist Trading Blocks when you create them. They are so much fun.
16 Comments
Super Cute Bonnie….and awesome tutorial….looking forward to more of your artwork.
Thanks so much, Virginia. It was pure play!
awesome project, love the colors and the great tut. tfs.
Thanks, Agnes.I love vibrant colours and the ATBs are so much fun to create.
Love it, so cute! Will have to try one myself. Thanks for sharing.
Thanks, Faye. I would love to see it when you are finished 🙂
Here is my finished box. I did not put a title on the top of it as you did, but overall am satisfied.
Here is my attempt at an ATB with Tim’s crazy birds. I used all six of them band had a great time with it. I used your process Bonnie, just picked different colors, etc. Will have to post the pics one at a time. The top is the first one.
One of the sides
Another side.
Bonnie! This is so awesome, I love your work and the tut! Great share, thanks so much and see you again soon!!
Thanks, Gerrie. I appreciate your kind words.
Welcome Bonnie. What a beautiful piece of art. Love the stamps you choose. Never could figure out what to do with that stamp and now I have an answer. Thanks.
Bobbie, thanks so much. I love that stamp and would love to see what you create with him. I want to do an atc with him, too.
Fabulous !! I love the bright colors and the texture. Thank you for sharing your art. Can’t wait to see more.
What a beautiful ATB – I love the colors and stamps – just wonderful!