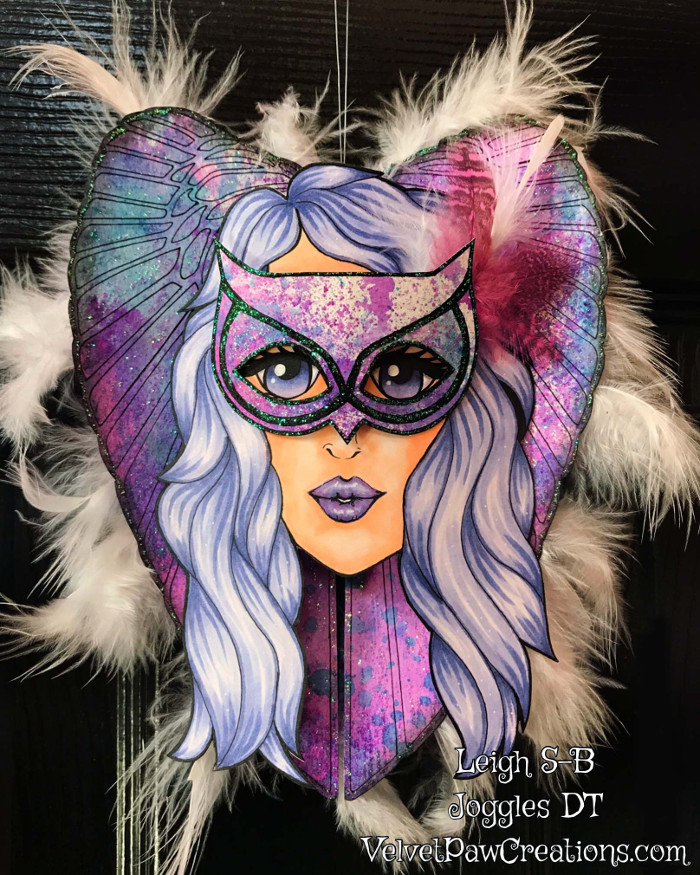
Hello Joggles fans! Leigh here and I’m so thrilled to be sharing my first Joggles design team project with you all today. I’m sure most of you are now familiar with Joggles/Margaret Applin Designs Fearless Face Stencil System and today I’m expanding on the creative possibilities this system provides you. I enjoy taking 2 dimensional projects and bringing them to life in glorious 3D and today I’m going to show you how to make a fabulous 3 dimensional hanging Owl Fairy.
If you haven’t seen these stencils before than stop by Barbara’s wonderful introduction video HERE and also check out Bonnie’s gorgeous art journal project HERE.
SUPPLIES
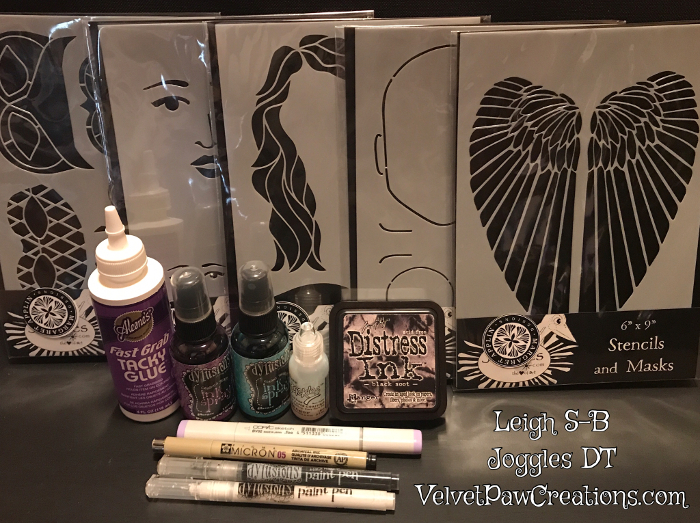
Joggles/ Margaret Applin Designs Fearless Face Stencil System: Medium Hair#1 – 33813; Facial Features #1 – 33804; Square Face – 33811; Medium Wings #3 – 57440; Owl and Harlequin Mask – 57442;
Stickles Glitter Glue – Crystal
Dylusions Ink Sprays by Dyan Reaveley – Crushed Grape; Vibrant Turquoise
Dylusions Paint Pens – black and white set
Tim Holtz Distress Ink Pad – Black Soot
Tim Holtz Alcohol Ink Applicator
Strathmore Mixed Media paper
Strathmore 300 Series Watercolor Paper – 9×12 inch 140# Cold Pressed Tape Bound Pad
Inkssentials NonStick Craft Sheet
Copic Sketch markers : E0000, E000, E00, E01, E02, BV01, 02, 04 and V05
Other: low tack tape – masking or painters tape; scissors; pencil and eraser; paper towel; water; hot glue gun and sticks; repositionable glue dots; eyelet and eyelet hole punch and setter tools
INSTRUCTIONS
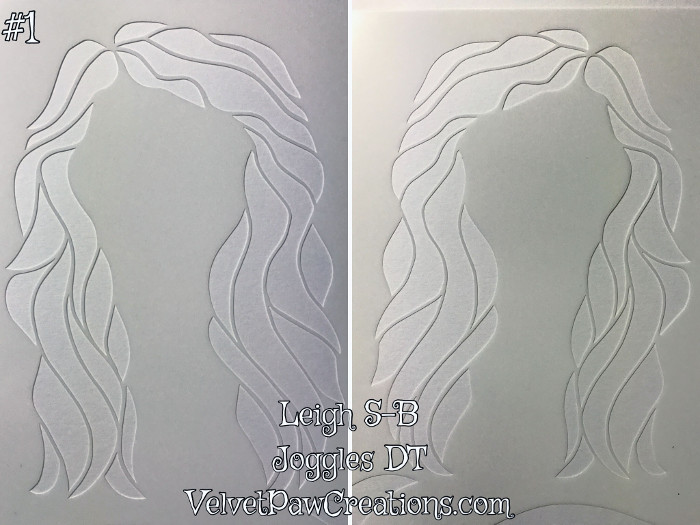
The Joggles Fearless Faces Stencil System has an assortment of hair styles in various sizes for you to pick from and you can even choose which way you want the hair to face simply by turning the stencil over. For my project I used Medium Hair #1 and decided to turn the stencil over which is the hair style shown on the left in the photo.
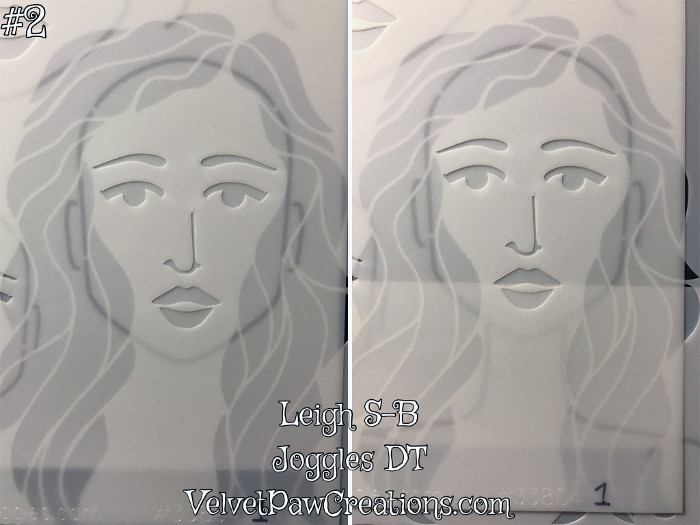
The beauty of this system is that it takes the fear out of creating faces and you can even design the face before putting pencil to paper just by laying the stencils on top of each other. You can see through each layer and play until you’re happy with the look or just jump right in and see where your creativity takes you.
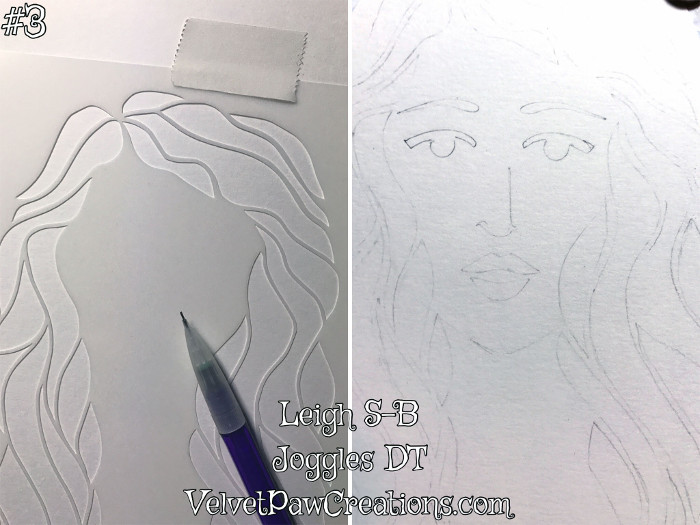
Start by securing the 6” x 9” hair stencil to a sheet of mixed media paper with low tack tape, masking tape or painter’s tape will do, and draw in the hair with a pencil. I then added the medium sized chin from the Square Face stencil first so that I could determine the placement of the medium size eyes, nose and mouth from the Facial Features #1 stencil. I’d normally draw in the pencil lines lighter but I wanted you to see them clearly in the photo. If your pencil lines turn out too dark you can lightly rub over them with an eraser before you start colouring.
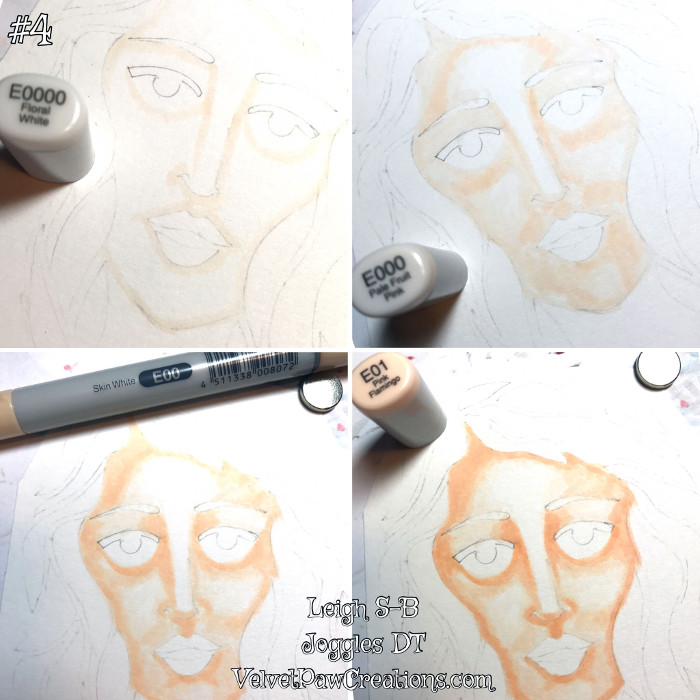
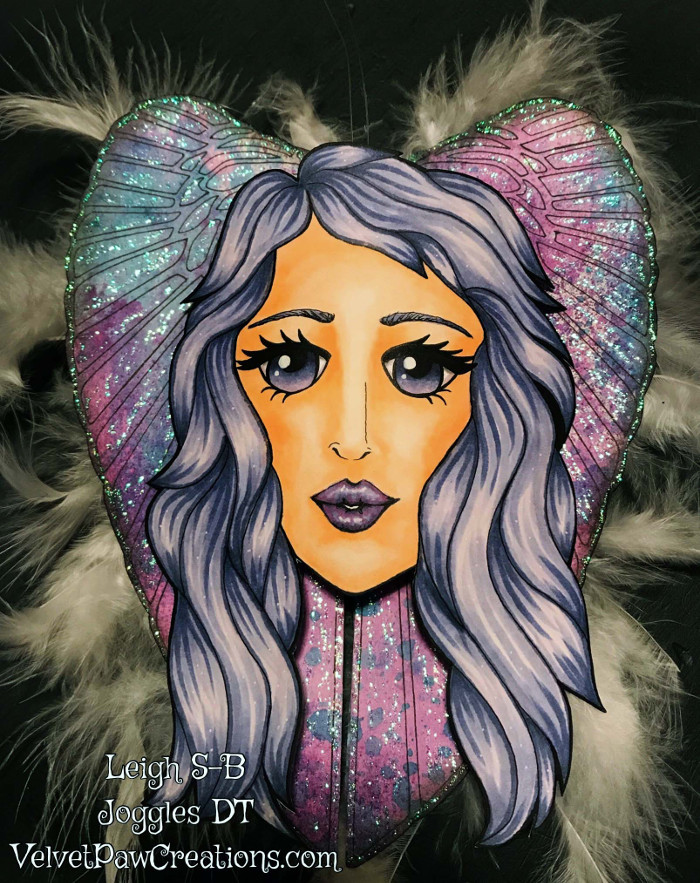
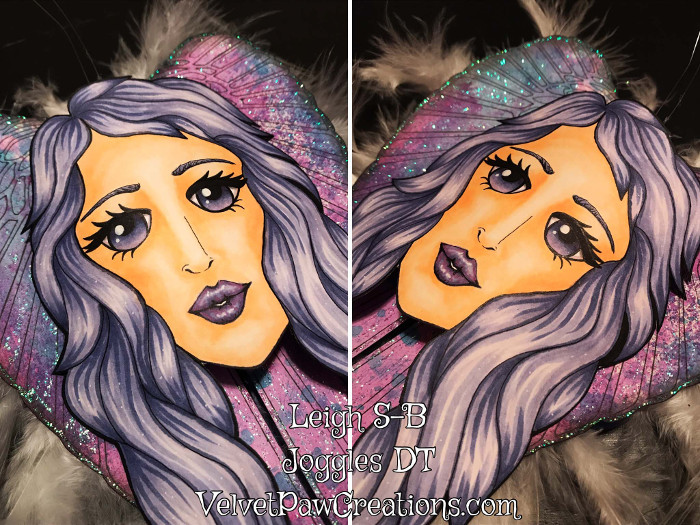
Now the magic begins as you bring the face to life with colour. I used Copic Sketch markers E0000 through to E01 to build up her features and define the areas of light and shadow. Start colouring from light to dark and then go over everything again working backwards from dark to light to achieve a good blend. I used E02 to add a touch of blush to her cheeks and to deepen the shadows and smoothed and blended it with the lighter colours.

Once I was happy with her skin, I coloured her hair with Copics BV01, 02 and 04 using the feathering technique. Start by creating the flowing waves by drawing over the pencil lines with BV01 first (which is the lightest shade of purple I used) to get a feel for the hair and it’s also then easier to change a ringlet or two in the next step if you wanted to. Then go over the lines again with BV04 to define the hair sections and map in where the darkest areas will be. I worked from dark to light and then back over everything again from light to dark. I also left some areas of the white paper showing for extra highlights. While working on her hair I coloured her eyes, eyebrows and lips using the same colours and finished off her lips with a touch of V05 to tie in with the pink colour I planned to use on the wings.
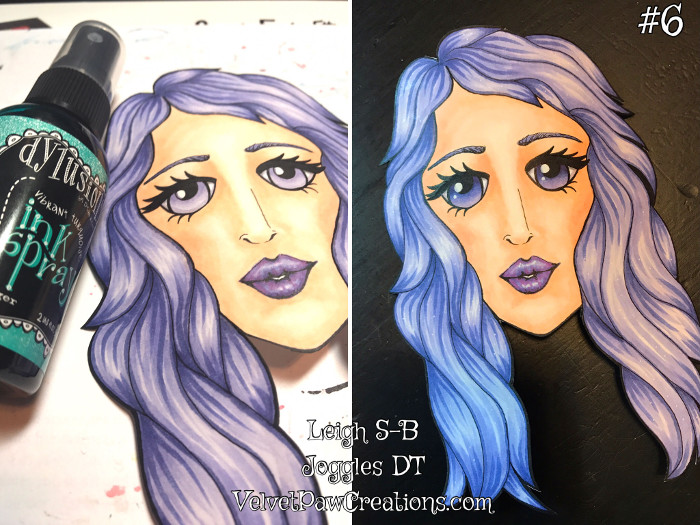
Once all the colouring is complete, draw in the details of her face by tracing over the faint pencil lines with a black Micron pen and add white highlights to her eyes, nose tip, lips and hair with a white Dylusions Paint Pen. If you’d prefer a softer look for the details, you could use colored pencils instead. For extra definition, I also outlined each lock of hair in black Micron and her entire head with a black Dylusions Paint Pen and then fussy cut her. To give her head dimension, I curved the paper by bending it over a Dylusions spray bottle.
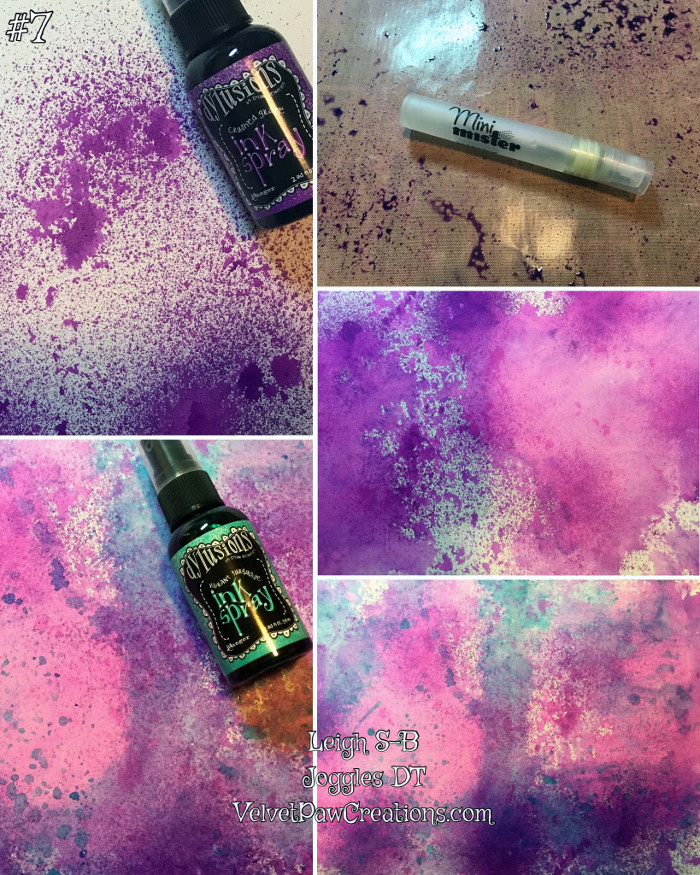
Now its time to make the wings. I started out by creating my own background paper with Dylusions Ink Sprays. Lay a 9” x 12” sheet of Watercolour paper onto a nonstick craft sheet and randomly spritz Crushed Grape directly onto the paper for a layer of pure colour. To get the lighter purple with pinkish tones I then spritzed Crushed Grape onto my craft sheet, diluted it with water and randomly pressed the paper onto the craft sheet. I did this to both sides of the paper and repeated the same steps using Vibrant Turquoise. It’s a really easy and fun way to make your own background papers and as Dylusions products dry very fast, you don’t have to wait very long for the paper to dry. You can speed up the drying process by zapping it with a heat tool.
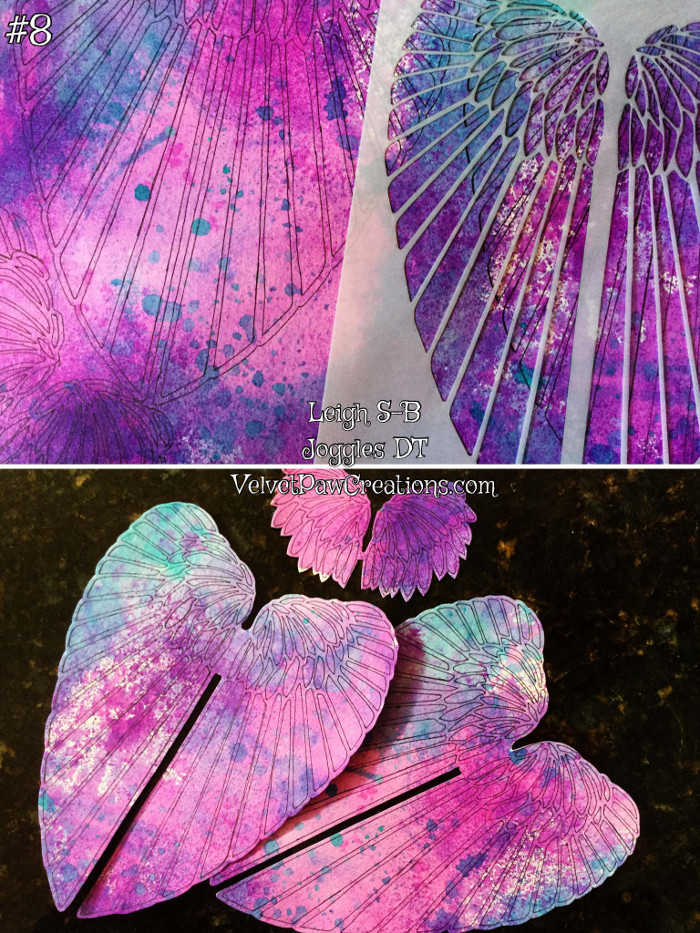
Once the paper was dry, I used the Medium Wings #3 stencil and a black micron pen to make two sets of large wings plus one small set by just using the smaller upper feathers from the same stencil. Then fussy cut them all out leaving a narrow border around the edges. I wanted feathers on both the front and the back of the 2 large wings so I turned the paper over and the semi-opaque stencil made it easy to line up the design and draw in the feathers.
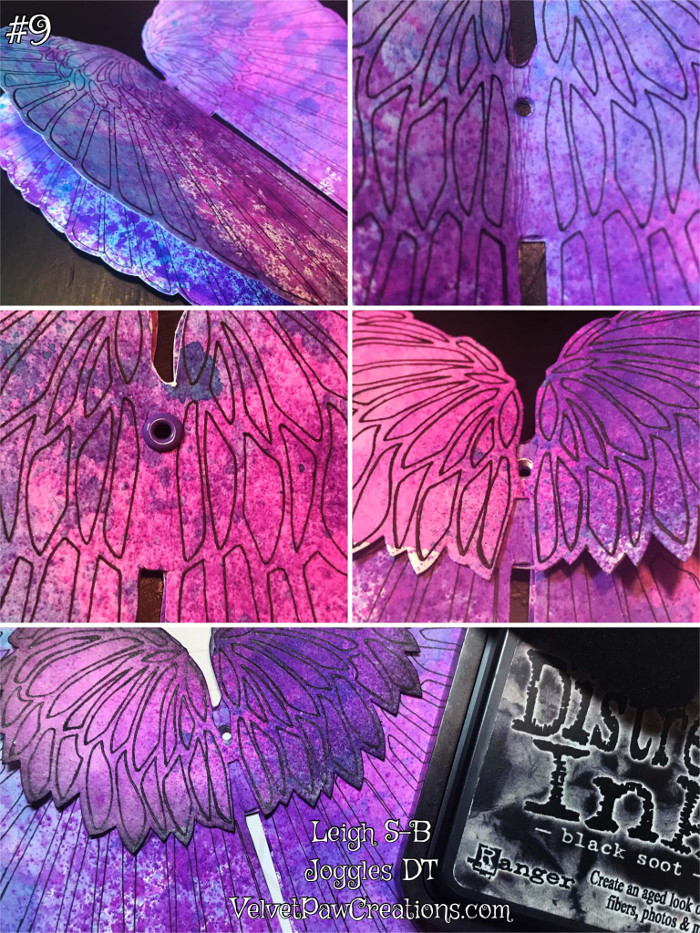
To construct the 3D wings, I applied a dab of glue to the middle section of one set of large wings where the two join and adhered the other set of large wings to it. Once dry, I punched a small hole and attached a purple eyelet to reinforce the hole. This is where we’ll later thread fishing line through so the Owl Fairy can hang. The smaller wings were then glued just below the hole. Once dry I gently bent the wings at the center point to create the 3D effect. At this point, I decided that I wanted to edge the wings in black to make them a bit more dramatic before blinging them up with glitter. I therefore recommend doing these next two steps before you glue them all together. No biggie if you forget, just do as I did and slip a piece of scrap paper under the upper smaller wings to protect the large wings and apply Black Soot Distress Ink to the edges with a foam ink applicator. Do the same to the outside edges of the large wings. Turn the wings over and do the same to other side.
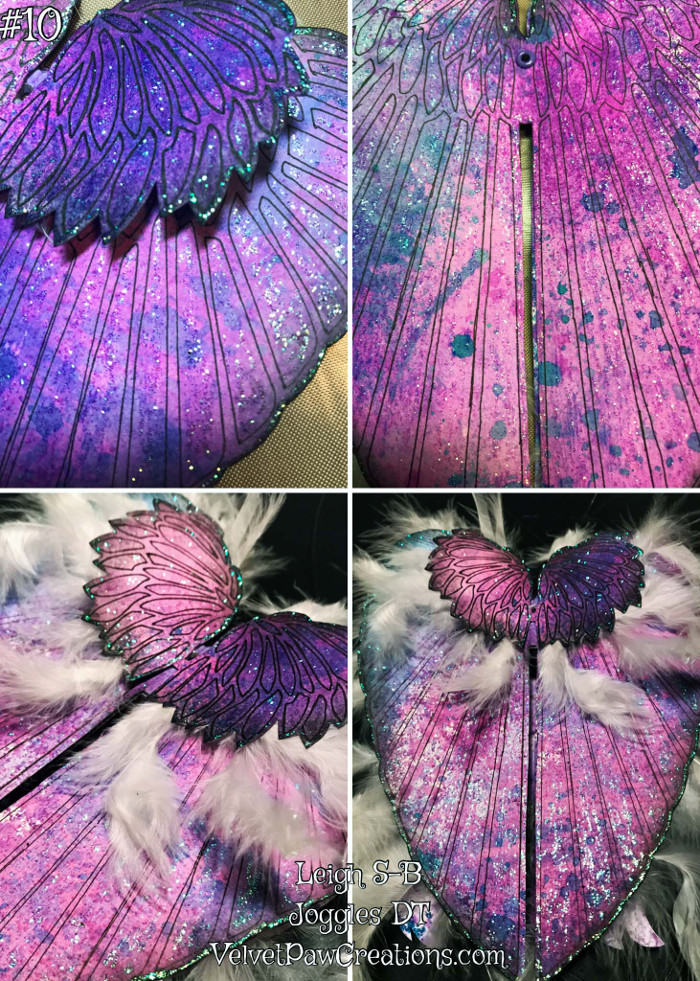
Apply Crystal Stickles Glitter Glue to the inside of each drawn feather and then outline the outer edges of all the wings for lots of magical sparkle. Once the glitter is dry, hot glue lots of white fluffy feathers underneath the small set of wings and between the two sets of large wings. Cut a length of fishing line and thread it through the eyelet. Decide how long you’d like the hanger to be, tie the ends together, and cut off the excess line.
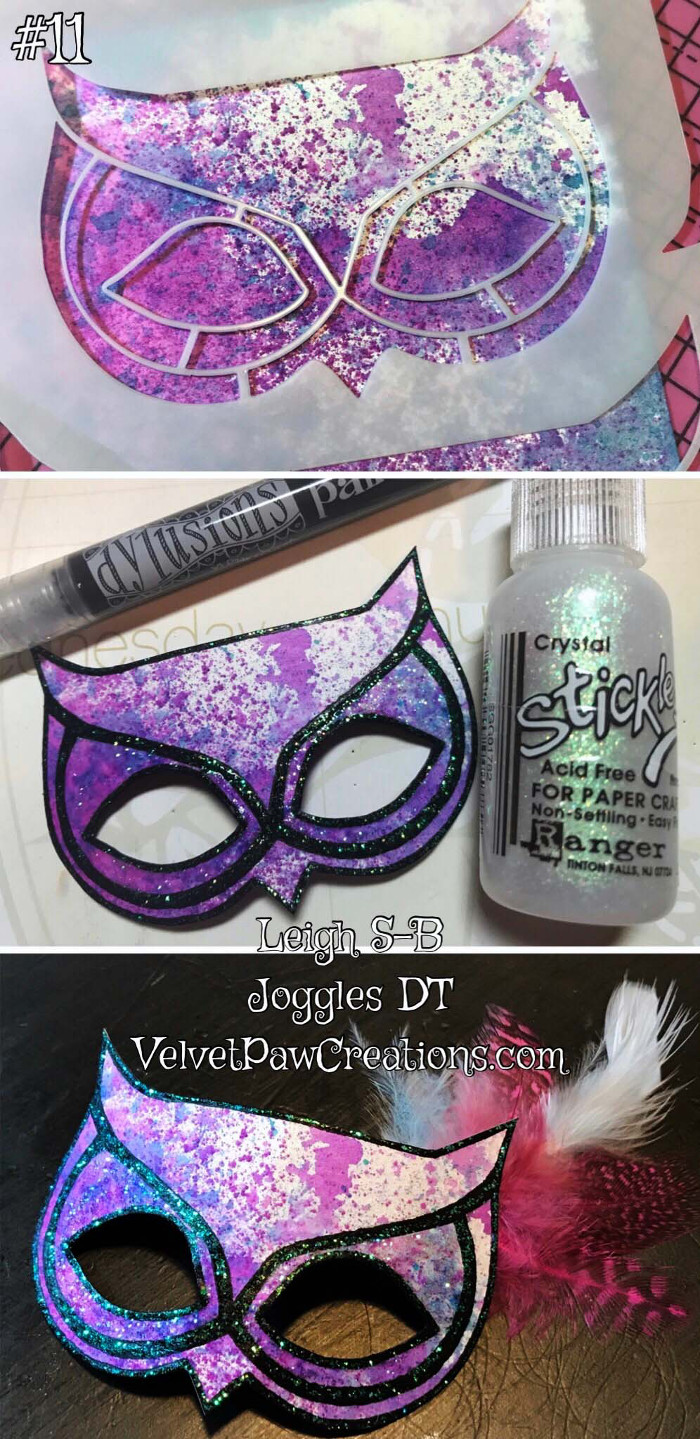
To turn her into a mysterious Owl Fairy, the next step is to make her masquerade mask. I used the Medium Owl Mask from the Owl and Harlequin Mask Stencil. Draw the mask with black Micron pen onto a piece of left over background paper. Colour in the design features with a black Dylusions Paint Pen and edge the whole mask and the inner eye areas before fussy cutting the mask and the eye holes. Apply Crystal Stickles Glitter glue to the black design, the eyes, and the edges and, once dry, hot glue white and pink feathers to the right hand side.
The next step is to assemble the Owl Fairy. To add the head to the wings, cut two small rectangular tabs from leftover background paper and fold them in half. Hot glue a tab to the inside edge on both sides of the head where the hair touches the wings best. My tabs are below where her ears would be. Apply glue to the other side of the tabs and adhere the head to the wings.
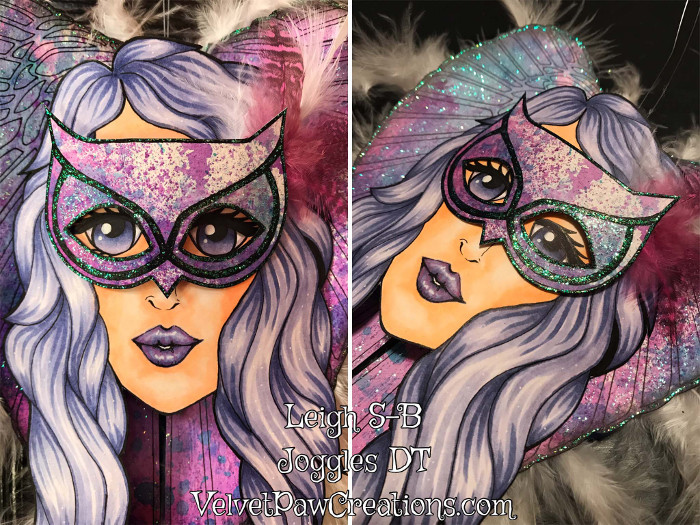
The final step to complete the Owl Fairy is to attach the mask to her face. I decided to attach mine with repositionable glue dots so that I can display her with or without the mask. You could even make her more masks and change her look to fit the season so that she can stay out on display all year long!
Here’s a little video of my Owl Fairy in action….she’s so pretty dancing in the breeze don’t you think ;0)
I hope you’ve enjoyed my tutorial and I’ve inspired you to make your own 3D fairy and explore all the possibilities of what you can create using Joggles/Margaret Applin Fearless Face Stencil System.
Happy Creating!
Leigh S-B
The Sharpie Domino Queen
VelvetPawCreations.com
8 Comments
Leigh, I am soooo impressed by the cool effects and what you did with the face stencils!!!! Awesome!!!!!
Thank you so much Margaret, I’m so pleased you love her :0)
So super COOL~ I locw this post, Leigh. Very inspiring 🙂
Thank you Diana :0)
Wow!!! She is GORGEOUS! Great job, and great instructions!
Thank you Robyn, I’m pleased you enjoyed my tutorial :0)
Love your tutorial…so inspirational!
Thank you Valerie, I’m pleased it inspired you :0)