Hi everyone. It’s Bonnie here today with some 6 x 6 mixed media artist tiles showcasing the new Joggles/Bloobel Cling Mounted Rubber Stamps…just in time for Halloween but honestly, I will use these year round. They make me laugh and there are so many sayings which suit them.
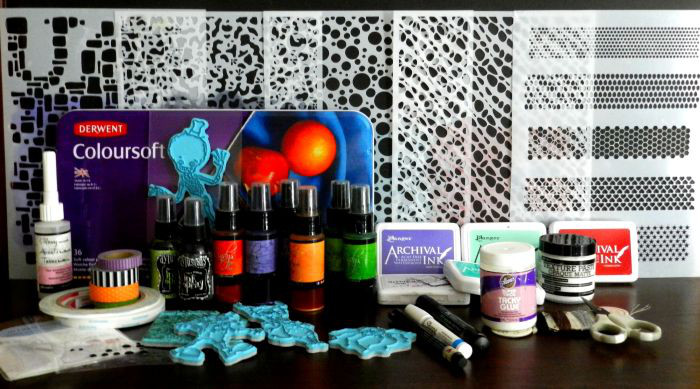
Supplies Needed:
Strathmore Artist Tiles – Bristol – 6×6 inches
Joggles Stencils: Punchinella Quintet – Minis; Confetti; Bubble Blast; Ancient Ruins; Wander;
Joggles/Margaret Applin Designs Cling Mounted Rubber Stamps – Vintage Correspondence
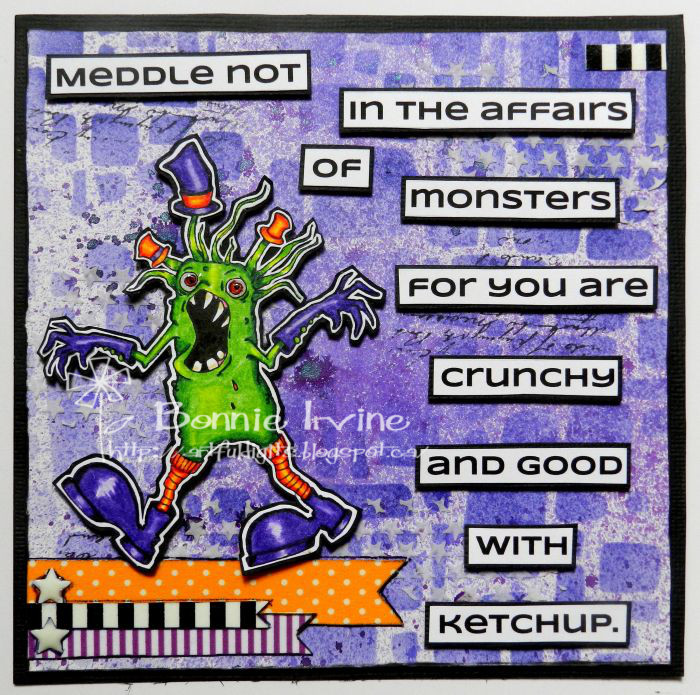
Joggles/Bloobel Cling Mounted Rubber Stamps: Halloween Dragon; Mr. Monster; Spider #1; Top Hat;
Joggles Clear Acrylic Stamp Mount – 4×8 inches
Lindy’s Stamp Gang Two Toned Starburst Sprays: Bells of Ireland Green; Freaky FrankenLime; Hag’s Wart Orange; Marigold Yellow Orange; French Lilac Violet; Witch’s Potion Purple
Dylusions Ink Sprays: Black Marble; Dirty Martini;
Archival Ink Pads: Vermillion;Viridian; Garden Patina; Deep Purple; Jet Black;
Ranger Inkssentials Mini Ink Blending Tool
Dina Wakley Media Palette Knife
Inkssentials Glossy Accents – 2 oz.
Aleene’s Super Thick Tacky Glue – 4 ounce jar
Scor Tape: 0.125 inch; 0.375 inch;
Scrapbook Adhesives 3D Self-Adhesive Foam Squares – .5x.5 inches
Faber Castell Pitt Big Brush Pen – Black
Faber Castell Pitt Artist Pen – (S) Super Fine Tip Black
Sharpie Waterbased Paint Marker – Extra Fine Tip White
Other: die cut web; die cut arrow; cheesecloth scrap; washi tape; scissors; black twine; white card stock; black card stock; enamel dots and stars;
Here is my process:
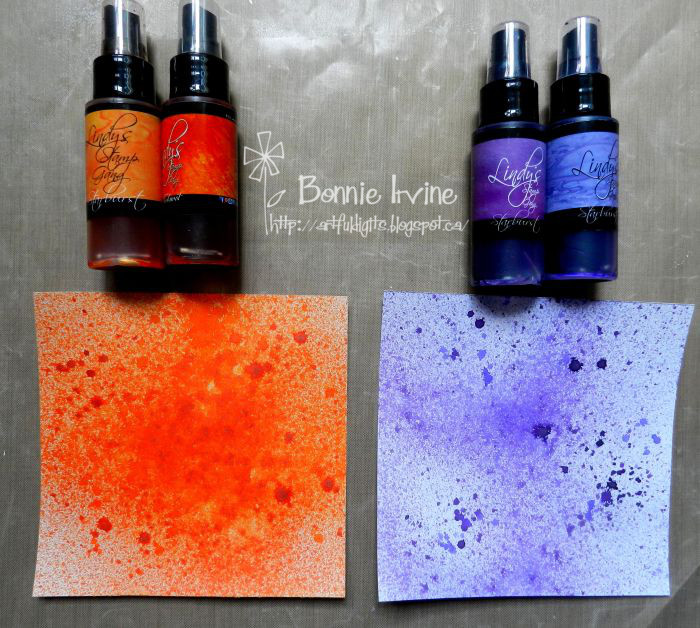
To one of the Strathmore 6 x 6 inch Bristol Artist tiles, spritz Marigold Yellow Orange and Hag’s Wart Orange Lindy’s Stamp Gang Starburst Sprays.
Spritz Lindy’s French Lilac Violet and Witch’s Potion Purple Starburst Sprays onto a second tile.
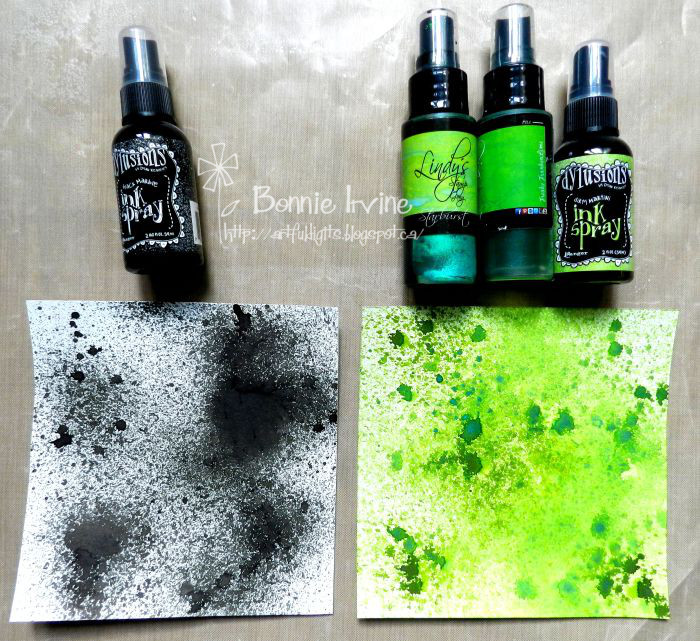
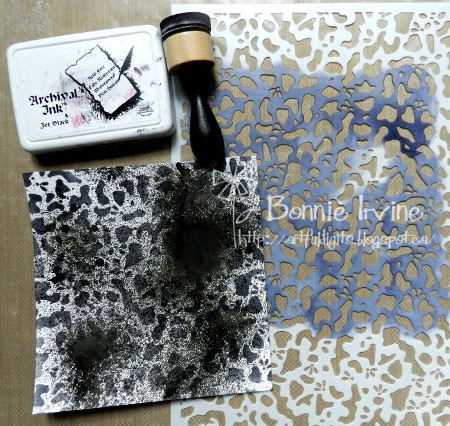
Spritz Dylusions Black Marble Spray Ink onto the third artist tile. On the final tile, spritz Lindy’s Freaky Franken Lime and Bells of Ireland Green Starburst Sprays as well as Dylusions Dirty Martini Spray Ink. Allow all four tiles to dry completely or help them along with a heat tool.
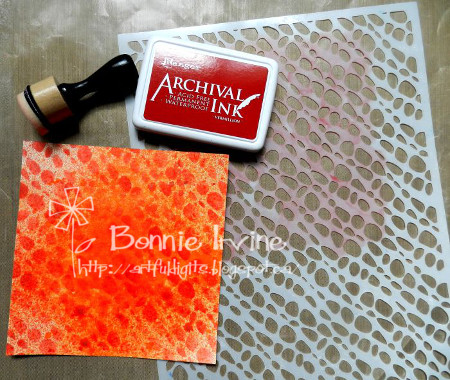
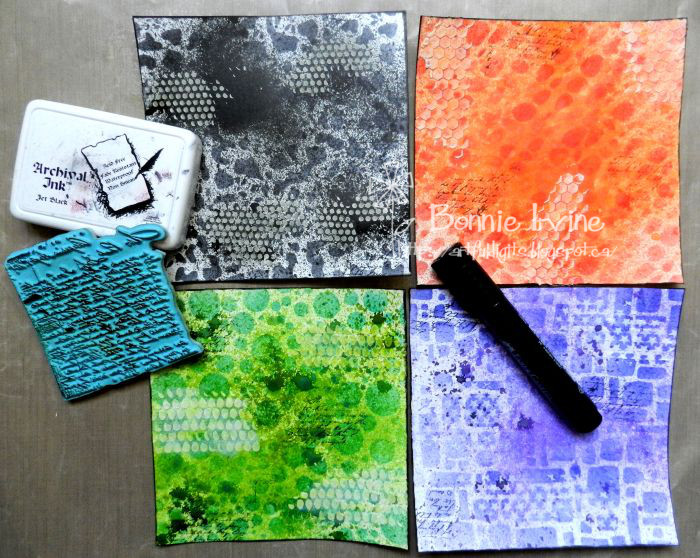
Using an Inkssentials Mini Ink Blending tool, apply Vermillion Archival Ink through the openings of Joggles Wander stencil onto the orange tile.
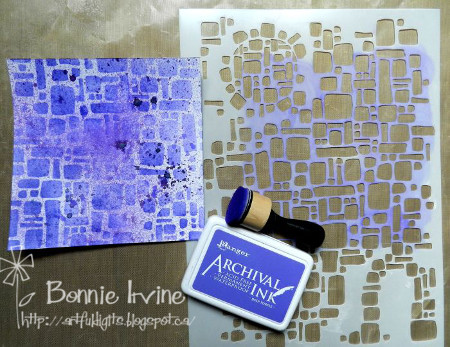
Repeat the process on the purple tile using Deep Purple Archival ink and Joggles Ancient Ruins stencil.
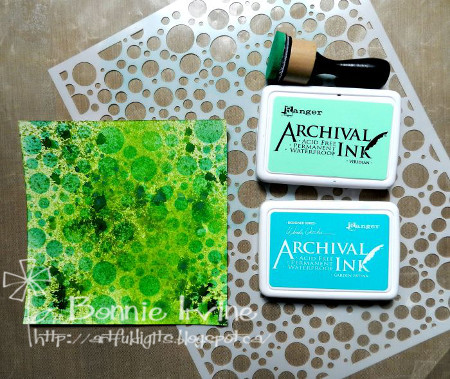
Apply Viridian and Garden Patina Archival Inks through Joggles Bubble Blast stencil onto the green background, and Jet Black Archival through Joggles Confetti stencil onto the black background. Again, allow these to dry thoroughly.

Using different patterns from the Joggles Punchinella Quintet – Minis stencil, add Ranger Texture Paste through the stencils with a palette knife in several places on each background. Let dry. Some of the colour from the Lindy’s sprays will work its way up through the Texture Paste which I like. If it bothers you, dry brush with white paint or gesso to brighten the raised areas once they are dry.
To add more texture to the backgrounds and also tie them together through repetition, Joggles/Margaret Applin Designs Vintage Correspondence cling mounted rubber stamp was rolled onto each using Jet Black Archival Ink. By applying the stamp without a block, it gives a more random and imperfect effect.
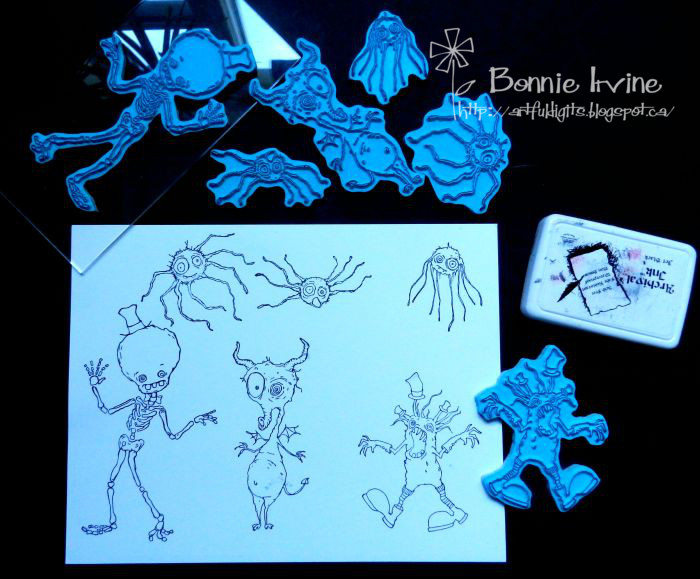
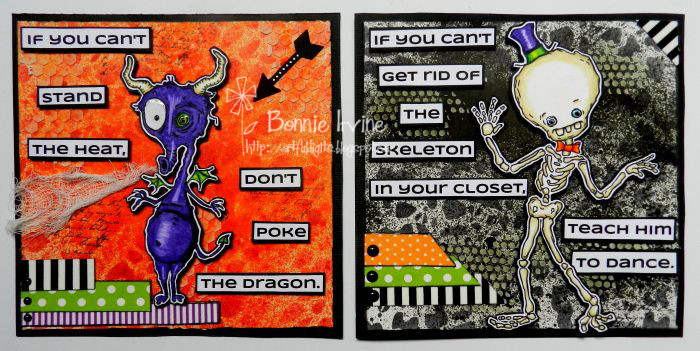
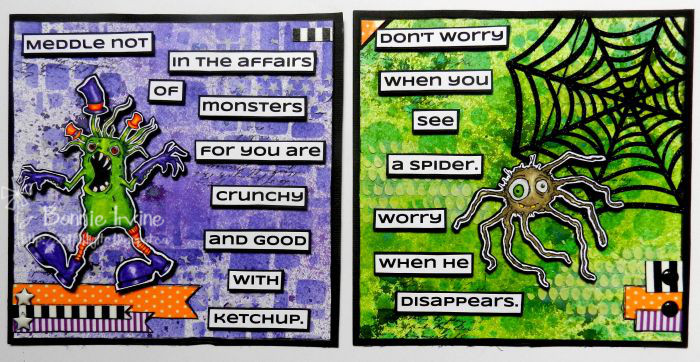
With Jet Black Archival Ink and using a Joggles Clear Acrylic Mount, stamp the Joggles/ Bloobel Halloween Dragon, Top Hat;,Mr. Monster, and the spiders onto white card stock. I stamped all of the spiders because I wasn’t sure which and how many I would need. Allow to dry.
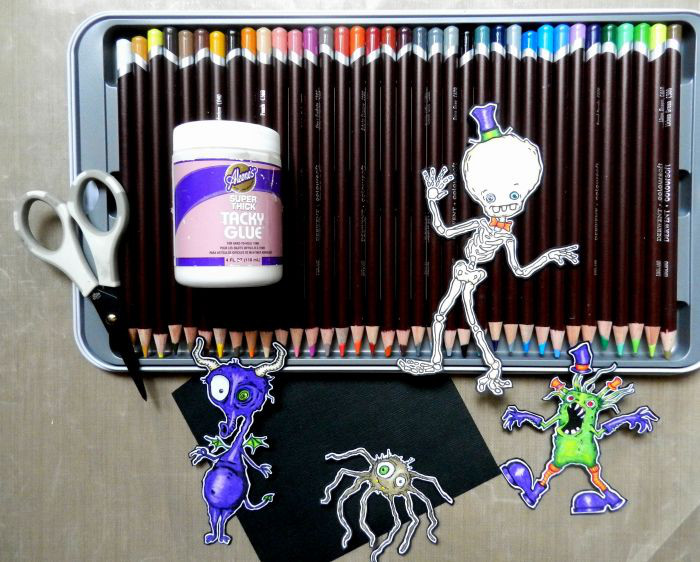
Each of the stamped images was coloured with Derwent Coloursoft pencils, fussy cut leaving a narrow white border, and then adhered to black card stock using Aleene’s Super Thick Tacky Glue. They were then cut around again leaving a narrow black border. I like the way this helps them contrast with the mixed media background and also how it gives the skinny bits extra strength so they don’t tear or bend.
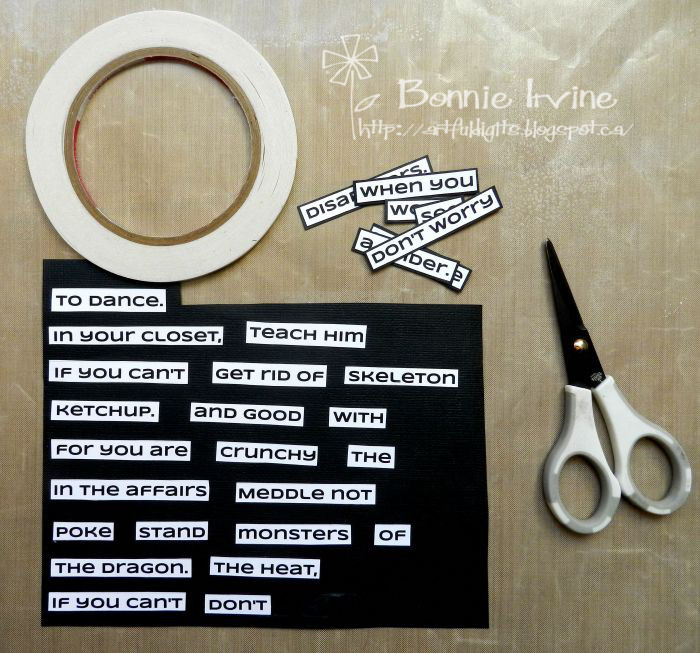
The sayings for each of the artist tiles and images were printed from the computer onto white card stock. They were then cut into segments to fit around the image, and matted with black card stock using Scor Tape.
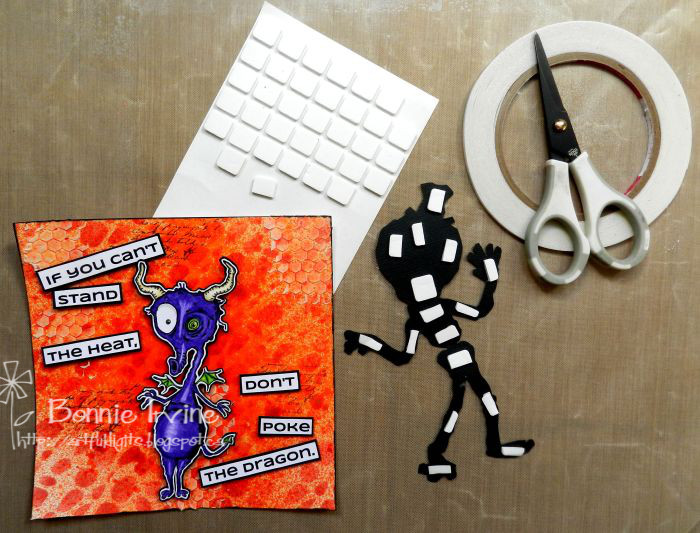
3D foam squares were added to the back of each image to give them dimension and adhere them to the background. Scor Tape was used to adhere the words in place.
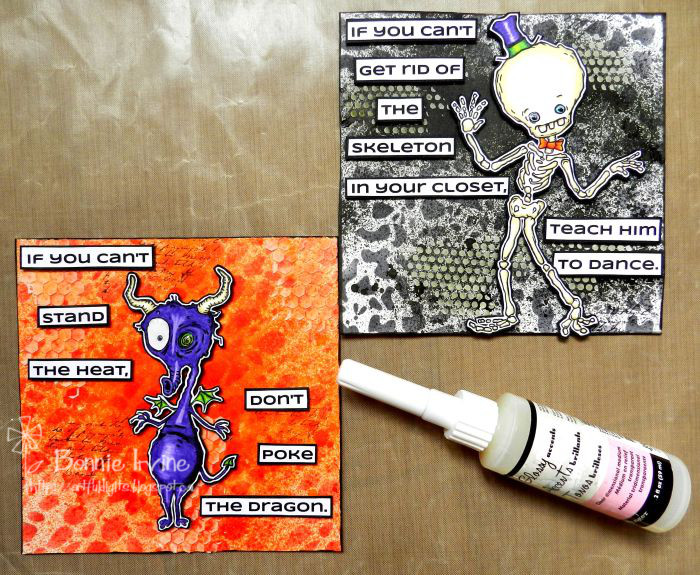
Glossy Accents was added to the eyes of the images to give them shine and dimension. I like the way it makes them bulge a little, brings out the detail, and also looks wet.

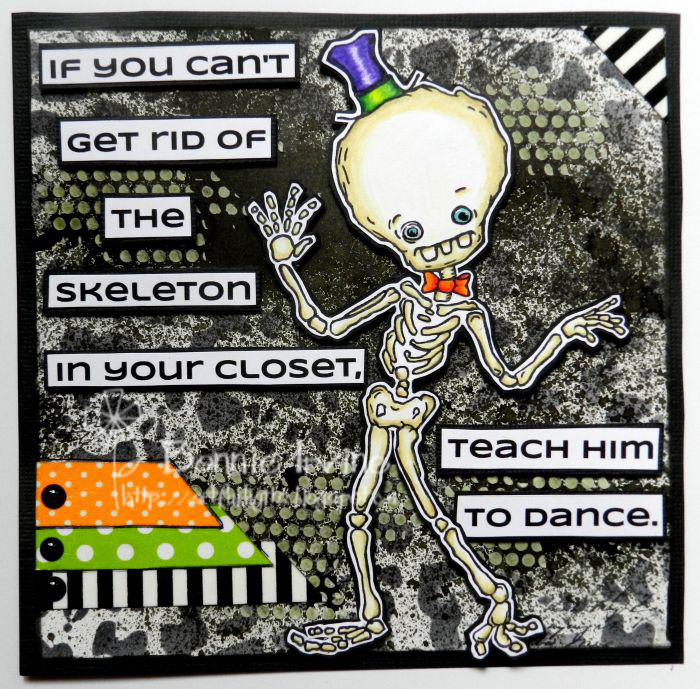
I love adding the finishing touches to a mixed media project. It’s like accessorizing a room or an outfit. I audition and play with things until I’m satisfied. In this case, I used washi tape which I apply to white card stock and cut out first to remove the transparency and keep them vibrant. I used two die cuts, a spider web and an arrow, and also some shiny enamel stars and dots. Each artist tile was edged with Black Big Brush pen to get rid of the white edges and then matted with black card stock to frame it.
And that’s all there was to it. These would be adorable as card fronts, bound together as a book, or framed as is. Below are the individual close-ups of each completed tile so you can see the detail.


Thanks for stopping by today. Stay safe…remember there are scary things everywhere…especially at this time of year 🙂 Bwa-ha-ha!
2 Comments
Really cute and perfect for Halloween!
These are so cute and the sayings so perfect. The skeleton even looked good in black (backside) with the tape squares on it. They looked like bones.