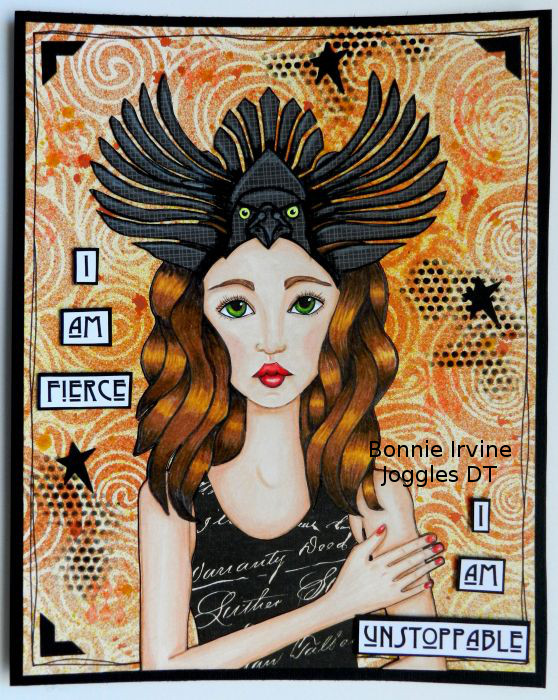
Hi everyone. It’s Bonnie here today with an art journal page featuring a woman created by combining several of the Joggles/Margaret Applin Designs 6 x 9 inch Fearless Face Stencil System. I was a huge fan of these with the first release but now that I can create shoulders, arms, and hands, I love them even more. I think you could create forever and never draw the same person twice. I also was excited to add one of the fabulous headpieces.
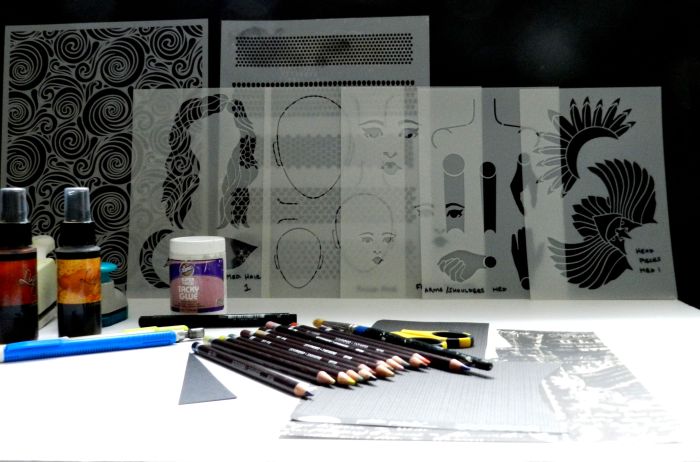
Supplies Used:
Joggles/Margaret Applin Designs 6 x 9 inch Fearless Face Stencil – Round Face
Joggles/Margaret Applin Designs 6 x 9 inch Fearless Face Stencil – Facial Features 2
Joggles/Margaret Applin Designs 6 x 9 inch Fearless Face Stencil – Medium Arms/Hands/Shoulders
Joggles/Margaret Applin Designs 6 x 9 inch Fearless Face Stencil – Medium Hair 1
Joggles/Margaret Applin Designs 6 x 9 inch Fearless Face Stencil – Medium Headpieces 1
Scotch Quick Drying Tacky Glue – 2 oz. bottle
Lindy’s Stamp Gang Two Toned Starburst Spray – Canna Lily Burnt Orange; Grab a Guy Gold;
Joggles Stencil – Punchinella Quintet- Minis
Aleene’s Super Thick Tacky Glue – 4 ounce jar
Other: pencil, eraser. white card stock, scraps of designer paper, other coloured pencils of choice, scissors, craft knife, neon yellow gel pen, scrap of tracing paper, star punch, photo corner punch, black card stock,
Here is my process:
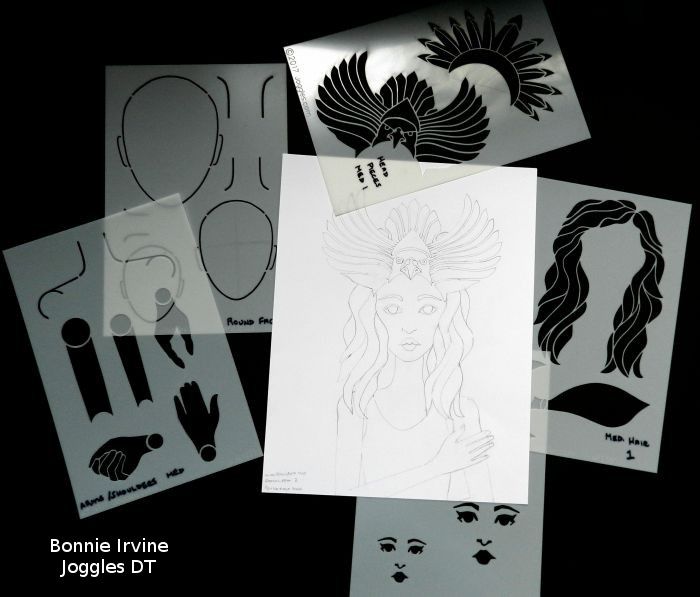
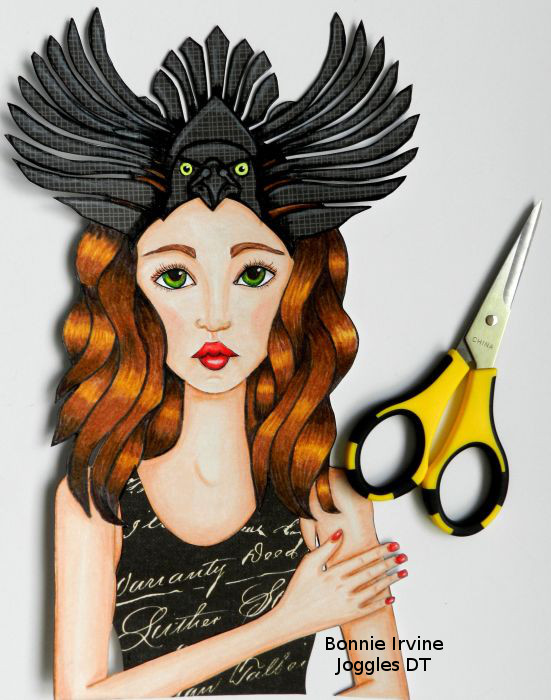
I began with the face shape, choosing the Medium Round Face, which I traced with pencil onto an 8.5 x 11 inch piece of smooth card stock. Next I auditioned several of the features stencils, finally settling on the Medium Facial Features 2 Stencil, again tracing it with pencil. Normally I would trace lighter but I wanted the camera to be able to pick up what I did. She needed a torso so the Medium Shoulders and Arms Stencil was used, following the excellent PDF which Margaret made since this was the first time I had played with this stencil. Those circle joints make it a breeze to get the proportions and angles correct.
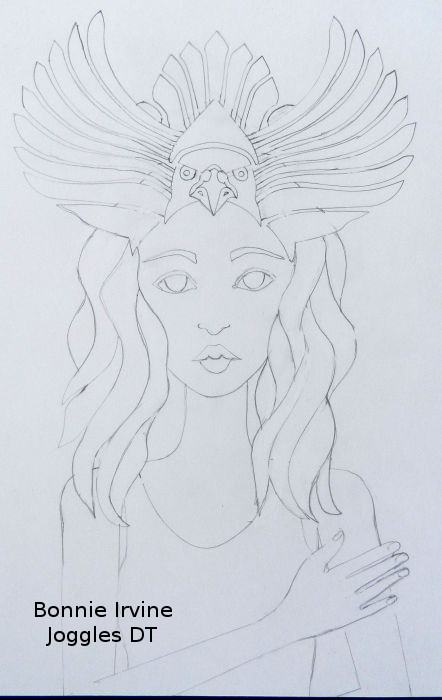
I traced the bird from Head Pieces 1 in detail since I originally thought I would be colouring it. As it turned out I didn’t need to trace until later. Finally I auditioned several of the hair styles by laying the stencils over my drawing to see which look I wanted. The side pieces of the Medium Hair 1 Stencil gave me the look I wanted. Next I erased lines which weren’t needed and finished lines and connections where the stencils had bridges.

Coloured pencil is always my first choice to add colour and shading to my images although other ways (paint, Gelatos, Markers, Neocolor II) would be just as effective. I use a combination of Derwent Coloursoft, a few Polychromos, and Prismacolor pencils depending upon the colour I want.
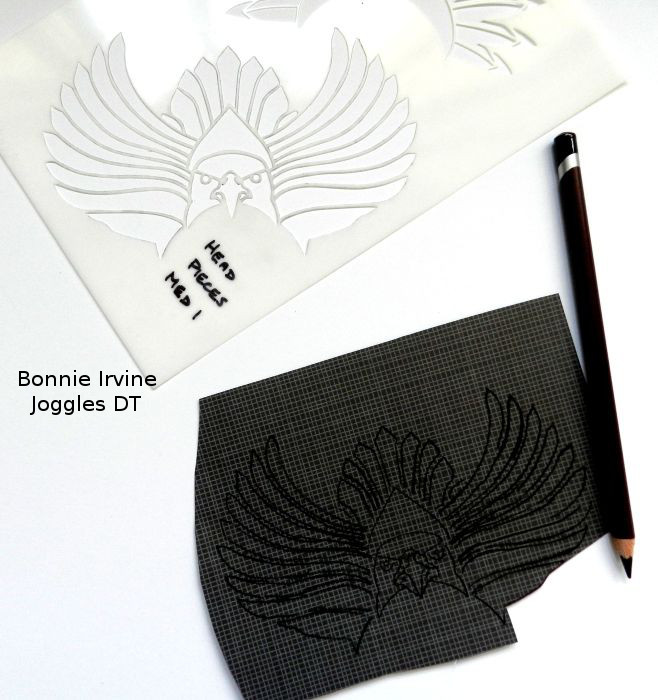
I decided that I wanted to paper piece her head piece so I traced it again on gray checked designer paper using a black Derwent Coloursoft Pencil. I knew I would be shading with that same pencil so it gave me a head start on that and was very visible.
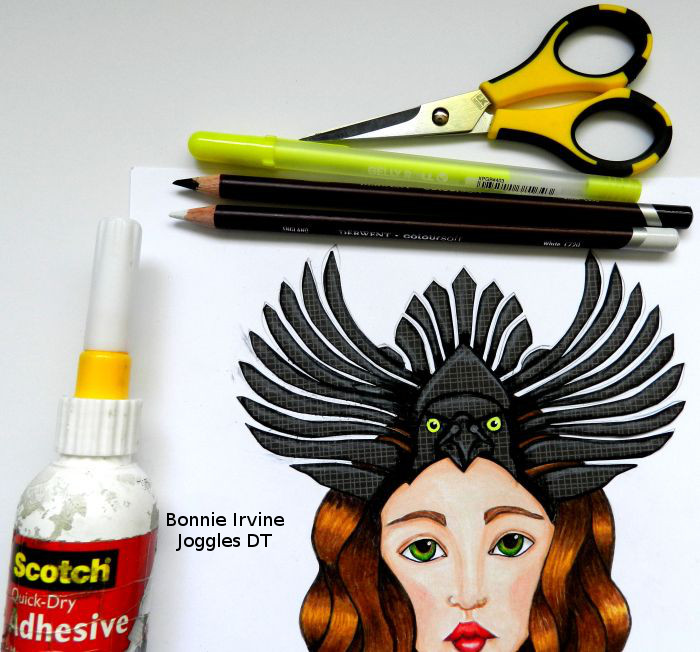
The head piece was fussy cut, highlighted with white pencil, and then shaded with black. The bird’s eyes were coloured with a neon gel pen to make them pop and look fierce. Then the head piece was fussy cut and adhered to the background. When doing this again, I would cut her head out around where the hair would be at the top and then adhere the head piece to that to save a step in fussy cutting the bird wings a second time. Live and learn 🙂
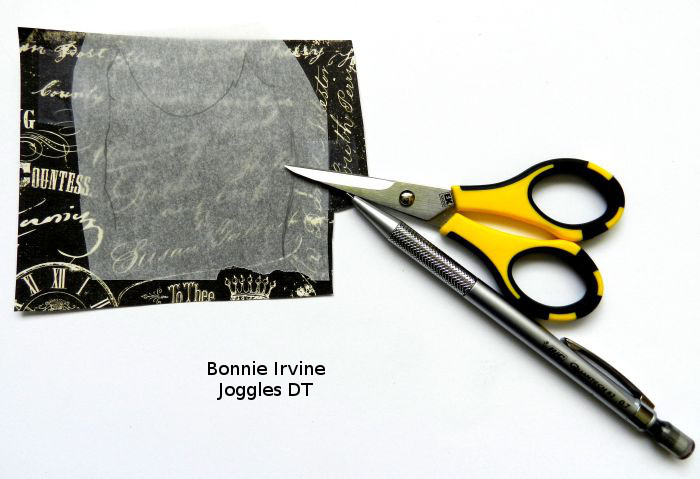
I also wanted her top to be paper pieced so I traced the shape onto tracing paper, cutting around her hair but not worrying about her arm and hand. This was placed over a scrap of black designer paper with cream writing and cut to shape.
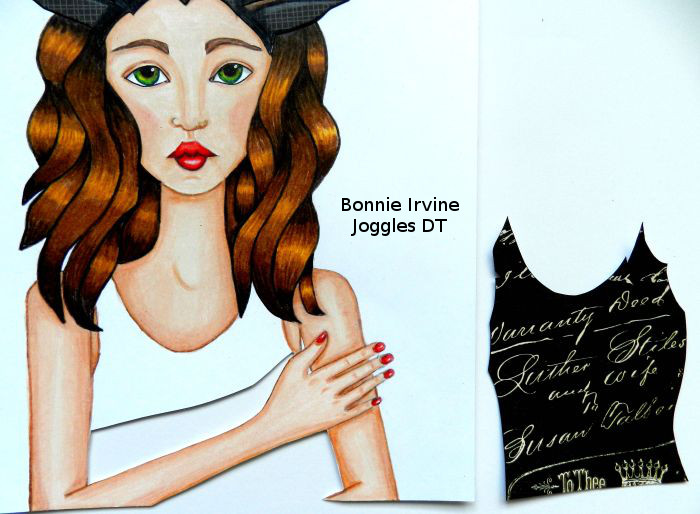
A craft knife was used to cut along her upper arm and remove a section of the original top so the new one could be slid under her arm and over the neckline of the white tank top.
You can see how that worked here. Scotch Quick Dry Glue was used to adhere the arm to the tank top and the tank top to the drawing under it. Now she needed a background.
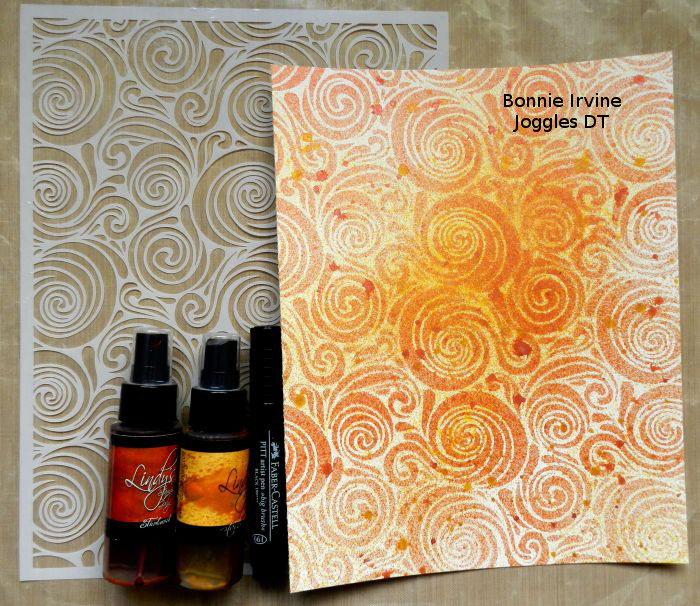
Lindy’s Stamp Gang Grab a Guy Gold Starburst Spray was spritzed into the center of a 9 x 12 inch sheet of white bristol paper. Once dry, Lindy’s Canna Lily Burnt Orange Starburst Spray was spritzed through Joggles Cyclone Stencil to create the pattern you see above.
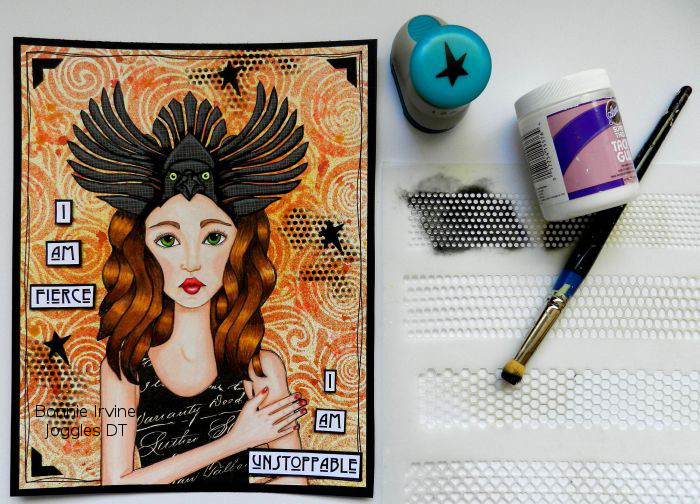
The background needed more detail so black gesso was pounced through Joggles Punchinella Quintet Minis stencil. A loose border was doodled around the edges with a Fine black Faber Castel Pitt Pen. I used a finer pen to add eyelashes and outline a little on her face and fingers. Three stars were punched from black card stock and layered over the black stencilling. The Fearless woman was adhered in place with a combination of Scor tape and Aleene’s Super Thick Tacky Glue.
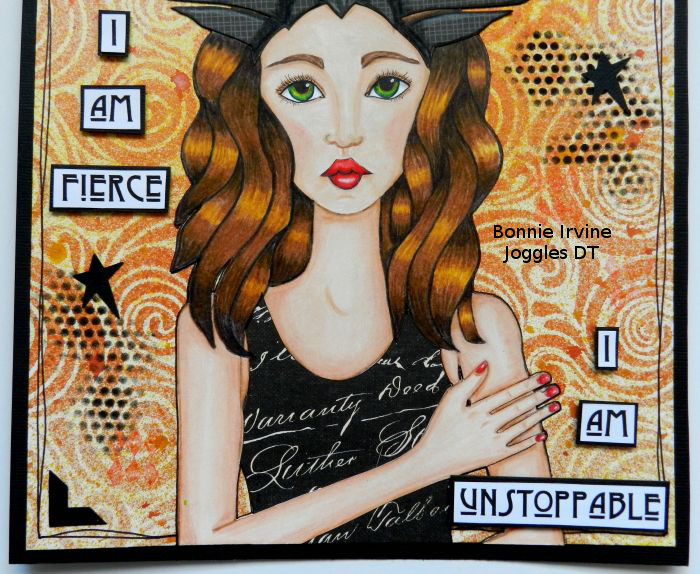
The sentiment was printed onto white card stock, cut into individual words, and matted with black. Foam squares were added to the back to add dimension. Before backing the page with black card stock to frame it, black punched photo corners were added to three of the corners to add to the design and add a few more black touches.
And that’s it for my completed art journal page featuring my unstoppable woman created with the Fearless Face Stencils. Have I mentioned how much I love them…LOL. Not only is it the endless possibilities they provide but I also feel they are training my eye and my hand to proper placement so that I can branch out and draw different sorts of faces in the future.
Thanks for joining me today.
Bonnie
7 Comments
This is just fabulous Bonnie! She looks so real; your attention to the colors and shading is awesome. And the headpiece just rocks! Thanks for sharing your process with us.
Thanks so much, Faye. I really enjoy playing with these stencils and then seeing what personality emerges once she is coloured.
Beautiful journal page Bonnie. Your coloring is amazing.
Thanks, Patricia! I find colouring very relaxing and it’s always fun to see how it comes out. It’s like the magic is in the pencils.
This is gorgeous! I am in awe of your coloring skills!
Julie, you are so kind! Thanks for the encouraging words. Colouring and mixed media are two of my happy places so this was win/win 🙂
She’s so stunning, gorgeous project Bonnie!