Hi everyone! It’s Bonnie here today. Yesterday, Barb introduced us through her post and video to a wonderful set of cards by Alibabette with images which were all ready for us to add colour. Today I am creating a set of cards using 7 images from two of the 22 Art Play Paintables sheets from AdornIt. These are much simpler and smaller and come with 12 images on each sheet. They are printed on quality watercolour paper and can be coloured with as much or as little detail as you want. I chose to play with images from the Hello sheet and the Love You one, using seven of the 24 images with one as a focal for each card.
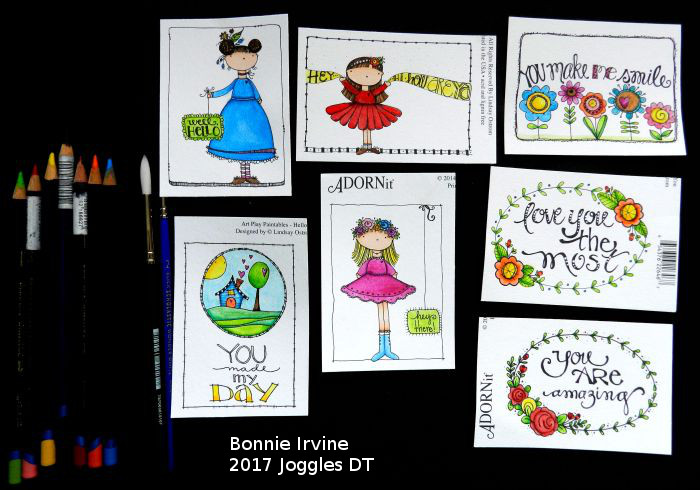
I started by roughly cutting apart the images and then choosing the ones I wanted. There is ample room between them so there is no need to cut carefully yet. Using Derwent Inktense Pencils, water brushes, and a container of water, I coloured each one. For most areas, I applied the wet brush to the pencil tip and applied the colour to the image. Because the paper is textured and the areas are small, this seemed to give me the smoothest colour with the least amount of work.

I could easily have stopped there and gone on to create the cards but I love detail so I decided to play a little more. Yellow Stickles Glitter Glue was added to flower centers and the sun. Glam Pink Stickles was added to some hearts and Black Diamond Stickles to eyes, hearts, and buttons. White Sharpie Extra Fine Tip Waterbased Paint Marker and Black Faber Castell Pitt Artist Pen were used to add dots. The images were then fussy cut leaving a narrow white border around the image borders, matted with black card stock, and fussy cut again leaving a narrow black border. Foam adhesive was adhered to the back of each image.
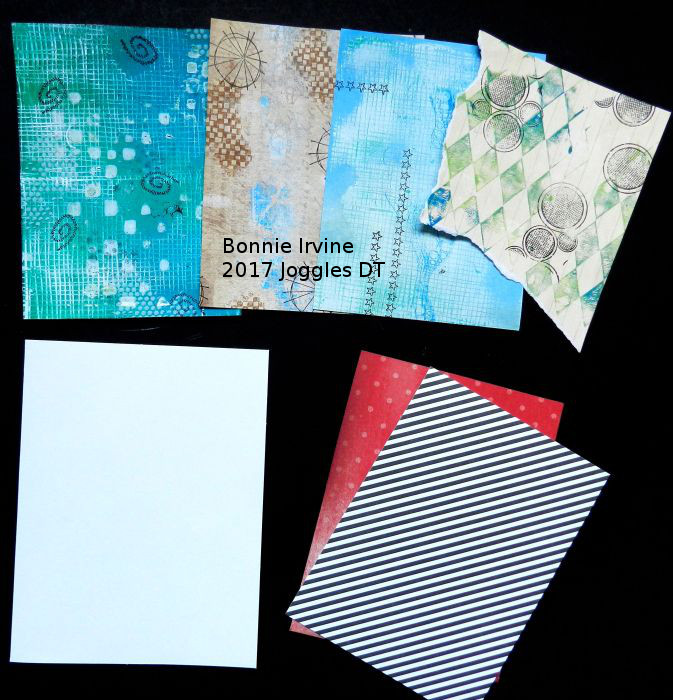
My idea was to create clean and simple cards with a minimum of fuss and embellies. I also wanted to use backgrounds which I had prepared ahead as well as some scraps of patterned paper. The top 4 papers in the photo above were backgrounds which started as gel printed papers, several of them created just to clean up the plate. To each, I added additional stamping with Jet Black Archival Ink or a colour to go with the background colour. The bottom right papers were scraps left over from designer papers, and I actually had to add another green dotty piece for the last card. The white card base was card stock cut at 10 x 6.5 inches and folded in half to get 5 x 6.5 inch cards. Black card stock was cut at 4.75 x 6.25 inches to serve as the mat for each card. The backgrounds were cut at 4.5 inches x 6 inches.
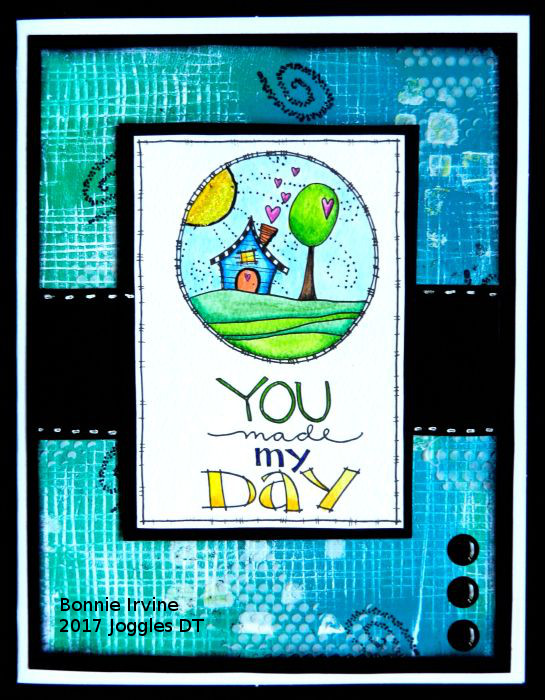
This one has a simple faux stitched black card stock belly band and three enamel dots added to the gel print acrylic paint background. Ranger Texture Paste was also added to the original print as well as Stampotique Originals Dot Swirl stamp.
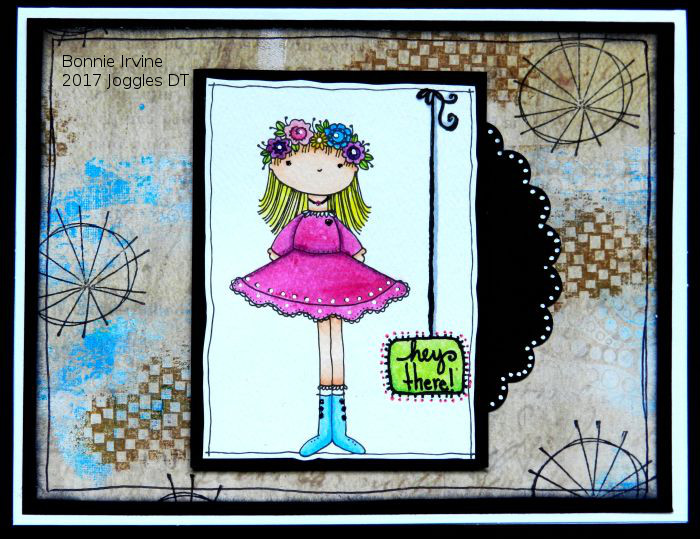
This background was gel printed on designer paper which had a faint script printed on it. The blue was stamped off of the stamp when it was used to lift paint from the gel plate. I often “clean” my stamps on designer paper to make it my own. The Jet Black Archival Ink circles come from Stampotique Originals Kate’s Doodle Cube. The brown pattern was created with Carabelle Studio Quadrillages stamp and Coffee Archival Ink. I use that stamp all the time! The scalloped circle was punched from black card stock, cut to fit, and dotted with White Sharpie Paint pen.
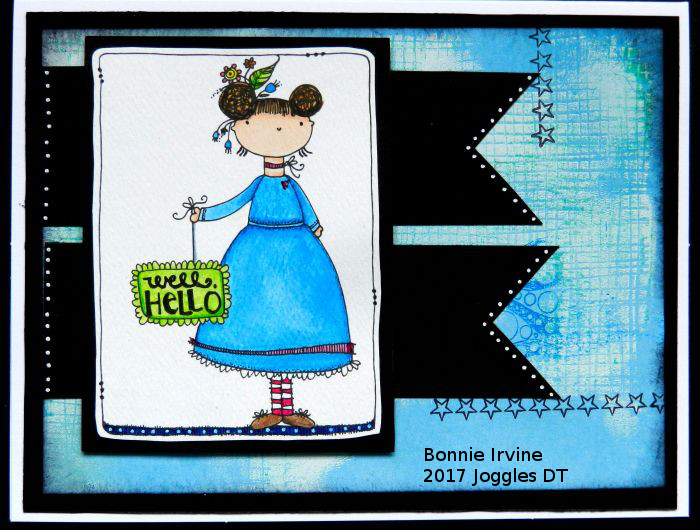
Blue card stock was used to clean off a mesh background stamp which was coated with white and then green acrylic paint. Again I used the stamps to remove paint from the Gel Plate and then stamped off the paint I picked up onto blue card stock so as not to waste it. A rubber stamp border was used in the same way to remove blue acrylic paint from the plate and then transferred to this background. The star border was added with Jet Black Archival Ink. Two black card stock fishtail flags were cut and then dotted with a White Sharpie paint pen.

A torn scrap of lined designer paper was used to clean the blue and green acrylic paint off a harlequin stamp. Jet Black Archival Ink was used to stamp Carabelle Studio Circles and Text stamp. No block was used since I wanted the images to be imperfect. Fine orange twine was wrapped around the card and knotted on the front to tie in with the flower colour.
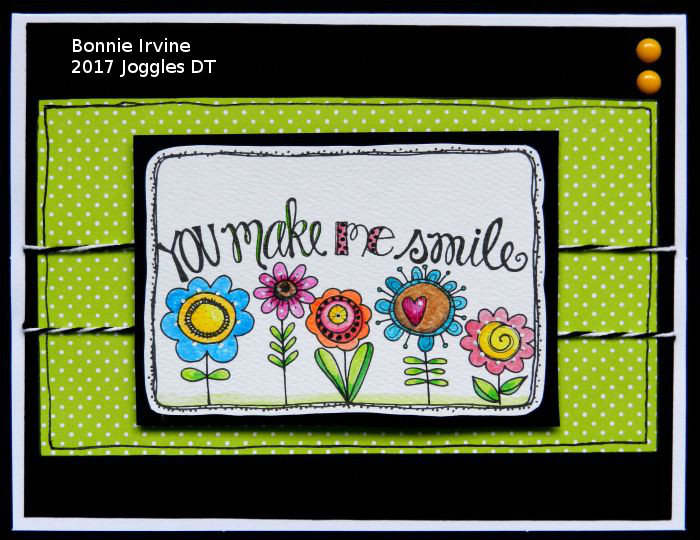
I only had a scrap of this green dotty paper but that was enough to create the background rectangle. A simple border was doodled with a Pitt Artist pen and black and white twine was adhered behind the image wrapping to the back of the black layer. Two yellow enamel dots were used to accent the corner and repeat the yellow from the flower centers.
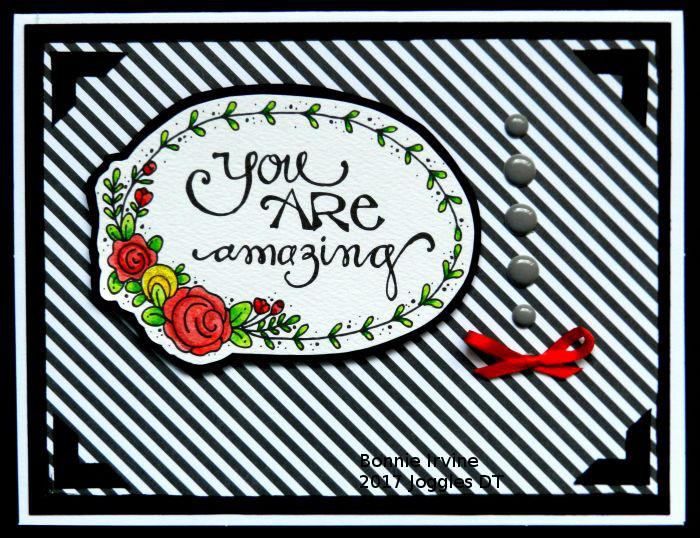
Gray and white striped paper created the background for this image. Five gray enamel dots were used to accent the image and a bright red mini bow repeated the colour of the flowers and looks a bit like the dot of an exclamation point. Black card stock photo corners were punched and adhered to finish this off.
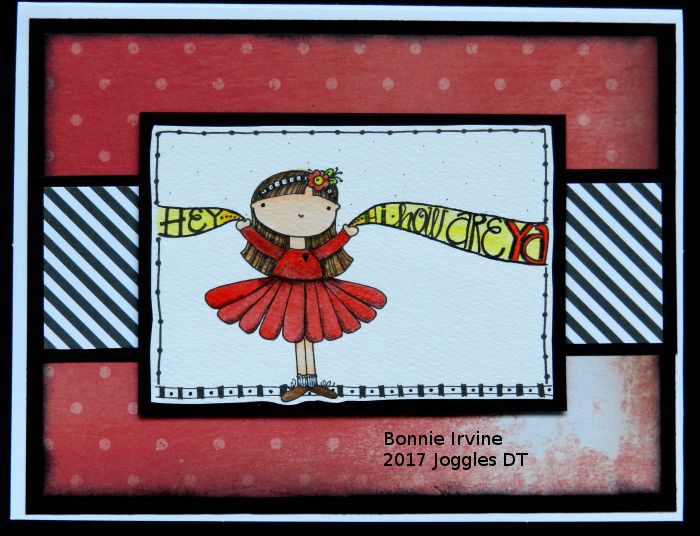
Does the belly band on this one look familiar? It was the piece left when I cut the previous background to size. I matted it with black and adhered it to the red dotty patterned card stock which I wanted for the background. I liked how the gray and white stripes echoed the stripes pattern at the bottom of her frame.
I think these cards would make a lovely gift if given as a set or I might just keep them to send individually when I need a card in a hurry. The colouring was great fun to do. I love Inktense pencils but I could have easily used Distress Markers, Neocolor II crayons, or Distress ink pads with a water brush for the same effect. The backgrounds were ones I already had completed so it made for a quick and easy set of cards. With 22 different sets of AdornIt Art Play Paintables with 12 images each, you are sure to find many adorable images to star as the focal on your own cards. We would love to see what you create!
6 Comments
wonderful cards. great that you used up some of your background stash.
stamping sue
Thanks so much, Sue! I’m going to colour the remaining images because I always have papers in my clean-up background stash so it makes for a quick and easy card. When I want to play but don’t have a specific project in mind, I love to play with backgrounds. It gets my mojo hopping 🙂
Well…YESSSSS to all these wonderful stamps ‘n scraps!!! It’s clearly one of those “Duhhhh, why didn’t I think of that” moments or just a thought that got away is resurfaced. I always love and appreciate the ideas that are shared here.
Thanks so much, Barbara! It’s a great way to use up those papers I seem to accumulate and have a bunch of cards all ready to send.
I do love the Adornit paintable images–so cute and fun.
Wonderful, I need to copy these ideas. Tfs Bonnie