
Cover
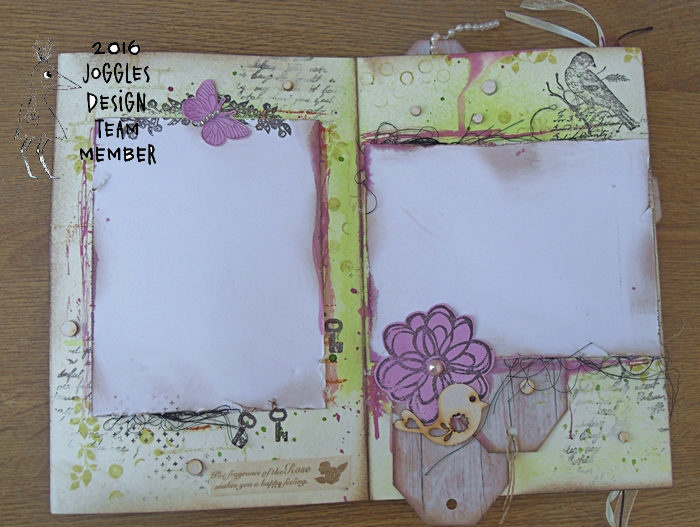
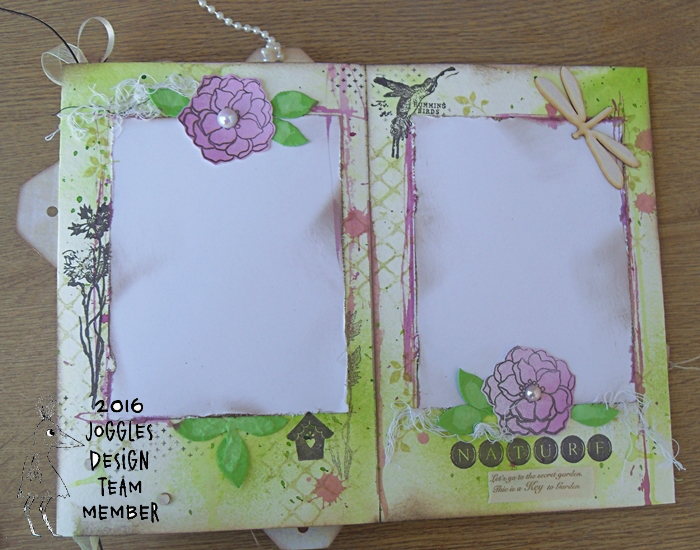
one of the inside pages
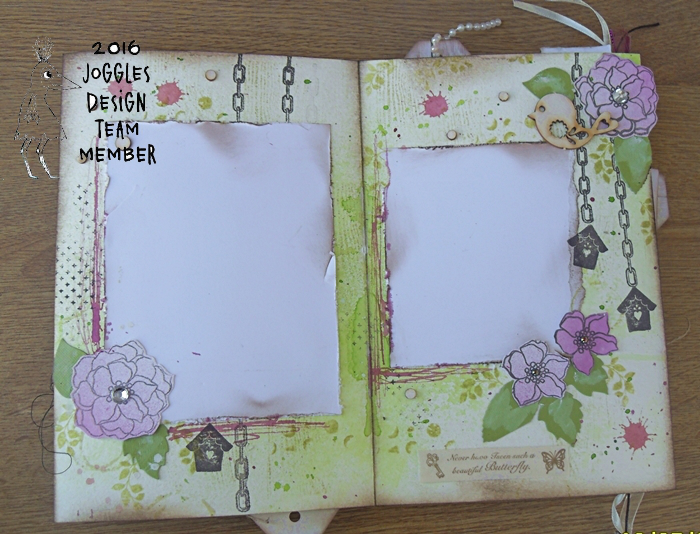
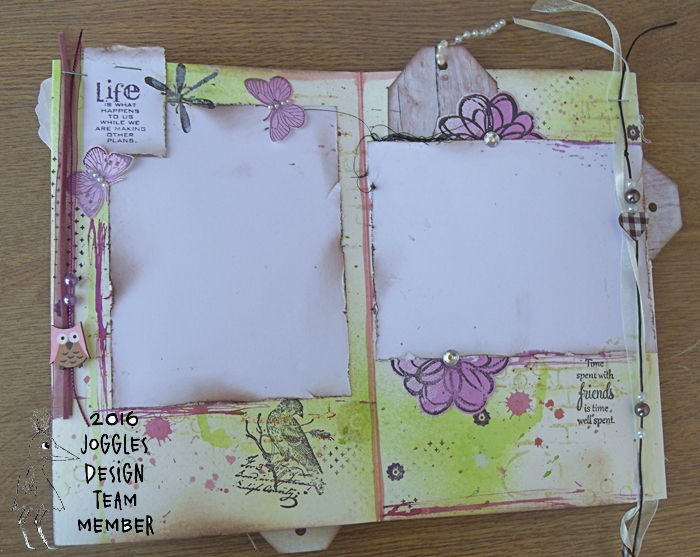
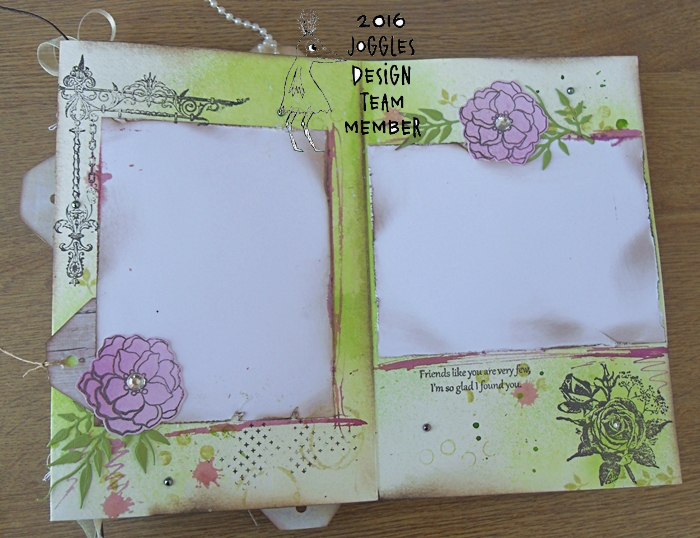
Another of the inside pages
Hello, it’s Frezja here today. I would like to introduce you to the Joggles accordion books and show you what I decided to do with one of them.
I love them!!! I have tried other types of accordion books, and I guarantee that the Joggles ones are best!!
Once dry, they do not curl, become distorted or ripple. You can use wet media many times and they are still perfect! My project today is a mini album for your favourite photos.

Supplies list:
Joggles Accordion Book – 6″ x 9″ – 10 Panels
Tattered Angels Glimmer Mists – Kiwi OR (Alternative: Lindy’s Stamp Gang Two Toned Starburst Spray – Sea Mint Green)
Tattered Angels Glimmer Mists – Dried Lavender OR (Alternative: Lindy’s Stamp Gang Two Toned Starburst Spray – Cotton Candy Pink)
Joggles Stencils – Ancient Ruins
Tim Holtz Distress Ink Pad – Old Paper
Tim Holtz Distress Ink Pad – Antique Linen
Tim Holtz Distress Ink Pad – Peeled Paint
Tim Holtz Distress Ink Pad – Black Soot
Archival Inks: Coffee, Tree Branch, Viridian, Jet Black
Aleene’s Super Thick Tacky Glue
Ranger Inkssentials Ink Blending Tool
Dina Wakley Media Palette Knife
Other: scissors, stapler, white cardstock; gems and pearls; washi tape; green cardstock; flowers; small brush; tags; black and white threads; assorted background stamps of choice plus flowers and butterflies; wooden or chipboard embellishments such as birds or birdhouses; hand cut or purchased tags.
Here are the steps for my project:
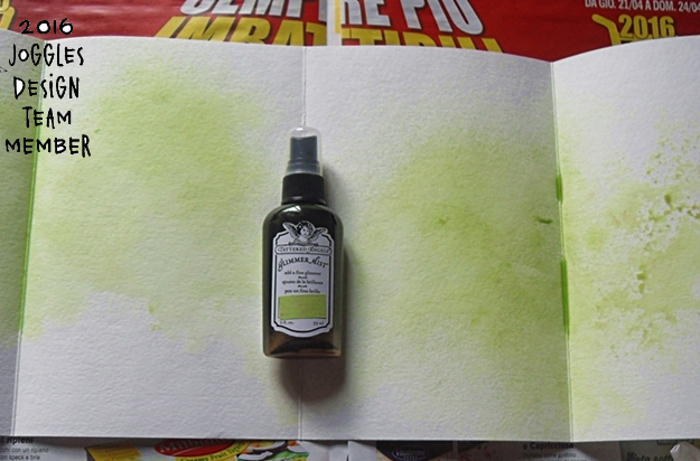
Spray Tattered Angels Glimmer Mist-Kiwi (or the alternative – Lindy’s Stamp Gang Two Toned Starburst Spray – Sea Mint Green) on all pages of the accordion book leaving some white spaces.
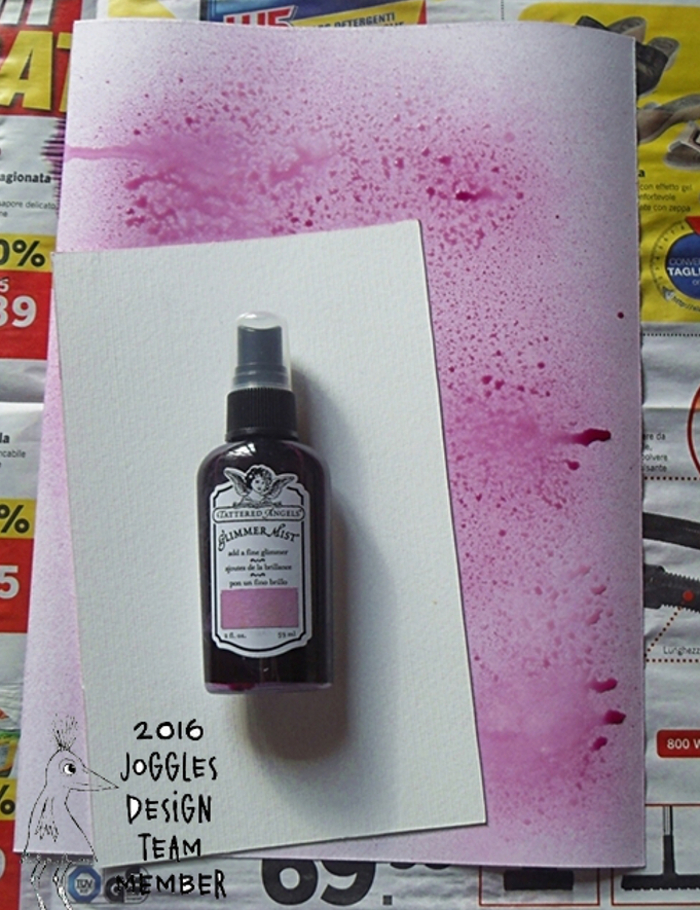
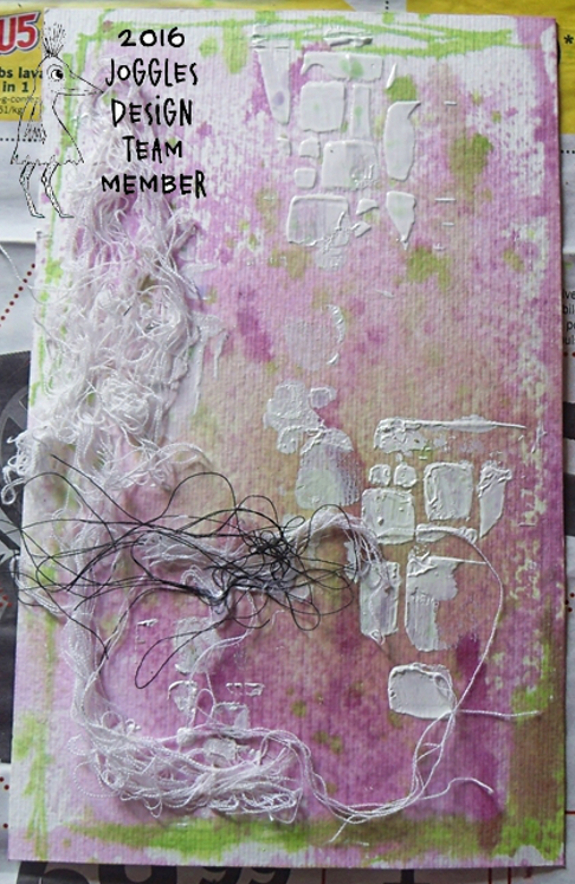
Cut a piece of white cardstock 5.5 inches by 8.5 inches to make the cover. On an 8.5 x 11 inch piece of white cardstock, spray Tattered Angels Glimmer Mist – Dried Lavender (or alternative: Lindy’s Stamp Gang Two Toned Sprays – Cotton Candy Pink) to colour all of it. Place the white cardstock cover piece over it while still wet to absorb the excess colour and transfer colour to the cover at the same time. Allow to dry.

On the cardstock we just spritzed pink, using Coffee Archival Ink, stamp several butterflies and flowers with your favourite stamps. These will be fussy cut and used to decorate the pages of the book.
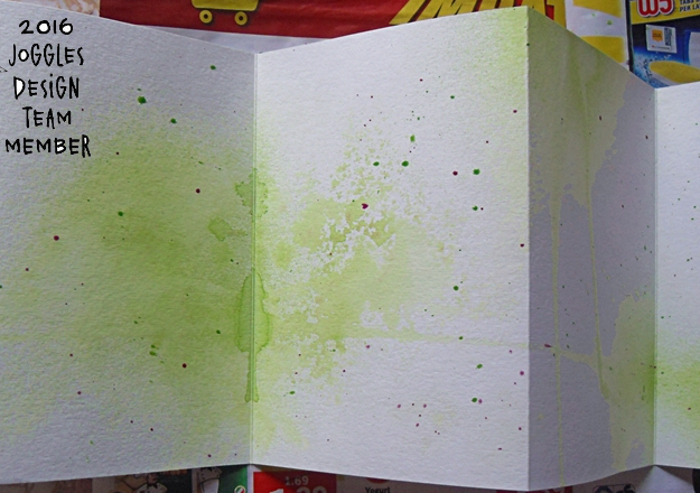
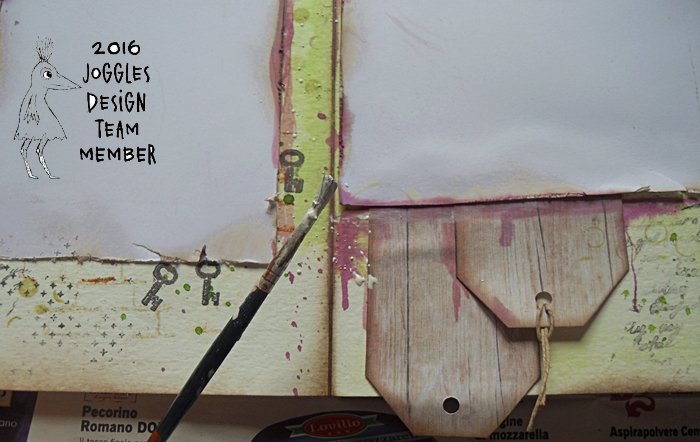
Splatter some of the green ink we just spritzed onto the accordion book pages by removing the top and tapping on the pump over your background. Repeat with the pink as shown in the photo above. Allow to dry.
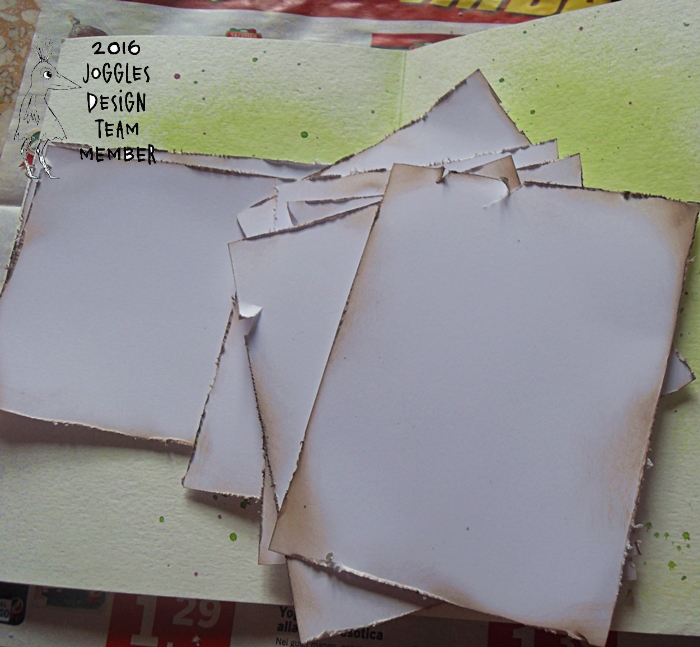
Cut pieces of white cardstock slightly larger than the photos you will insert on each page. Distress the edges of each photo mat using scissors or a distressing tool. Age those distressed edges with Old Paper Distress Ink applied with a blending tool.
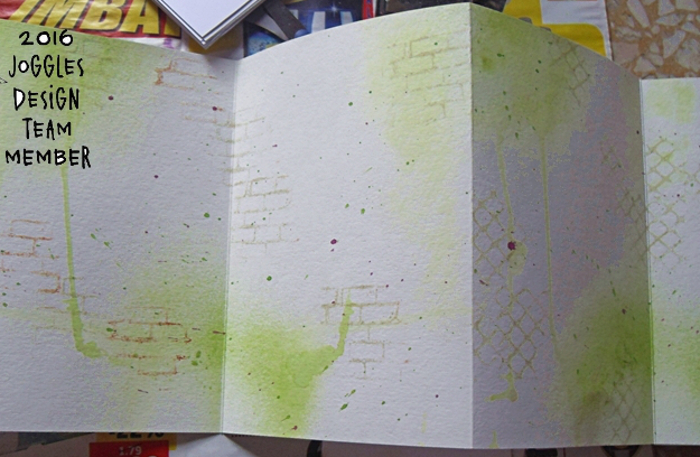
Using Tree Branch Archival Ink, stamp a text stamp in some places. Using Viridian Archival Ink stamp a chicken wire stamp here and there to create pattern and texture.
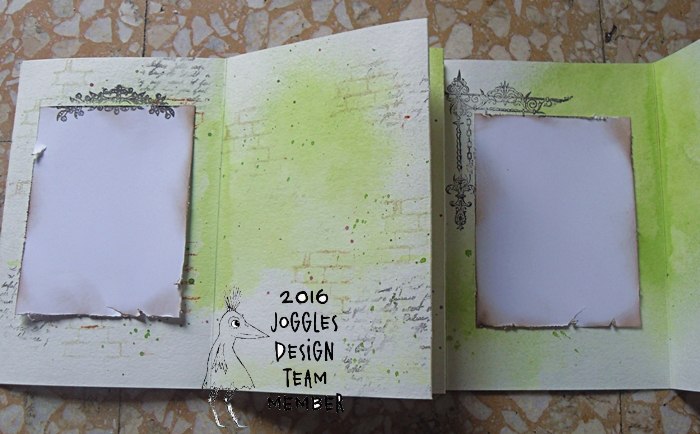
On some of the pages, add the photo mats directly to the accordion book page backgrounds using Scor Tape. Tie the mats into the backgrounds by overlapping stamps onto both the background and the mat.
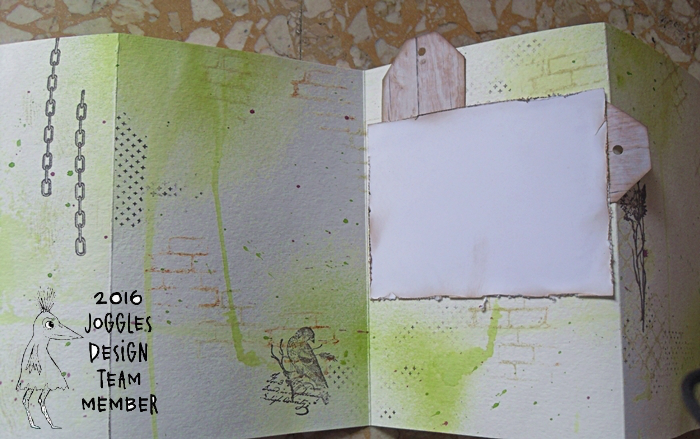
On other pages, adhere a photo mat on the left and bottom sides but on the other two, only add Scor Tape to one half, leaving room for tags to slip into the newly created pocket. This can be reversed to add variety. The tags could be created from cardstock or use purchased ones.

Once all of the photo mats and stamping have been added to each page, adhere the fussy cut flowers created earlier using Aleene’s Super Thick Tacky Glue. Apply this only to the centers of the flowers so that the petals have some dimension and lift.

Using the tube attached to the top of the spray ink, add a little green ink here and there to the white photo mats.
Add the pink spray ink by dipping a small brush into the bottle and transferring some onto the pages and tags. Spritz using a Mini Mister filled with a mixture of gesso and water to spread the colour and create drips.
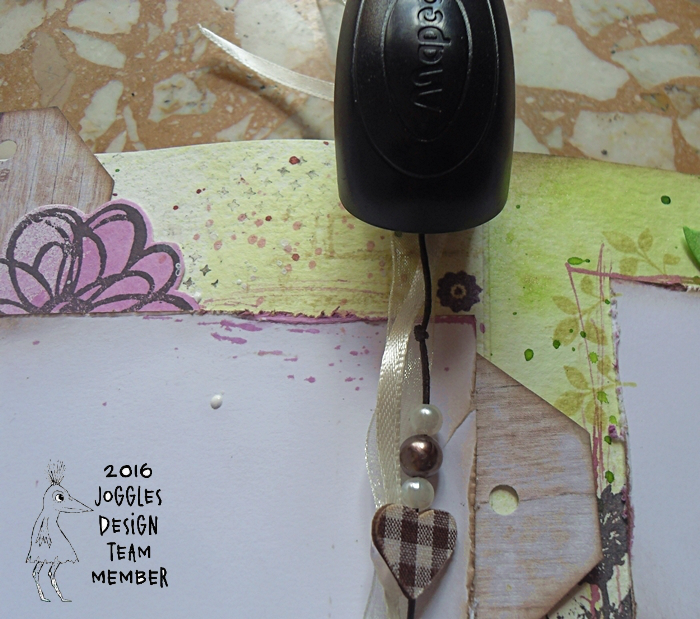
Decorate one or more of the pages adding charms, beads, ribbons, or twine and attaching with a stapler.
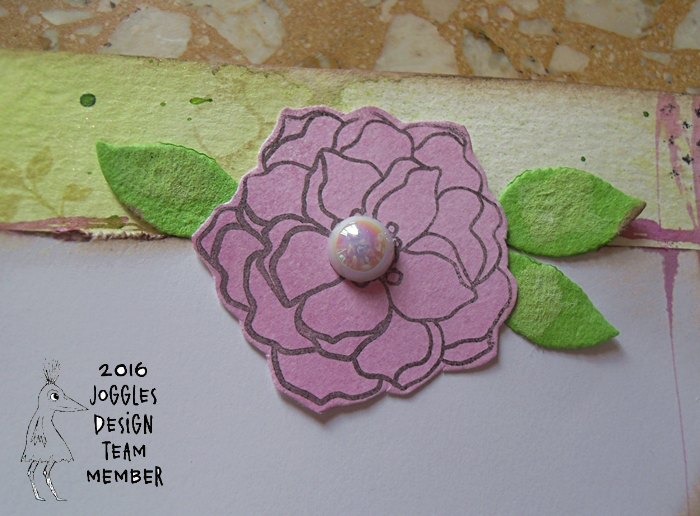
Adhere flat pearls to the center of the flowers and hand cut leaves to finish them off.
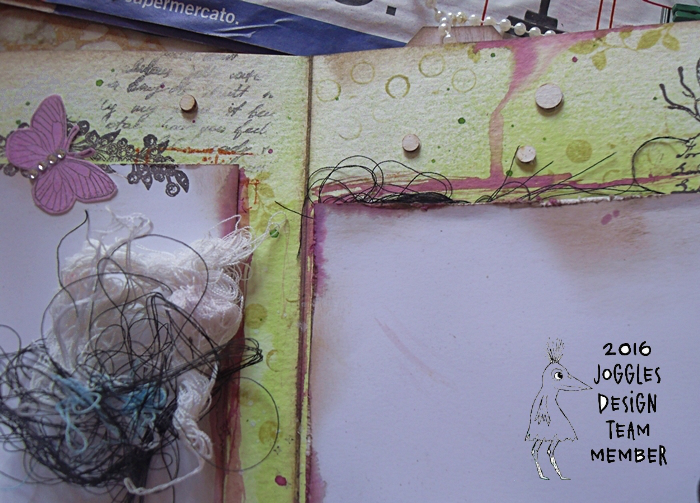
Tuck rolled up lengths of sewing thread under the edges of some of the photo mats to add texture. Adhere the butterflies and apply rhinestones to their bodies using Aleene’s Super Thick Tacky Glue.

To complete the front cover, add Texture Paste through Joggles Ancient Ruins Stencil by scraping it on with a palette knife in a few places.
Splatter the cover with the green spray ink and allow to dry. Adhere white and black thread to the left side of the cover with Aleene’s Super Thick Tacky Glue.
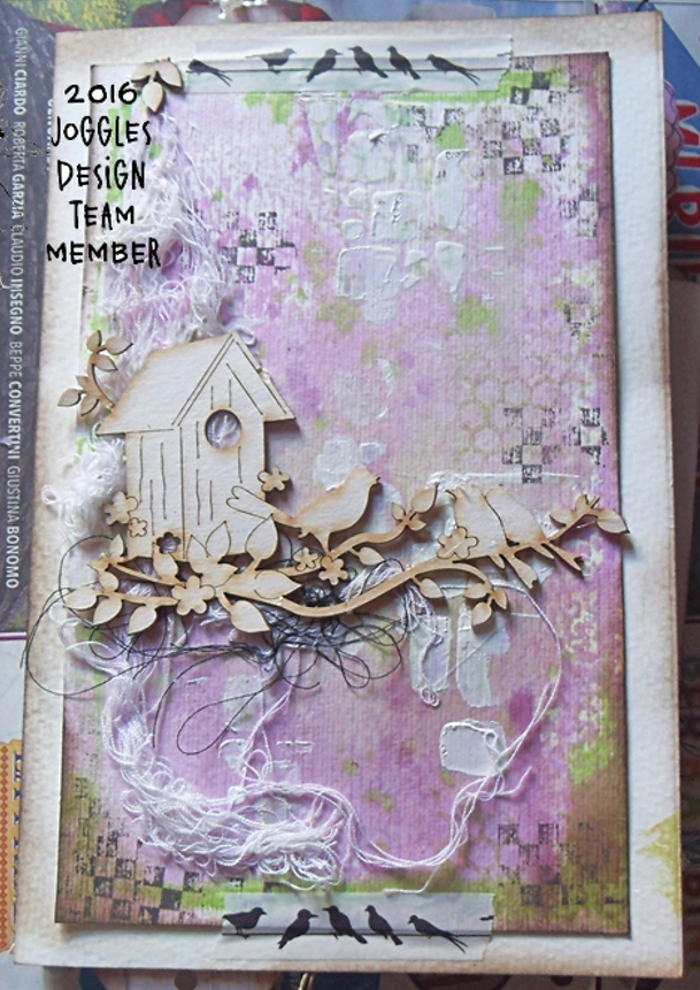
Decorate the cover with bird themed washi tape, a chipboard birdhouse and branch with birds, and some stamping with Jet Black Archival Ink. Stamp off onto scratch paper first so the stamped images are not as dark.

For the final touches on the cover, add flowers, gems, and a doodled border. Adhere the words to the front and also to the inside pages either from pre-printed or stamped sentiments.
Here are the other inside pages:
Thank you for joining me today. I hope that you have been inspired to make your own Mini Album Accordion Book.
9 Comments
Very pretty Frezja….the soft colors are gorgeous.
What a beautiful mini album Kasia….and thank you for the great tutorial!…I love the colors you used. Wow…you are such a great mixed media artist…
Beautiful mini book Kasia! I love the colours and all the little details.
Absolutely beautiful, so much attention to detail. It would make a wonderful present for a loved one.
So beautiful! I love your color palet.
This is so beautiful and spring like! Love all of the little details you added to the backgrounds and to the pages. The soft colors are fabulous!
WOW … This wonderful project is packed to the brim with WONDERFULNESS. Thank you for sharing your creative talent … and speaking for myself: Wish me LUCK!!!
This is absolutely beautiful – I have a house full of teenage girls and this is just the project they would like; Thanks so much
This is a beautiful project. I like everythig about it.