If you watched the Sticky Snippets™ video from last Wednesday (click here) then you saw the beginnings of this week’s page. I was demoing what can be done with the background of the labels sheet and needed a place to put the one I was working on. I cut the sheet to fit, edged the page in black, and put it in place. That left openings to fill with doodles which you’ll see as I go along with this post.
If you don’t have Sticky Snippets™, the alternate prompt is to work one shape within another. A circle in a square or vice versa. A star in a circle. A heart in a circle. Just pick a couple of shapes and fit one inside of the other, then see what you can do with what results. Mine ended up being the starburst shapes in the large square, which is what gave me the idea to begin with. You can make one large shape and add smaller ones to it, make lots of smaller ones, or whatever your muse suggests!
If you want ideas for adding color and pattern to Sticky Snippets™, view the video by clicking the link above, in the first sentence. Or just jump in and get started. There is nothing difficult about the process and I find it very enjoyable.
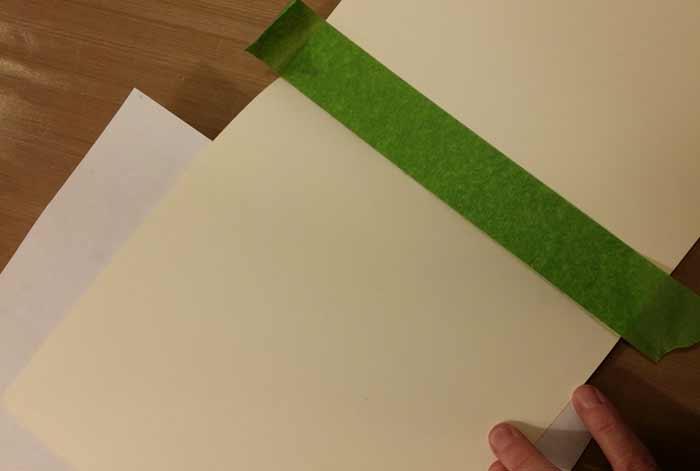
Since I knew I the square I cut from the sheet of Sticky Snippets™ was smaller than the page, I added a border with black paint. I was (reasonably) careful to keep the paint confined to the border so none would be visible in the openings. Masking off the edge of the page was the first step.
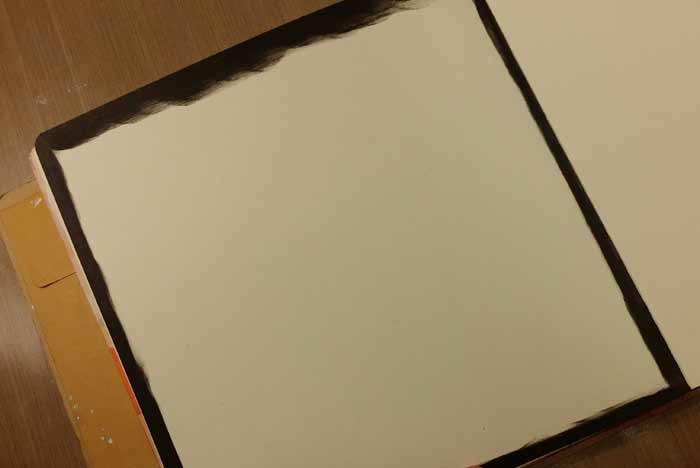
I used Black Marble Dylusions Paint and one of the Mini Inkssentials Blending Tools to create this border.
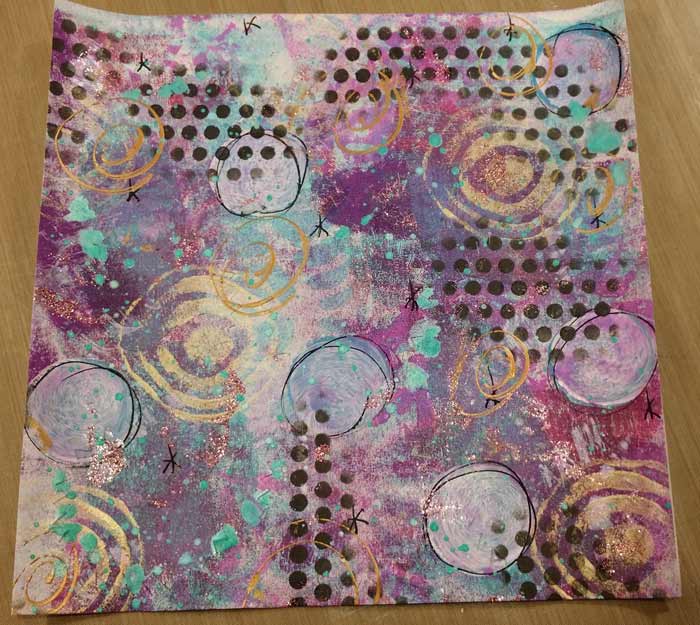
My sheet of Sticky Snippets once I trimmed it to fit the page.
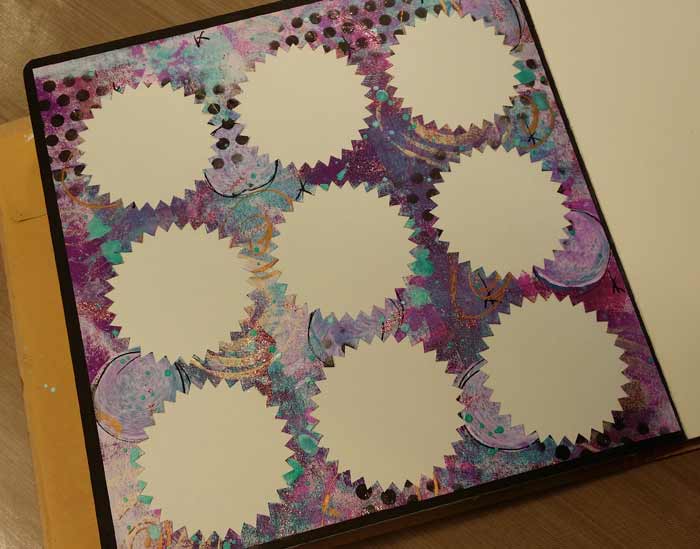
And here it is applied to the page. This sheet is the Large Starburst style.
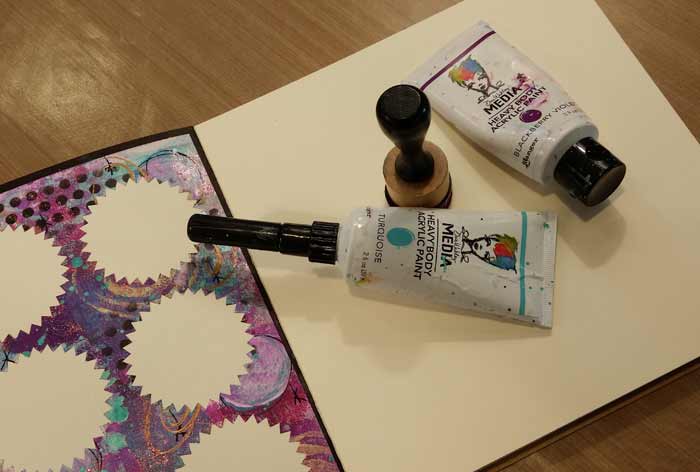
What would one of my pages be without big dots of color? (lost, alone, and sad. I digress) I grabbed two new Replacement Foam for my Mini Ink Blending Tool and two colors of Dina Wakley’s Media Paint: Blackberry Violet and Turquoise.

And added alternating colors of big dots to the center of each opening. give them time to dry, then add…
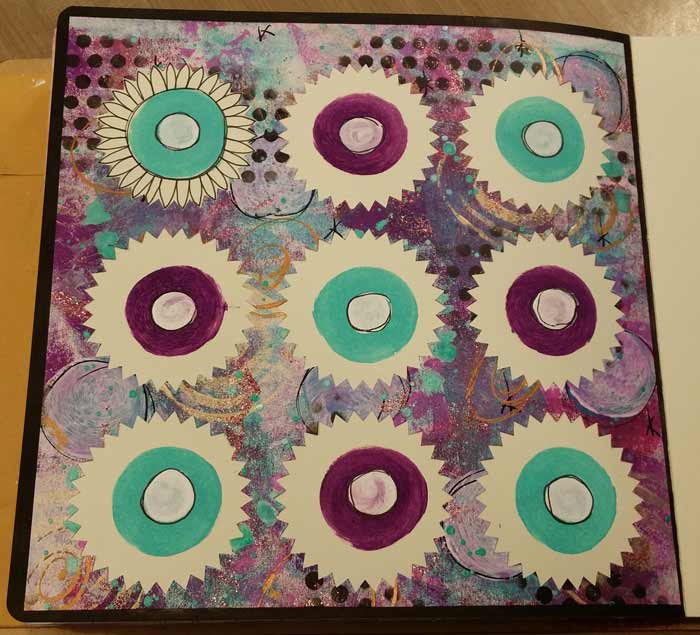
White dots of paint to the center. This photos is kind of all over the place. I’ve added white dots and let them dry, plus I used a Sharpie Extra Fine Black Paint Pen and have outlined around each of them. If you look in at the dot in the upper left you’ll see I’ve begun to doodle around it with a Black Pitt Fine Pen. I used the same black Sharpie to outline the turquoise dot. It’s important to let all of the paint dry before you use either pen. If the paint gets on the tip of either, you’re not going to be happy with the way it writes. (been there, done that)
The turquoise dots are all finished, though there are more dots to come…

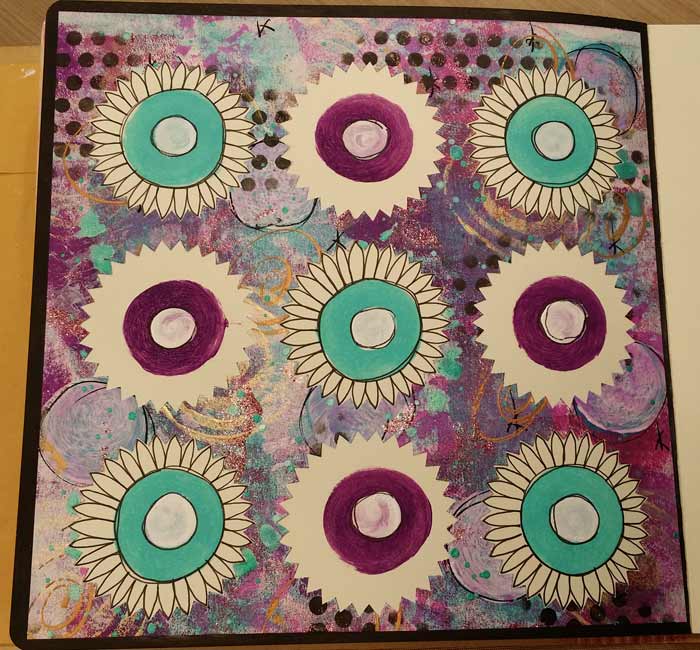
Once I finished the petals on the purple flowers everything felt a little bare, so I used a White Extra Fine Sharpie Paint Pen and added some dots. Better now, and finished!
9 Comments
Such a great way to use the remnants!! Loved the video and your page for the Journal.
Great idea! My snippets arrived and I am busy coloring them! Can’t wait to get started on this weeks page.
I used mine on another art page and the came off the page. I covered the whole page with clear gesso. It solved my problem. I used Avery stickers.
Can these sheets go through an inkjet printer?
Yes, they’re suitable for either an inkjet or laser printer. :+)
Just curious, did you use gesso on these before adding color to them?
No gesso, nope. I just applied color and stuff on the sheet of labels without any primer.
I just got my order of snippets and am working on them already. Thanks for all the great videos to help me be creative.
I got my supplies yesterday! Can’t wait to play! I love this journal page!