I’m a border person, with nearly all of my pages featuring one. The Week 16 prompt was to include a border of some kind and my spread ended up all borders, with concentric rectangles decreasing in size as the design moves toward the center. Some of the members of the Facebook AJA group suggested that it looked like a magic carpet, which I didn’t see at the time, but completely agree with.
I decided I would like to have another go at borders, but this time I didn’t want to go the magic carpet route, nor did I want the usual frame around the perimeter of the page. But if not that, then what?
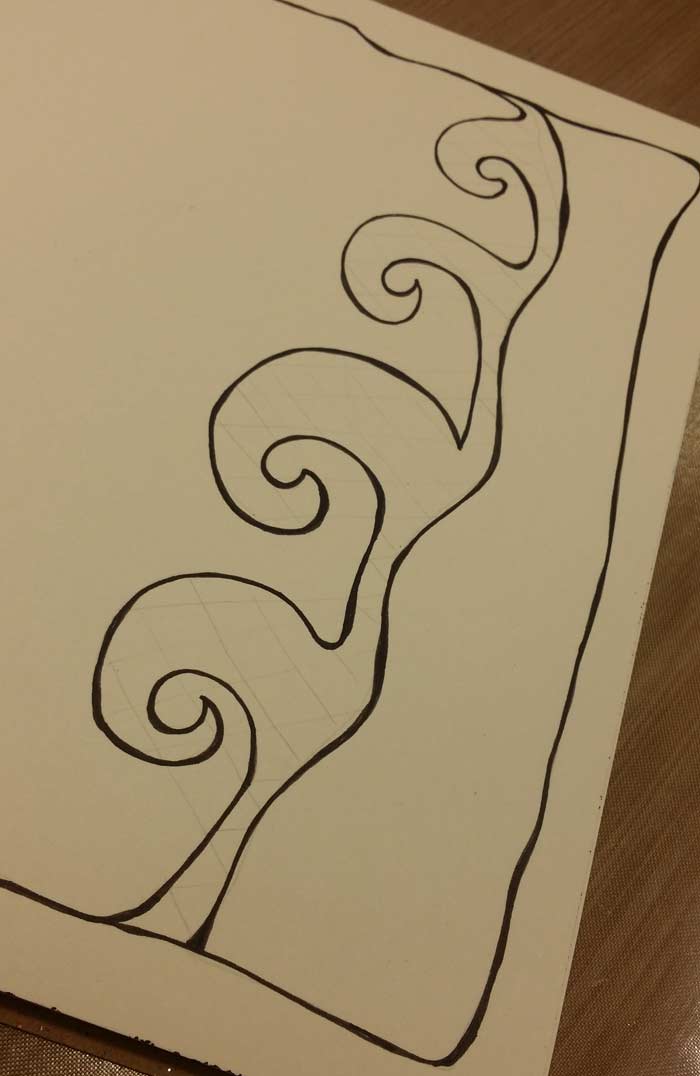
I thought about it for a bit and decided I wanted it to be curvy. I’m a person who loves curvy, organic shapes, so that’s pretty much a no-brainer. I also wanted something different than any of the borders I’d used in previous weeks, which added a bit of a different challenge.
With that in mind I sat down with my journal and a pencil to see where this might go.
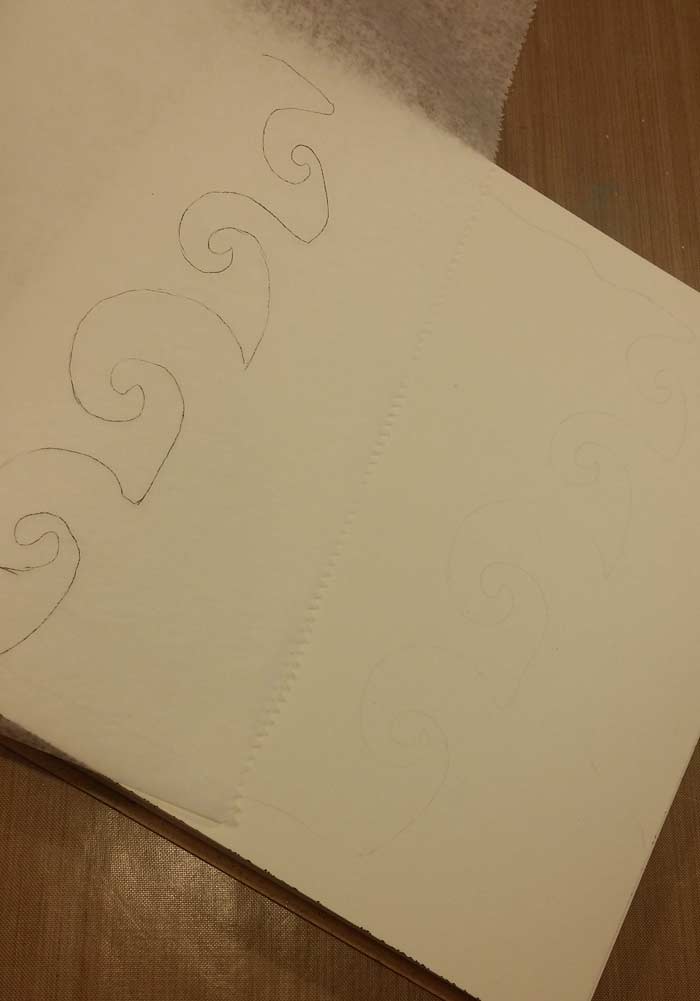
Look closely at the right side and you’ll see the faint pencil outline of my curvy, swirly design.
The likelihood that I would create the same thing for the other side, and mirror image it? Slim to none. The darker version is traced on a piece of Deli Paper. By doing that I knew I could flip the piece to mirror the design, then trace that mirrored version on the left side. And that I would be happier with the result than with anything I might draw to try and mimic the first side.
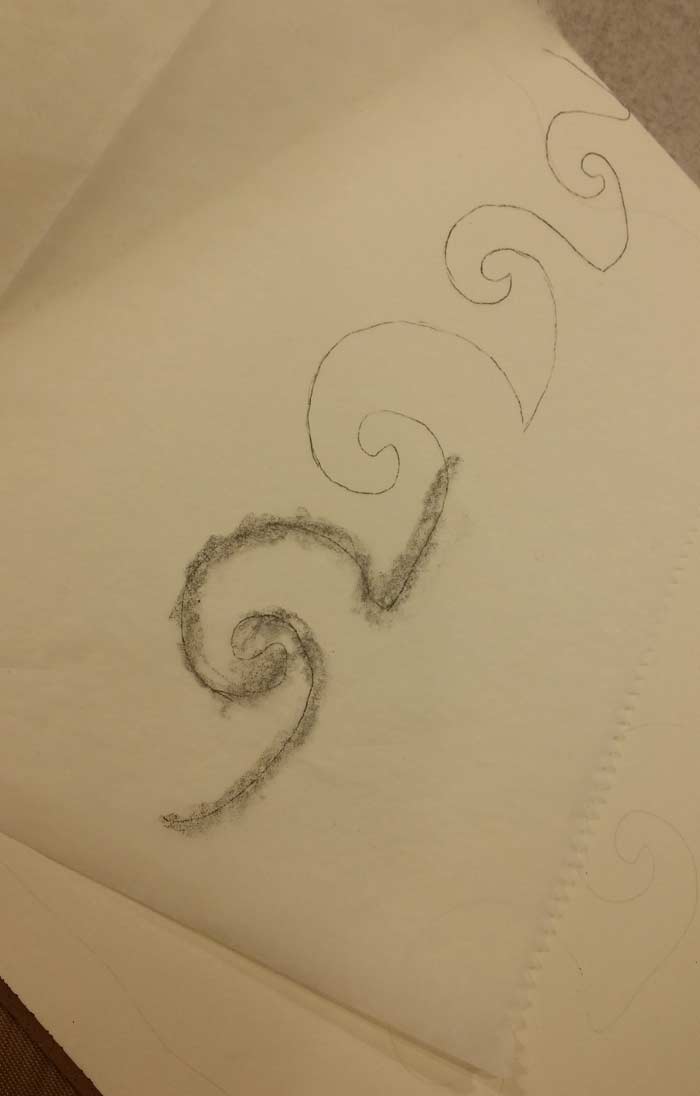
Since I want to mirror what is on the right side and trace it, the easiest way is to use a soft lead pencil and scribble on the FRONT, over the traced design – right over the pencil marks from my tracing. Remember, I want to flip the design to get a mirror image. This scribble method allows me to trace without a piece of Saral or other transfer paper. Salral is kind of like an artist’s carbon paper, only less messy.
My suggestion is that you use two different kinds of pencils: a hard lead for the lines on the page and a soft one for the scribbling you do on the Deli Paper which acts as your transfer medium. Hard leaded pencils create lighter lines that are easier to erase – unless you bear down hard and make a darker line. Those are more difficult to erase cleanly, so don’t do it!

Again, the lines are faint (there’s less to erase that way), but if you look closely you can see the design on the left side. The section along the top and bottom, that are not the curvy side bits, was freehanded. Just wing it – those parts don’t need to mirror or be the same. At least I didn’t feel as though they needed to be.
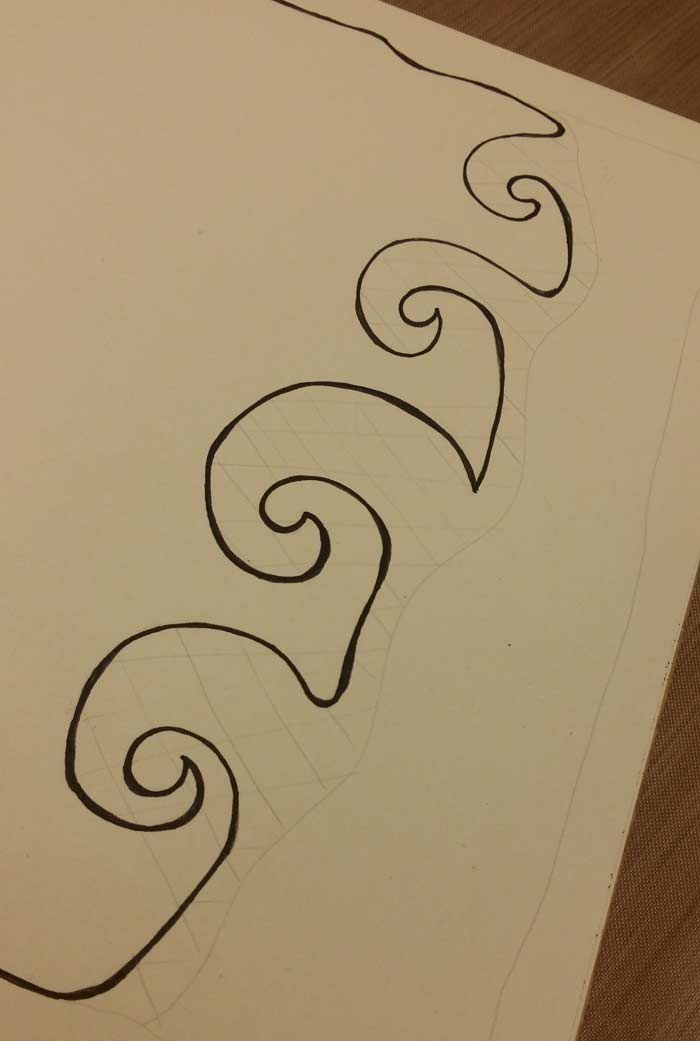
Here I’ve used a black PITT Pen in the F, Fine Tip and have inked in the design. You can also see where I’ve penciled in other sections and an idea for filling the curvy shapes.
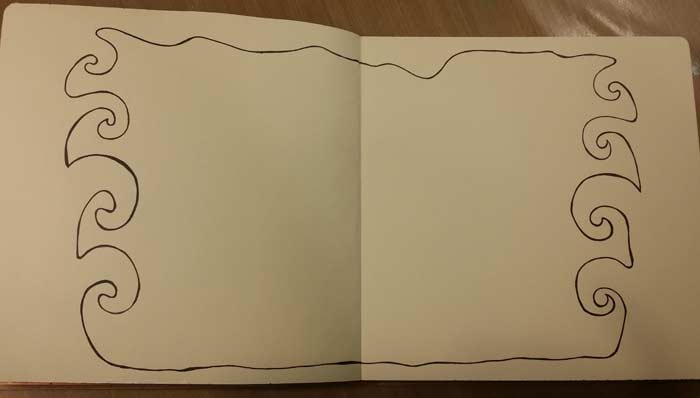
Mission accomplished so far. Not only do I have a border that looks nothing like a magic carpet, it looks nothing like any other so far this year.
More lining of the other areas. I’ve still not made up my mind that I don’t like the crosshatching, but trust me… it’s going, going, gone. Very soon.
The important part here? The varying widths of the lines. It happened accidently when I was trying to “fix” a section that looked a little off. In no time it looked nothing like the rest of the lines of the border, so the solution was to thicken them all randomly. With no discernible pattern of what is thicker, who’s to say anything is imperfect? Perfect is way too difficult to achieve. I aim for a perfectly imperfect look in my work.
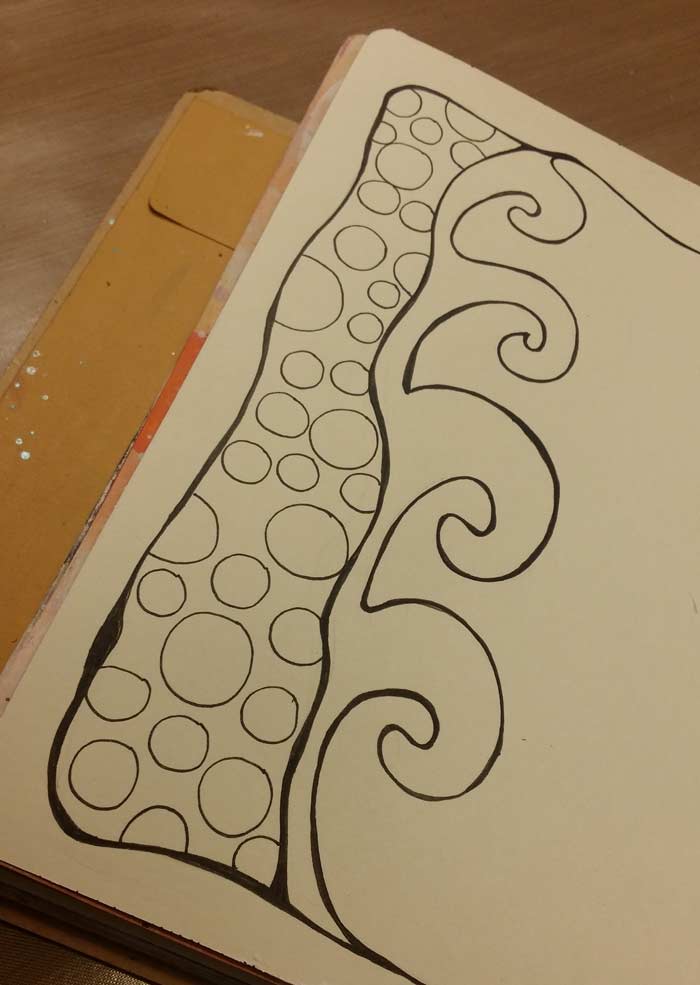
Bubbles are one of my favorite fill designs. I really enjoy creating them and love the way they look. To begin with I fill an area, beginning with larger circles and then decreasing the size as the area becomes full. With the area mostly filled with larger circles of varying sizes I begin to use smaller ones to fill in those in between spaces, till everything is full and it looks something like this…

To create the bubbles I used black PITT Pens in an F and S tip. Aside from those two pens, the only other thing you need is a little time and patience. Since I love the look I’m willing to put the time in.
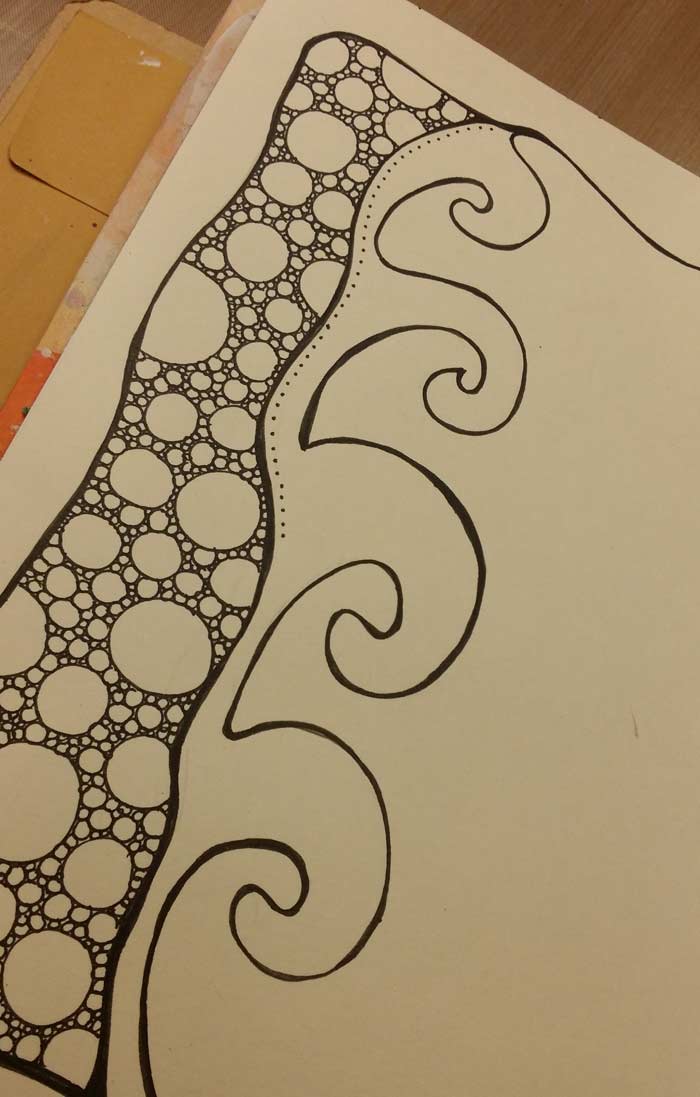
It felt like there was a little too much open space, so in come the dots which are another design element I use often. I took the photo part way through the process and did finish the section all the way to the bottom. And added them on the right side too.
With those sides done it was time to think about what to do with the center of the spread.
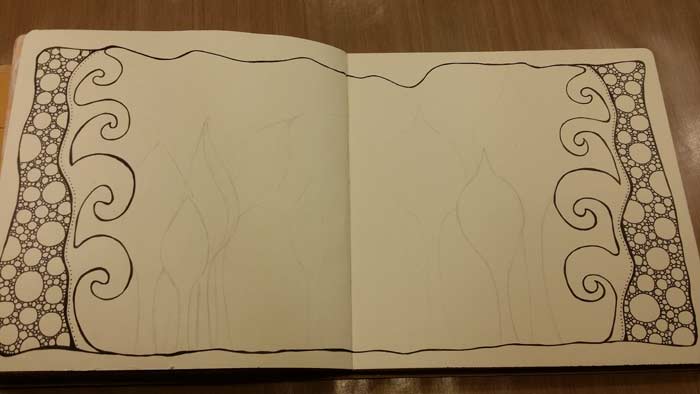
Leaf shapes. A couple of groves of them. Penciled in first, otherwise they’d be a mess. And a half.
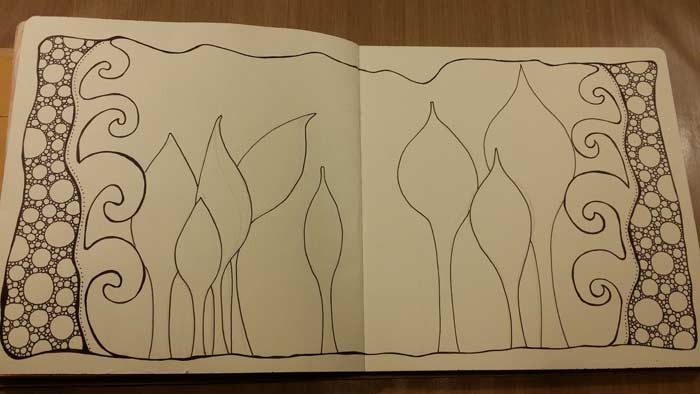
Then inked with a F tipped black PITT Pen. Now what to do to fill the leaf shapes? I started on the left…

Which I liked, but was feeling the lack of color was a detriment.
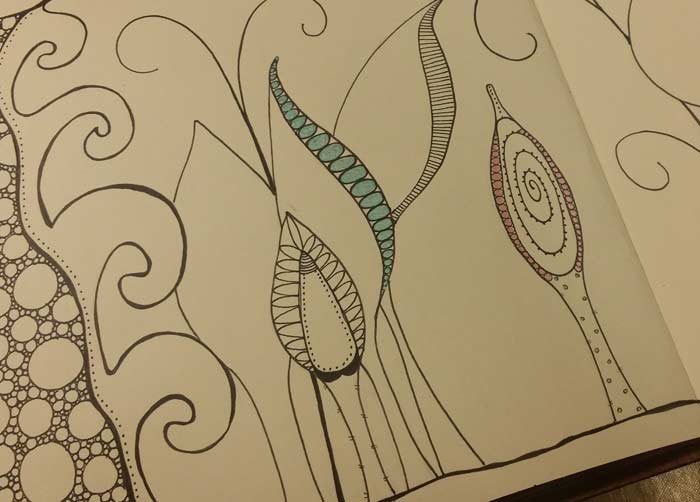
So out came the metallic Gelly Roll Pens and on goes some shimmering color.
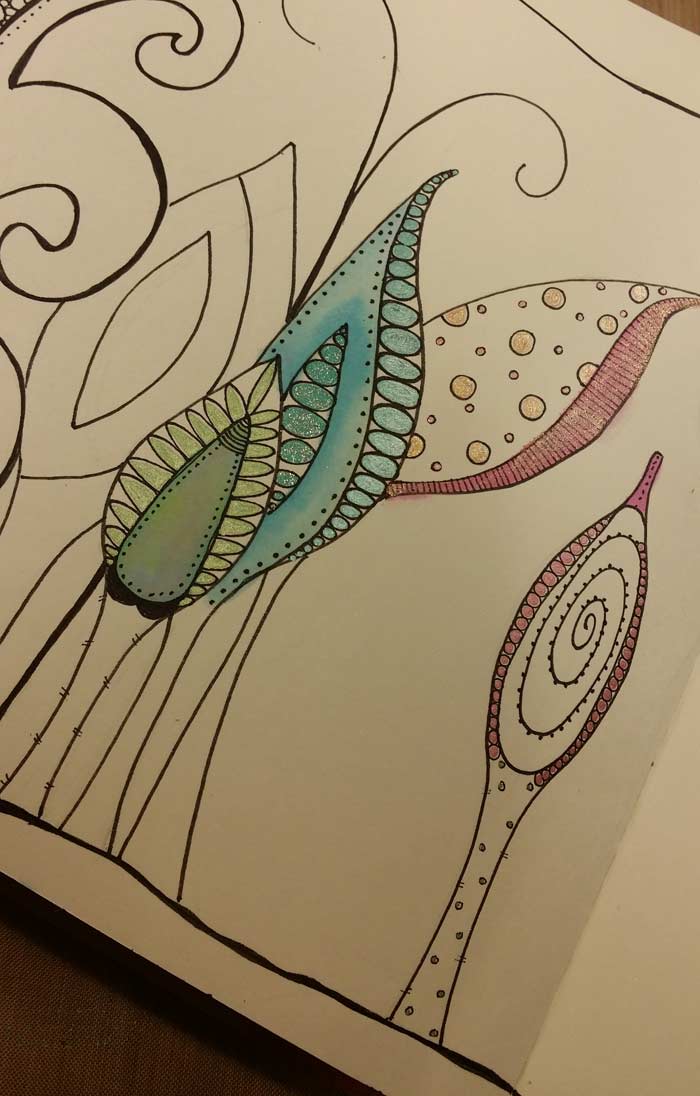
I broke out my Detail Water Brushes, the ones filled with diluted version of Dylusions Ink Sprays and Distress Spray Stains, and added small mounts of color to areas of the leaves.
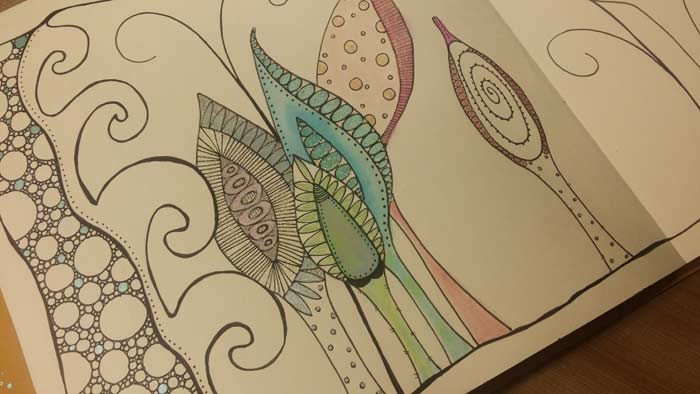
More progress.
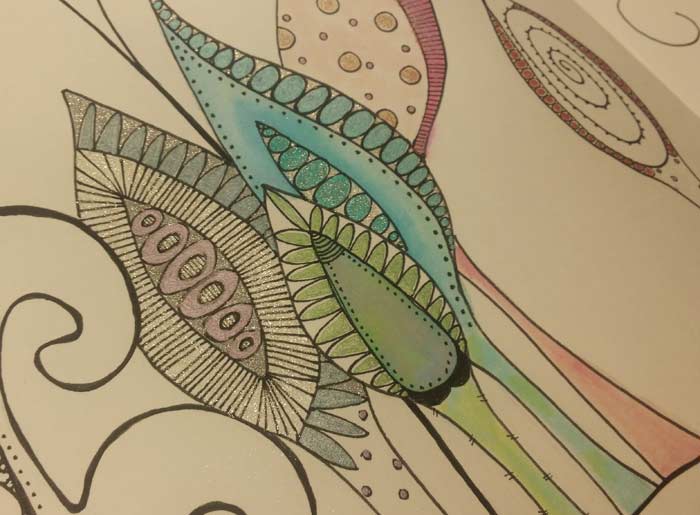
The glittery areas were done with Gelly Roll Stardust Pens.
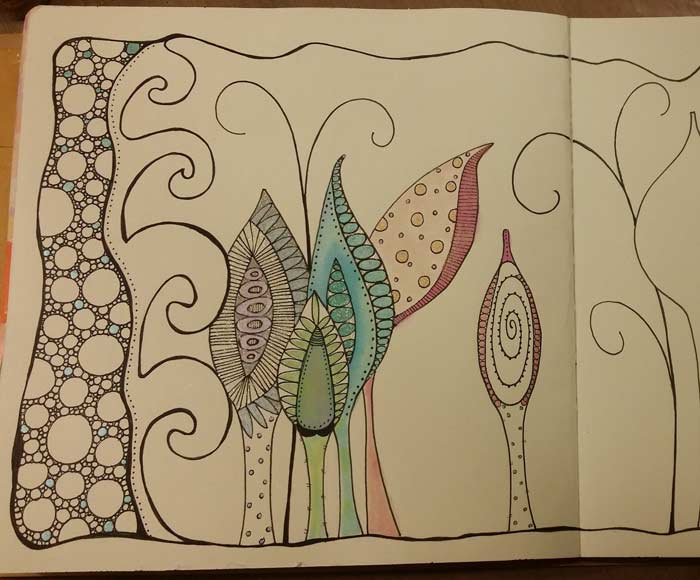
And… this is as far as I got. Everything on the left side of the spread is finished and I’m pleased. The day to day demands of Joggles got in the way of my finishing the elements on the right side.
Will I get back to it? Honestly, it’s difficult to say, but at a guess it won’t happen for a few weeks. Next Monday I’m attending a trade show, leaving early Sunday morning, which means my week is compressed to begin with. Getting next Monday’s spread done will be more of a focus than finishing this one.
The challenge/prompt was to develop a border that was not my usual, not a magic carpet, and different than everything else I’d done so far. I’m satisfied that I met the challenge, even if the spread is incomplete.
19 Comments
I love, love, love this Barb….and I see some new rubber stamps brewing there
I agree with Virginia. These would make amazing rubber stamps. Love this page!!
Thanks to you both! I guess I’d better get my but in gear and draw some for stamps. :+)
I’m soliciting suggestions for names. Got any??
Gorgeous page.
This is fabulous Barb! I agree with Bonnie and Virginia, new stamps for sure. It was the first thing I thought of when I saw the page. I have all of your leaf stamps and just love them. As they just have numbers, not names (except Spike!) maybe just Wonky leaf and a number. Although maybe names like the birds — only a different letter (Gerta, Gretchen, etc or Lily, Lucy, Lucky, Liz, etc. I think you get the idea! Awesome page. Now to come up with an idea for mine (on one page!)
I would call the single leaf Curly!
Lookin’ fabulous! I love it!
From one bubble lover to another…no one does bubbles as awesome as you do…lol
Possible name for new stamp line?: How about “Not-your-mama’s-leaves” and then a number? Love them.
FUN…FUN…FUN.
Wonderful idea. I love the way your mind works! Those circles just make the page. TFS
I love the design and the fact I was not bemoaning the fact I did not have your latest stamp. I love your stamps….just cannot get them right now. So this is very doable and each attempt would be different. Thanks for your great tutorials.
I think that this is, by far, my favourite page! Love the inspiration and serendipity of it all.
Your “swirly” side borders bring to mind ocean waves with the bubbles that I remember seeing billowing around me when I’d get tossed about underneath the waves. The leaves remind me of the algae and sea grasses that we have here in the Pacific in No. California but much more magical. The whole lay-out is very much “under the sea” to me!
I love this page Barb, and yes I definitely agree that there are stamps to be made! I think you named them perfectly yourself when you said ‘leaf shapes. A couple of groves of them’. Why not call the collection Leaf Grove? Then you could name or just number each individual stamp. 🙂 Are they available in the UK yet? I cant seem to find them anywhere yet.
Blessings,
Sharon xx
Great page, can’t wait to see it finished. There is certainly a lot of work put into it. Oh those BUBBLES!!
And of course the leaves or I also see plants, seeds in side of them there just beautiful. I call them LEAFTASTIC! Thank you for all your creativity,Neighbor.
Nice to see the the way you tied the borders and subject matter.
Come on Barb…let’s see some those funky leaves. We need them before autumn. Hurry…lol
Such a fun page!!